For 1990-2009 cars only
Removal Procedure
- Record the Rear Integration Module (RIM) personalization settings. Refer to Driver Personalization in Personalization.
- Remove the rear storage compartment trim. Refer to Rear Compartment Trim Panel Replacement in Body Rear End.
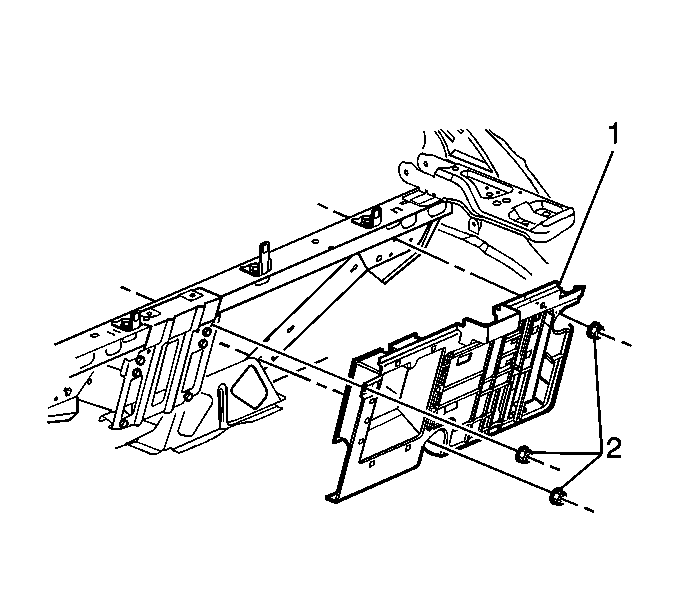
- Remove the electrical component mounting panel nuts (2).
- Pull the electrical component mounting panel (1) away from the body and place the panel (1) module side up in the rear compartment.
- Disconnect the RIM electrical connectors.
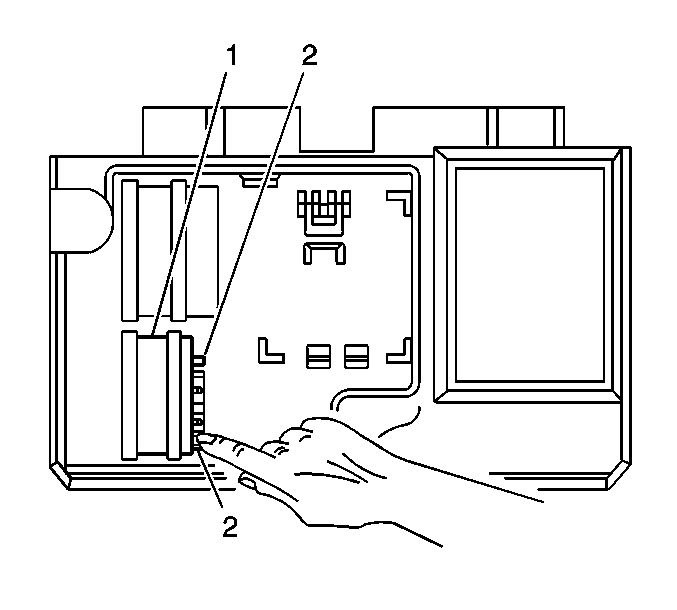
- Remove the RIM (1) by depressing the locking tabs (2) inward, in order to release the RIM (1) from the electrical component mounting panel.
Important: Before replacing the RIM module, record the personalization settings in order to restore the settings after the new module is installed.

Installation Procedure
- Install the RIM (1) to the electrical component mounting panel.
- Push the RIM (1) into the opening on the electrical component mounting panel, until an audible click is heard, indicating the Rim (1) is secured to the electrical component mounting panel.
- Connect the electrical connections to the RIM (1).
- Install the electrical component mounting panel (1) to the vehicle body.
- Install the electrical component mounting panel nuts (2).
- Install the rear storage compartment trim. Refer to Rear Compartment Trim Panel Replacement in Body Rear End.
- Restore the drivers personalization settings. Refer to Driver Personalization in Personalization.
Notice: Refer to Fastener Notice in the Preface section.
Tighten
Tighten the nuts (2) to 9 N·m (80 lb in).
