For 1990-2009 cars only
Radio Replacement U1R, UL6, UM5, UM9
Removal Procedure
- Remove the instrument panel center trim plate. Refer to Instrument Panel Center Trim Panel Replacement in Instrument Panel, Gages and Console.
- Remove the console trim plate. Refer to Console Trim Plate Replacement in Instrument Panel, Gages and Console.
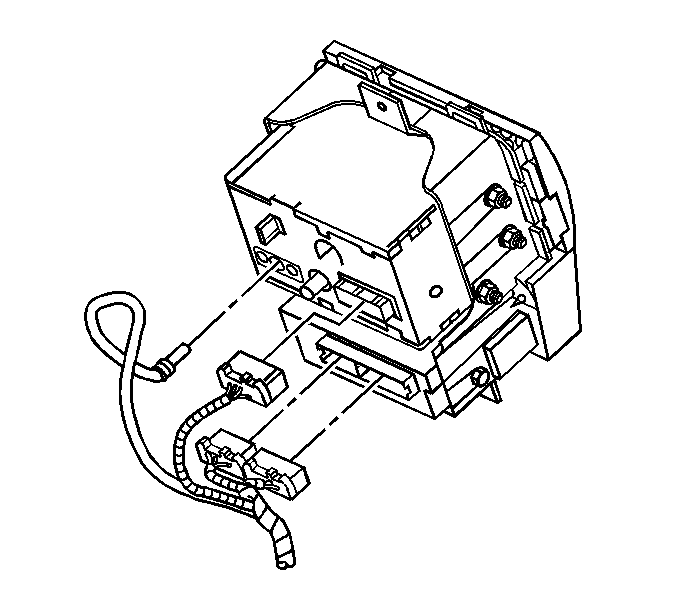
- Remove the HVAC control and the radio bracket screws.
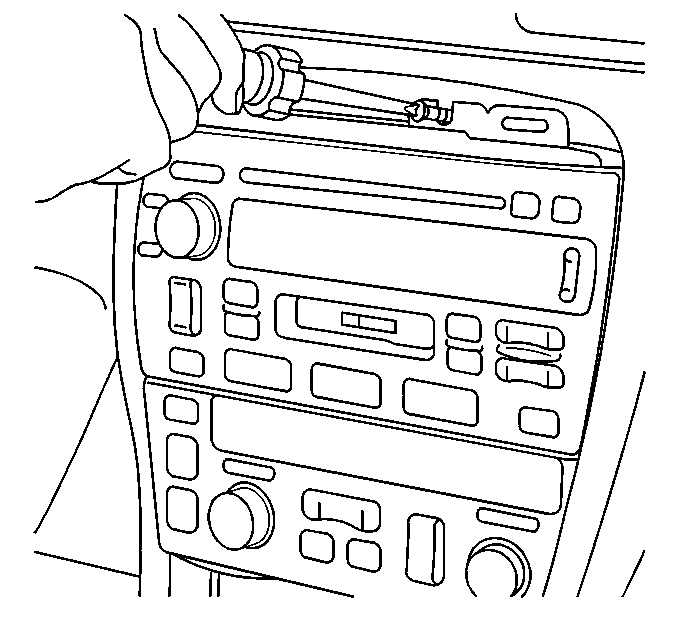
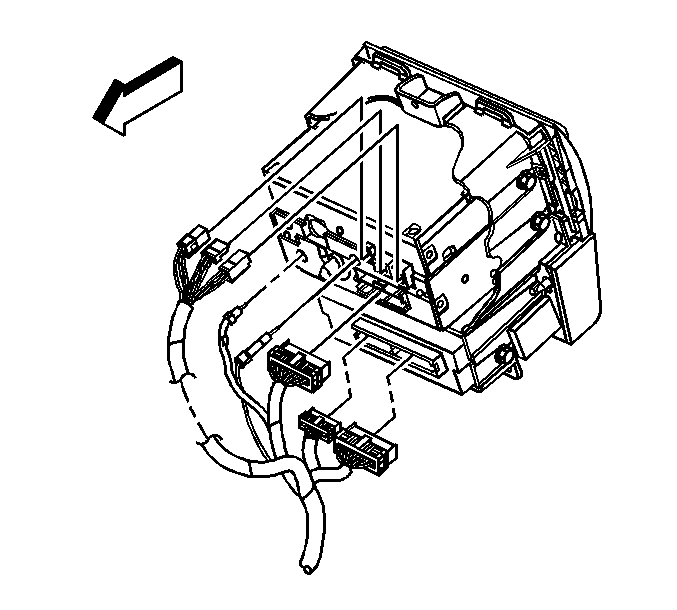
- Disconnect the antenna and electrical connectors from the radio and the HVAC control assembly.
- Remove the radio retaining nuts.
- Remove the radio from the radio bracket.
- If the radio is to be replaced, remove the hardware from the radio.
Important: New and remanufactured radios do not come with mounting brackets, studs or nuts. The hardware will need to be transferred to the replacement radio.
Installation Procedure
- Install the mounting hardware to the radio.
- Install the radio to the radio bracket.
- Install the radio retaining nuts.
- Connect the antenna and electrical connectors to the radio and the HVAC control assembly.
- Install the HVAC control and the radio assembly.
- Install the console trim plate. Refer to Console Trim Plate Replacement in Instrument Panel, Gages and Console.
- Install the IP center trim plate. Refer to Instrument Panel Center Trim Panel Replacement in Instrument Panel, Gages and Console.
Notice: Refer to Fastener Notice in the Preface section.
Tighten
Tighten the radio retaining nuts to 5 N·m (44 lb in).
Tighten
Tighten the screws to 2 N·m (18 lb in).
Radio Replacement U3Q, U3R, U3S
Removal Procedure
- Remove the instrument panel (IP) center trim plate. Refer to Instrument Panel Center Trim Panel Replacement in Instrument Panel, Gages and Console.
- Remove the console trim plate. Refer to Console Trim Plate Replacement in Instrument Panel, Gages and Console.
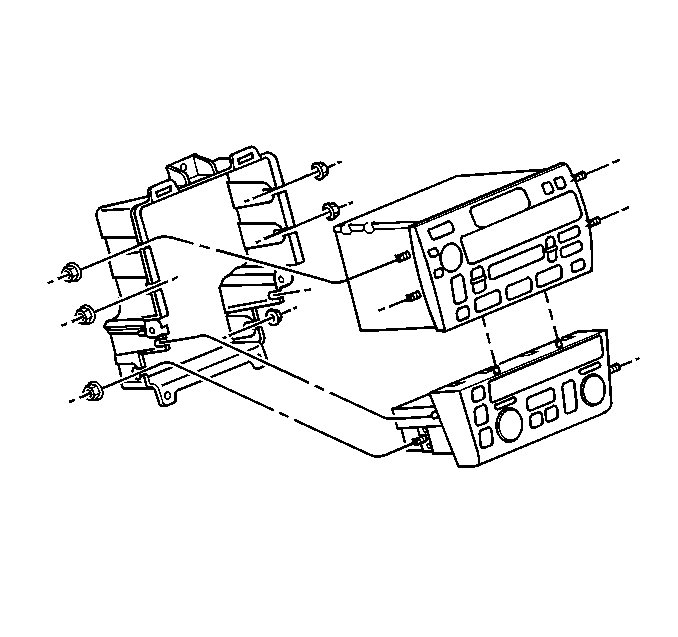
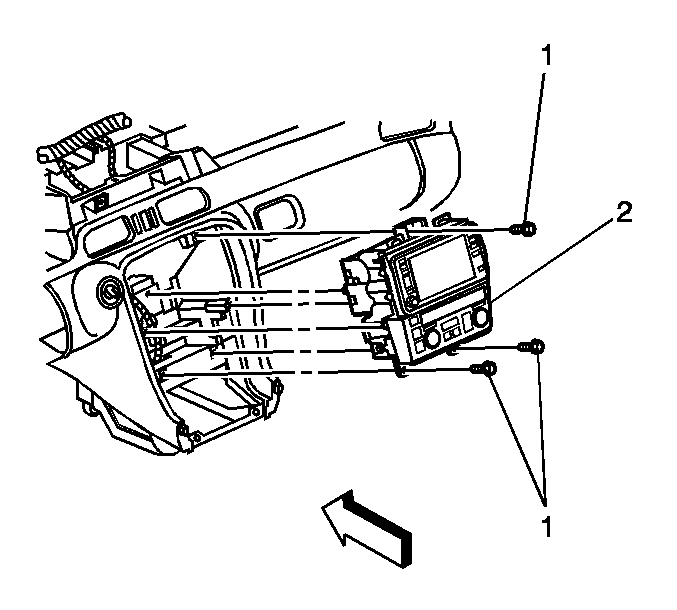
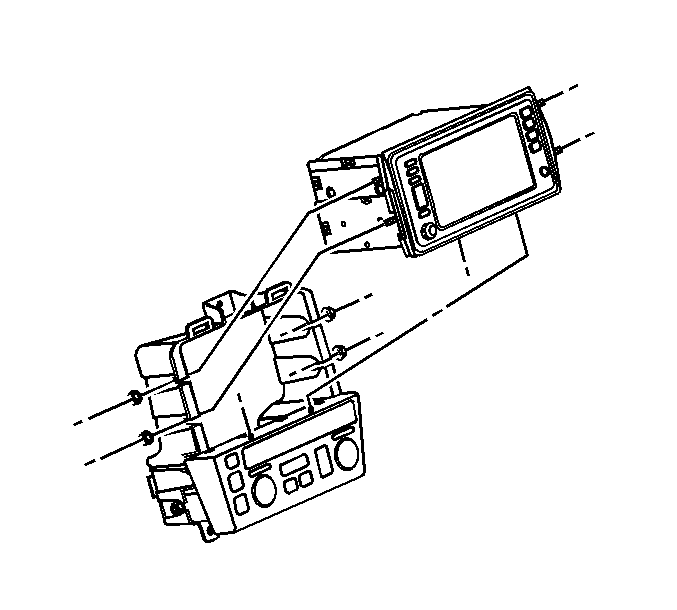
- Remove the HVAC control and the navigation radio bracket screws (1).
- Partially remove the HVAC control and the navigation radio assembly (2) away from the IP in order to access the antenna and the electrical connections.
- Disconnect the antennas and the electrical connectors from the navigation radio and the HVAC control assembly.
- Remove the navigation radio to mounting bracket nuts
- Remove the navigation radio from the radio bracket.
- If the navigation radio is to be replaced, remove the hardware from the original navigation radio.
Important: New and remanufactured navigation radios do not include the mounting studs or nuts. The hardware will need to be transferred to the replacement navigation radio.
Installation Procedure
- Install the mounting hardware to the navigation radio.
- Install the navigation radio to the mounting bracket.
- Install the navigation radio mounting bracket nuts.
- Partially install the navigation radio in order to connect antennas and electrical connectors.
- Install the HVAC control/navigation radio (2) to the IP.
- Install the HVAC control/navigation radio assembly (2) to IP screws (1).
- Install the console trim plate. Refer to Console Trim Plate Replacement in Instrument Panel, Gages and Console.
- Install the instrument panel center trim plate. Refer to Instrument Panel Center Trim Panel Replacement in Instrument Panel, Gages and Console.
Notice: Refer to Fastener Notice in the Preface section.
Tighten
Tighten the navigation radio nuts to 5 N·m (44 lb in).
Tighten
Tighten the screws (1) to 2 N·m (18 lb in).
