For 1990-2009 cars only
Instrument Panel Insulator Panel Replacement - Left Side LHD
Removal Procedure
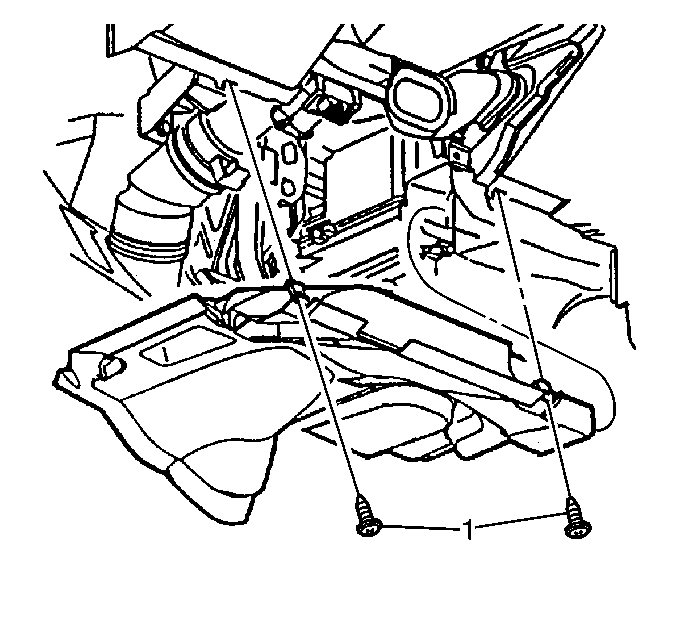
- Remove the fasteners (1) at the rear edge of the insulators in order to disengage the fasteners from the lower IP.
- Push in on the snap tab retainers in order to release the insulator.
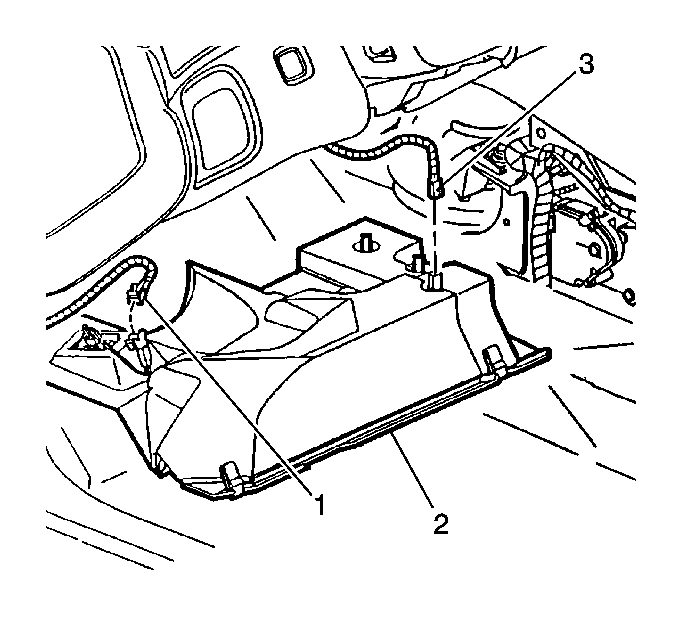
- Disconnect the electrical connectors (1, 3) as necessary.
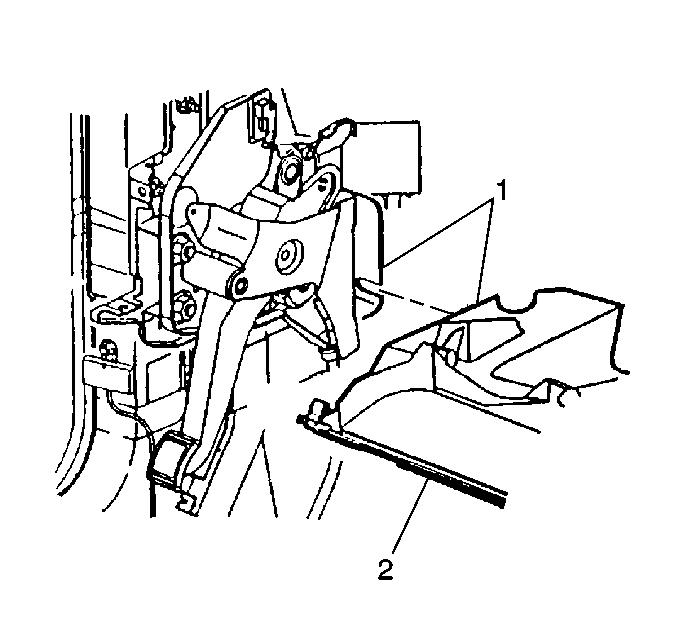
- Slide the insulator panel (2) rearward toward the vehicle in order to clear the emergency brake bracket (1).
Installation Procedure
- Slide the insulator (2) over the top of the emergency brake bracket (1).
- Reconnect the electrical connectors (1,3).
- Set the forward edge of the insulator onto the shelf of the carpeting at the front of the vehicle.
- Align the insulator with the floor duct at the HVAC module.
- Align the snap tab fasteners with the lower IP and push the insulator upward in order to engage the fasteners.
- Install the insulator fasteners (1) into lower IP.


Notice: Refer to Fastener Notice in the Preface section.
Tighten
Tighten the fasteners to 2 N·m (18 lb in).
Instrument Panel Insulator Panel Replacement - Left Side RHD
Removal Procedure
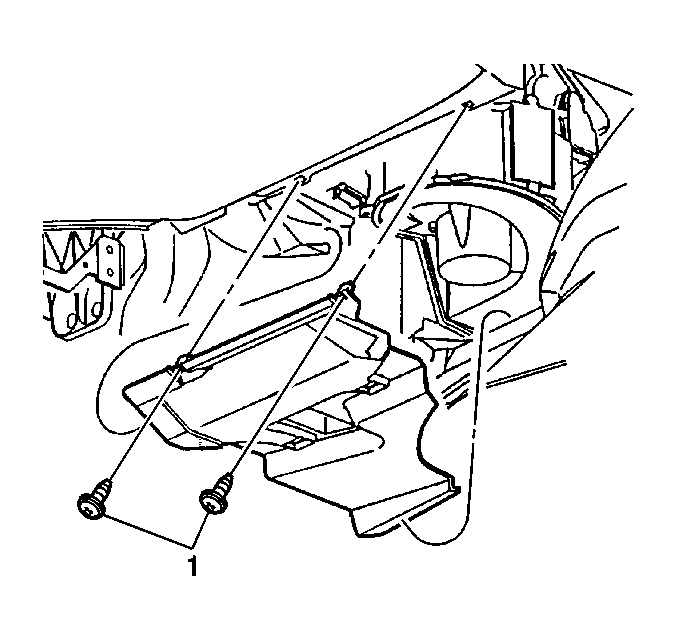
- Remove the fasteners (1) at the rear edge of the insulators.
- Push in on the snap tab retainers in order to release the insulator.
- Disconnect the electrical connectors (1,2) as necessary.
- Slide the insulator (3) rearward toward the vehicle.
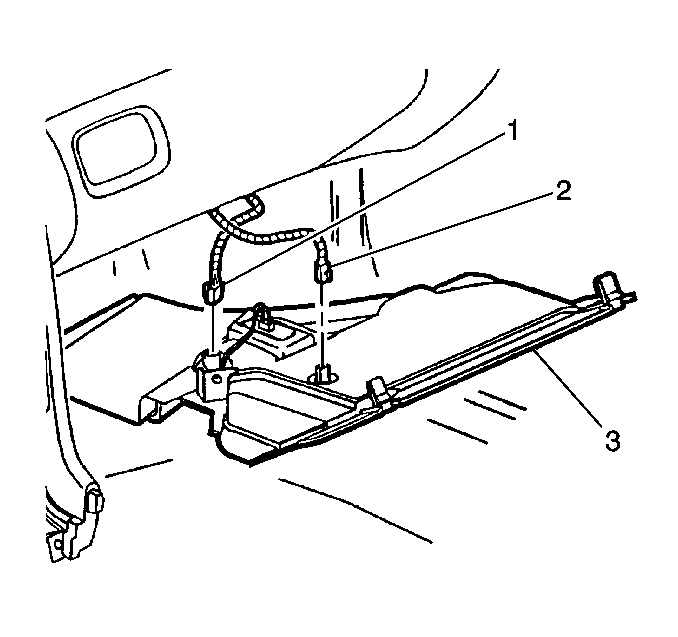
Installation Procedure
- Set the forward edge of the insulator onto the shelf on the carpeting at the front of the vehicle.
- Reconnect the electrical connectors (1,2).
- Align the insulator with the floor duct at the HVAC module.
- Align the snap tab fasteners with the lower IP, and push the panel upward in order to engage the fasteners.
- Install the insulator fasteners (1) into the lower IP.


Notice: Refer to Fastener Notice in the Preface section.
Tighten
Tighten the fasteners to 2 N·m (18 lb in).
