
| Subject: | Driven Sprocket Support Revised Art and Procedure for Hydra-Matic
4T80-E Automatic Transmission (RPO MH1) |
| Models: | 1996-2000 Cadillac DeVille, Eldorado, Seville |
| 1996-2000 Oldsmobile Aurora |
| with Hydra-Matic 4T80-E Automatic Transmission (RPO MH1) |
Bulletin Content
This bulletin is being issued to revise the Service Manual
art and procedure for the disassembly and assembly of the Driven Sprocket
Support. Attached are the updated pages for the 1996-2000 Unit Repair
Service Manual Sections. Replace these pages in your Service Manual. The updated
Service Manual information shows the Driven Sprocket Support art and procedure
without the third clutch exhaust valve cup plug (426). This third clutch exhaust
valve cup plug (426) was removed from production April 5, 1996 (Julian date
095). The sub-assembly parts for the Driven Sprocket Support Assemblies produced
after the above Julian date are not interchangeable with the sub-assembly
components for the Driven Sprocket Support Assemblies produced prior to the
above Julian date. When the third clutch exhaust valve cup plug (426) was
removed from production, the length of the third clutch exhaust valve spring
(425) was increased as well. However, the Driven Sprocket Support Assembly
- Complete is interchangeable.
Driven Sprocket Support Disassemble
Tools Required
J 39694 Second Clutch Spring Compressor
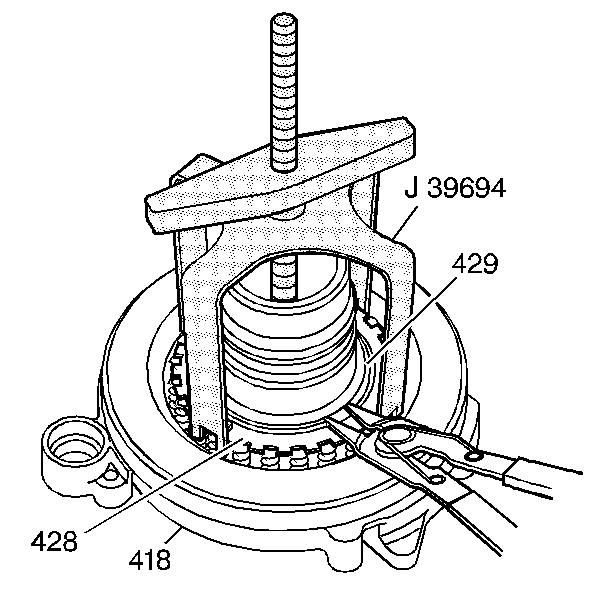
- Use the J 39694 second clutch spring
compressor to compress the spring and remove the snap ring (429). Then remove
the spring compressor.
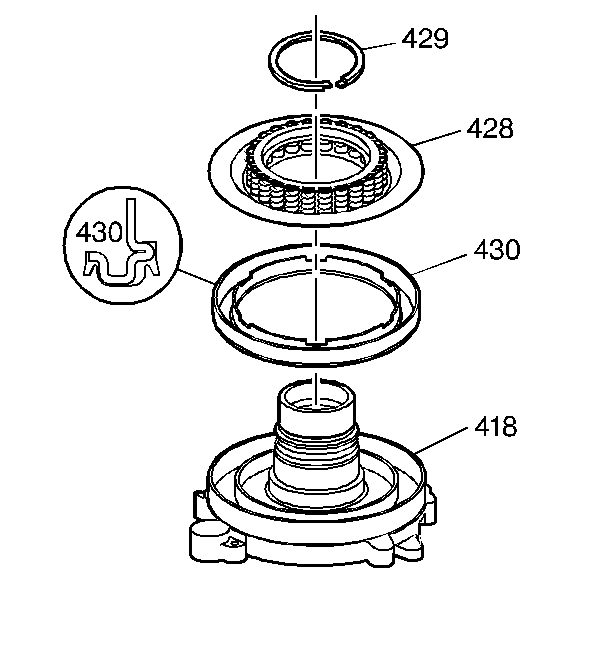
- Remove the return spring and retainer
assembly (428), and remove the piston assembly (430).
- Remove the following parts:
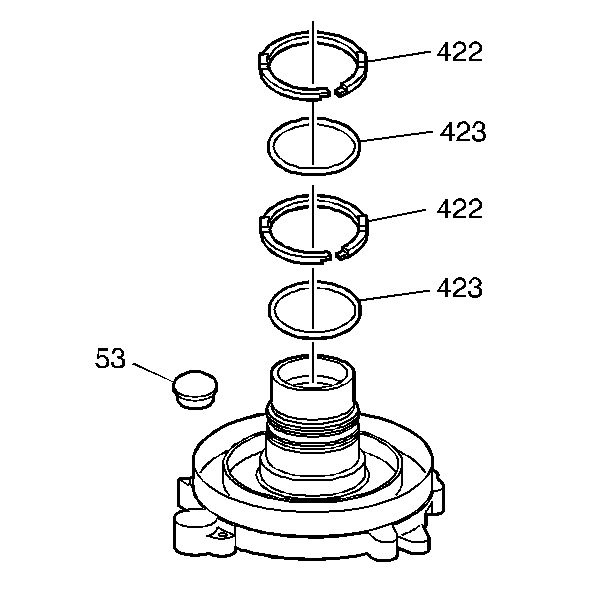
| • | The two sealing rings (423) |
| • | The two oil rings (422) |
| • | The scavenge tube seal (53) |
- Remove the following parts:
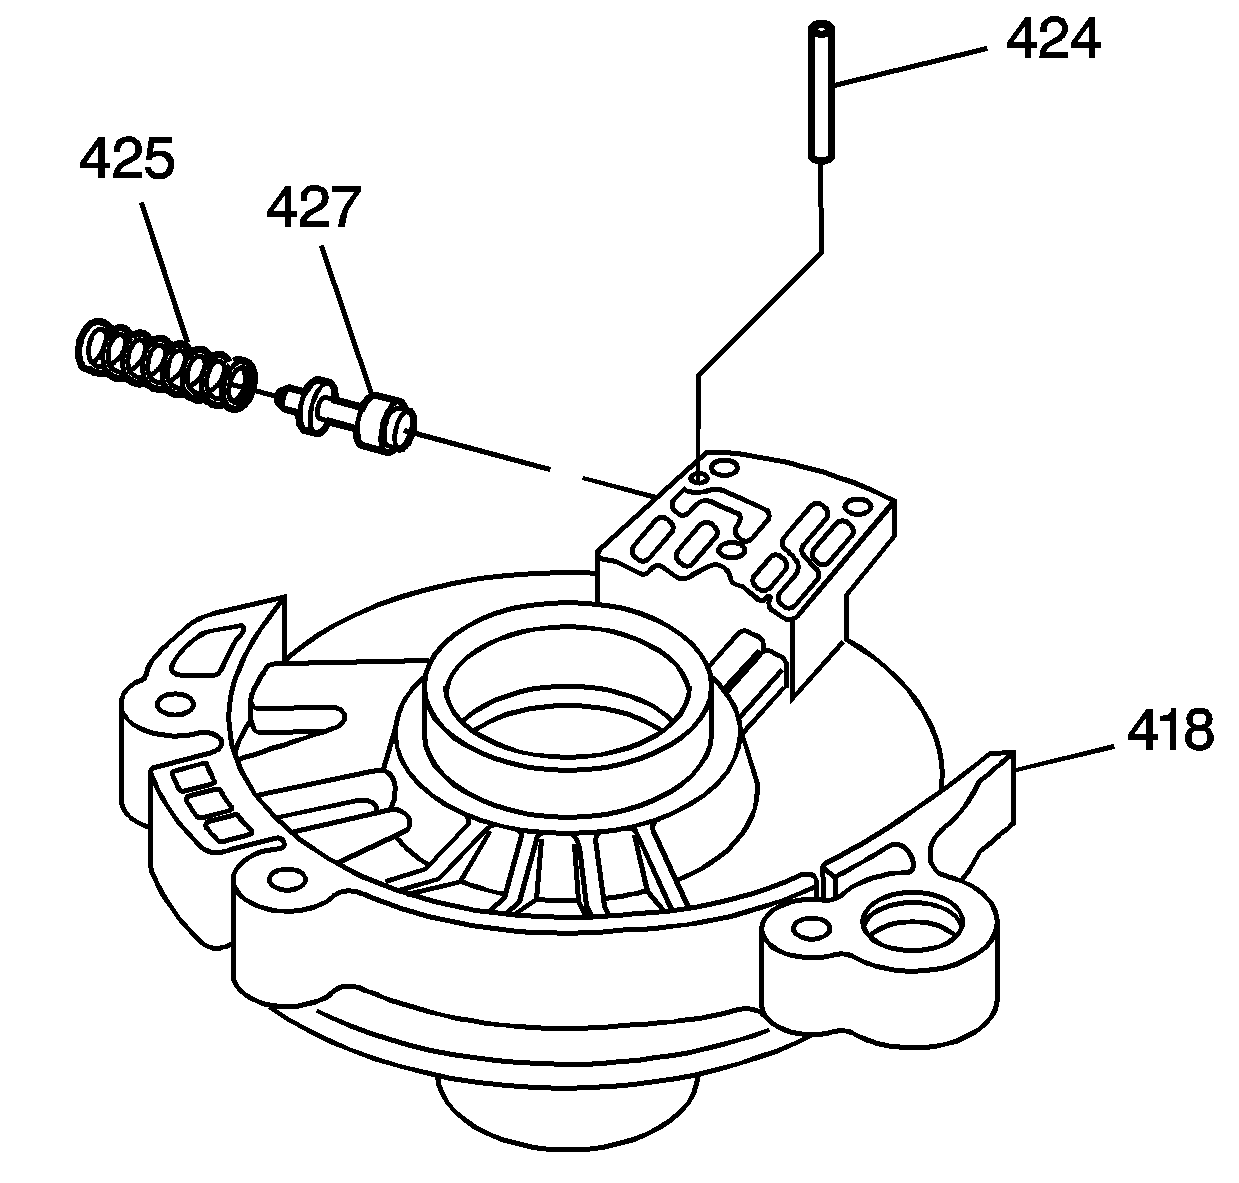
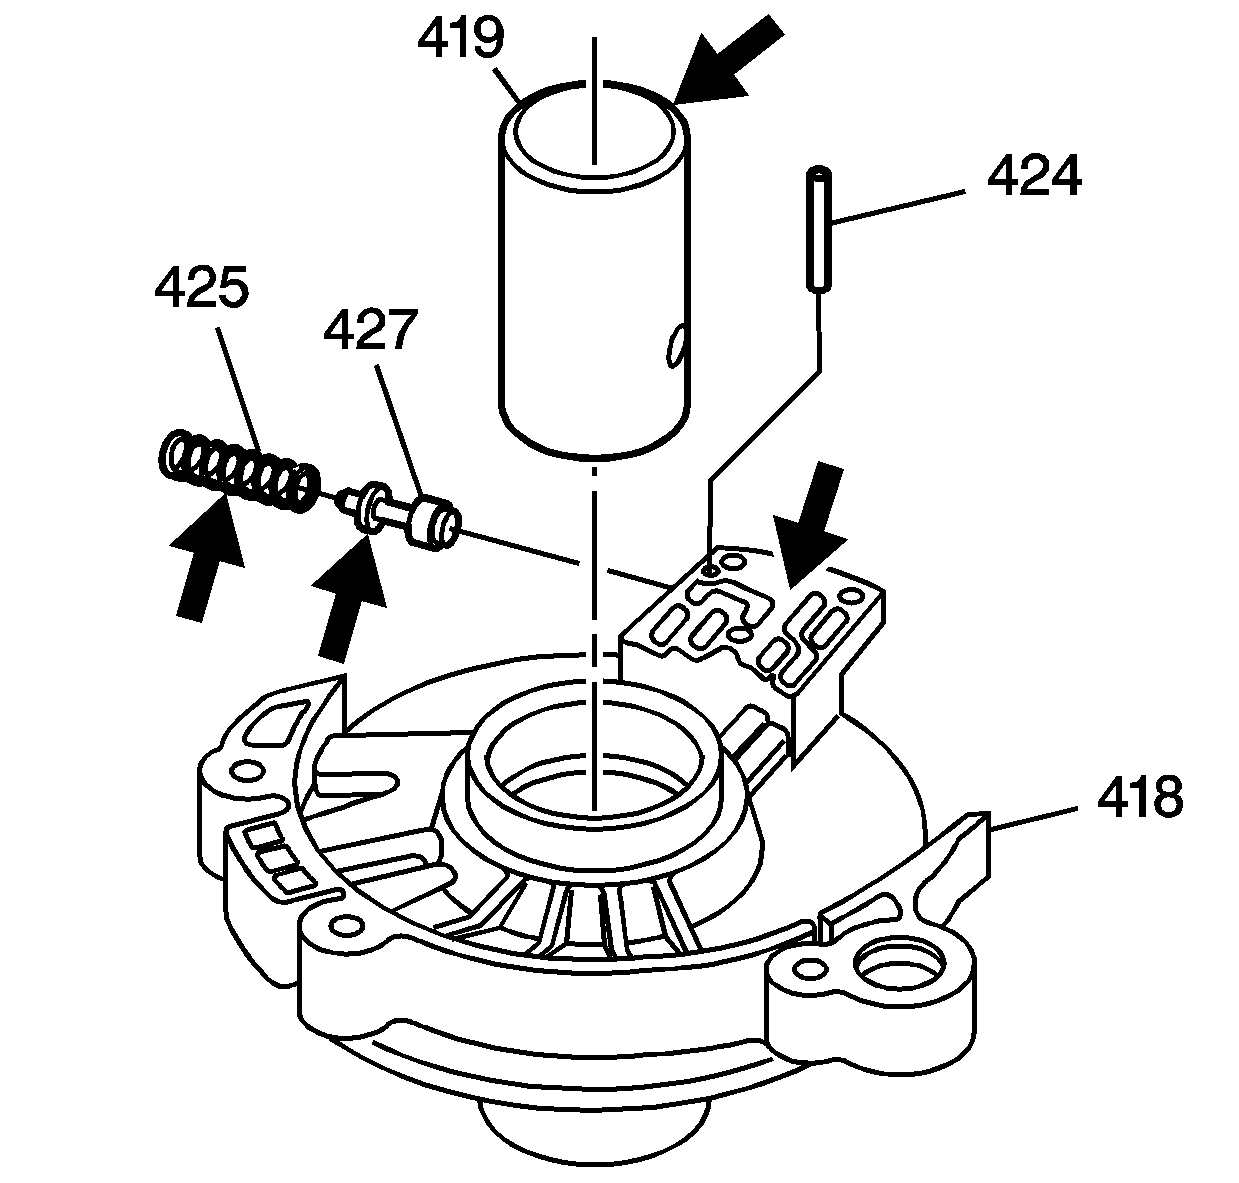
| • | The third clutch exhaust valve spring retaining pin (424) |
| • | The third clutch exhaust valve spring (425) |
| • | The third clutch exhaust valve (427) |
- Remove the oil transfer sleeve (419).
Driven Sprocket Support Assemble
Tools Required
J 39694 Spring Compressor
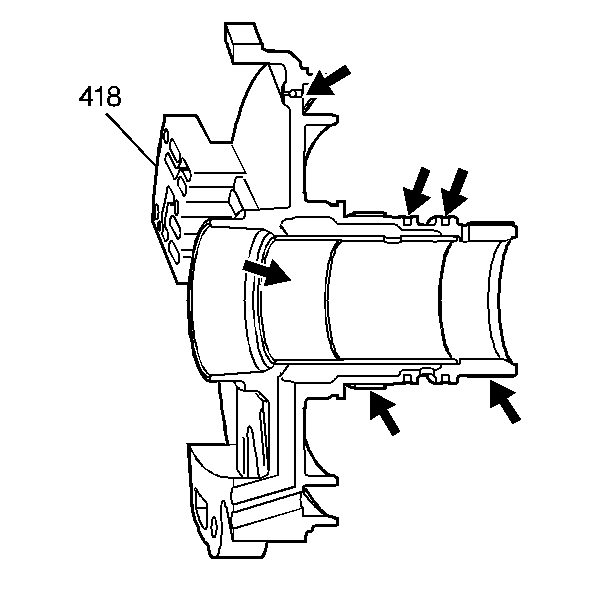
- Inspect the driven sprocket support (418)
for the following:
| • | Hub nicks, burrs, or damage |
| • | Worn or damaged splines |
| • | Bushings for nicks, scratches, or wear |
| • | The checkball for movement |
| • | The seal ring grooves for damage |
- Inspect the following parts for damage:
| • | The third clutch exhaust valve (427) |
| • | The exhaust valve spring (425) |
| • | The oil transfer sleeve (419) |
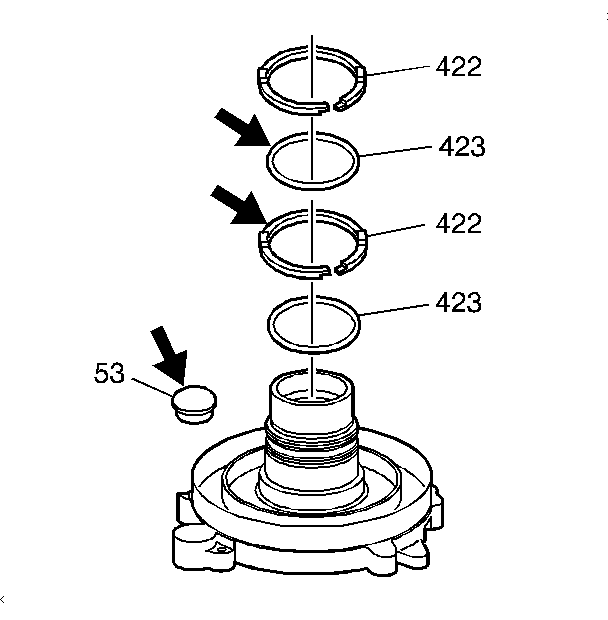
- Inspect the two sealing rings (423) and
the two oil rings (422). Replace any damaged rings.
- Inspect the scavenge tube seal (53). If the seal is damaged, replace
the seal.

- Inspect the second clutch piston and seal
assembly (430). Inspect the second clutch spring and retainer assembly (428)
for damage. Replace any damaged part.
Notice: Do not roll the seals when installing the second clutch piston assembly
(430), or damage may occur.
- Install the second clutch piston assembly (430). Twist and push the
piston simultaneously. Use a light coating of J 36850 or equivalent.
- Use the J 39694 to compress the
spring and retainer assembly (428).
- Install the snap ring (429).
- Install the following parts:
| • | The third clutch exhaust valve (427) |
| • | The third clutch exhaust valve spring (425) |
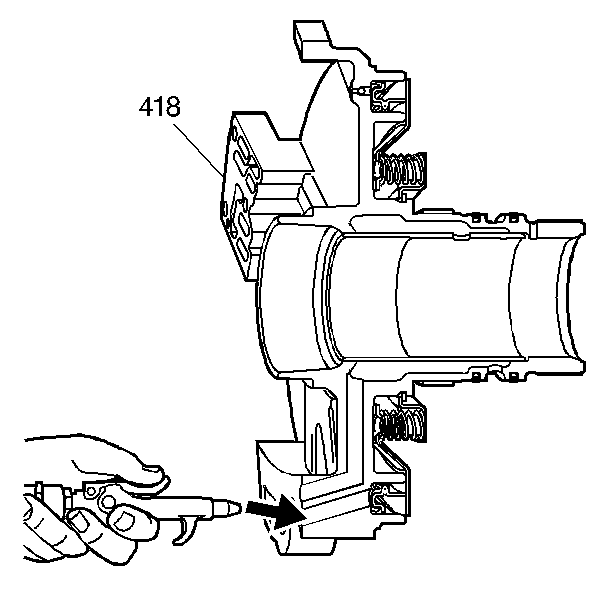
- Air check the second clutch piston by
applying air through the driven sprocket support (418).
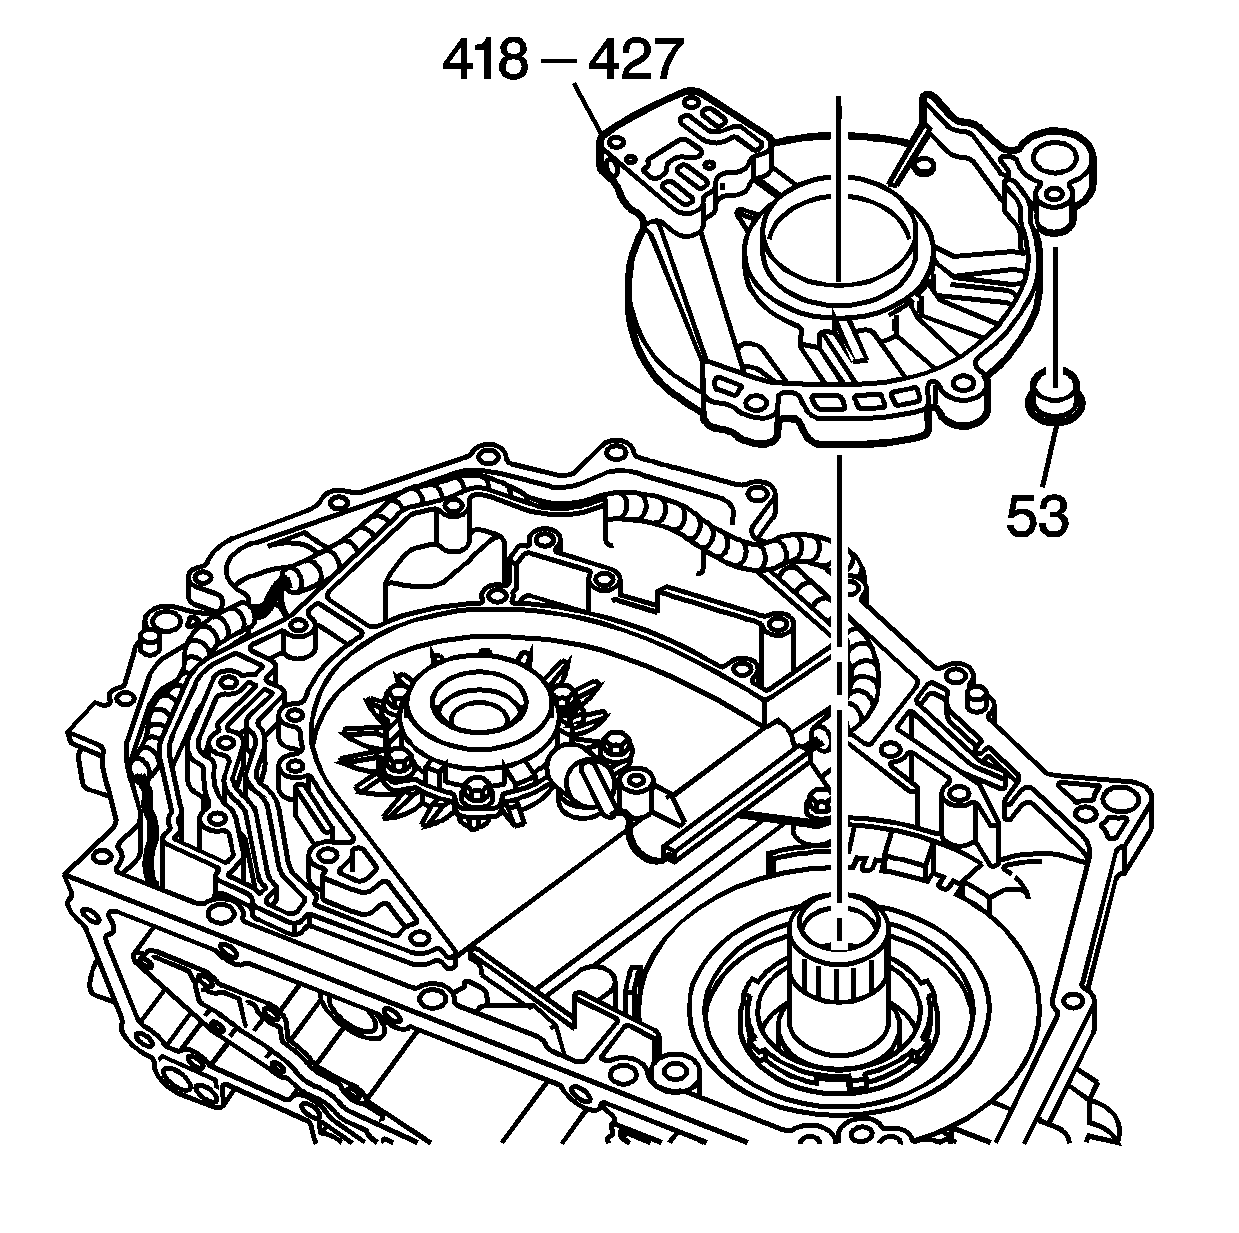
- Install the driven sprocket support (418-427)
over the input shaft. When seated, the support will be flush with the case
line surface.
