Special Tools
| • | J 5590 Pinion Bearing Race Installer - Rear |
| • | J 8092 Driver Handle |
| • | J 24433 Pinion Cone and Side Bearing Installer |
| • | J 36850 Transjel Lubricant |
| • | J 46268 Output Seal Installer |
| • | J 46269 Input Seal Installer |
For equivalent regional tools, refer to Special Tools.
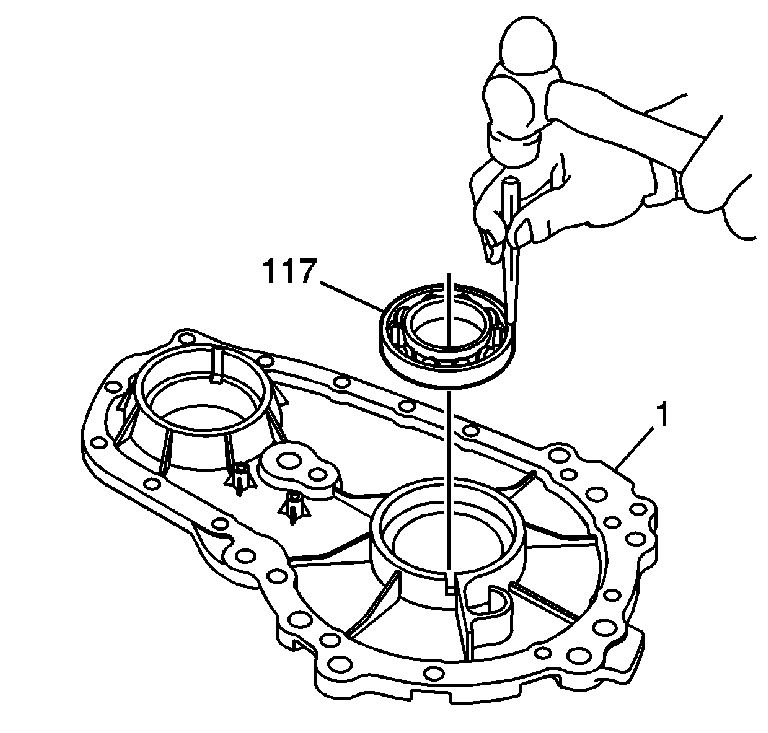
- Install the input shaft bearing (117) into the case (1).
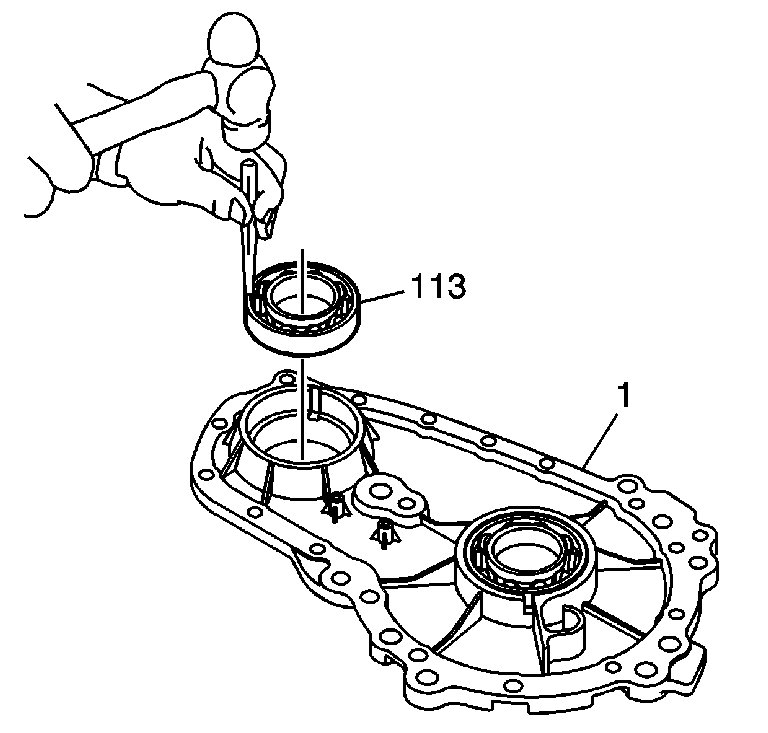
- Install the front output shaft bearing (113) into the case (1).
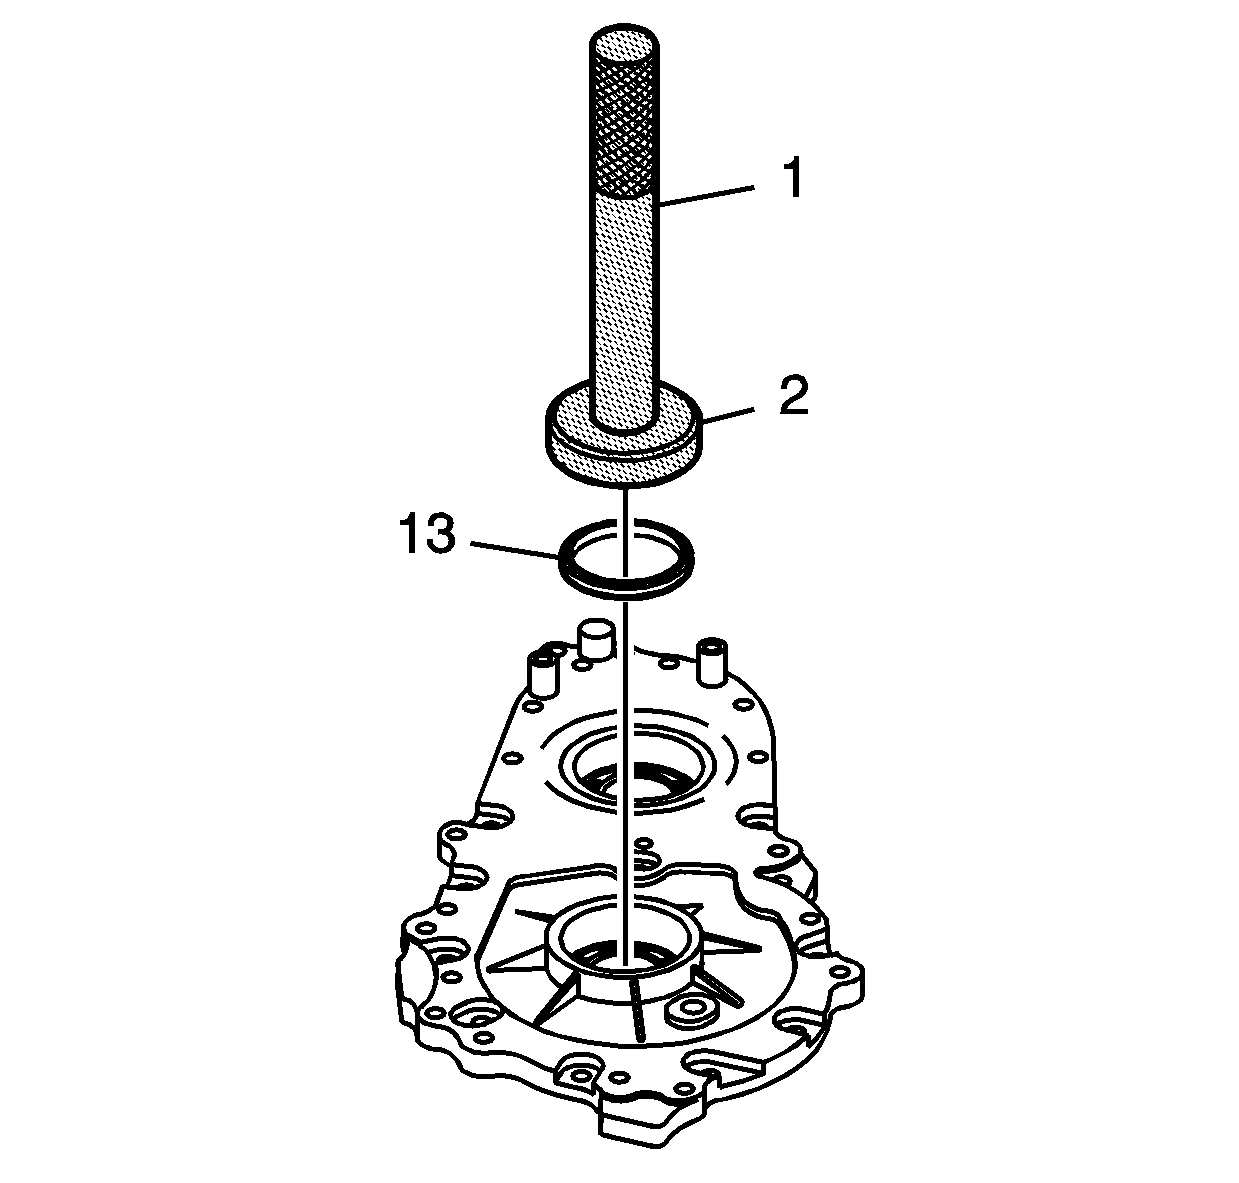
- Using the J 46269 seal installer (2) and the J 8092 driver handle (1), install the input shaft oil seal (13).
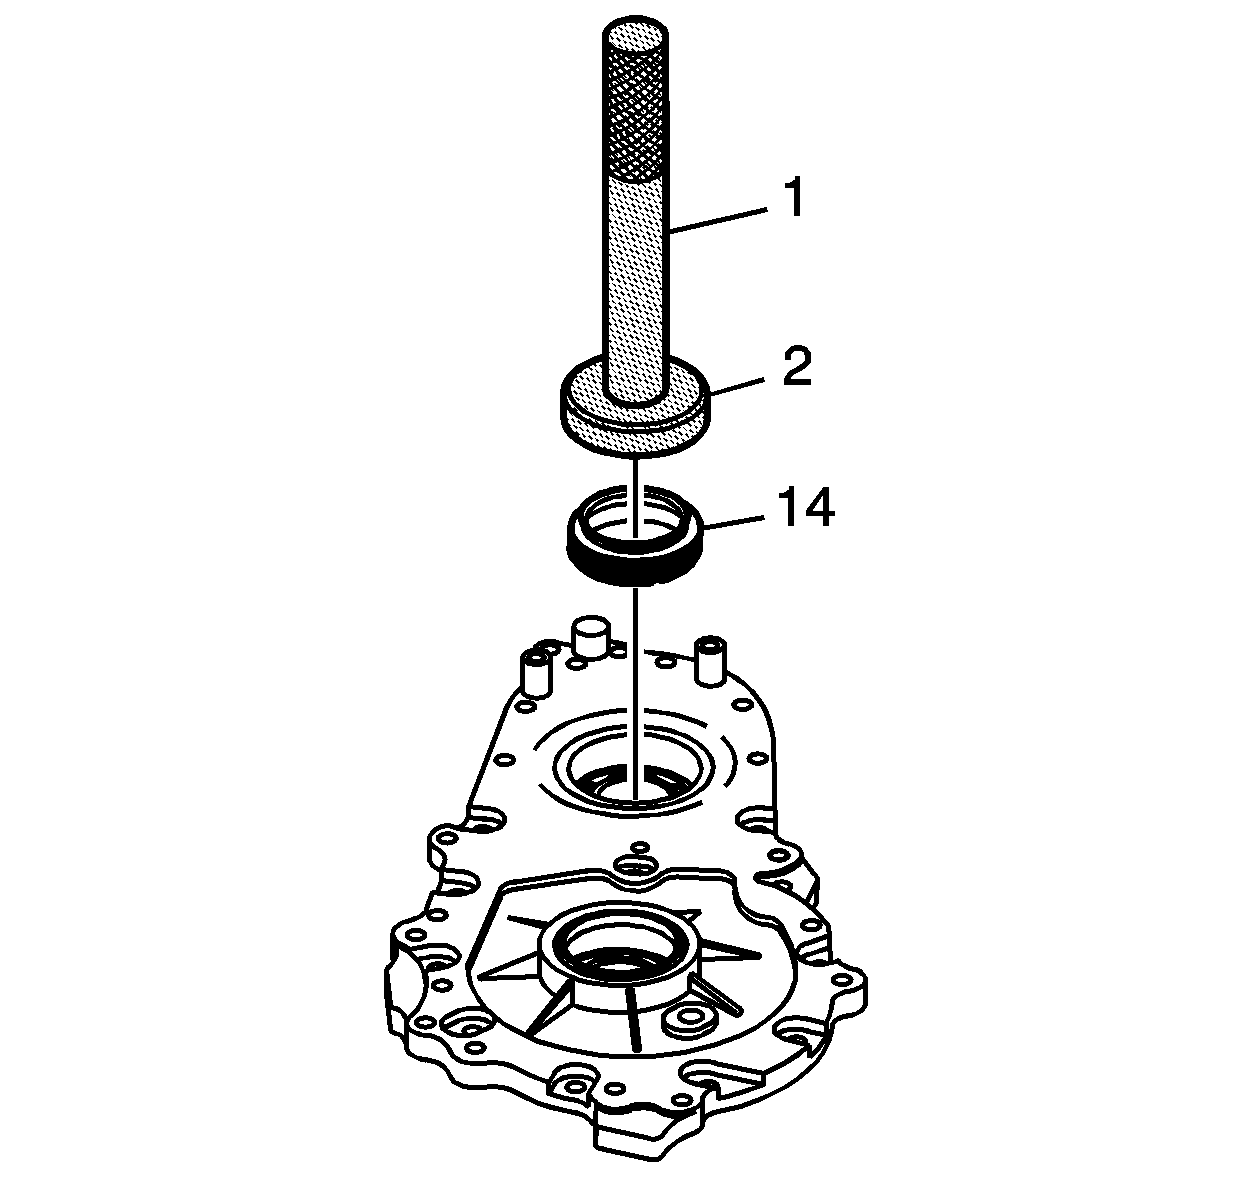
- Using the J 46268 seal installer (2) and the J 8092 driver handle (1), install the front output shaft oil seal (14).
- Install the chain snubber (3).
- Apply sealant GM P/N 12345382 (Canadian P/N 10953489), or equivalent, to the threads of the bolts (4) and tighten to 7 N·m (62 lb in).
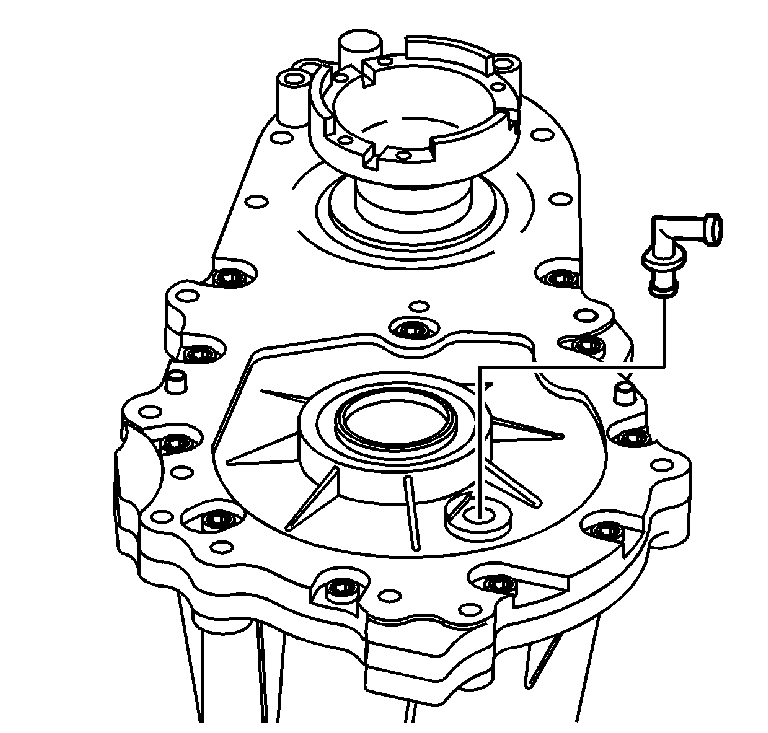
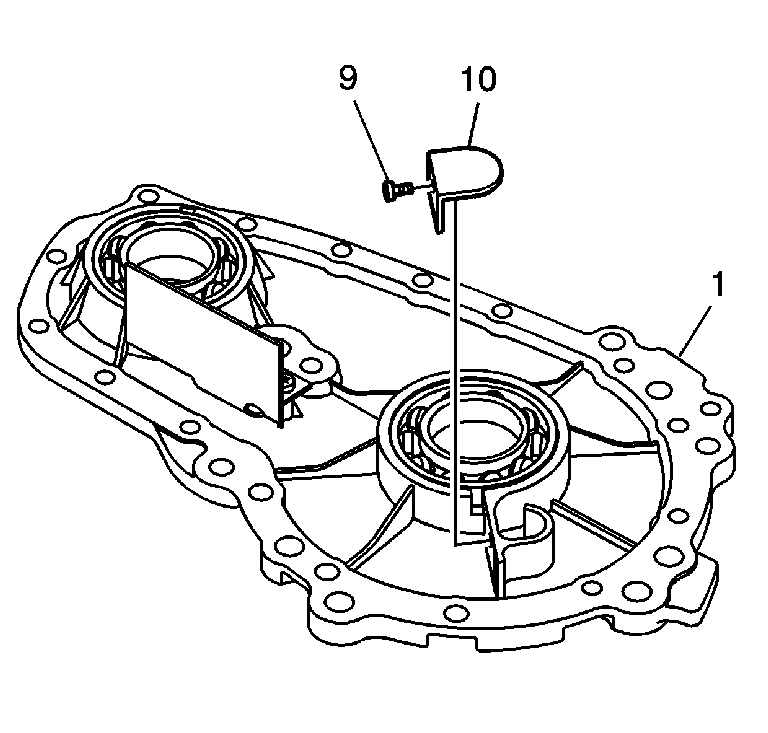
- Install the vent baffle (10).
- Apply sealant GM P/N 12345382 (Canadian P/N 10953489), or equivalent, to the threads of the bolt (9) and tighten to 7 N·m (62 lb in).
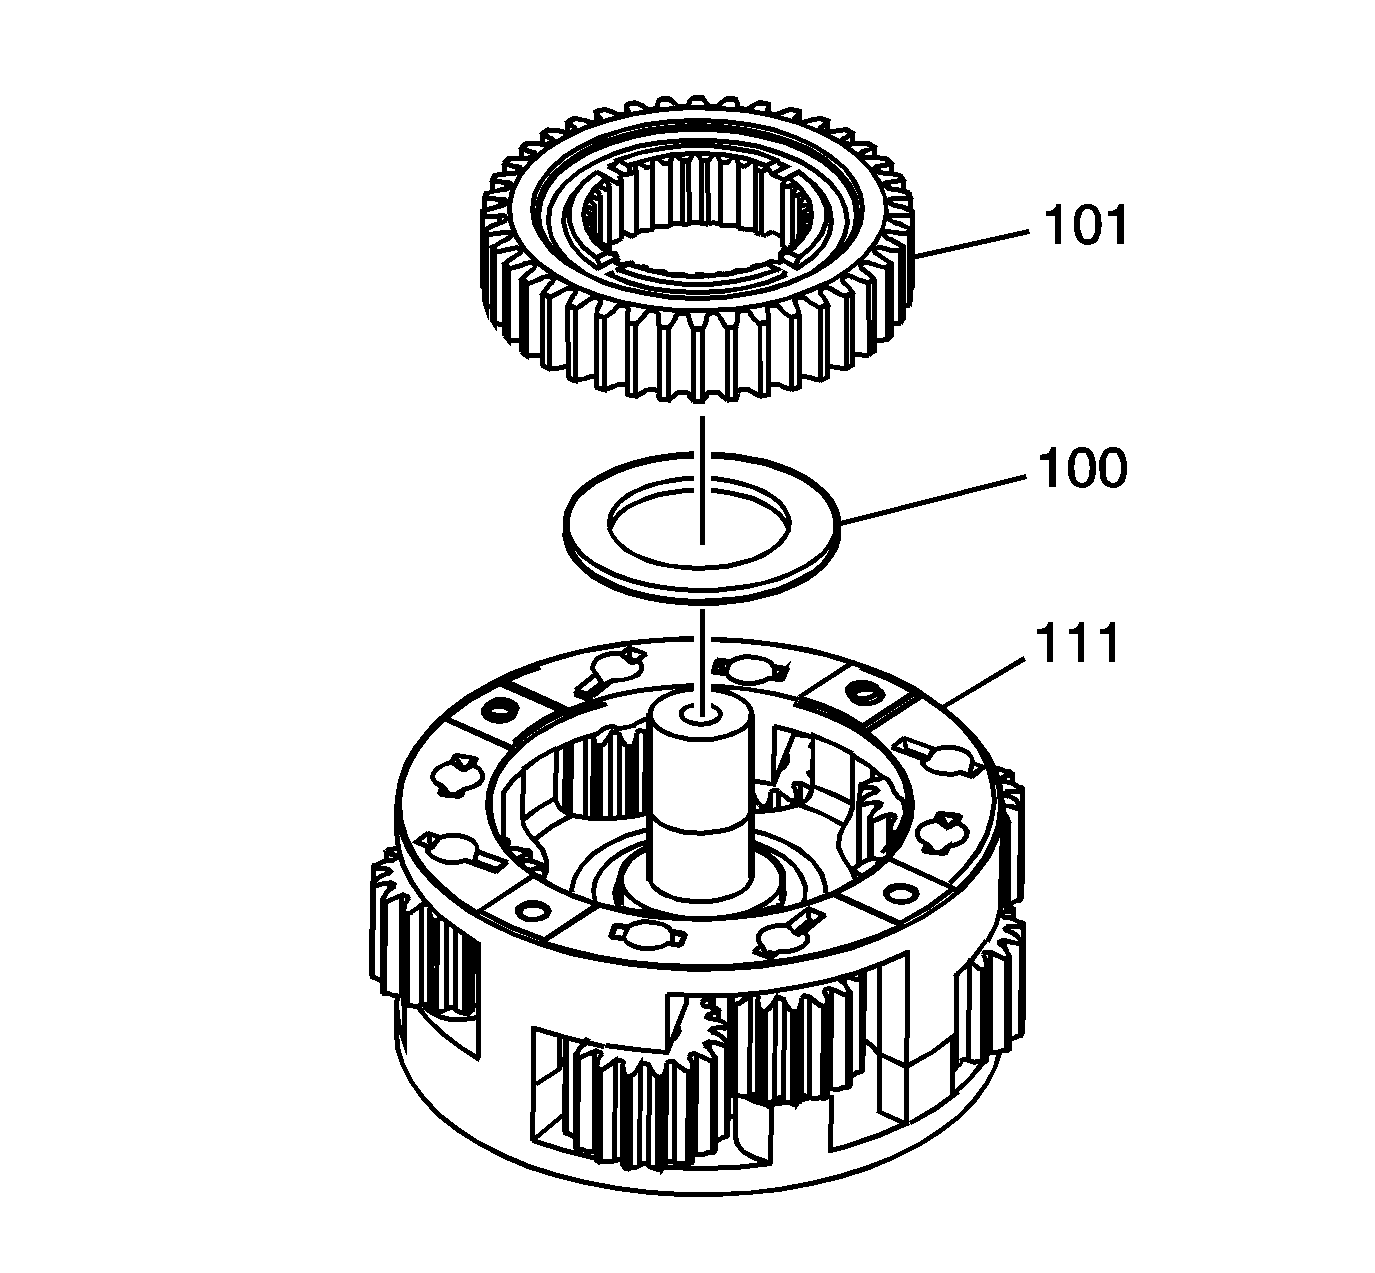
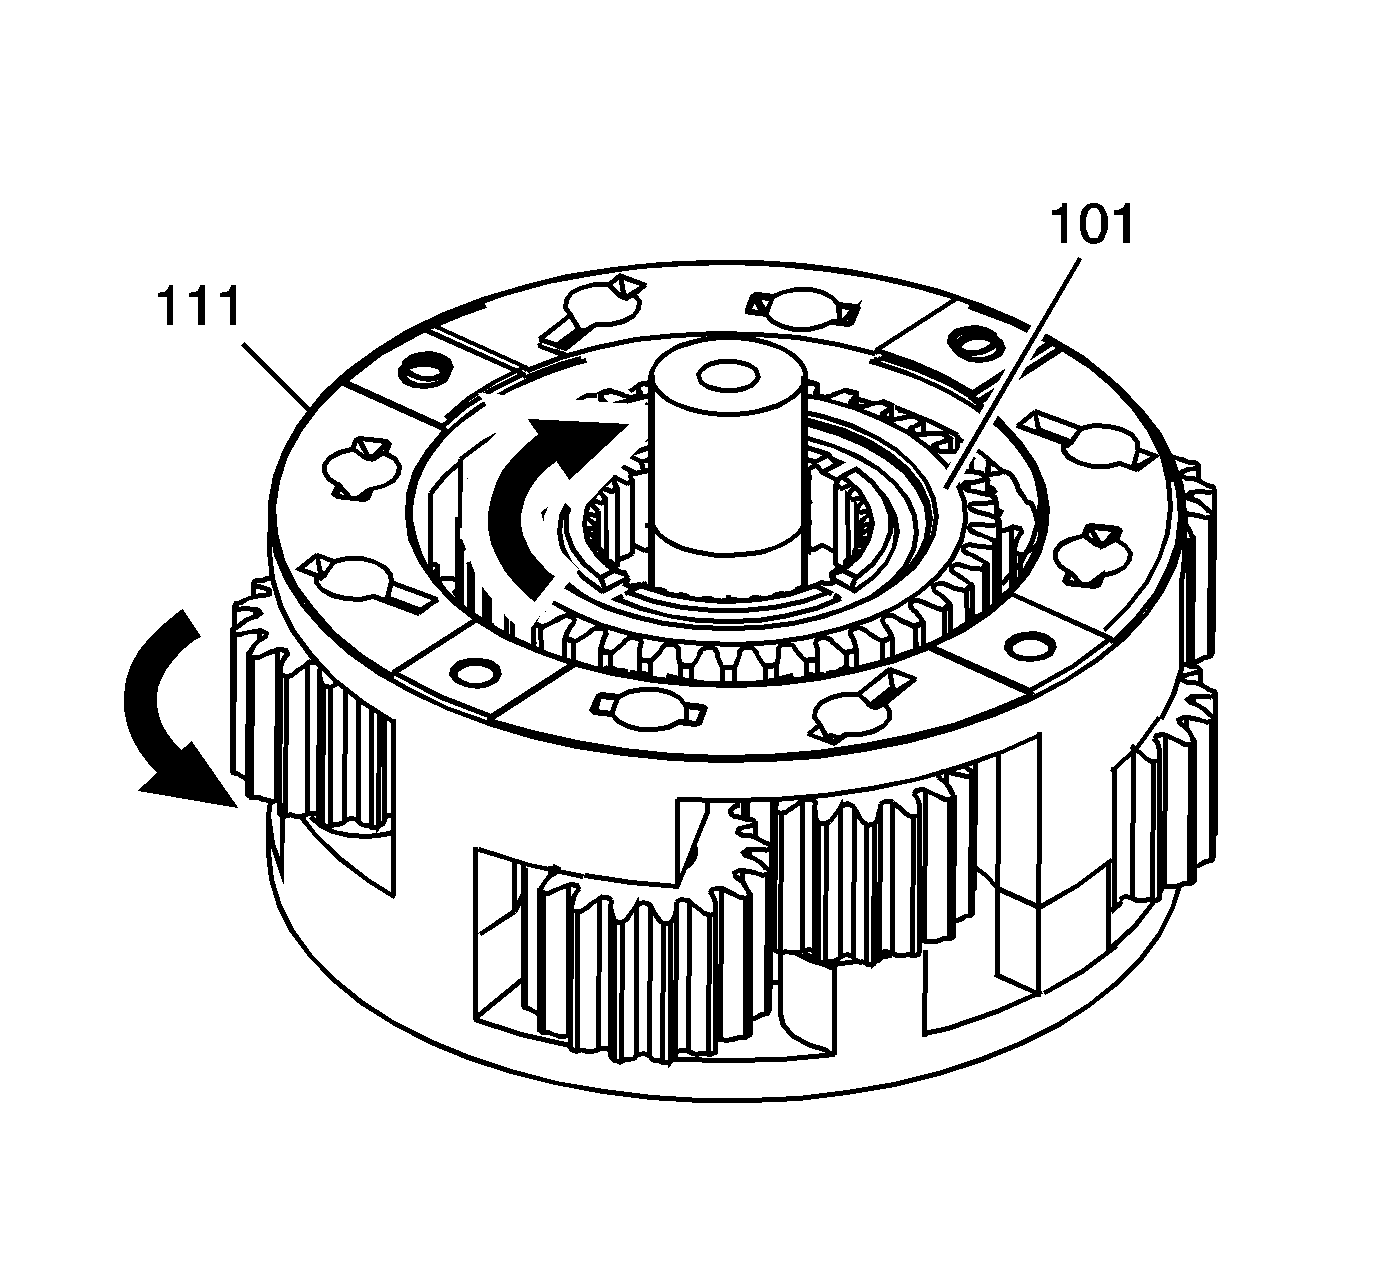
- With the thrust washer side of the planetary differential facing down, align the marks on the pinion gears. Position the alignment marks with an area on the planetary differential that can be reference for all gears.
- Use a press to install the input shaft assembly to the carrier (111).
- Lubricate the thrust washer (100) with J 36850 lubricant or equivalent.
- Install the thrust washer over the rear of the input shaft, into the groove of the carrier (111).
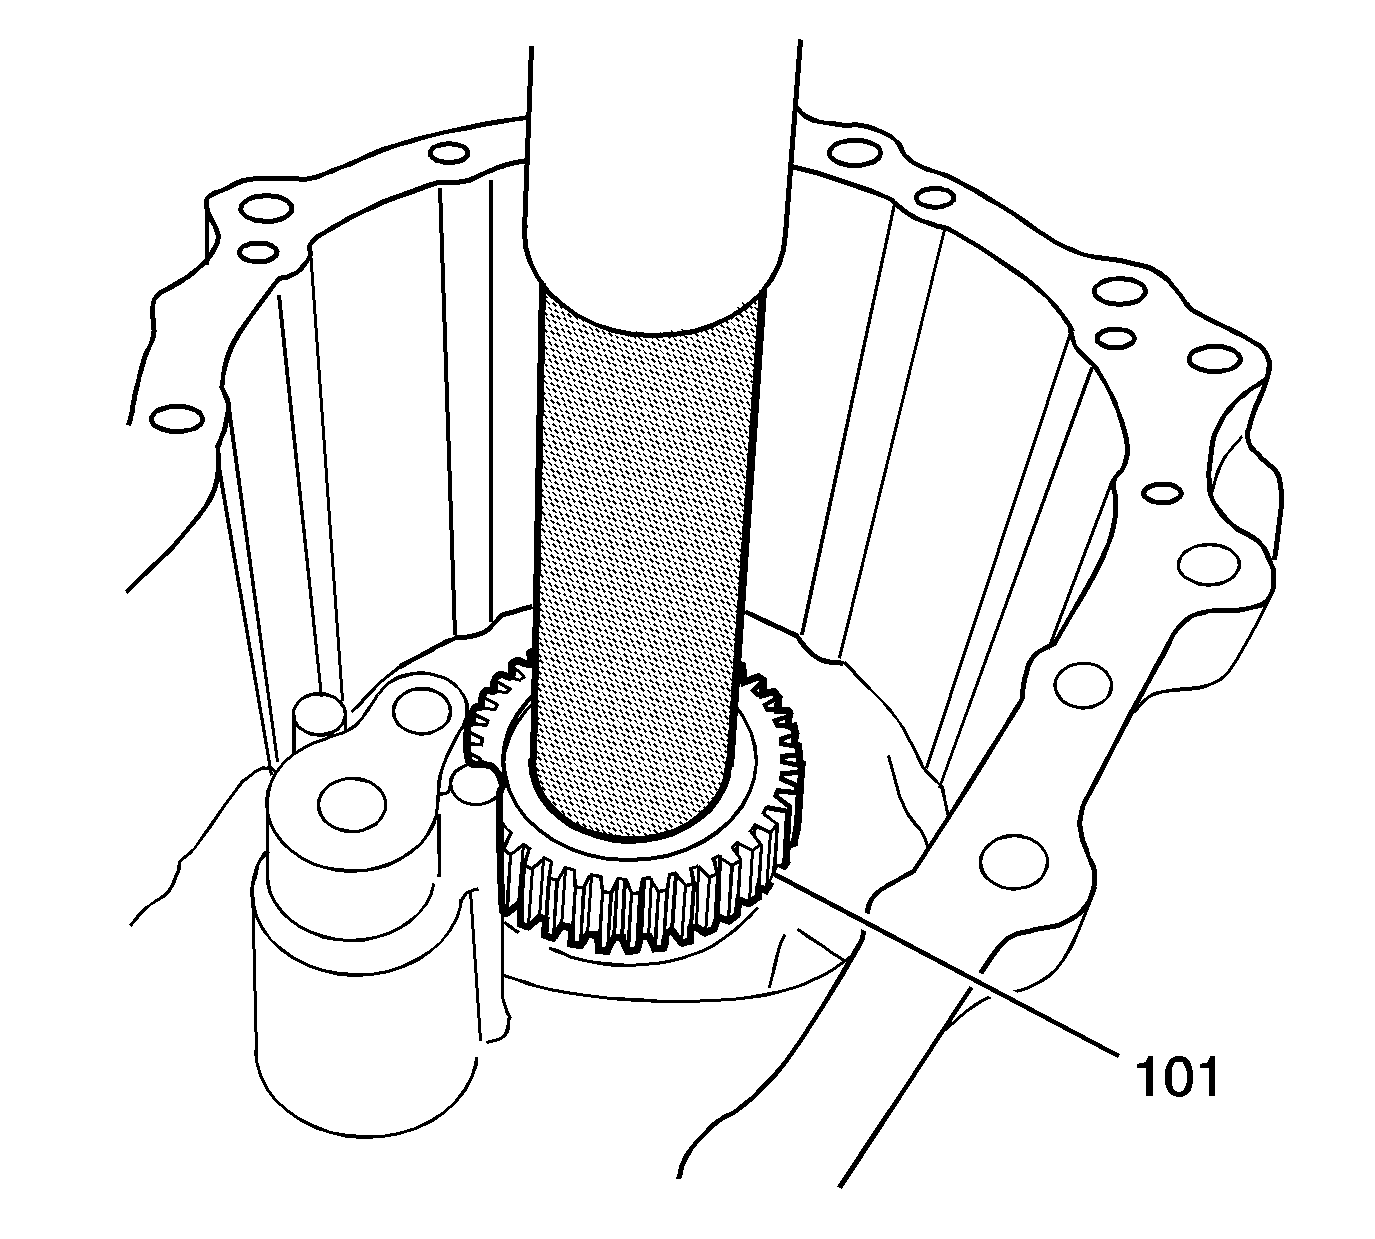
- Insert the sun gear (101) into the carrier.
- If the pinion gears are properly aligned, the sun gear (101) carrier assembly will rotate freely.
- Remove the sun gear (101) from the carrier (111).
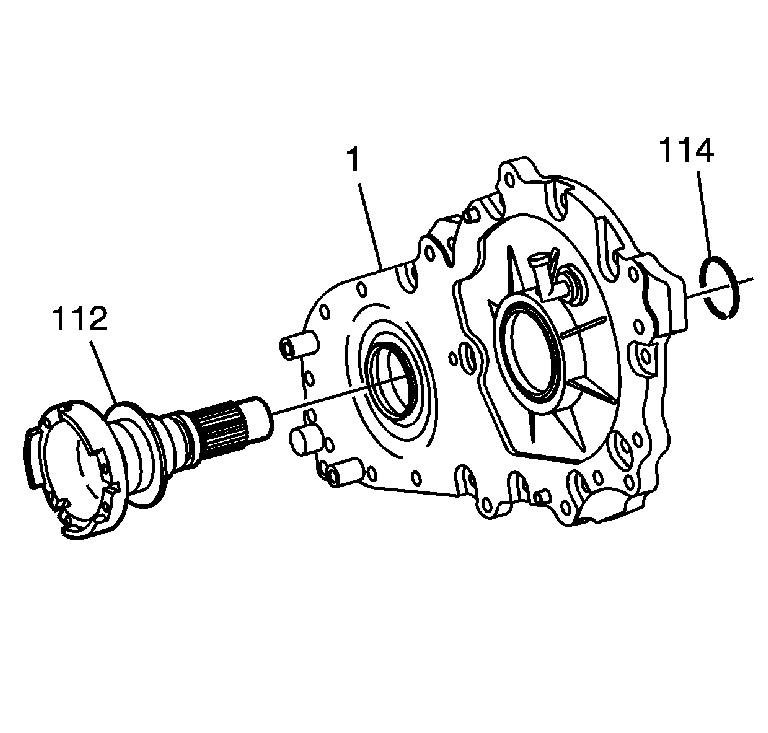
- Assemble the front output shaft (112) to the case (1).
- Assemble the snap ring (114).
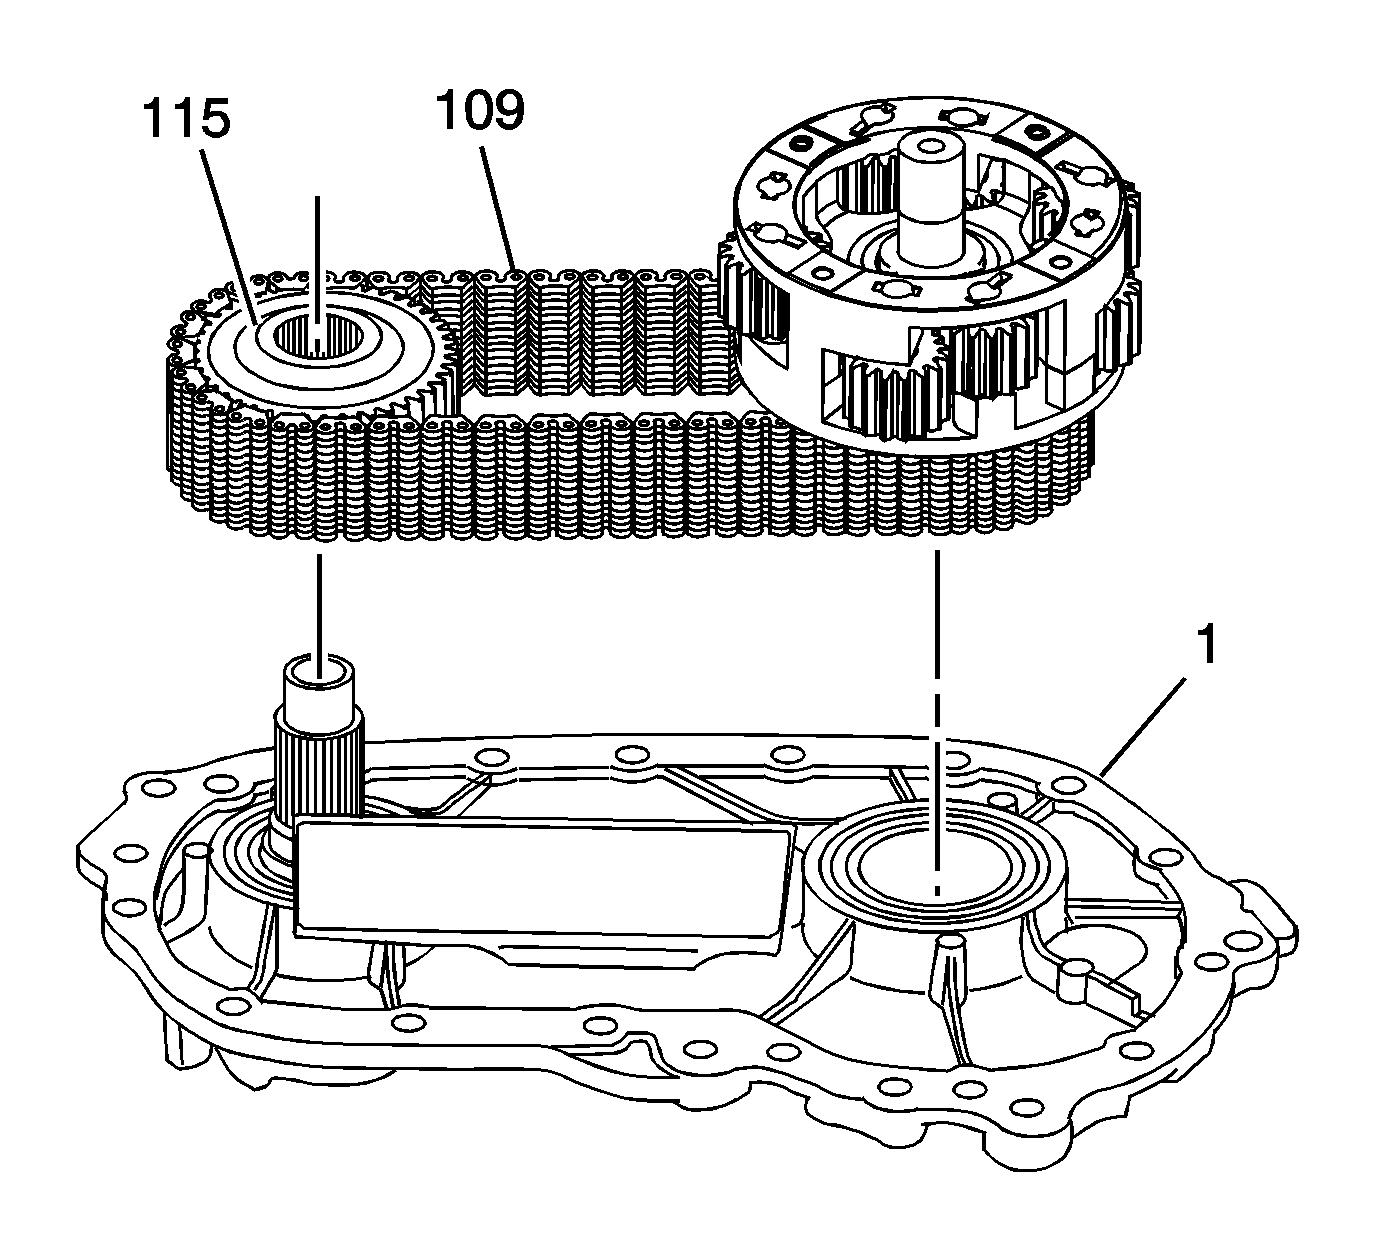
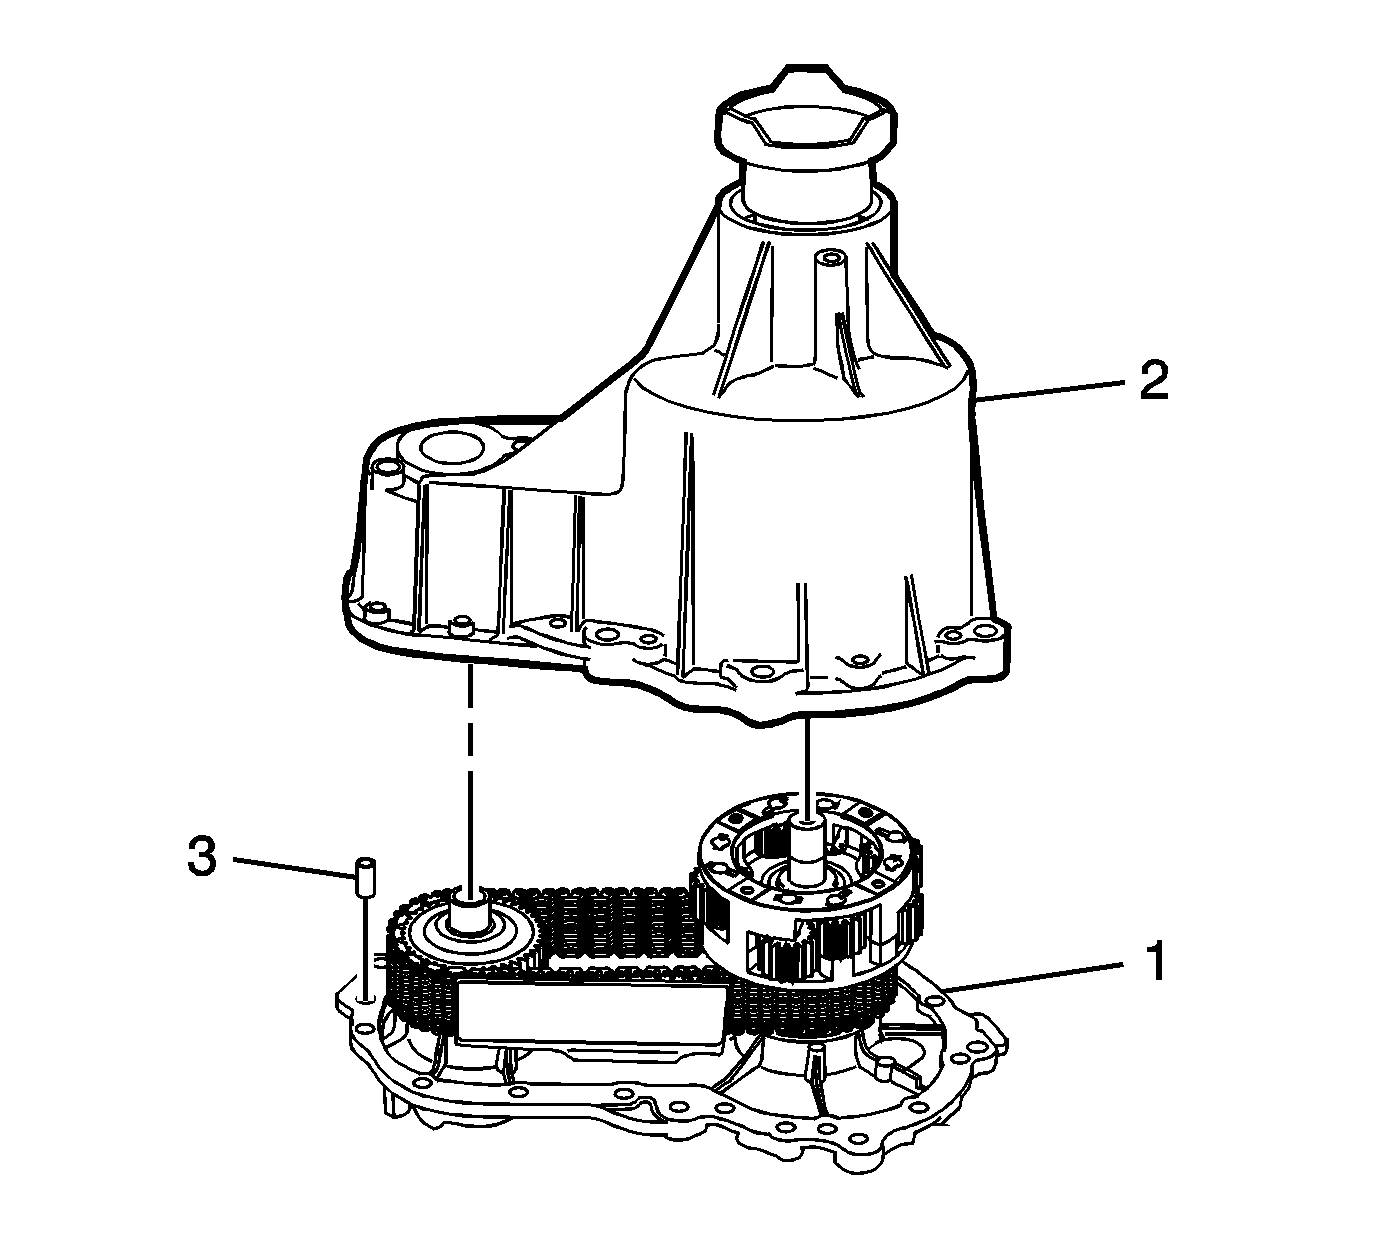
- Assemble the chain (109), upper gear of the planetary assembly, and lower sprocket (115) to the case (1).
- Use the J 5590 race installer and a press to fully seat the lower sprocket (115) to the front output shaft, while guiding the input shaft of the planetary assembly, until it is seated to the case.
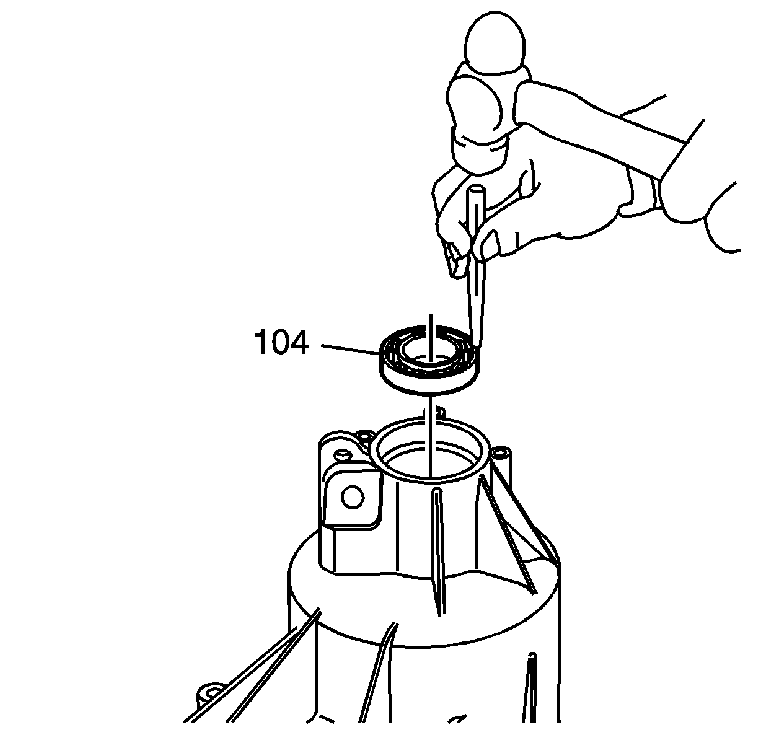
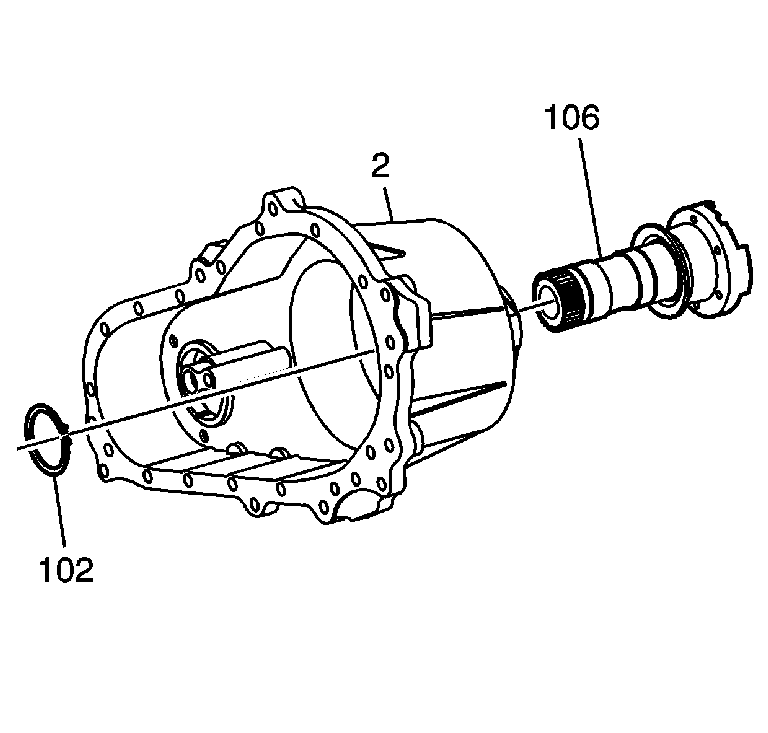
- Install the rear output shaft bearing (104).
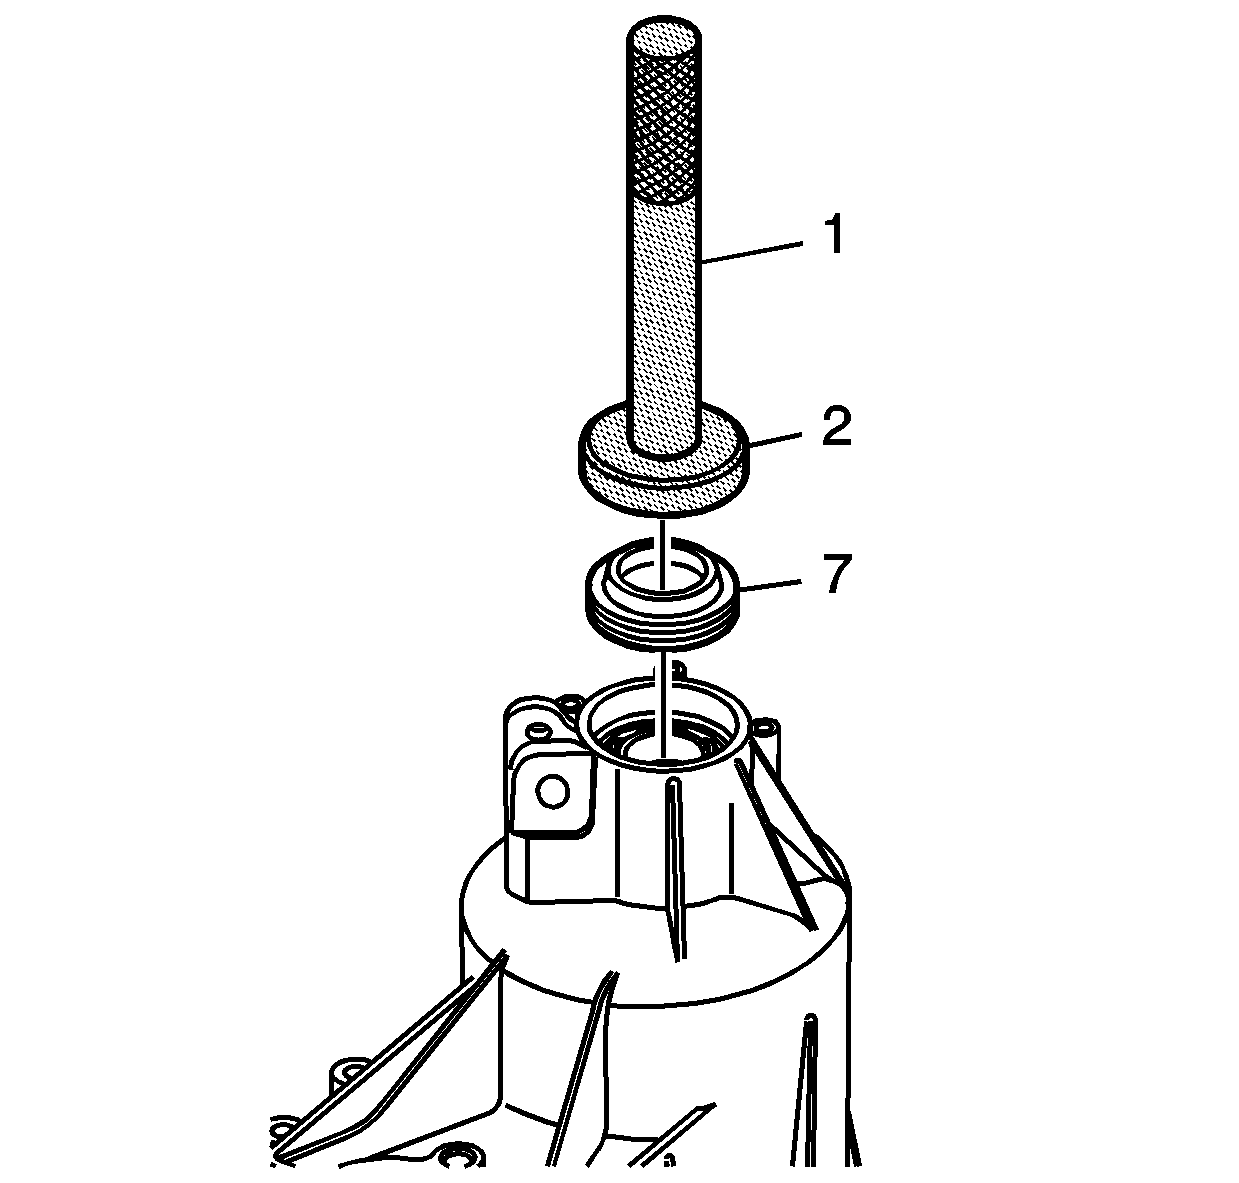
- Using the J 46268 seal installer (2) and the J 8092 driver handle (1), install the rear output oil seal (7).
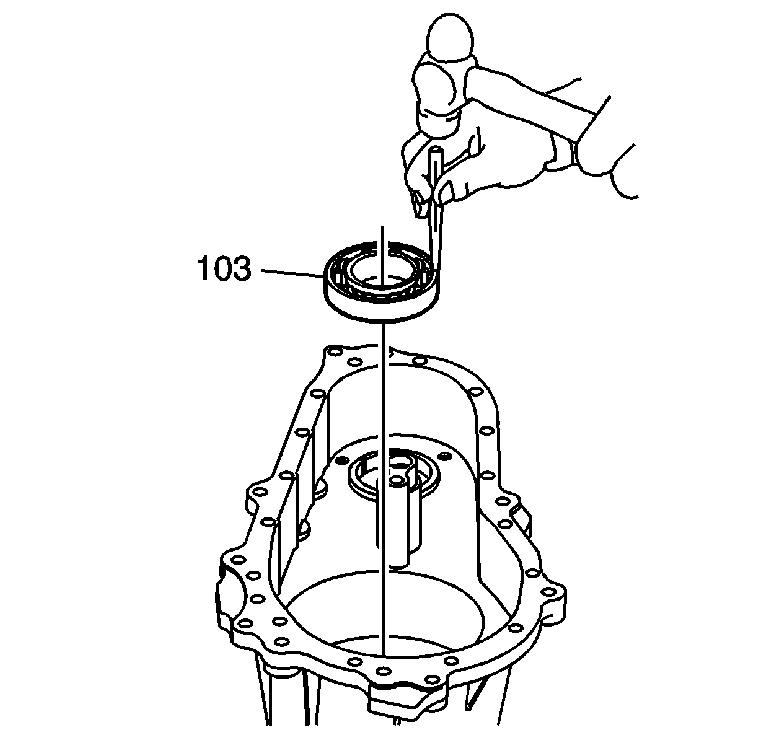
- Install the inner output shaft bearing (103).
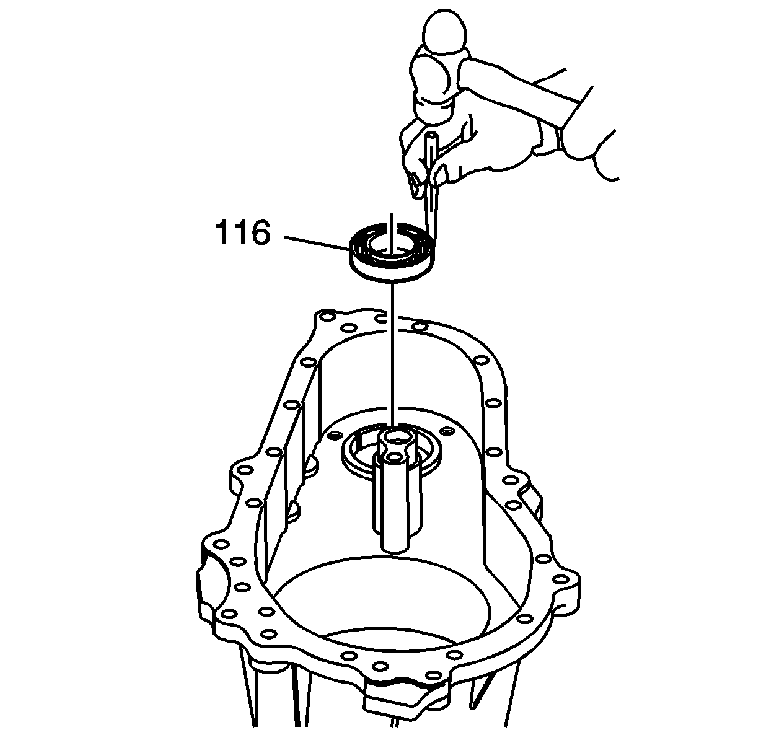
- Install the front output shaft inner bearing (116).
- Install the rear output shaft (106) by pushing it in through the bearings.
- Install the rear output shaft snap ring (102) in the lower groove of the output shaft (106).
- Use the J 24433 bearing installer and a press to install the sun gear (101) to the output shaft.
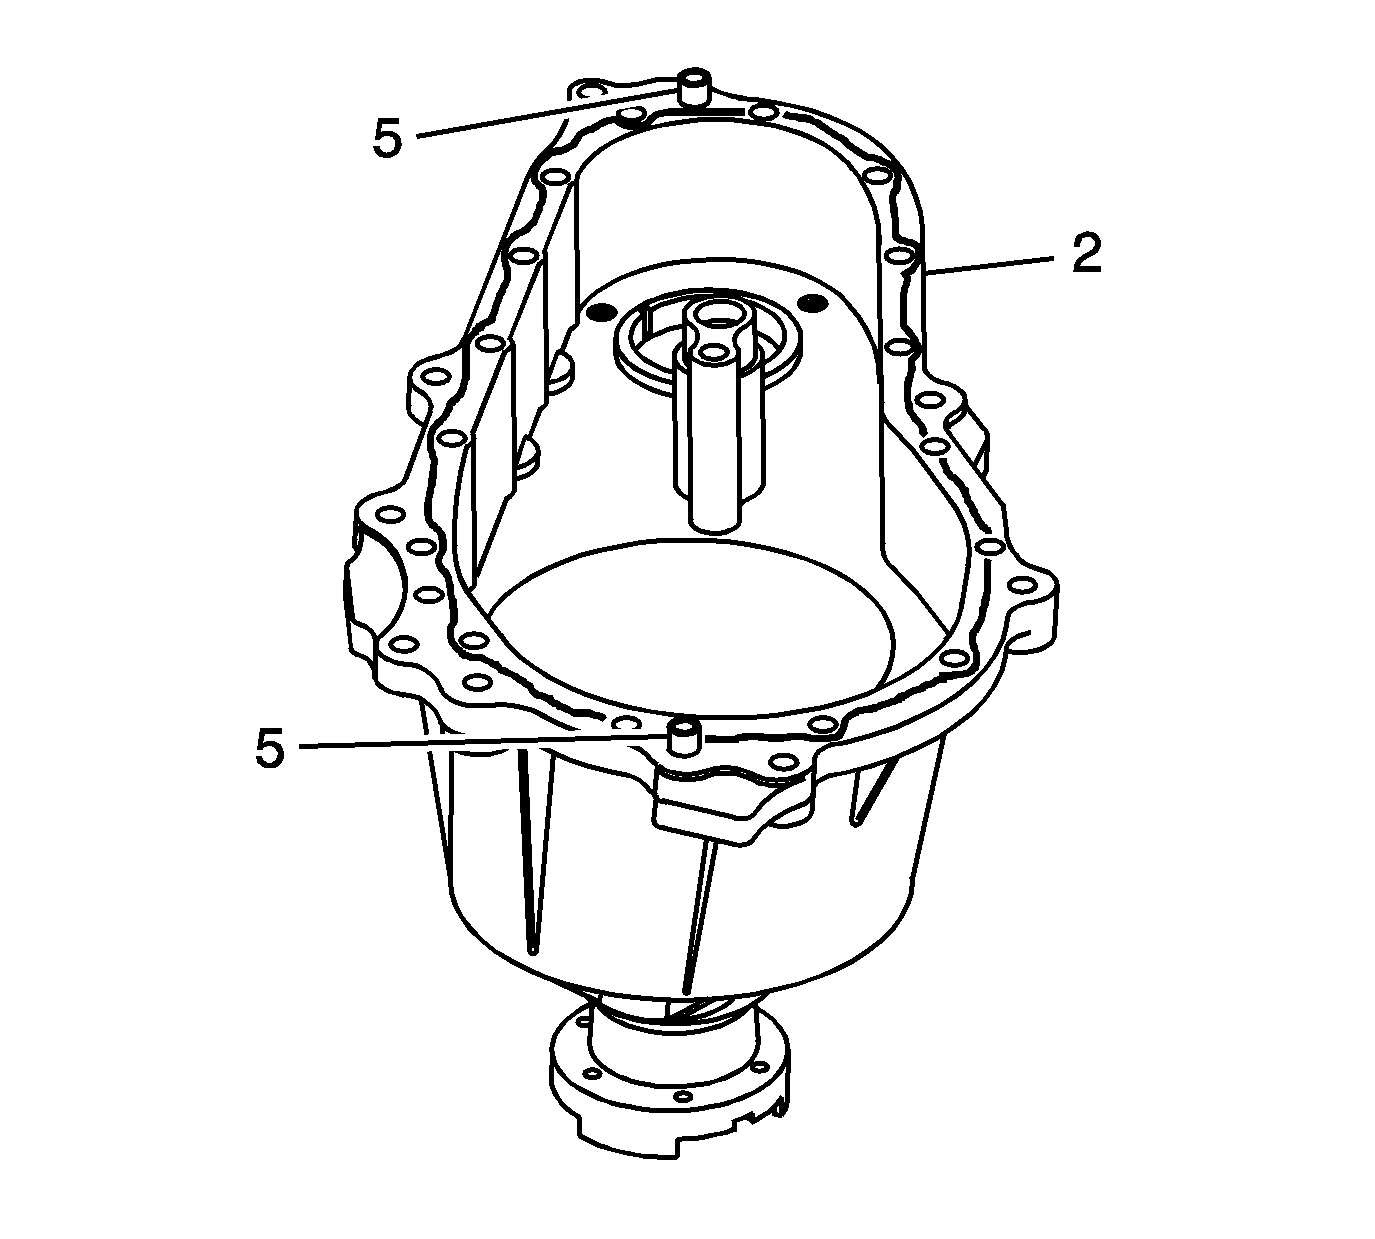
- Install the dowel pins (5) into the cover (2), if necessary.
- Apply a 3.175 mm (1/8 in) bead of RTV sealant GM P/N 12345739 (Canadian P/N 10953541), or equivalent, to the mating surfaces of the cover (2).
- Insert the dowel pin (3), if removed.
- Lower the cover (2) over the case (1). Turn the rear output shaft in order to align the splines and the shaft into the bearing in the cover.
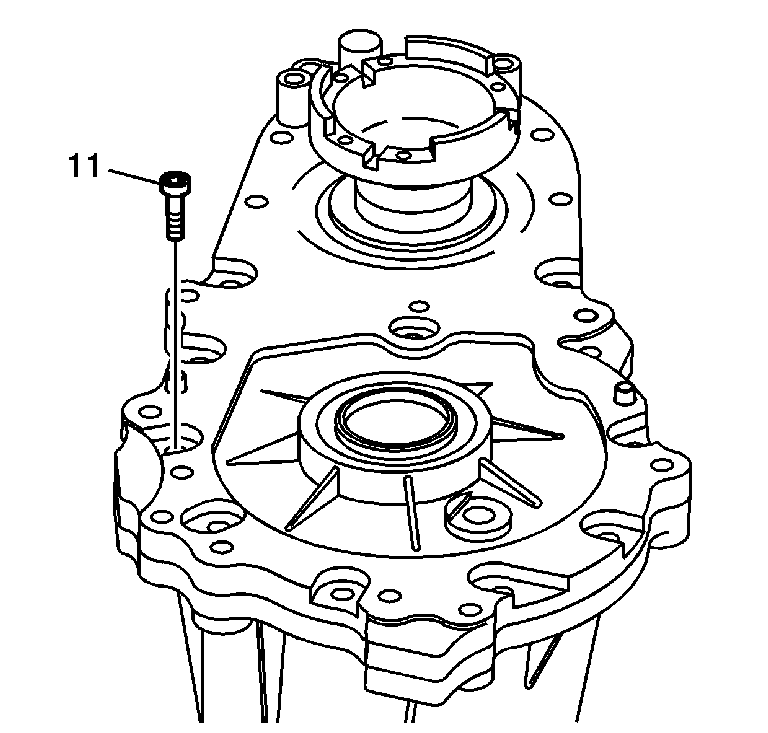
- Install the case bolts (11) and tighten to 25 N·m (18 lb ft).
- Install the vent breather by pushing it into the hole. Align the flat on vent with the flat on the case.
- Lightly pull on the vent to ensure proper installation.
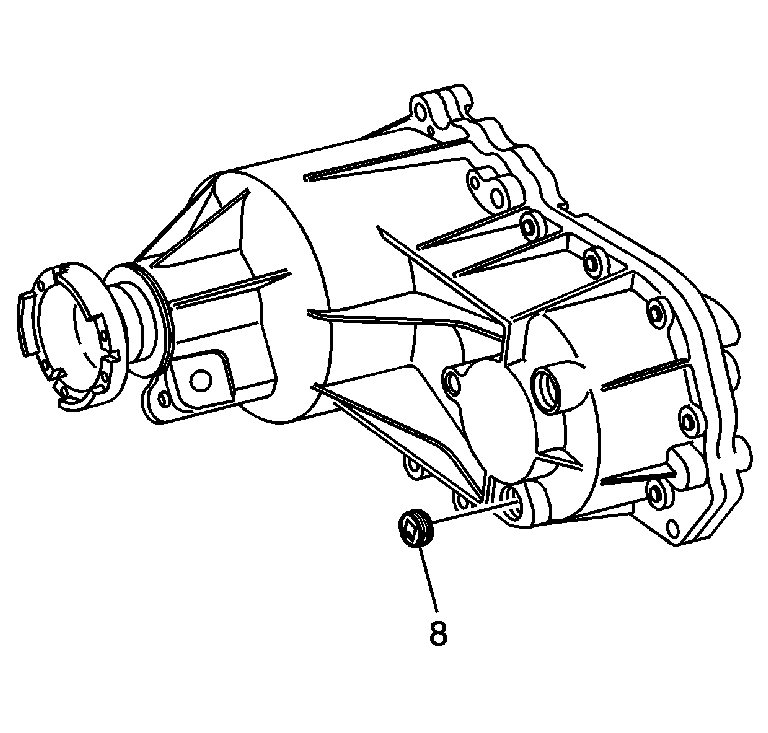
- Apply pipe sealant GM P/N 12346004 (Canadian P/N 10953480), or equivalent, to the threads of the drain plug (8).
- Install the drain plug (8) and tighten to 25 N·m (18 lb ft).
- Fill the transfer case with manual transmission fluid GM P/N 88861800 (Canadian P/N 88861801). Fill to the bottom of fill plug threads. Ensure the vehicle is on a level surface. Refer to Approximate Fluid Capacities.
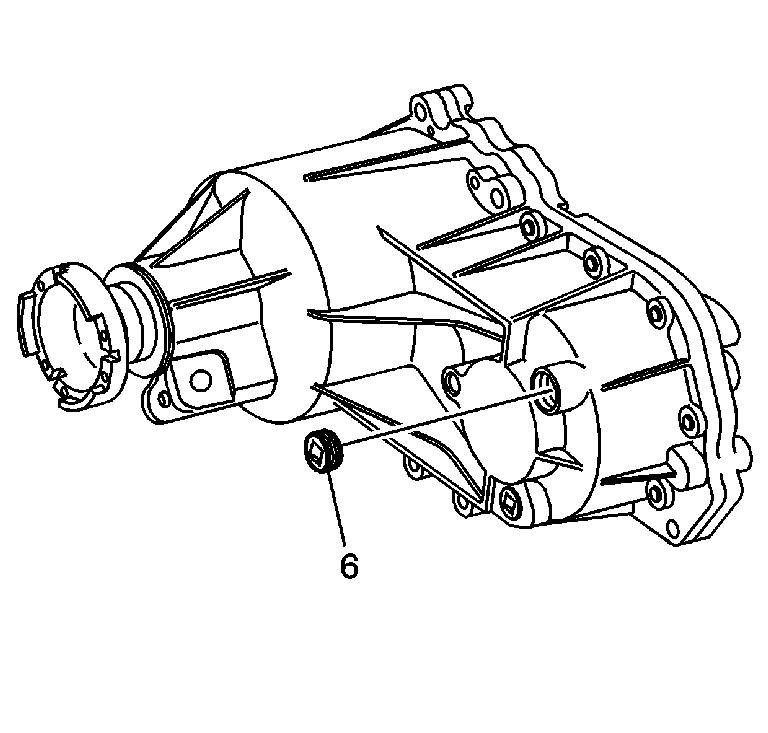
- Apply pipe sealant GM P/N 12346004 (Canadian P/N 10953480), or equivalent, to the threads of the fill plug.
- Install the fill plug (6) and tighten to 25 N·m (18 lb ft).
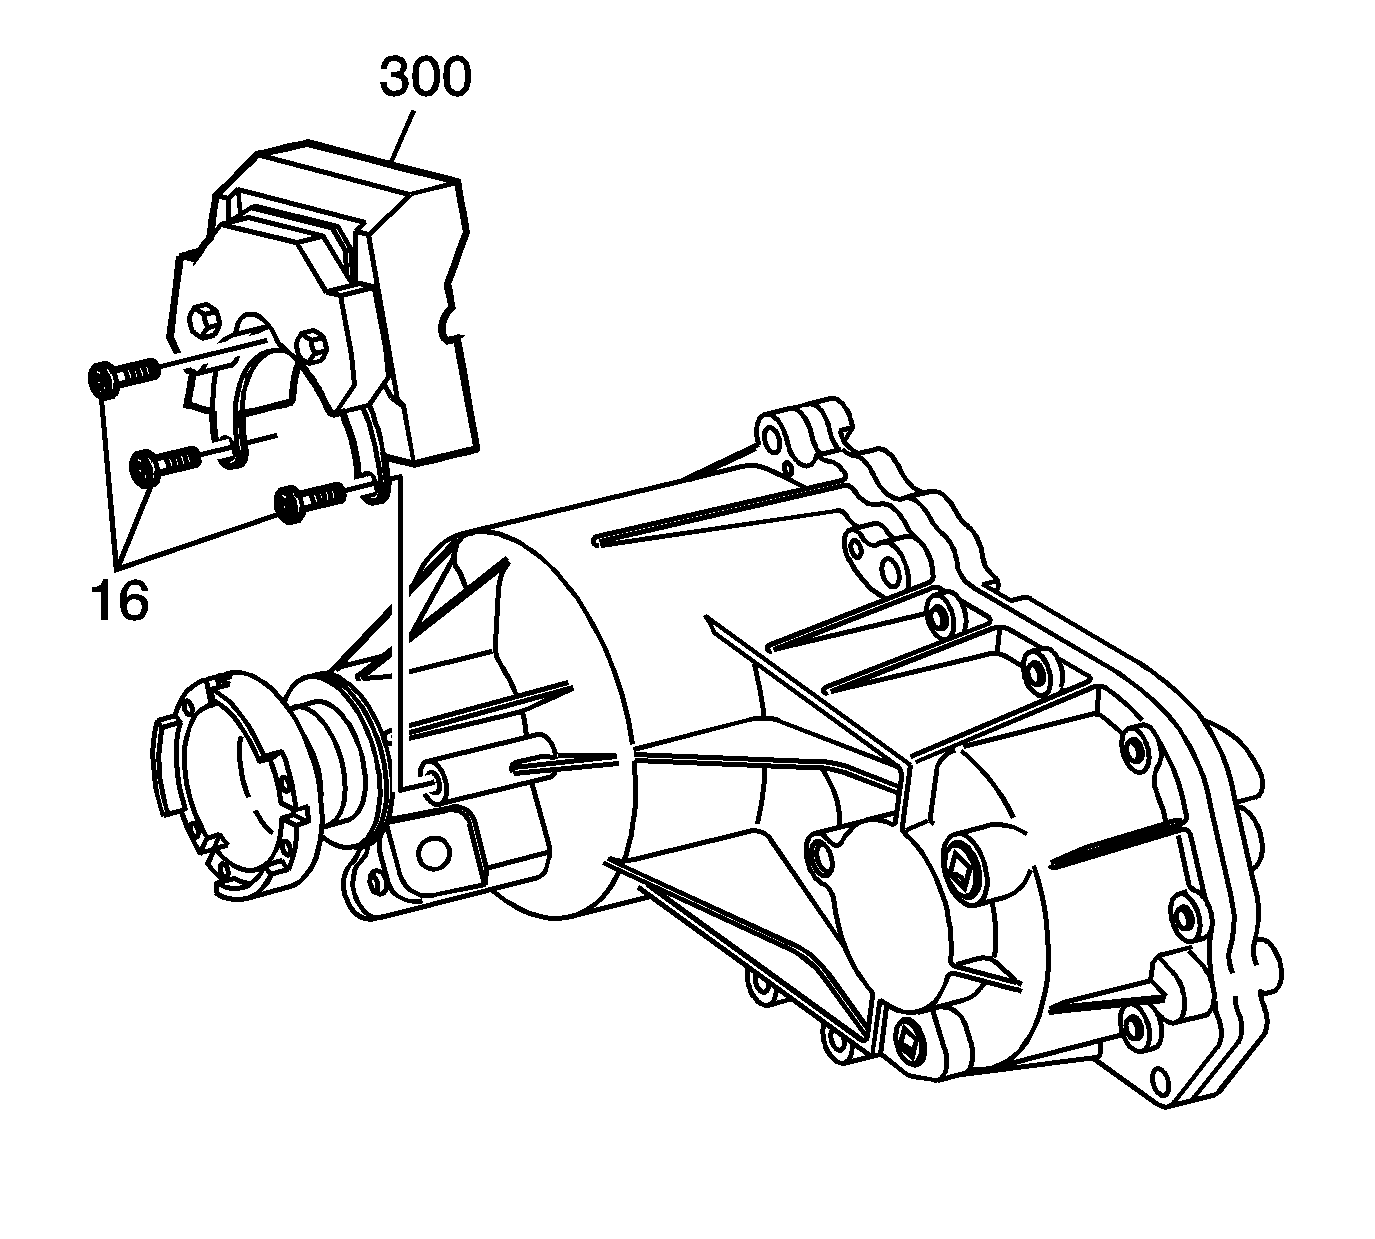
- Install the dampener (300) and the bolts (16) and tighten to 27 N·m (20 lb ft).
Note:
• Lubricate all bearings and bearing journals with transfer case fluid during installation. • Use a hammer and a brass drift only on the outer bearing race. • Ensure the bearing is kept square to the bore while installing.
Note:
• Use a hammer and a brass drift only on the outer bearing race. • Ensure the bearing is kept square to the bore while installing.
Caution: Refer to Fastener Caution in the Preface section.
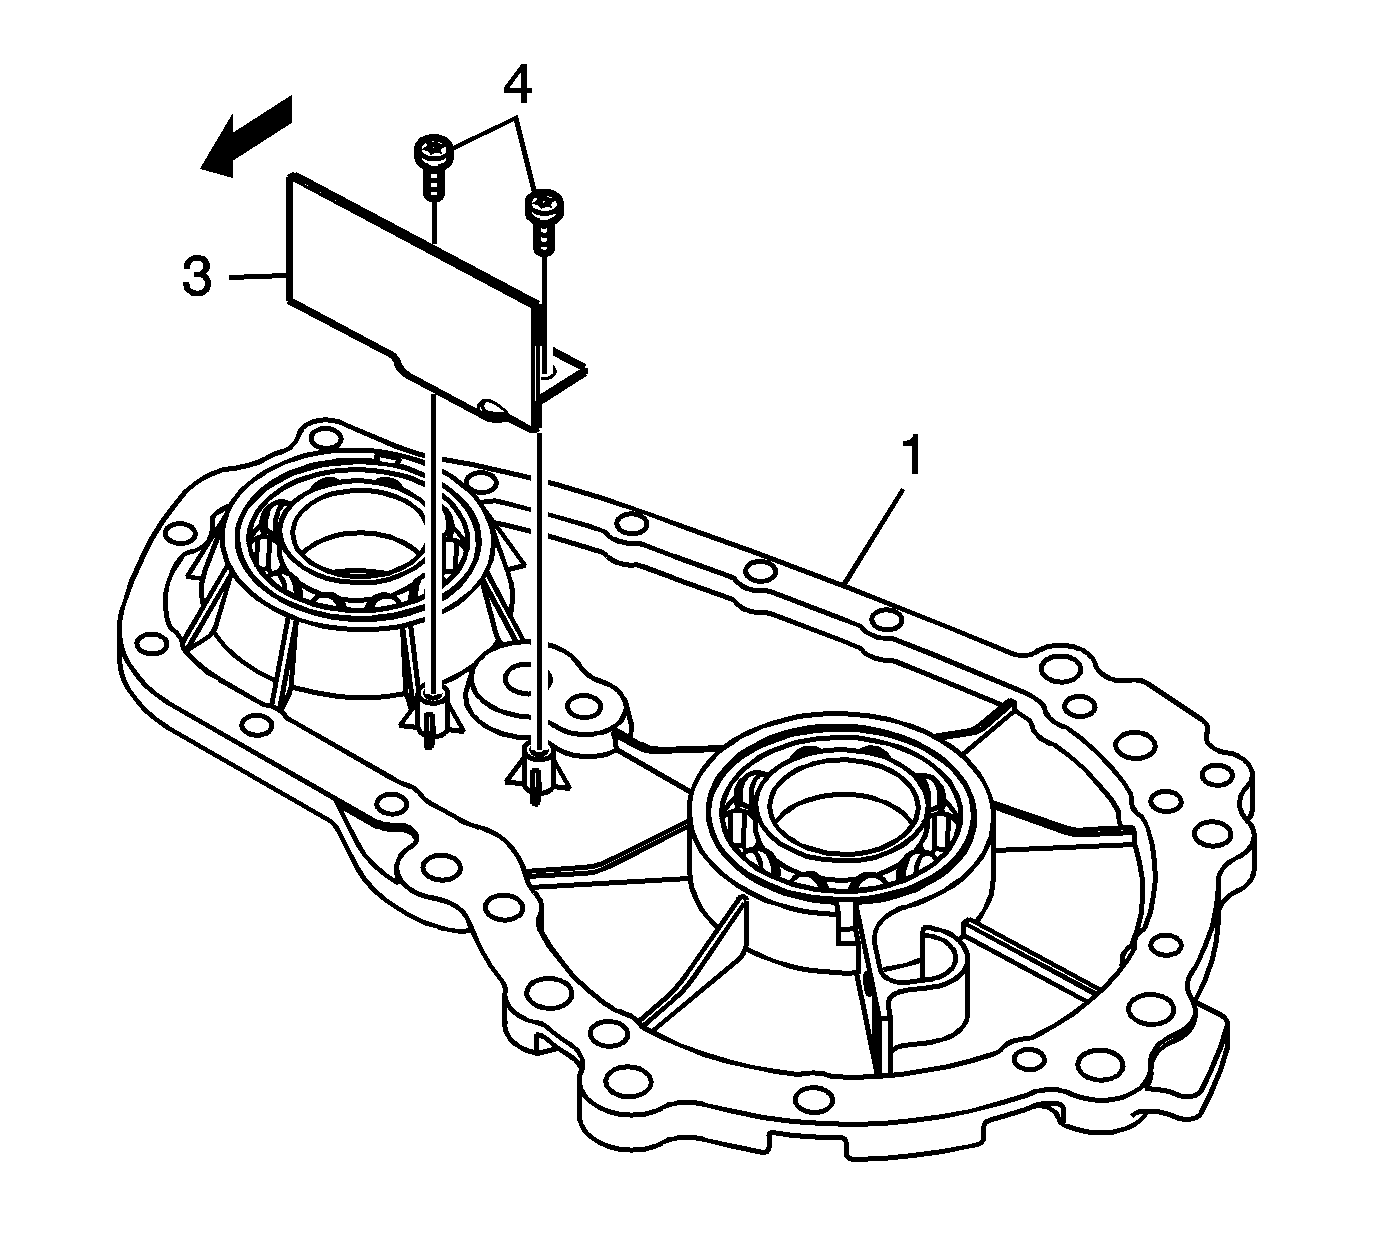
Note: While tightening the snubber bolts, position the snubber to the outside of the case, so when assembled, the snubber is in the farthest position away from the chain.
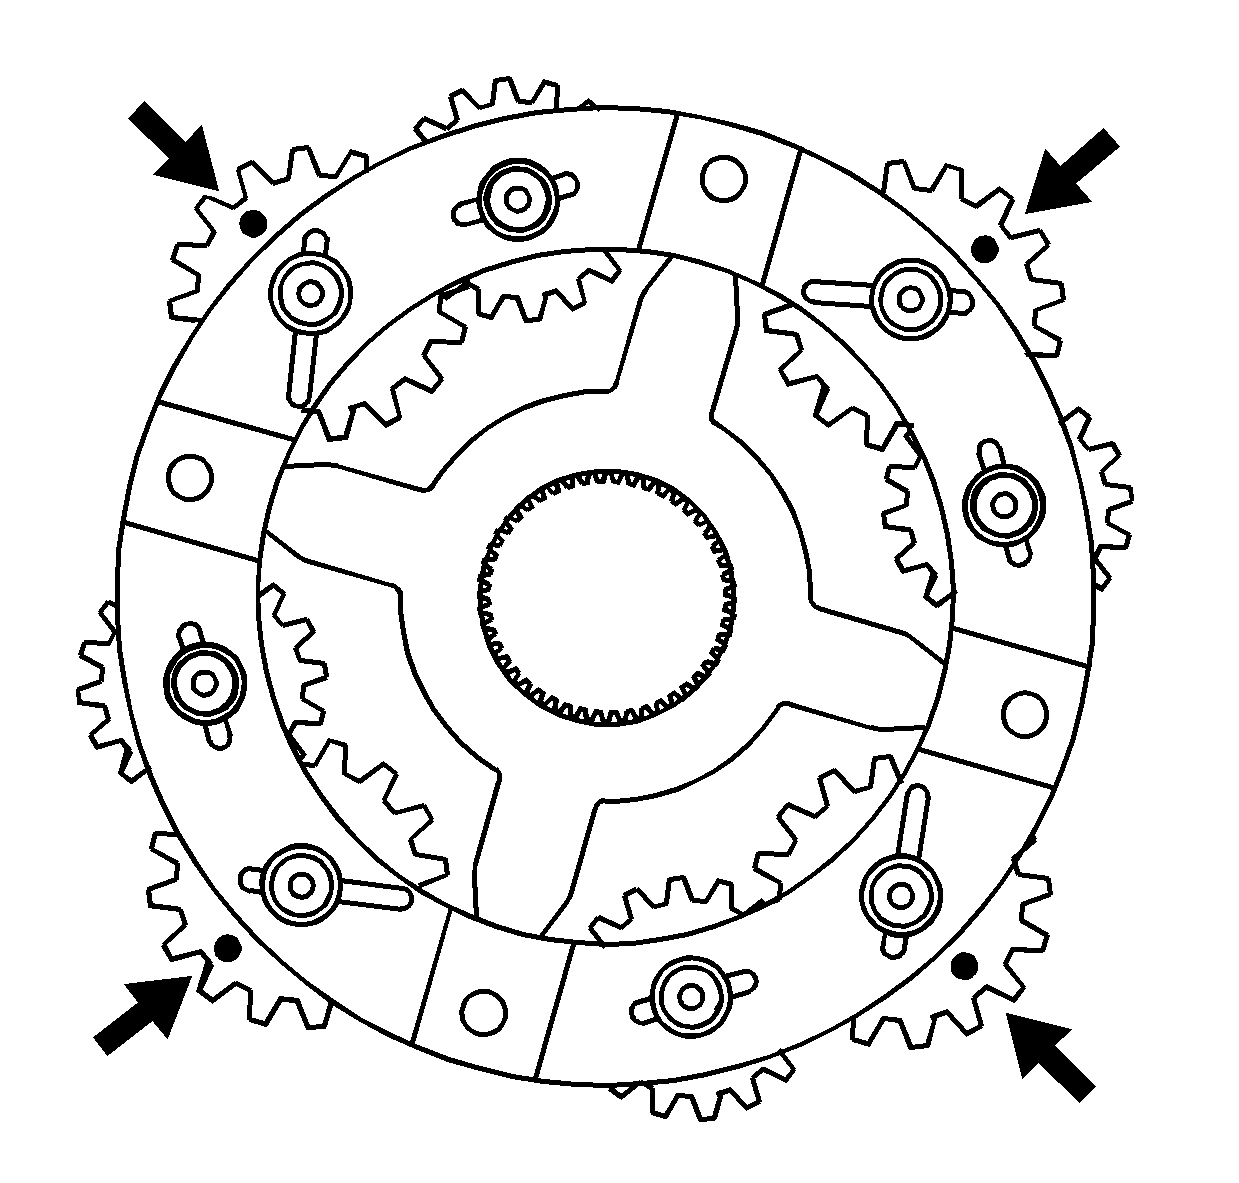
Note: The planetary differential gears are timed to the sun gears. If the gears are not timed properly, the differential will not rotate without binding - 40/60 ratio.
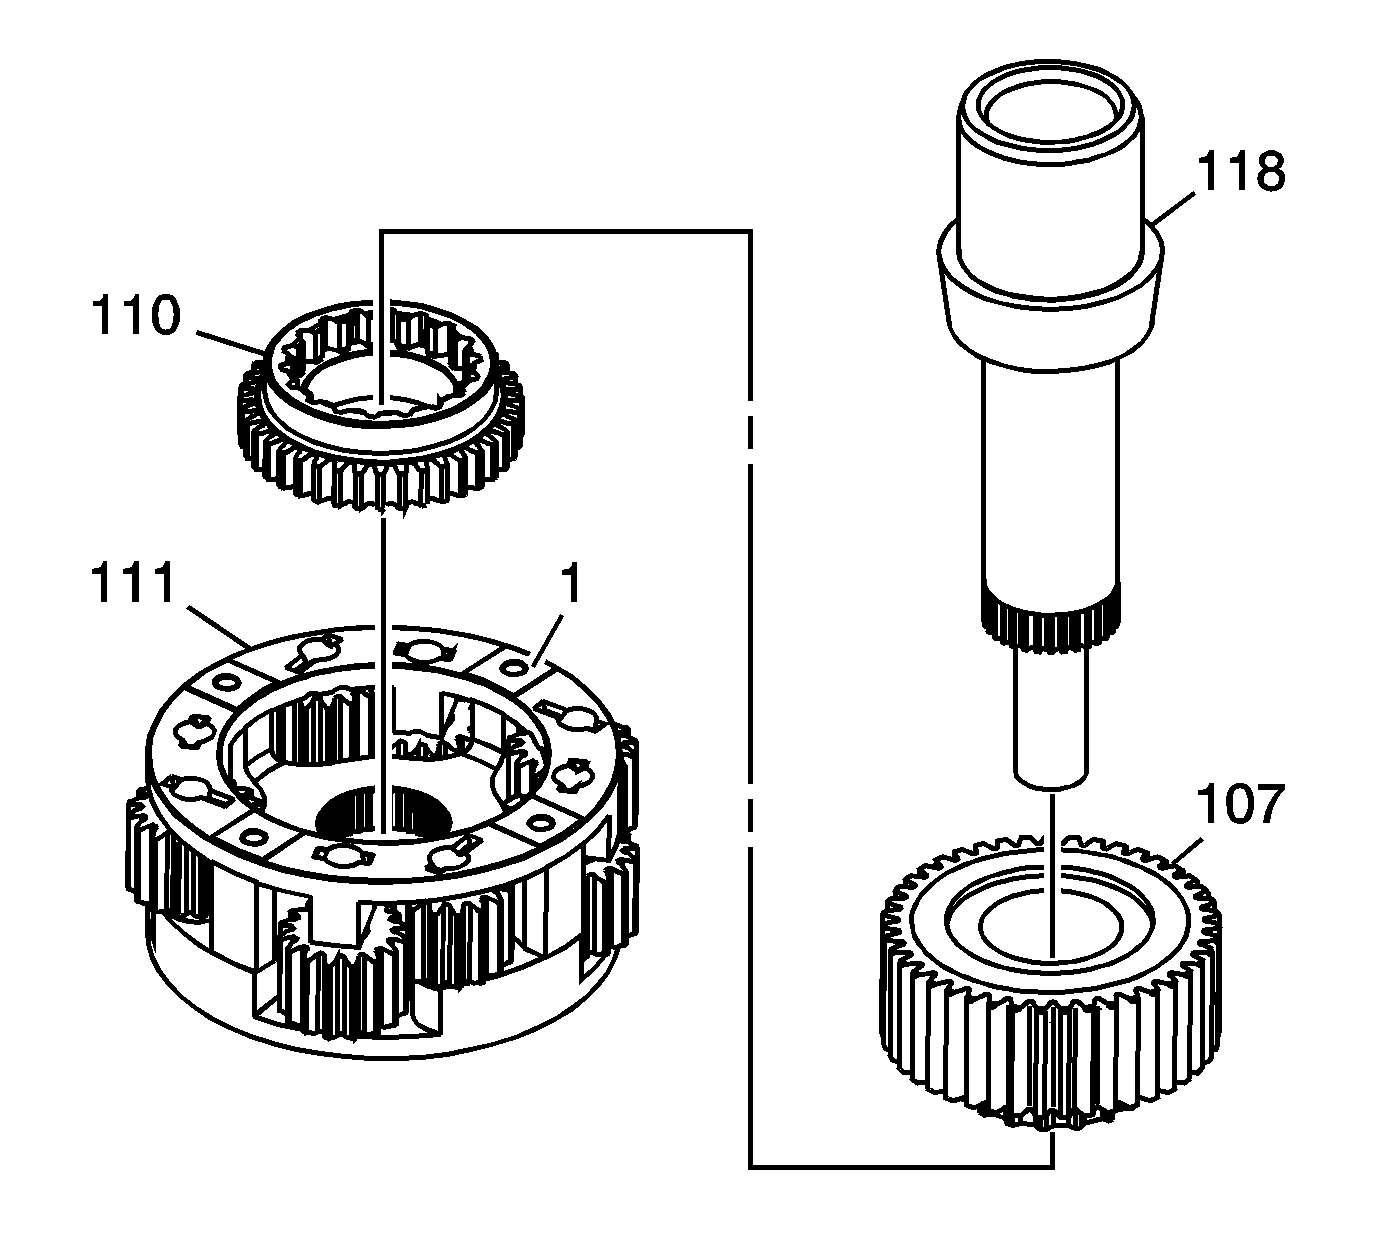
Note: The input shaft (118) must be installed to the carrier (111) with the raised bosses (1) facing up and the thrust washer groove facing down. Reversing this causes a mis-build, and the wrong torque split of 60/40.

Note:
• Use a hammer and a brass drift only on the outer bearing race. • Ensure the bearing is kept square to the bore while installing.
Note:
• Use a hammer and a brass drift only on the outer bearing race. • Ensure the bearing is kept square to the bore while installing.
Note:
• Use a hammer and a brass drift only on the outer bearing race. • Ensure the bearing is kept square to the bore while installing.
Note:
• Ensure both the sealing surfaces on the case and cover are free of dirt, oil, and cleaning solvent. • Ensure the dowel pins (5) are installed in the cover (2).
Note: The bolts are self-tapping. They must be hand started. Do NOT use power-assisted tools to install the bolts (11).