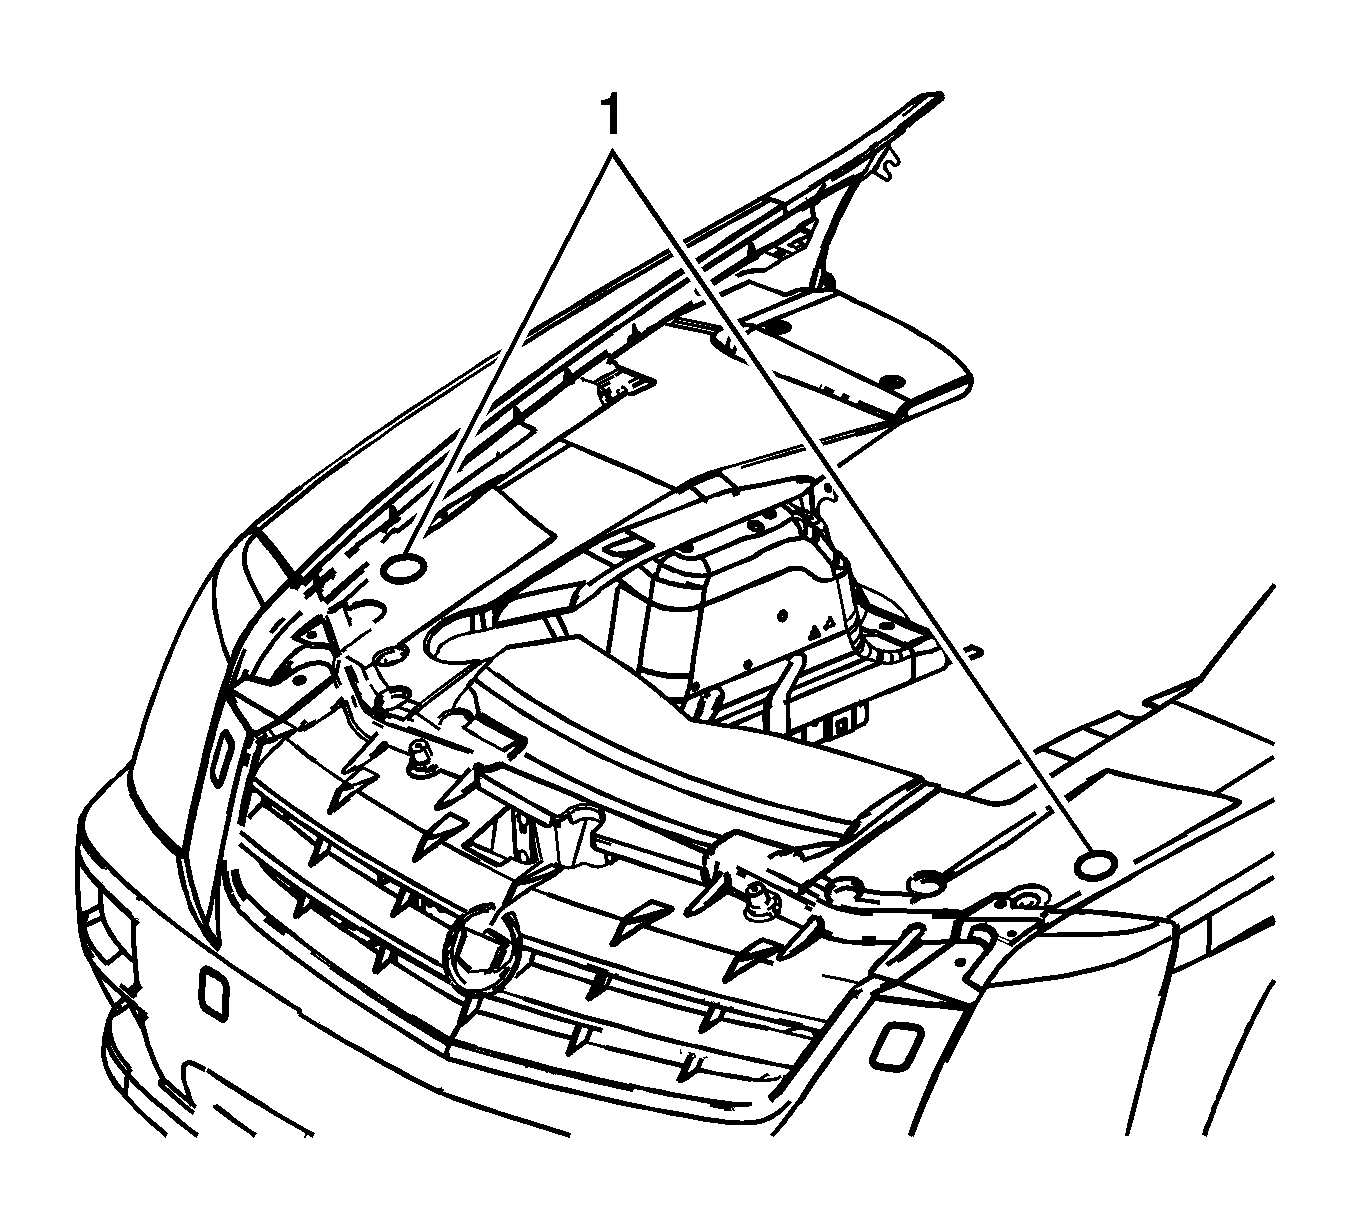
Aiming of each of the headlamps is done by turning the vertical (1) adjusting screw which moves the headlamp bulb in relation to the headlamp assembly. The adjusting screw is located inboard of the front fender wheelhouse panel. The high beam will be correctly aimed if the low beam is aimed properly.
Some state and local authorities have specific requirements for aiming the headlamps. These requirements must be followed.
Aiming Area Preparation
Choose an appropriate aiming area, then prepare the aiming screen:
| • |

|
| • |
| • |
| • |
Important: Adjust the horizontal line or tape (1) on the screen. for each vehicle tested. Vehicles of the same model and year may have different standing height for the headlamp. |
| • | If a regular commercial aiming screen is not available, use a vertical wall having a clear uninterrupted area at least 1.83 m (6 ft) high by 3.66 m (12 ft) wide, finished with a washable non-gloss white paint. |
Vehicle Preparation
Prepare the vehicle for adjusting the headlamp beam aim:
- Verify that all the components are in place on the vehicle, if other service has been performed on the vehicle.
- The vehicle must have a full tank of gas.
- Verify that the tires are inflated to the proper pressures.
- Stop all other work on the vehicle.
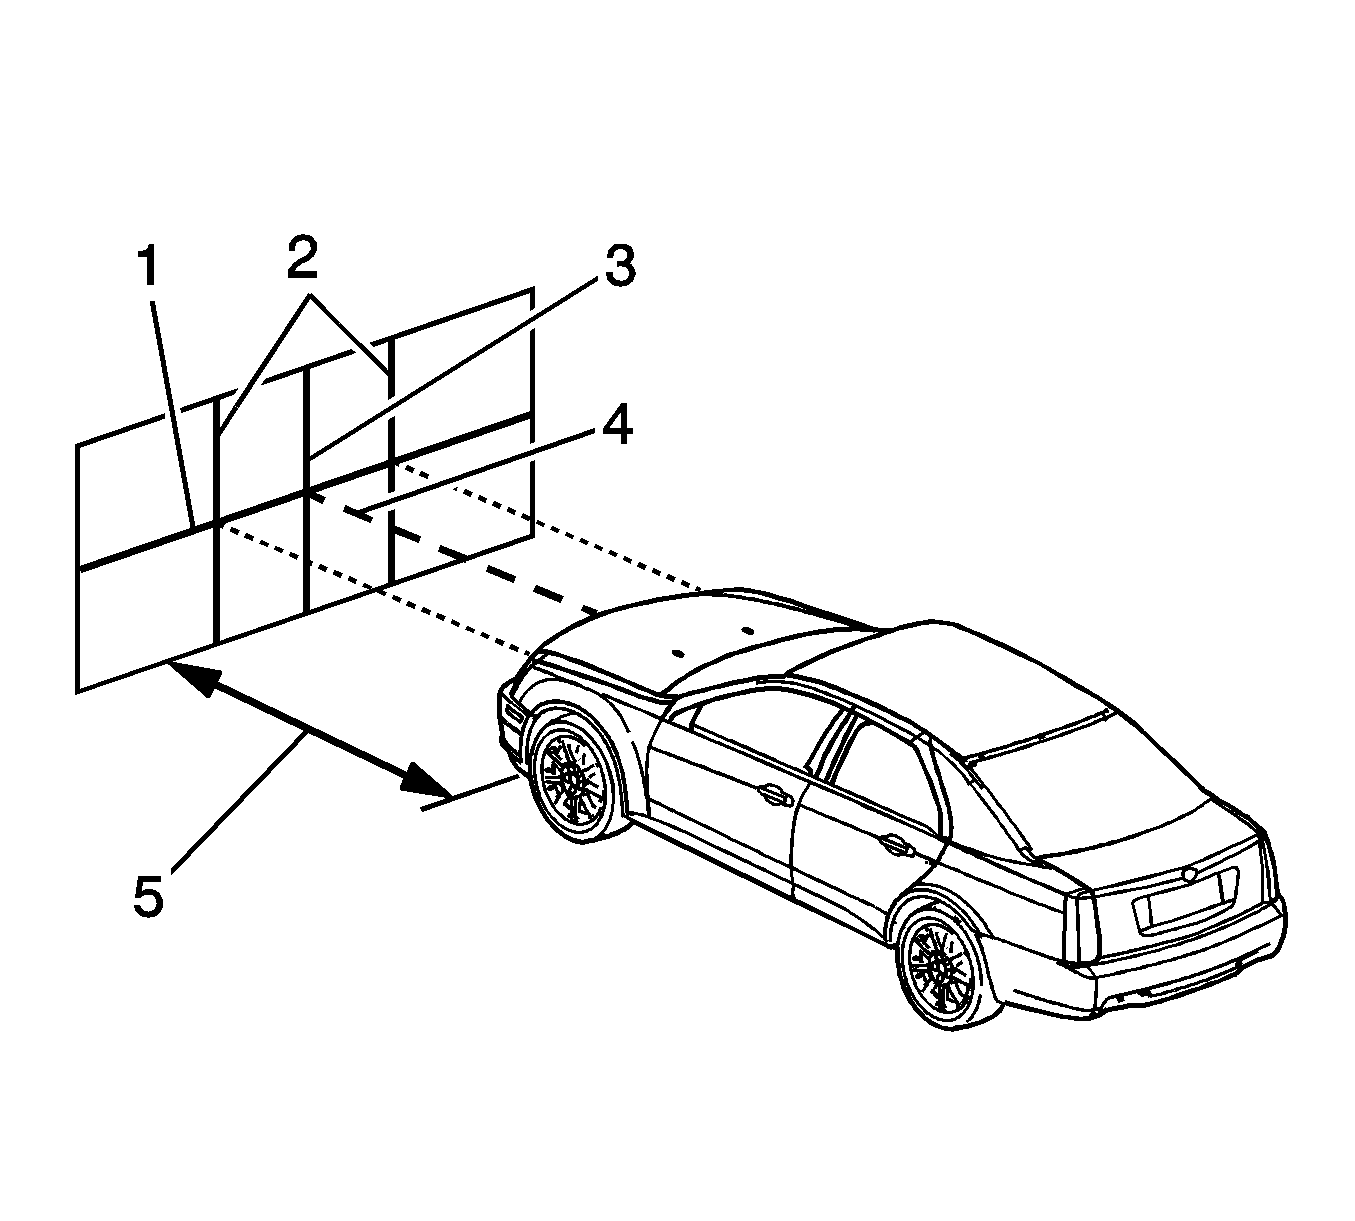
- Position the vehicle squarely with the aiming screen and with the headlamp directly over the reference line which is painted or taped on the floor.
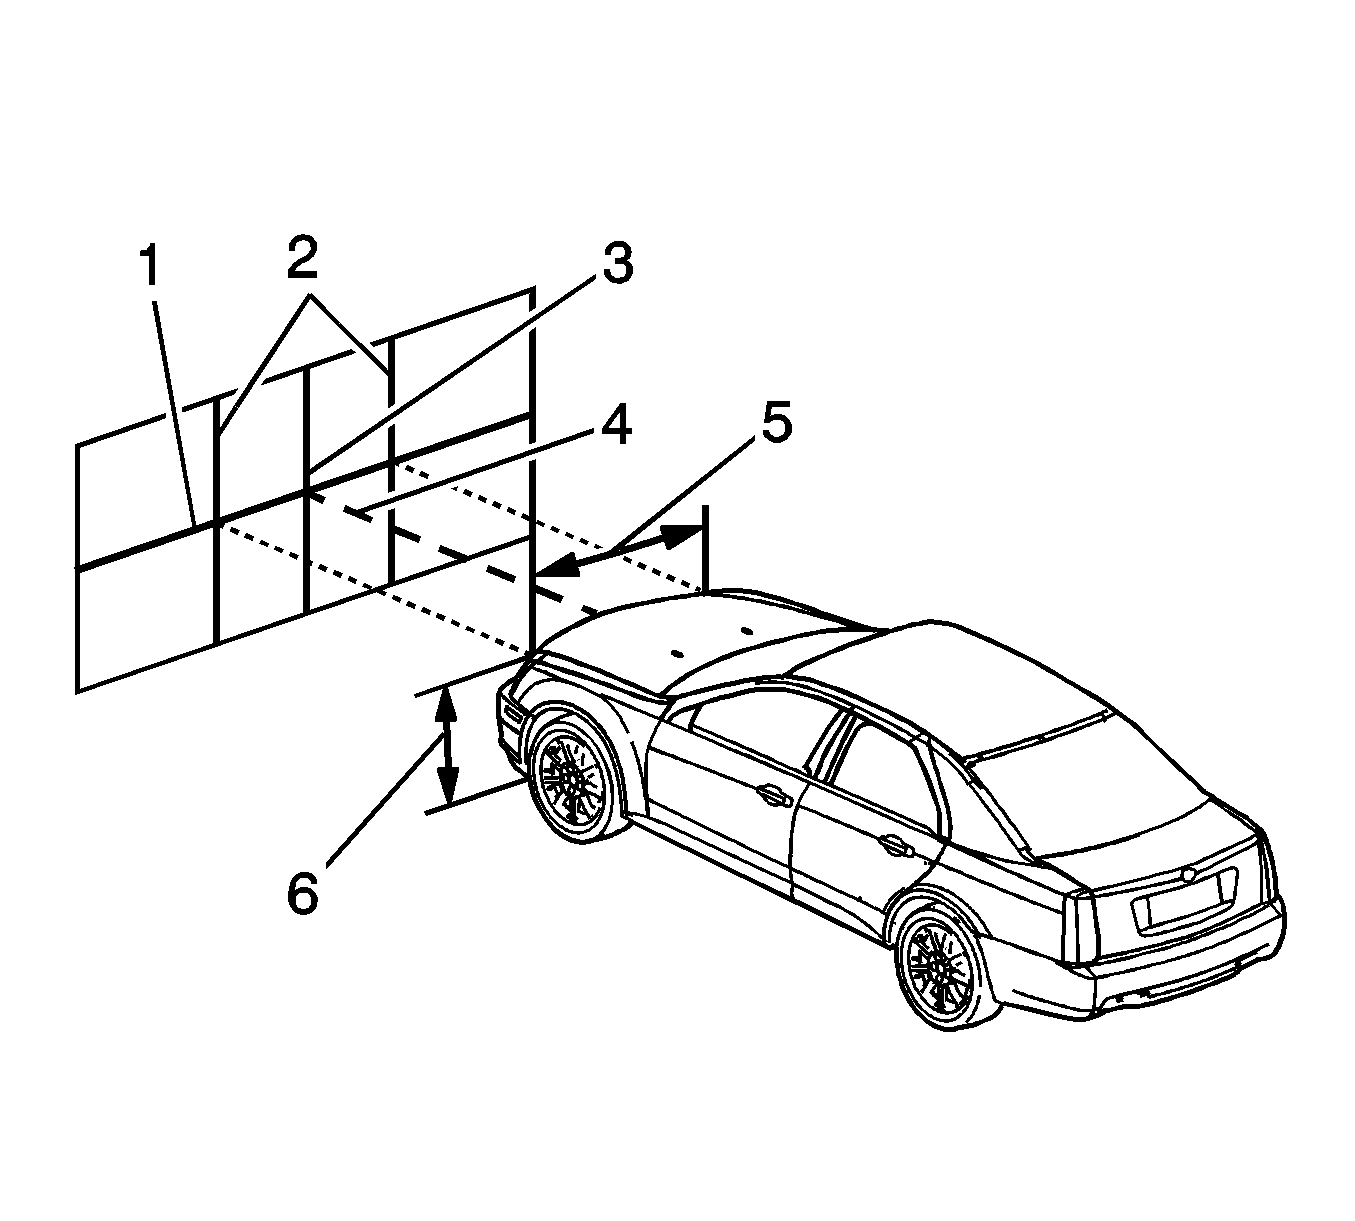
- Locate the vertical center line on the aiming screen (3) to be in line with the center of the vehicle (4). This can be accomplished by sighting through the center of the rear window and over the hood.
- Close the doors.
- Rock the vehicle sideways to stabilize the suspension.
- Measure the height (6) from the floor to the aiming dots of the headlamps. Adjust the horizontal tape (1) on the aiming screen to match this dimension.
- Measure the distance (5) between the headlamp aiming dots. Position the vertical tapes (2) this distance equally to the right and left of the centerline.

Mark the vertical center of the front and rear windows with narrow tape. Use these marks as sights to locate the centerline of the vehicle. Move the vehicle or the screen until the center line of the screen comes into alignment with the 2 points.
Headlamp Aiming Procedure
- Open the hood.
- Measure from the floor to the center of the headlamp bulb. Some headlamps have an aim dot marked on the headlamp lens.
- At the screen, measure from the floor and place the horizontal tape at the measured distance.
- Measure from the reference line on the floor to the left headlamp bulb centerline.
- At the screen, measure from the reference line and place the vertical tape at the measured distance.
- Measure from the reference line on the floor to the right headlamp bulb centerline.
- At the screen, measure from the reference line and place the vertical tape at the measured distance.
- Turn ON the low beam headlamps and block the light from projecting onto the screen from the passenger side headlamp.
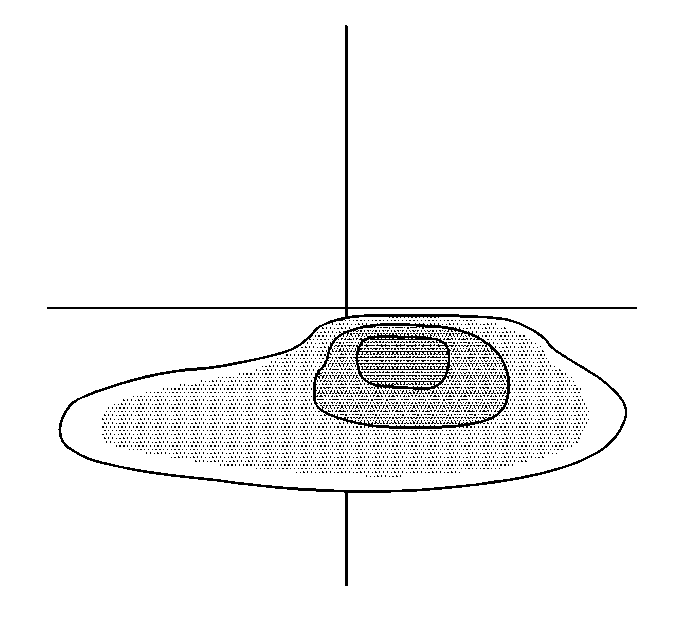
- Adjust the vertical aim of the headlamps to the specifications required by the state and the local authorities, or as shown in step 8.
- Rotate the headlamp adjuster (1) to change the vertical aim of the headlamp.
- Repeat the aiming procedure for the passenger side headlamp while blocking the light from projecting onto the screen from the driver side headlamp.
- Close the hood.
Important: Do not cover the headlamp. This may cause excessive heat build up.


Important: Horizontal headlamp adjustment does not exist.
