For 1990-2009 cars only
Removal Procedure
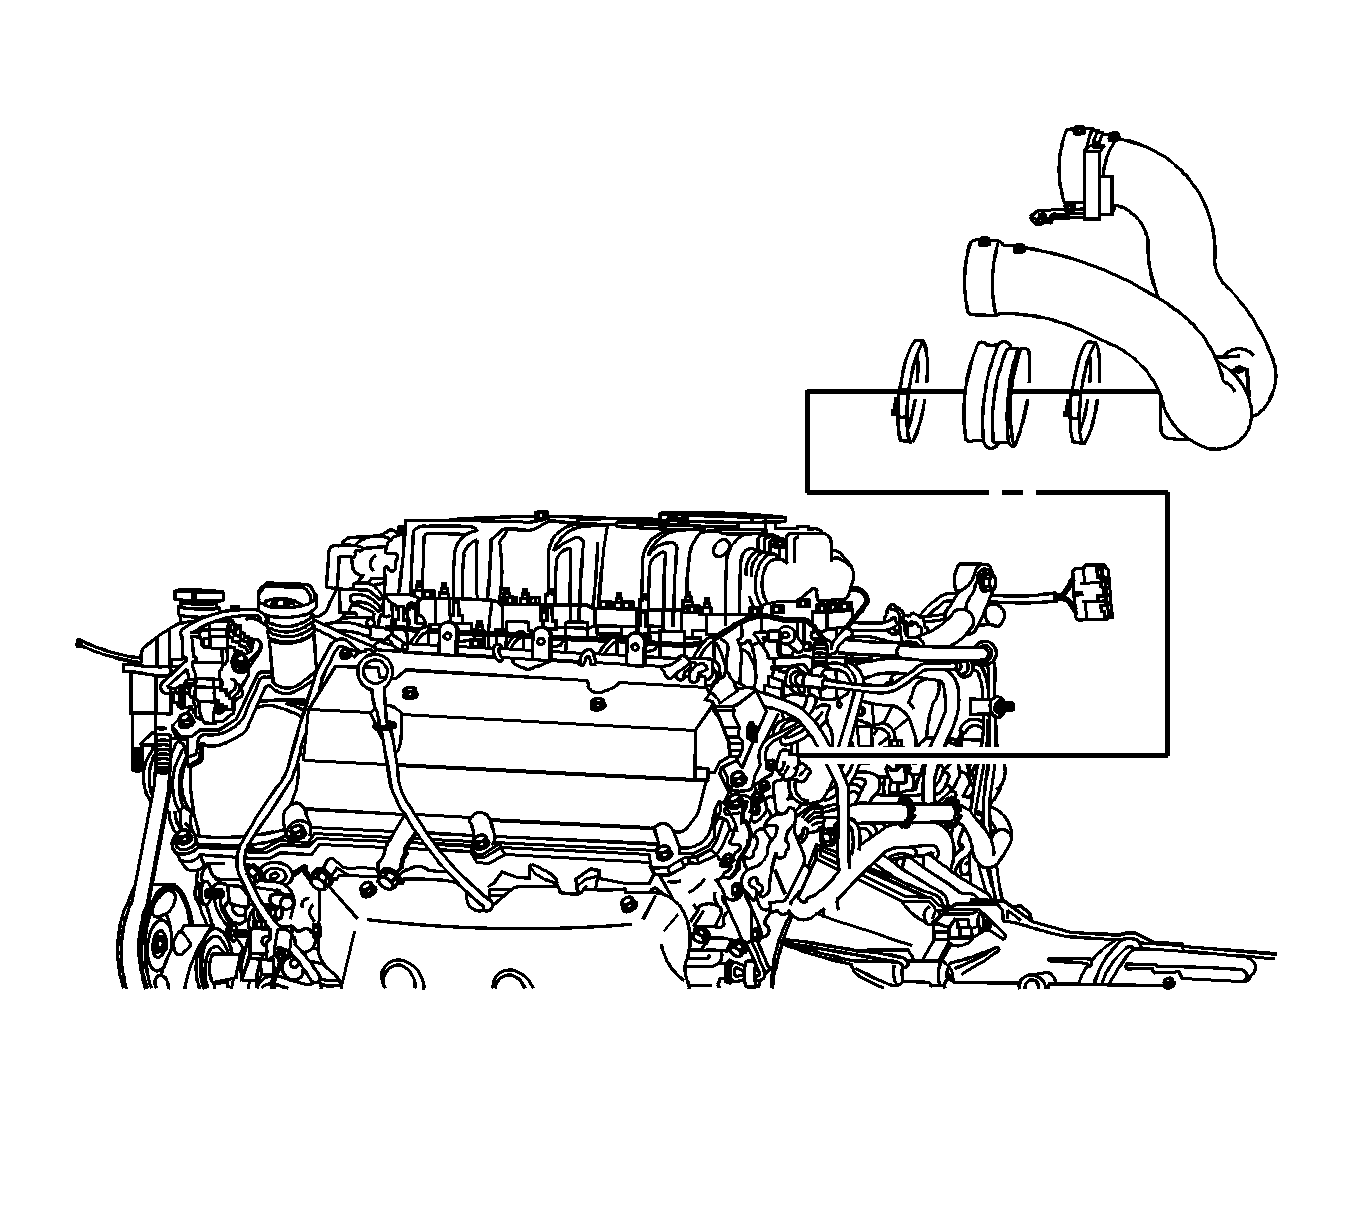
- The front section of the supercharger inlet duct assembly can be serviced independently of the rear section.
- Remove the engine sight shield. Refer to Intake Manifold Sight Shield Replacement.
- Remove the air cleaner outlet duct. Refer to Air Cleaner Outlet Duct Replacement.
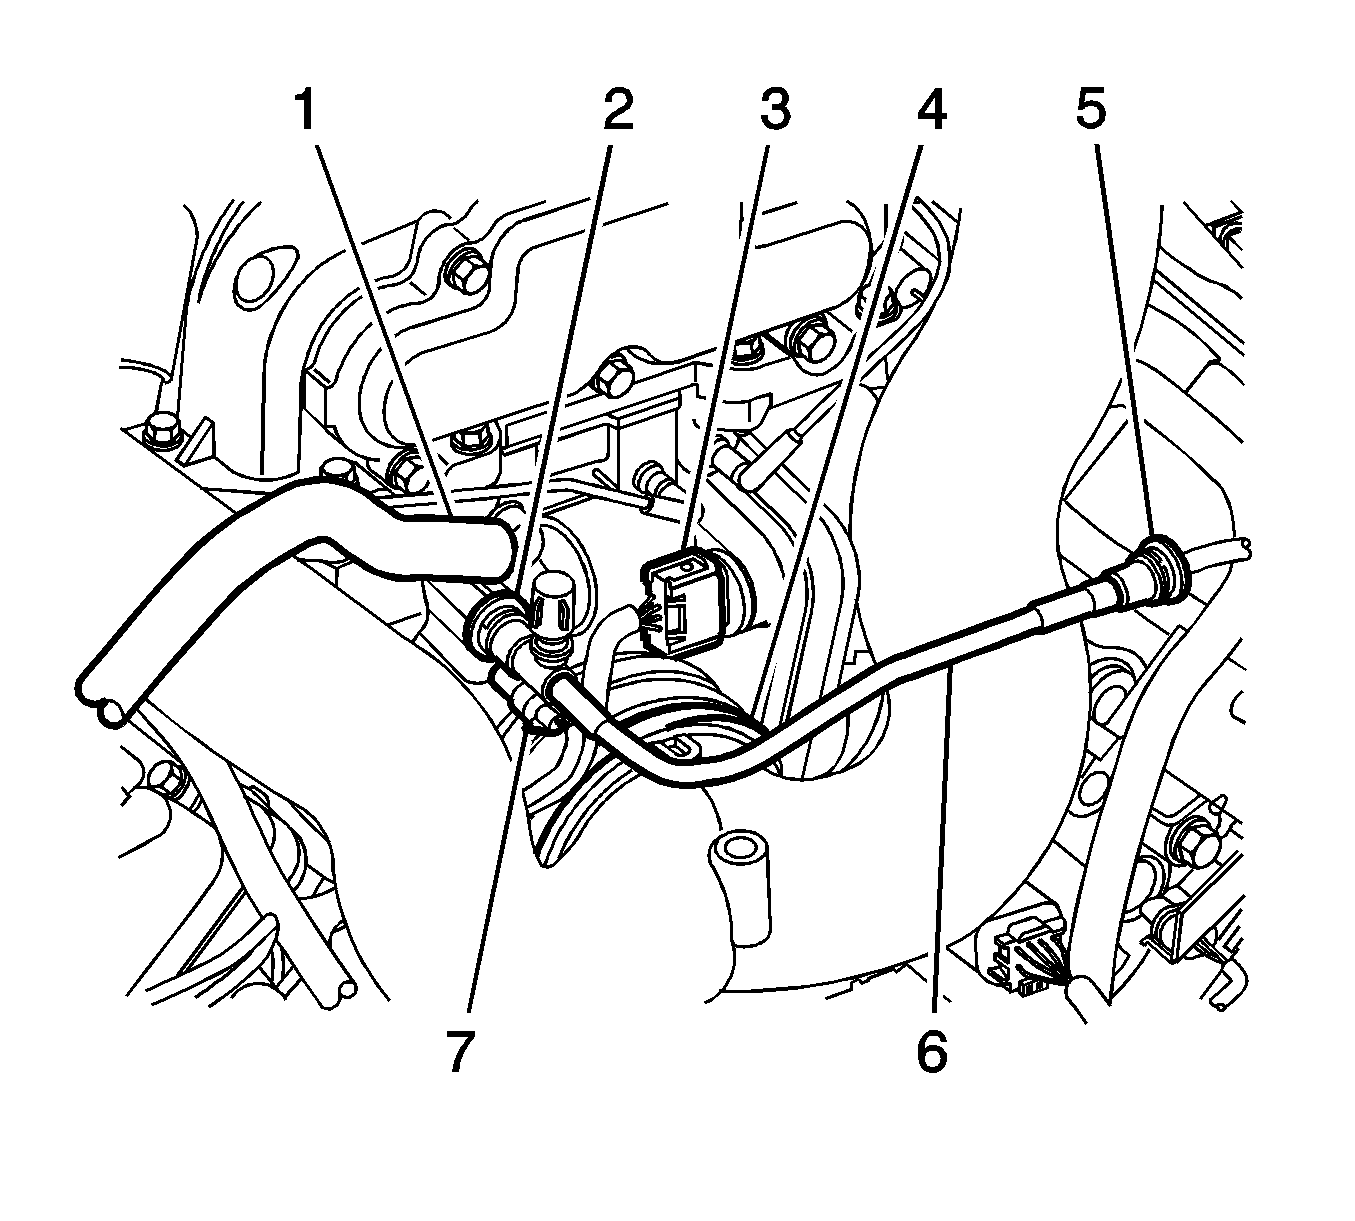
- Disconnect the PCV hose fitting (1) from the underside of the inlet duct assembly. Refer to Positive Crankcase Ventilation Hose/Pipe/Tube Replacement.
- Loosen the rear screw clamps (2) located between the front and rear section of the inlet duct assembly.
- Remove the ball studs (1) that retain the inlet duct to the supercharger. There are a total of 6 ball studs.
- Remove the front section of the supercharger inlet duct.
- Remove the hood assembly. Refer to Hood Replacement.
- Remove the windshield wiper arm assemblies. Refer to Windshield Wiper Arm Replacement.
- Remove the air inlet grille panel. Refer to Air Inlet Grille Panel Replacement.
- Remove the windshield wiper transmission. Refer to Windshield Wiper Transmission Replacement.
- Remove the front air inlet housing panel (1). Refer to Air Inlet Housing Front Panel Replacement.
- Disconnect the evaporative emission (EVAP) line fitting (2) from the EVAP valve.
- Disconnect the EVAP line fitting (5) from the chassis bundle. Remove the EVAP line (6) from the vehicle.
- Remove the brake booster hose (1) from the port on the rear of the supercharger.
- Loosen the rear screw clamp (4) on the inlet duct seal.
- Remove the rear section of the supercharger inlet duct from the vehicle.
Note: The following procedure is for removal and installation of both the front and rear section of the supercharger inlet duct assembly.

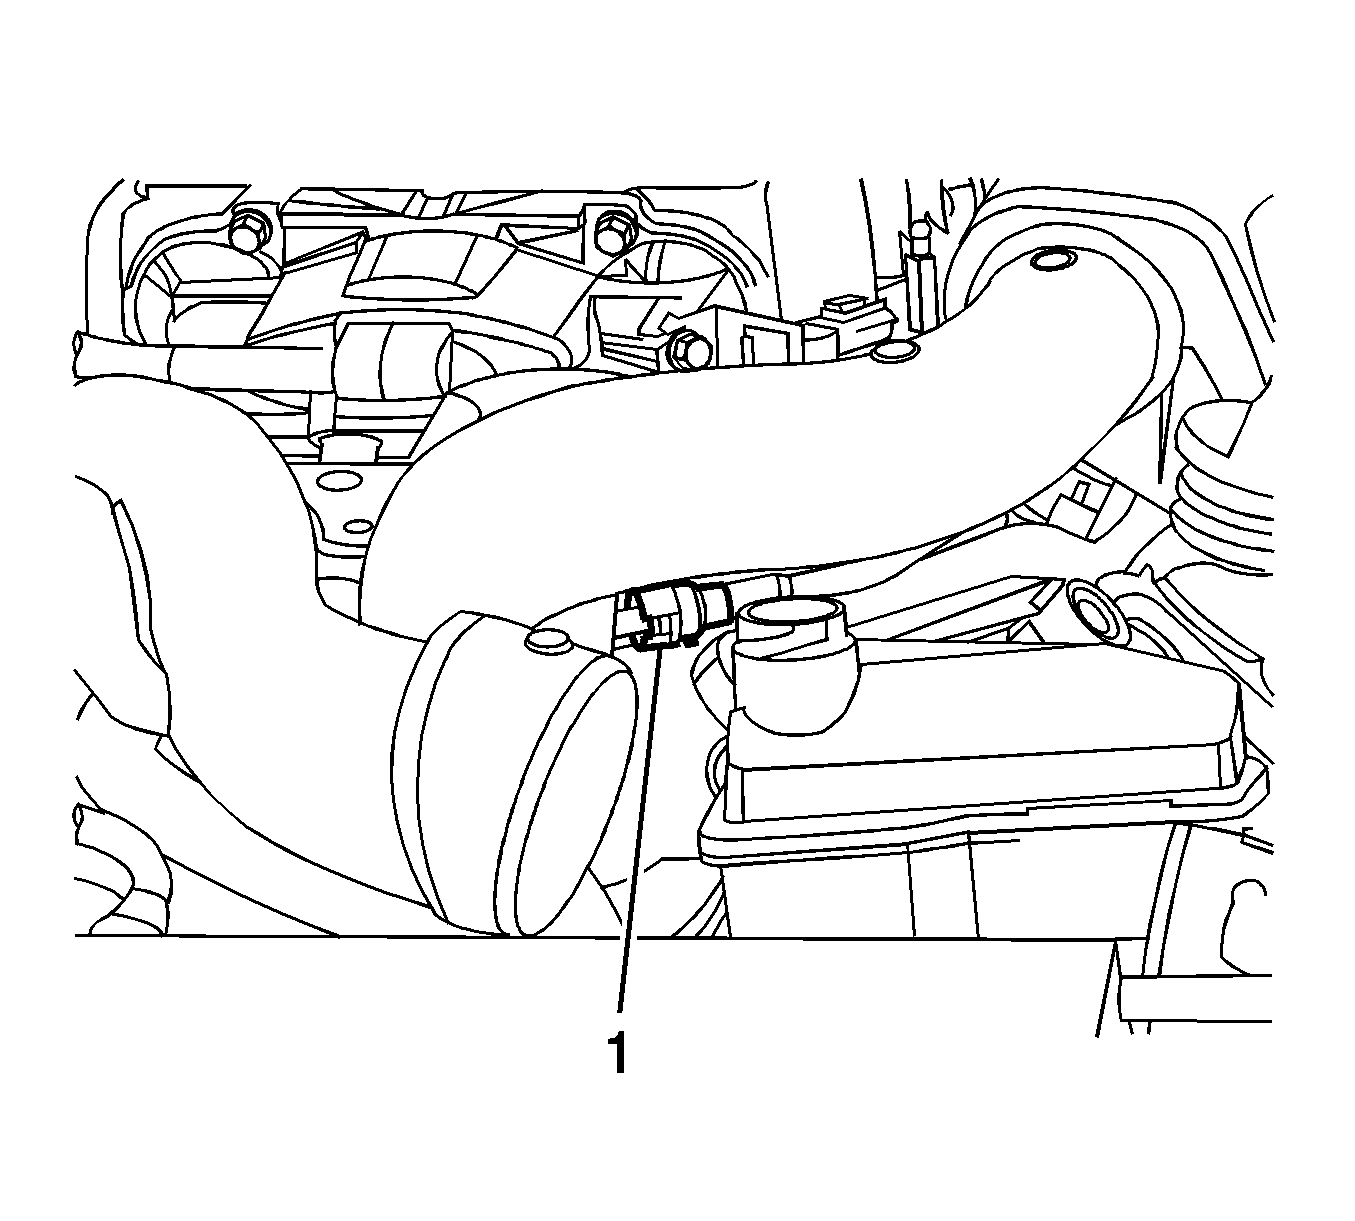
Note: There is a positive crankcase ventilation (PCV) hose fitting on the underside of the supercharger inlet duct.


Installation Procedure
- Install the rear section of the supercharger inlet duct assembly to the vehicle.
- Tighten the rear screw clamp (4) on the inlet duct seal to 2.5 N·m (20 lb in).
- Install the brake booster hose (1) to the port on the rear of the supercharger.
- Connect the EVAP line fitting (5) to the chassis bundle.
- Connect the (EVAP) line fitting (2) to the EVAP valve.
- Install the front air inlet housing panel (1). Refer to Air Inlet Housing Front Panel Replacement.
- Install the windshield wiper transmission. Refer to Windshield Wiper Transmission Replacement.
- Install the air inlet grille panel. Refer to Air Inlet Grille Panel Replacement.
- Install the windshield wiper arm assemblies. Refer to Windshield Wiper Arm Replacement.
- Install the hood assembly. Refer to Hood Replacement.
- Install the front section of the supercharger inlet duct to the vehicle.
- Tighten the inlet duct screw clamps (2) to 2.5 N·m (20 lb in).
- Install the ball studs (1) that retain the inlet duct to the supercharger. There are a total of 6 ball studs. Tighten the supercharger inlet duct ball studs to 10 N·m (89 lb in).
- Connect the PCV hose fitting (1) to the underside of the inlet duct assembly. Refer to Positive Crankcase Ventilation Hose/Pipe/Tube Replacement.
- Install the air cleaner outlet duct. Refer to Air Cleaner Outlet Duct Replacement.
- Install the engine sight shield. Refer to Intake Manifold Sight Shield Replacement.
Caution: Refer to Fastener Caution in the Preface section.
