For 1990-2009 cars only
Charge Air Cooler Coolant Pipe Replacement With Reservoir
Special Tools
J 38185 Hose Clamp Pliers
Removal Procedure
- Using the J 38185 , disengage clamp tension and disconnect the overflow hose from the fill neck.
- Using the J 38185 , disengage clamp tension and disconnect the outlet hose from the fill neck.
- Remove the fill neck bolts.
- Using the J 38185 disengage clamp tension and disconnect the overflow hose from the reservoir.
- Remove the overflow hose.
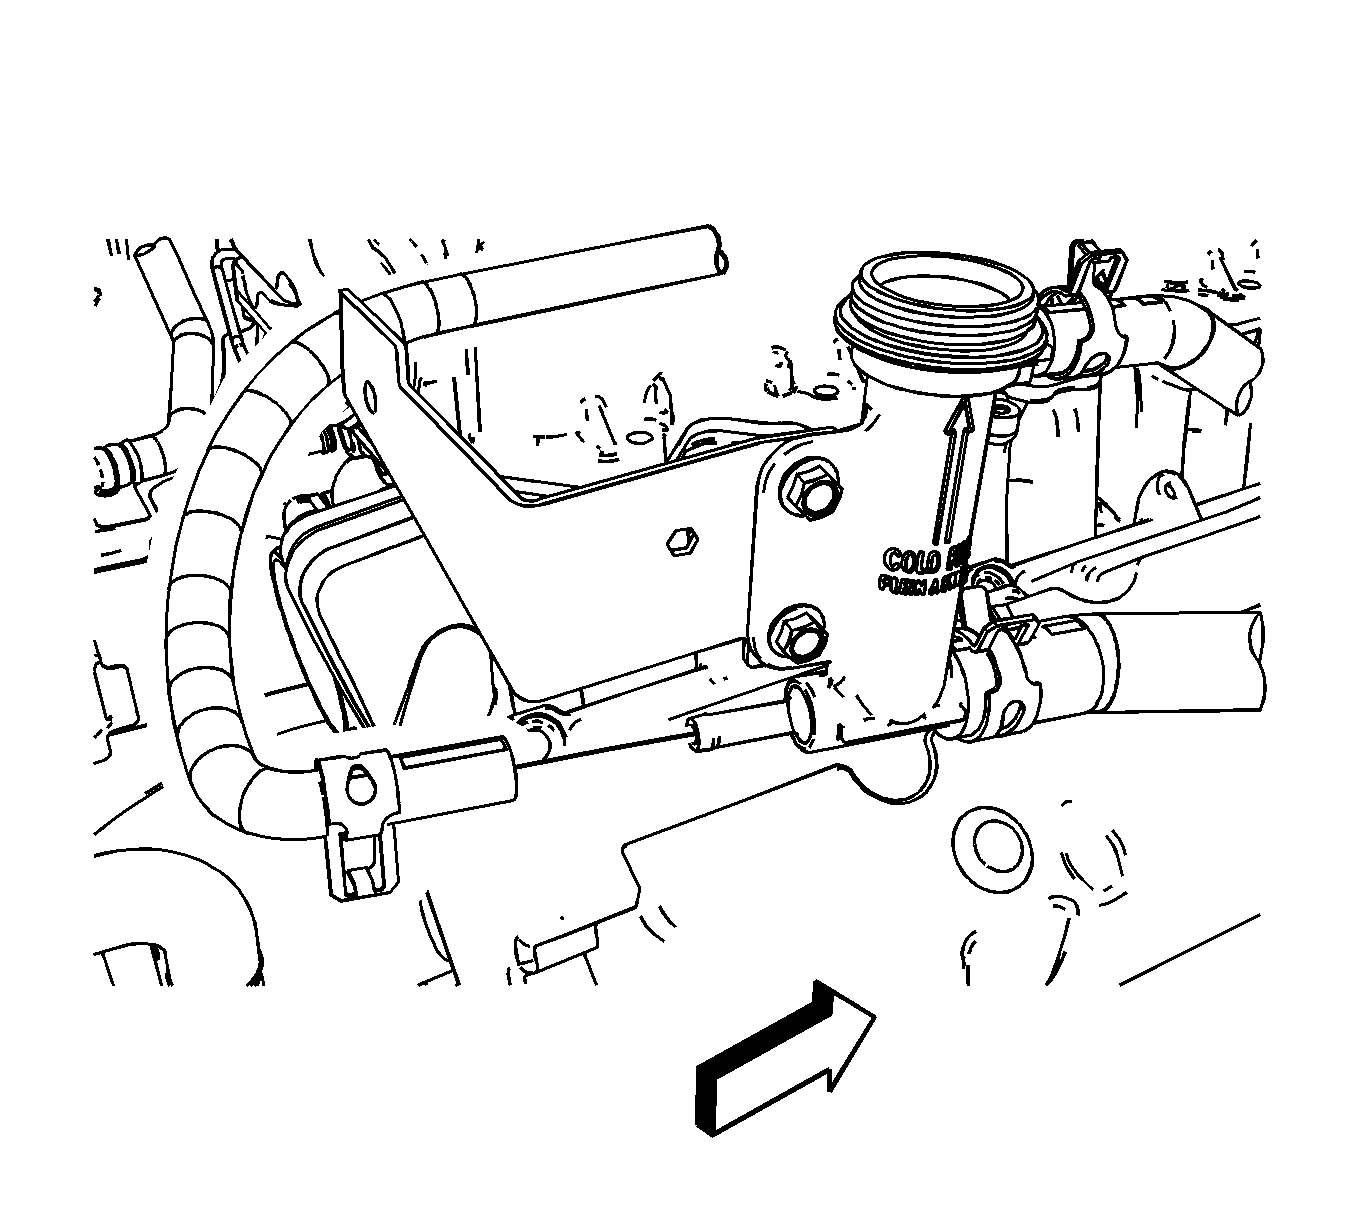
Note: Draining the coolant from the system is not necessary. Use an absorbent shop towel at the hose connections to absorb any minor coolant leakage. Ensure the coolant does not make contact with any other components.
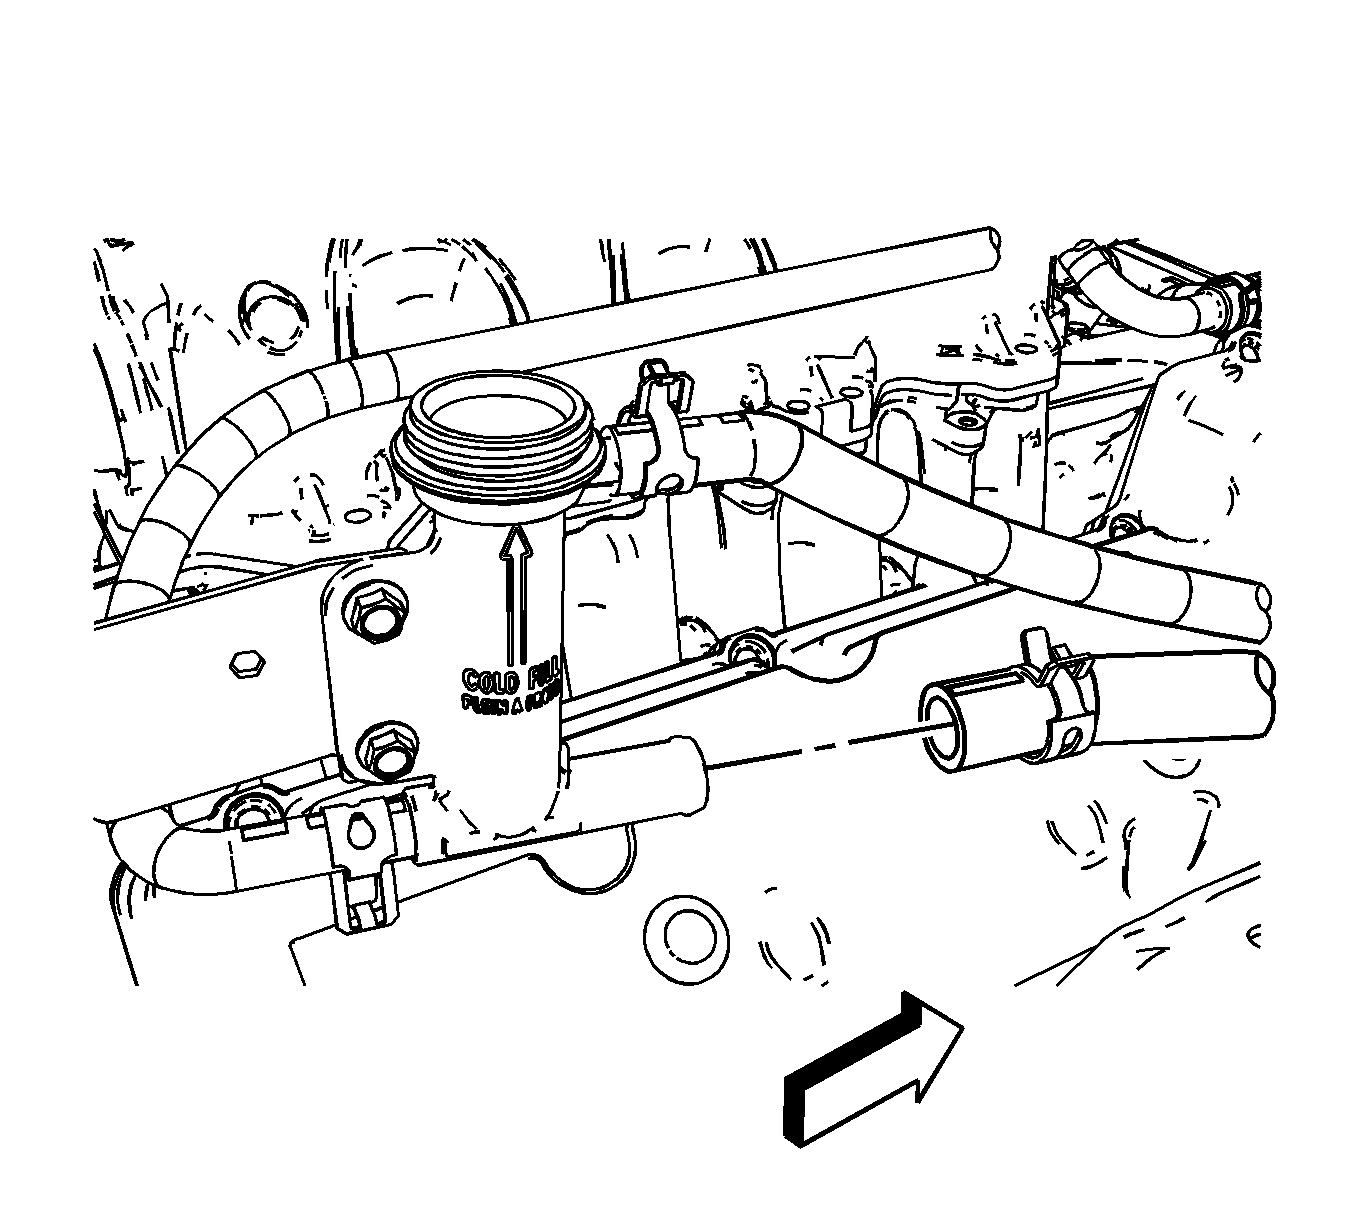
Installation Procedure
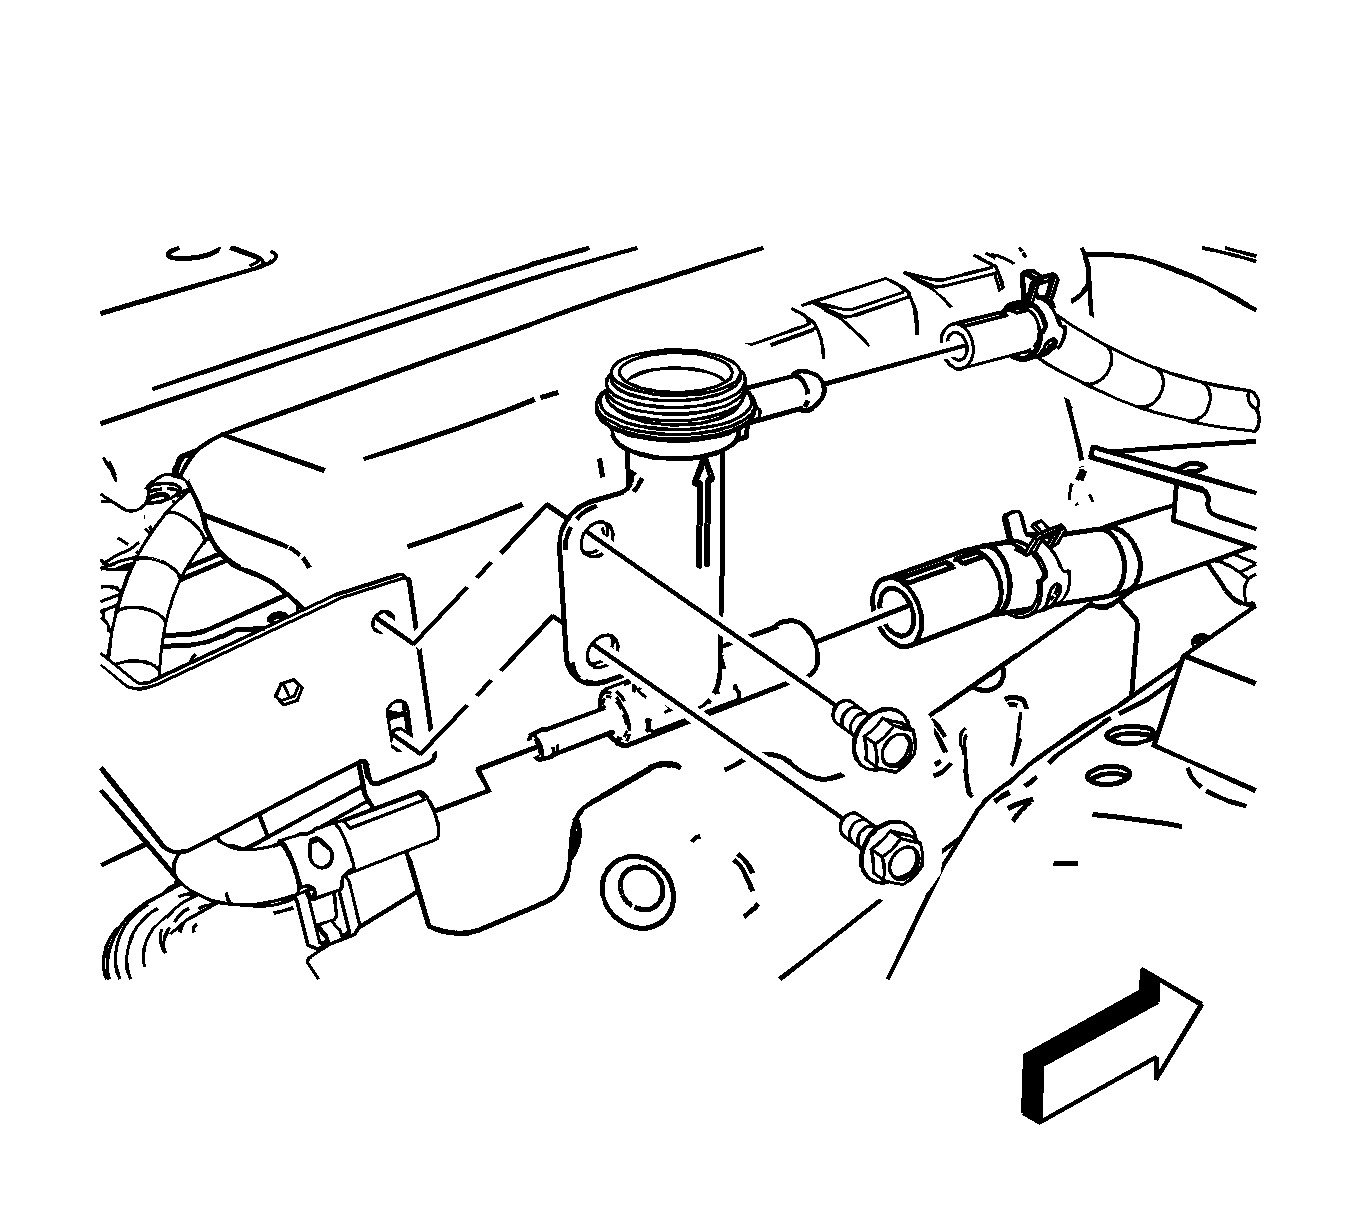
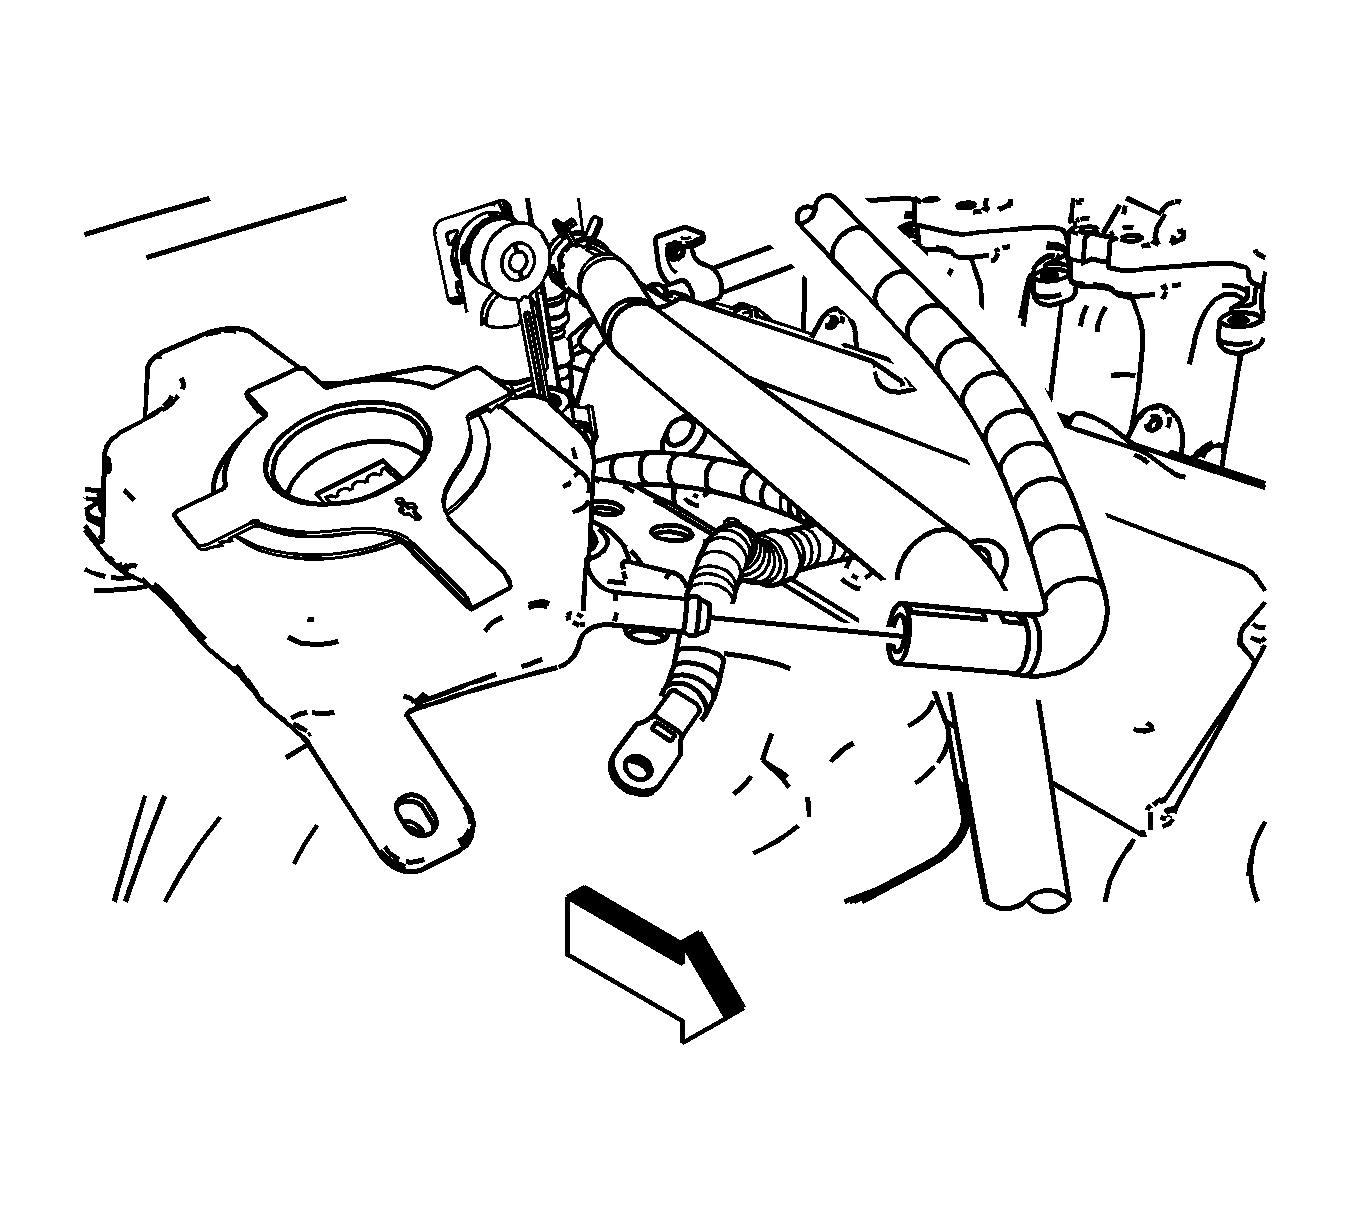
- Install the overflow hose.
- Using the J 38185 disengage clamp tension and connect the overflow hose onto the reservoir.
- Using the J 38185 disengage clamp tension and connect the outlet hose onto the fill neck.
- Using the J 38185 , disengage clamp tension and connect the overflow hose onto the fill neck.
- Install the fill neck bolts and tighten to 9 N·m (80 lb in).
- Inspect the level of the charge air cooling system and fill as necessary. Refer to Charge Air Cooling System Coolant Level Inspection.


Caution: Refer to Fastener Caution in the Preface section.

Charge Air Cooler Coolant Pipe Replacement Without Reservoir
Special Tools
J 38185 Hose Clamp Pliers
Removal Procedure
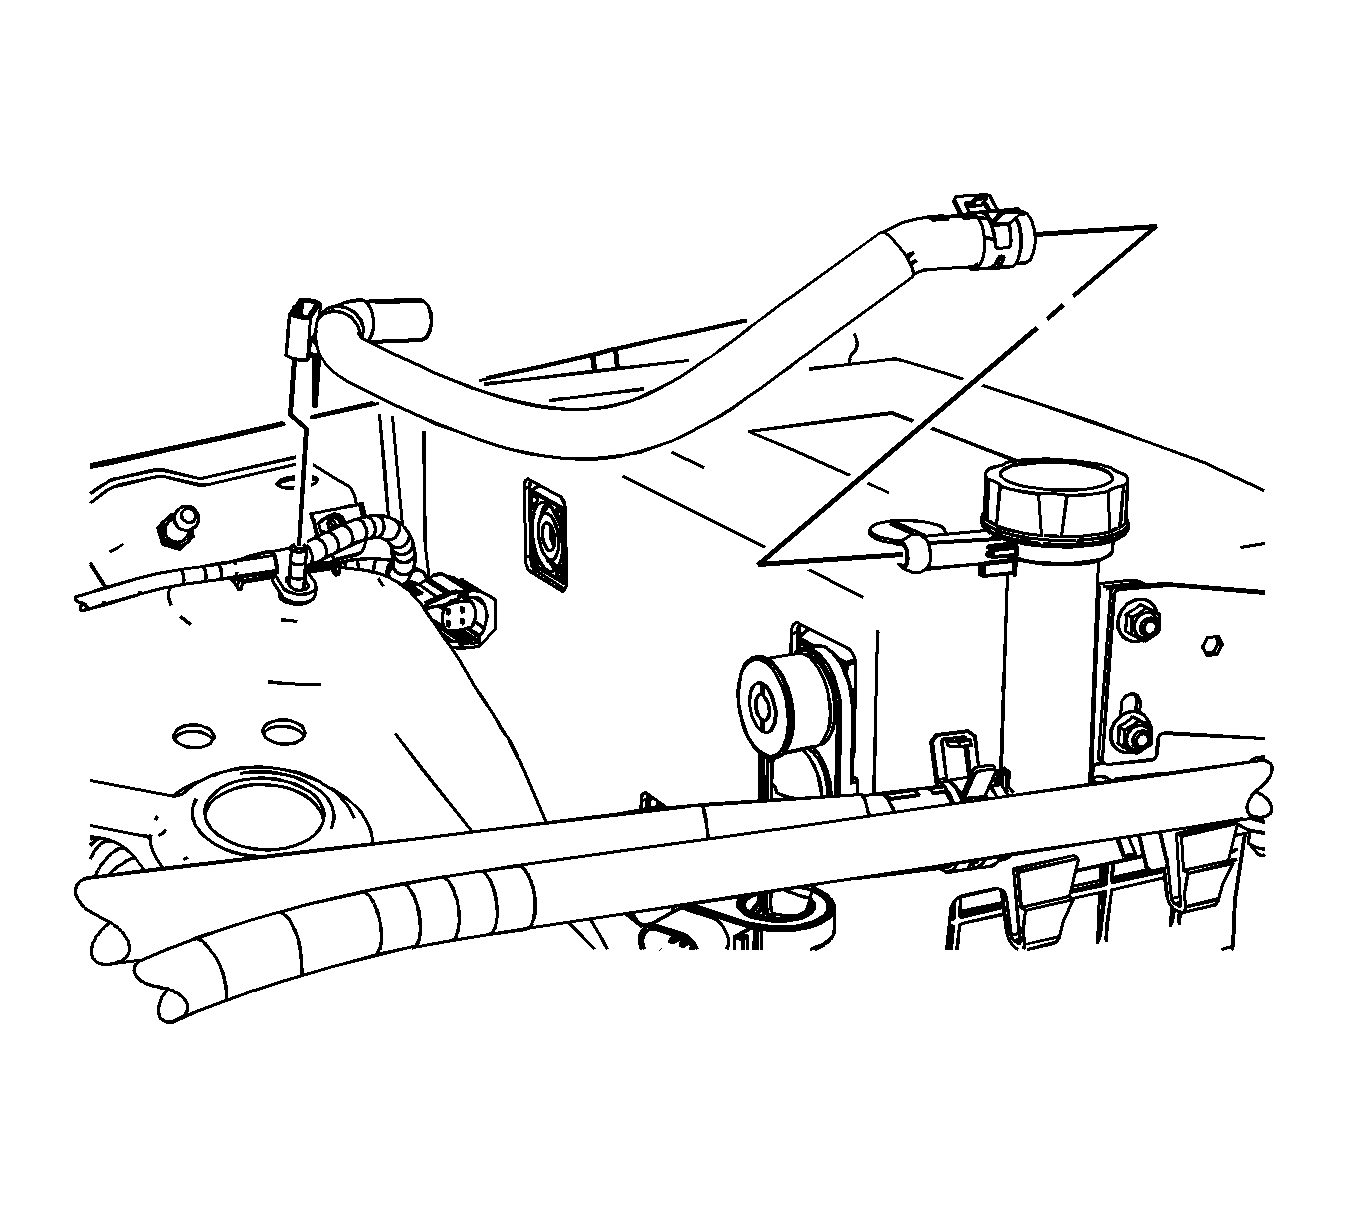
- Using the J 38185 , disengage clamp tension and disconnect the overflow hose from the fill neck.
- Using the J 38185 , disengage clamp tension and disconnect the outlet hose from the fill neck.
- Remove the fill neck bolts.
- Using the J 38185 disengage clamp tension and disconnect the overflow hose from the reservoir.
- Remove the overflow hose.

Note: Draining the coolant from the system is not necessary. Use an absorbent shop towel at the hose connections to absorb any minor coolant leakage. Ensure the coolant does not make contact with any other components.


Installation Procedure
- Install the overflow hose.
- Using the J 38185 disengage clamp tension and connect the overflow hose onto the reservoir.
- Using the J 38185 disengage clamp tension and connect the outlet hose onto the fill neck.
- Using the J 38185 , disengage clamp tension and connect the overflow hose onto the fill neck.
- Install the fill neck bolts and tighten to 9 N·m (80 lb in).
- Inspect the level of the charge air cooling system and fill as necessary. Refer to Charge Air Cooling System Coolant Level Inspection.


Caution: Refer to Fastener Caution in the Preface section.

