Fuel Injector Diagnosis w/J39021 or w/Tech 2
Diagnostic Instructions
Circuit/System Description
The control module enables the appropriate fuel injector pulse for each cylinder. The ignition voltage is supplied directly to the fuel injectors. The control module controls each fuel injector by grounding the control circuit via a solid state device
called a driver. A fuel injector coil winding resistance that is too high or too low will affect the engine driveability. A fuel injector control circuit DTC may not set, but a misfire may be apparent. The fuel injector coil windings are affected by temperature.
The resistance of the fuel injector coil windings will increase as the temperature of the fuel injector increases.
When performing the fuel injector balance test, the scan tool is first used to energize the fuel pump relay. The fuel injector tester or the scan tool is then used to pulse each injector for a precise amount of time, allowing a measured amount of the fuel
to be injected. This causes a drop in the system fuel pressure that can be recorded and used to compare each injector.
Diagnostic Aids
| • | Monitoring the misfire current counters, or misfire graph, may help to isolate the fuel injector that is causing the condition. |
| • | Operating the vehicle over a wide temperature range may help isolate the fuel injector that is causing the condition. |
| • | Perform the fuel injector coil test within the conditions of the customer's concern. A fuel injector condition may only be apparent at a certain temperature, or under certain conditions. |
Reference Information
Schematic Reference
Engine Controls Schematics
Connector End View Reference
Electrical Information Reference
Scan Tool Reference
Special Tools Required
| • | J 39021
Fuel Injector Coil and Balance Tester |
Component Testing
Fuel Injector Coil Test
Verify the resistance of each fuel injector with one of the following methods:
| • | If the engine coolant temperature (ECT) sensor is between 10-32°C (50-90°F), the resistance of each fuel injector should be 11-14 ohms. |
| ⇒ | If the injectors measure OK, perform the Active Fuel Injector Tester (AFIT) Test Procedure. |
| ⇒ | If not within the specified range, replace the fuel injector. |
| • | If the ECT sensor is not between 10-32°C (50-90°F), measure and record the resistance of each fuel injector with a DMM. Subtract the lowest resistance value from the highest resistance value. The difference between the lowest
value and the highest value should be equal to or less than 3 ohms. |
| ⇒ | If the difference is equal to or less than 3 ohms, perform the AFIT Test Procedure. |
| ⇒ | If the difference is more than 3 ohms, add all of the fuel injector resistance values to obtain a total resistance value. Divide the total resistance value by the number of fuel injectors to obtain an average resistance value. Subtract the
lowest individual fuel injector resistance value from the average resistance value. Compute the difference between the highest individual fuel injector resistance value and the average resistance value. Replace the fuel injector that displays the greatest resistance
difference above or below the average. |
Important:
| • | DO NOT perform this test if the engine coolant temperature (ECT) is above 94°C (201°F). Irregular fuel pressure readings may result due to hot soak fuel boiling. |
| • | Verify that adequate fuel is in the fuel tank before proceeding with this diagnostic. |
| • | Before proceeding with this test review the User Manual CH 48027-5 for Safety Information and Instructions. |
Fuel Injector Balance Test-Fuel Pressure Test
- Install a fuel pressure gage. Refer to
Fuel Pressure Gage Installation and Removal
.
- Turn ON the ignition, with the engine OFF.
Important:
| • | The fuel pump relay may need to be commanded ON a few times in order to obtain the highest possible fuel pressure. |
| • | DO NOT start the engine. |
- Command the fuel pump relay ON with a scan tool.
- Observe the fuel pressure gage with the fuel pump commanded ON. The fuel pressure should be 380-414 kPa (55-60 psi).
- Monitor the fuel pressure gage for one minute. The fuel pressure should not decrease more than 34 kPa (5 psi).
- Perform the Fuel Injector Balance Test with Special Tool or the Fuel Injector Balance Test with Tech 2.
Fuel Injector Balance Test with Special Tool
- Set the amperage supply selector switch on the fuel injector tester to the Balance Test 0.5-2.5 amp position.
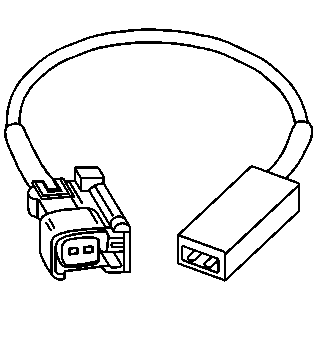
- Connect the
J 39021
to a fuel injector with a
J 44602
.
- Command the fuel pump relay ON and then OFF three times with a scan tool. On the last command, as the fuel pressure begins to slowly degrade and stabilize, select a fuel pressure within 34 kPa (5 psi) of the maximum pump pressure. Record
this fuel pressure. This is the starting pressure at which you will pulse each injector.
- Command the fuel pump relay ON one more time and energize the fuel injector by depressing the Push to Start Test button on the
J 39021
at the previously selected pressure.
- After the injector stops pulsing, select Min from the Display Mode and record the Min pressure.
Important: New test results will not be recorded if the Min/Max results are not cleared after each injector is tested.
- Clear the Min/Max results.
- Select Normal from the Display Mode.
- Repeat steps 2 and 4 through 7 for each fuel injector.
- Perform the Pressure Drop Calculation.
Fuel Injector Balance Test with Tech 2
- Command the fuel pump relay ON and then OFF three times with a scan tool. On the last command, as the fuel pressure begins to slowly degrade and stabilize, select a fuel pressure within 34 kPa (5 psi) of the maximum pump pressure. Record
this fuel pressure. This is the starting pressure at which you will pulse each injector.
- With a scan tool, select the Fuel Injector Balance Test function within the Special Functions menu.
- Select an injector to be tested.
- Press Enter to prime the fuel system.
- Energize the fuel injector by depressing the Pulse Injector button on the scan tool at the previously selected pressure.
- After the injector stops pulsing, select Min from the Display Mode on the
CH-48027
and record the Min pressure.
Important: New test results will not be recorded if the Min/Max results are not cleared after each injector is tested.
- Clear the Min/Max results on the
CH-48027
.
- Select Normal from the Display Mode on the
CH-48027
.
- Press Enter on the scan tool to bring you back to the Select Injector screen.
- Repeat steps 3 through 9 for each fuel injector.
- Perform the Pressure Drop Calculation.
Pressure Drop Calculation
- Subtract the minimum pressure from the starting pressure for one fuel injector. The result is the pressure drop value.
- Obtain a pressure drop value for each fuel injector.
- Add all of the individual pressure drop values except for the injector suspected of being faulty. This is the total pressure drop.
- Divide the total pressure drop by the number of fuel injectors that were added together. This is the average pressure drop. The difference between any individual pressure drop and the average pressure drop should not be more than 20 kPa (3 psi).
| ⇒ | If the difference between any individual pressure drop and the average pressure drop is more than 20 kPa (3 psi), replace the fuel injector. |
Repair Instructions
Perform the
Diagnostic Repair Verification
after completing the diagnostic procedure.
Fuel Injector and Fuel Rail Replacement
Fuel Injector Diagnosis w/CH47976
Diagnostic Instructions
Circuit/System Description
The control module enables the appropriate fuel injector pulse for each cylinder. The ignition voltage is supplied directly to the fuel injectors. The control module controls each fuel injector by grounding the control circuit via a solid state device
called a driver. A fuel injector coil winding resistance that is too high or too low will affect the engine driveability. A fuel injector control circuit DTC may not set, but a misfire may be apparent. The fuel injector coil windings are affected by temperature.
The resistance of the fuel injector coil windings will increase as the temperature of the fuel injector increases.
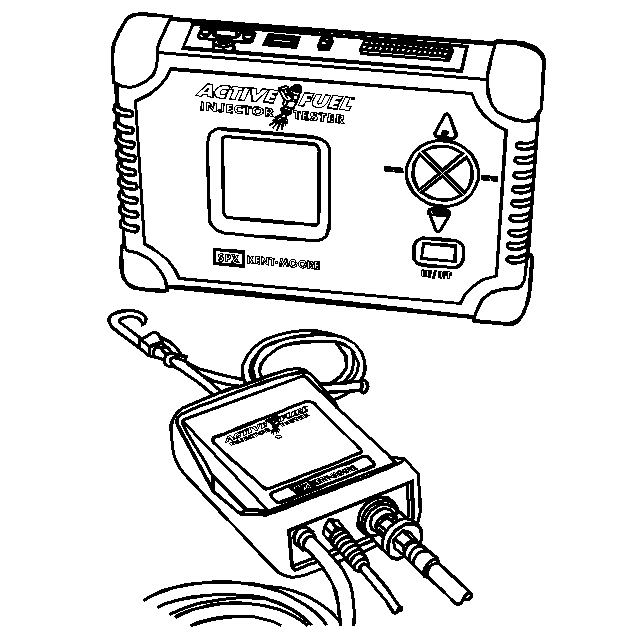
The
CH-47976
Active Fuel Injector Tester (AFIT) is used to test the fuel pump, fuel system leak down, and the fuel injectors. Following the User Guide, CH 47976-11, and the on screen prompts
or selections, will indicate the steps required to perform each of the available tests. The tester will perform all of the tests automatically and display results of the test. The results can also be down loaded for storage and printing.
Reference Information
Schematic Reference
Engine Controls Schematics
Connector End View Reference
Electrical Information Reference
Special Tools Required
CH-47976
Active Fuel Injector Tester (AFIT)
Component Testing
Fuel Injector Coil Test
Verify the resistance of each fuel injector with one of the following methods:
| • | If the engine coolant temperature (ECT) sensor is between 10-32°C (50-90°F), the resistance of each fuel injector should be 11-14 ohms. |
| ⇒ | If the resistance of any fuel injector is not 11-14 ohms, replace the fuel injector. |
| • | If the ECT sensor is not between 10-32°C (50-90°F), measure and record the resistance of each fuel injector with a DMM. Subtract the lowest resistance value from the highest resistance value. The difference between the lowest
value and the highest value should be equal to or less than 3 ohms. |
| ⇒ | If the difference is equal to or less than 3 ohms, refer to Fuel Injector Balance Test-Fuel Pressure Test for further diagnosis of the fuel injectors. |
| ⇒ | If the difference is more than 3 ohms, add all of the fuel injector resistance values to obtain a total resistance value. Divide the total resistance value by the number of fuel injectors to obtain an average resistance value. Subtract the
lowest and the highest individual fuel injector resistance values from the average resistance value. Replace the fuel injector that displays the greatest resistance difference above or below the average. |
Important:
| • | DO NOT perform this test if the ECT is above 94°C (201°F). Irregular fuel pressure readings may result due to hot soak fuel boiling. |
| • | Verify that adequate fuel is in the fuel tank before proceeding with this diagnostic. |
AFIT Test Procedure
- Turn OFF all accessories.
- Turn OFF the ignition.
- Install the AFIT. Refer to the AFIT User Guide.
- Turn ON the AFIT and select the vehicle.
- Turn ON the ignition and perform the Injector Test.
- View the test results.
| ⇒ | If any injector exceeds the recommended tolerance, replace the injector(s). |
Repair Instructions
Perform the
Diagnostic Repair Verification
after completing the diagnostic procedure.
Fuel Injector and Fuel Rail Replacement
