For 1990-2009 cars only
Removal Procedure
- Remove the fuel injector sight shield. Refer to Fuel Injector Sight Shield Replacement .
- Remove the air cleaner outlet duct. Refer to Air Cleaner Outlet Duct Replacement .
- If equipped with a crankshaft driven cooling fan, remove the cooling fan bracket. Refer to Engine Cooling Fan Bracket Replacement .
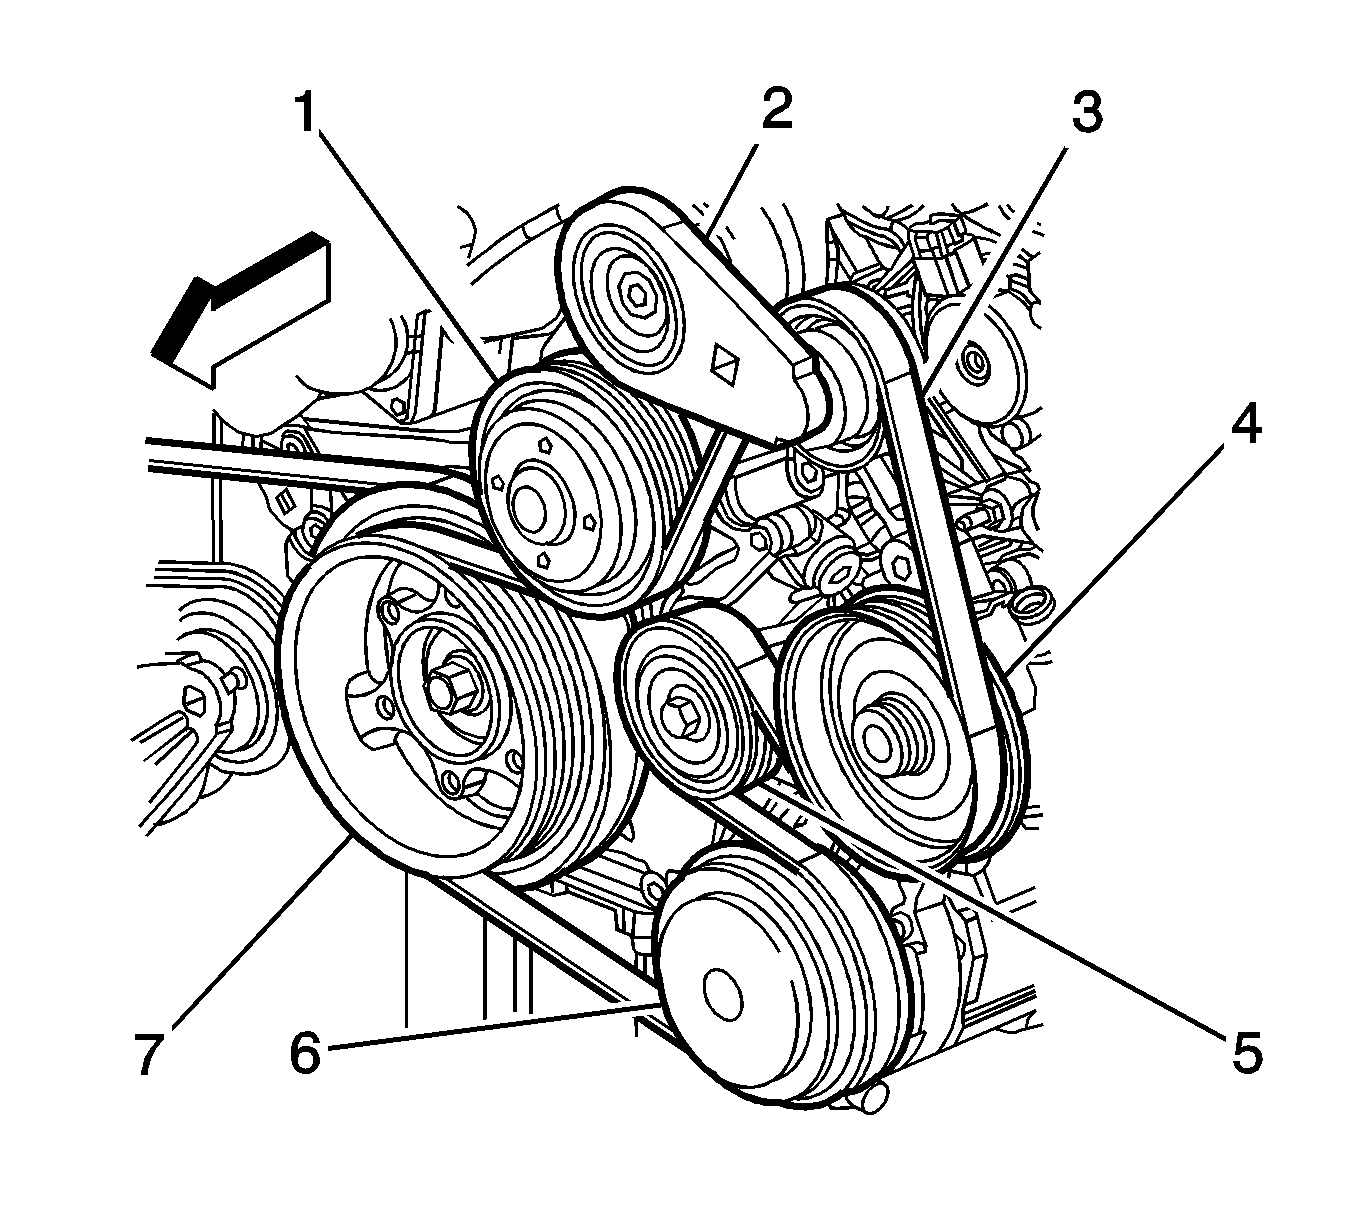
- Rotate the drive belt tensioner (2) clockwise to release drive belt tension.
- Slide the drive belt from the water pump pulley (1).
- Slide the drive belt out from behind the drive belt tensioner. Access the belt from the side of the tensioner pulley in the location of the lower reservoir mounting nut.
- Allow the drive belt tensioner to return to the relaxed position.
- Remove the drive belt from the remaining pulleys.
Installation Procedure
- Route the drive belt to the accessory drive pulleys, excluding the tensioner (2) and the water pump pulley (1).
- Rotate the drive belt tensioner (2) clockwise.
- Slide the drive belt behind the drive belt tensioner and around the tensioner pulley. Access the belt from the side of the tensioner pulley in the location of the lower reservoir mounting nut.
- Route the drive belt under the water pump pulley (1).
- Release the drive belt tensioner and inspect the drive belt for proper seating in the accessory drive pulleys.
- If equipped with a crankshaft driven cooling fan, install the cooling fan bracket. Refer to Engine Cooling Fan Bracket Replacement .
- Install the air cleaner outlet duct. Refer to Air Cleaner Outlet Duct Replacement .
- Install the fuel injector sight shield. Refer to Fuel Injector Sight Shield Replacement .
Important: Ensure the drive belt is properly aligned and seated into the grooves of the accessory drive pulleys.
