For 1990-2009 cars only
Special Tools
J 45747 Fuel Tank Sender Wrench
Removal Procedure
- Remove the fuel tank hoses. Refer to Fuel Hoses/Pipes Replacement - Filter to Tank.
- Disconnect the electrical connector from the primary fuel tank module.
- Rotate the cam lock ring counterclockwise using the J 45747 .
- Remove the cam lock ring from the fuel tank.
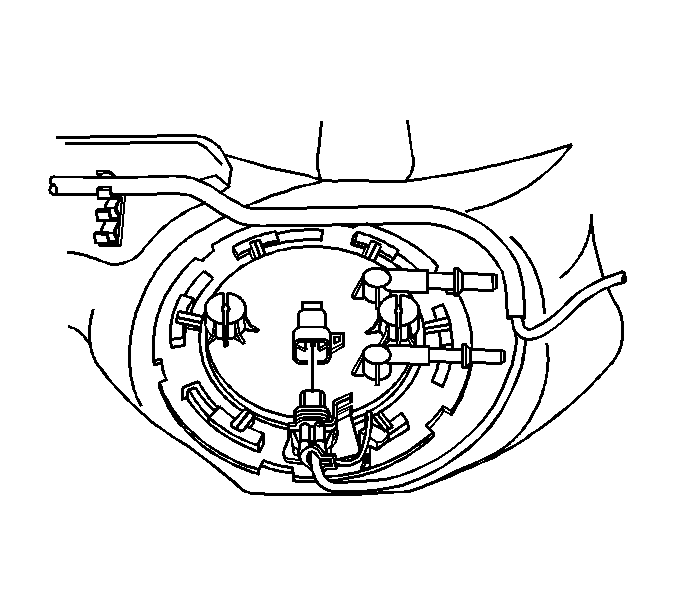
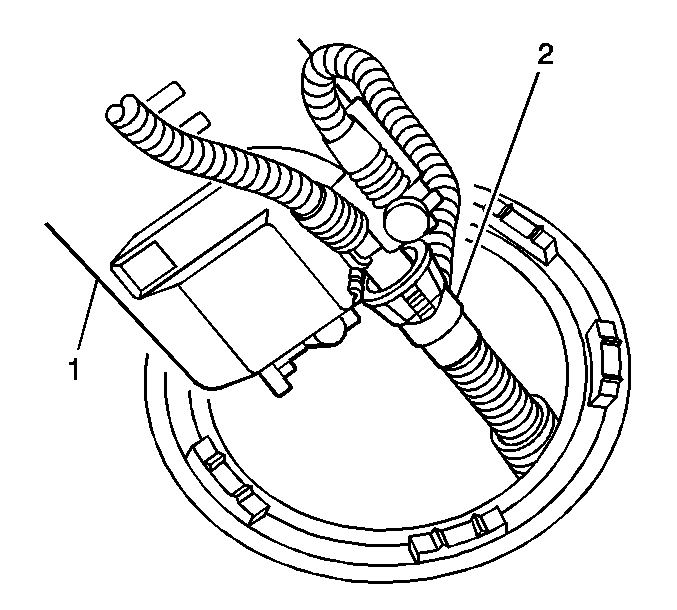
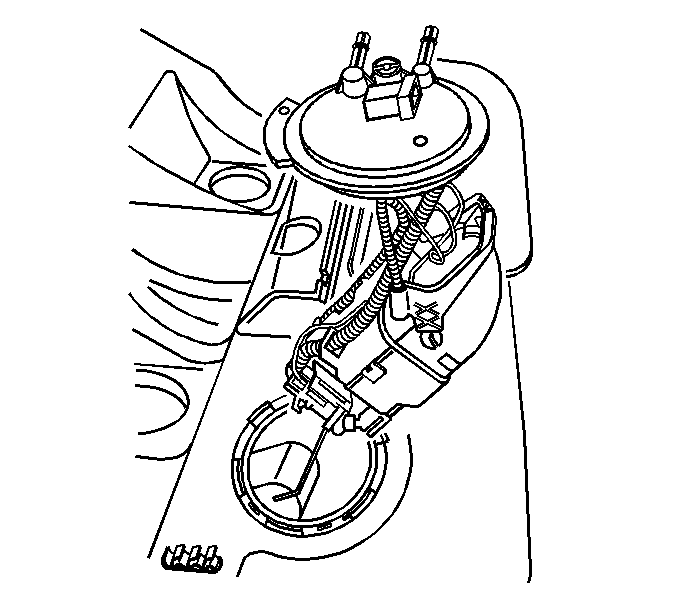
- Carefully lift the primary fuel tank module (1) from the fuel tank only enough to access the transfer tube (2).
- Complete the following in order to disconnect the transfer tube from the primary fuel tank module:
- Remove the primary fuel tank module from the fuel tank.
- Remove the primary fuel tank module seal from the module.
Warning: Refer to Gasoline/Gasoline Vapors Warning in the Preface section.
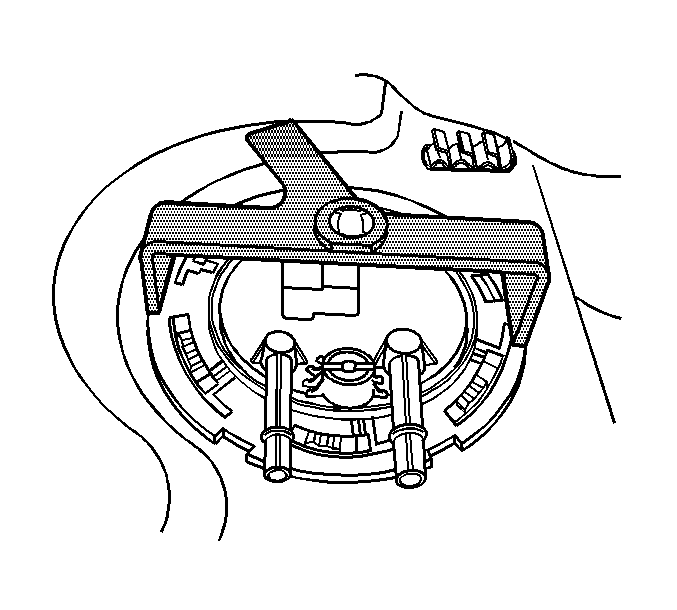
Note: Do not allow the tool to come in contact with the fuel pipes while unlocking the cam lock ring.
Note: The primary fuel tank module (1) is horizontal in the installed position, but pivots vertically for removal.
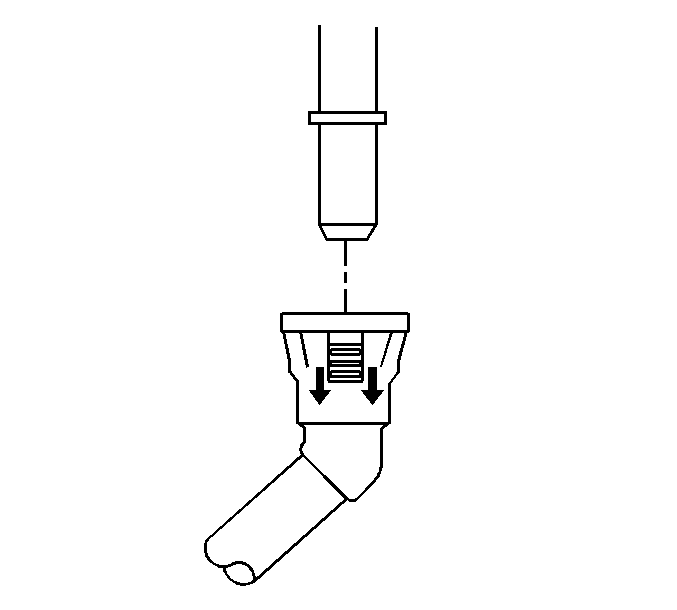
| 6.1. | Pull the locking mechanism away from the module. |
| 6.2. | Remove the transfer tube from the module. |
Do not reuse the seal.
Installation Procedure
- Place the new primary fuel tank module seal (1) over the module (2).
- Complete the following in order to connect the transfer tube (2) to the primary fuel tank module (1).
- Carefully insert the primary fuel tank module (1) into the fuel tank.
- Press the primary fuel tank module (1) downward, aligning the module to the encapsulated ring.
- Position the cam lock ring to the fuel tank.
- Rotate the cam lock ring clockwise using the J 45747 until fully seated.
- Connect the electrical connector to the primary fuel tank module.
- Install the fuel tank hoses. Refer to Fuel Hoses/Pipes Replacement - Filter to Tank.
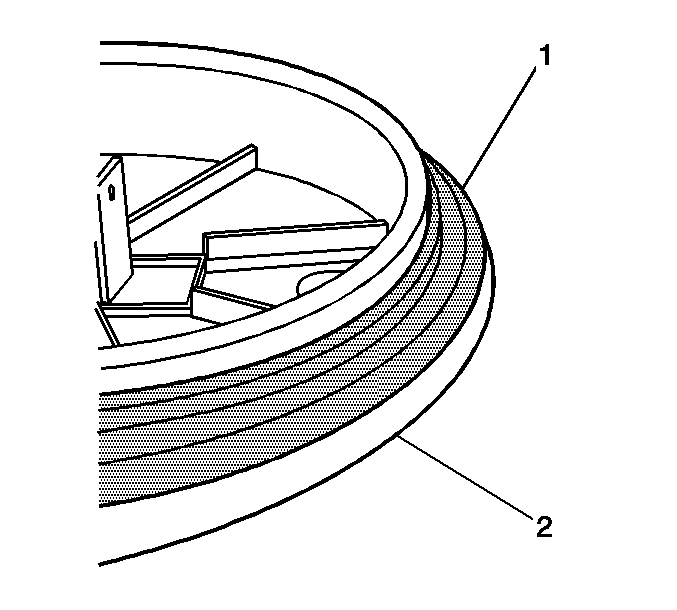
Note: Ensure the seal bead is facing the fuel tank.
| 2.1. | Grasp the transfer tube (2) from inside the fuel tank. |
| 2.2. | Position the module (1) near the module opening. |
| 2.3. | Connect the transfer tube (2) to the module (1). |
Note:
• The primary fuel tank module (1) is horizontal in the installed position, but pivots from the vertical position for installation. • Ensure the fuel level float is free from binding while inserting the module (1).
Note: Do not allow the tool to come in contact with the fuel pipes while locking the cam lock ring.
