Engine Coolant Fan Replacement LH2 - Heavy Duty Cooling
Removal Procedure
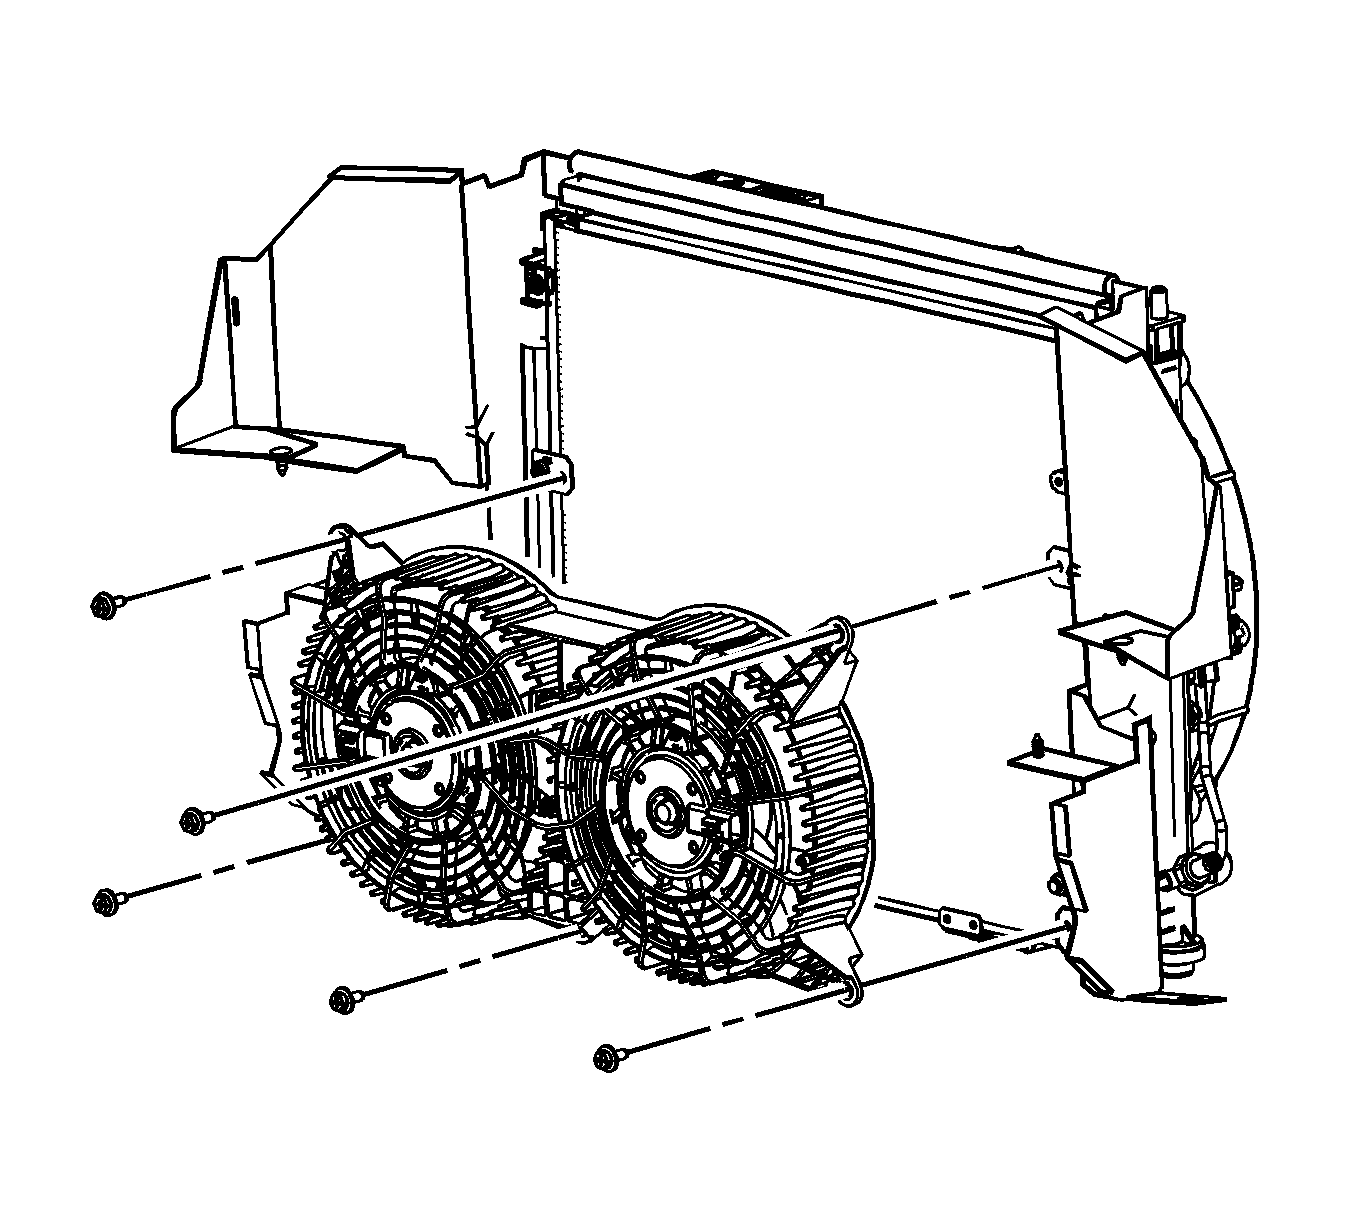
- Remove the auxiliary cooling fan assembly to condenser upper mounting bolts.
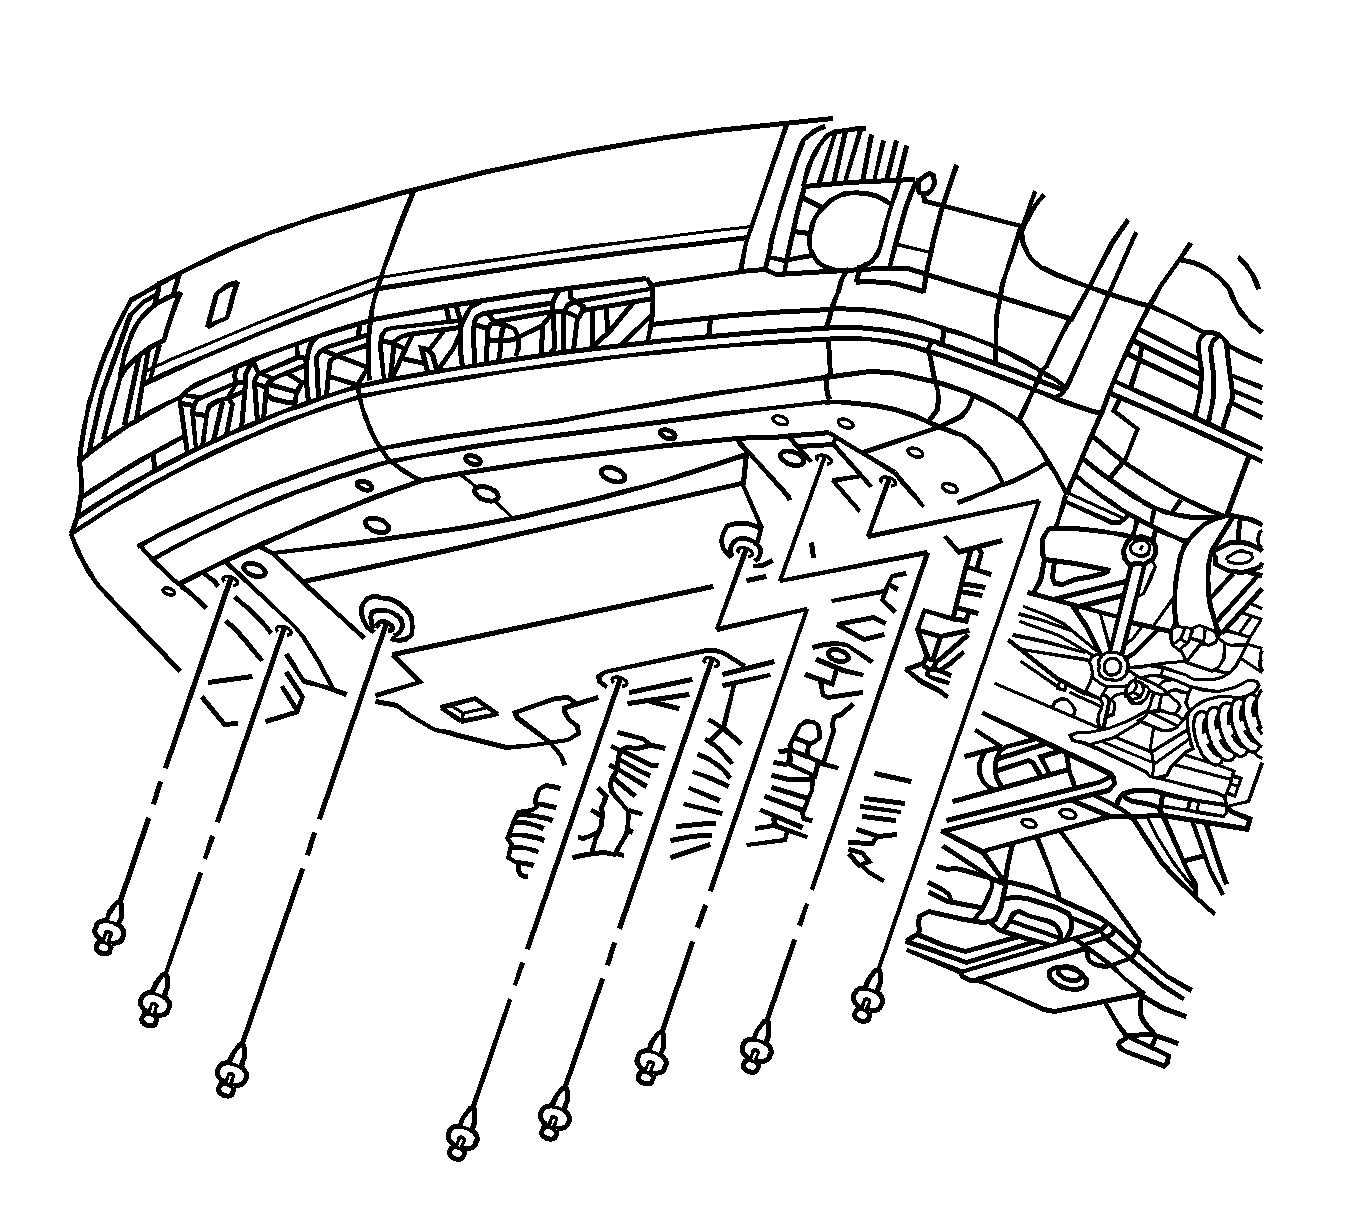
- Raise and support the vehicle. Refer to Lifting and Jacking the Vehicle.
- Remove the front air deflector retainers.
- Remove the front air deflector.
- Disconnect the auxiliary cooling fan assembly electrical connectors.
- Remove the auxiliary cooling fan assembly to condenser lower mounting bolts.
- Remove the auxiliary cooling fan assembly.


Installation Procedure
- Install the auxiliary cooling fan assembly.
- Install the auxiliary cooling fan assembly to condenser mounting bolts.
- Connect the auxiliary cooling fan assembly electrical connectors.
- Install the front air deflector.
- Install the front air deflector retainers.
- Lower the vehicle.
- Install the auxiliary cooling fan assembly to condenser upper mounting bolts.

Notice: Refer to Fastener Notice in the Preface section.
Tighten
Tighten the bolts to 6.5 N·m (58 lb in).

Tighten
Tighten the bolts to 6.5 N·m (58 lb in).
Engine Coolant Fan Replacement LY7
Removal Procedure
- Remove the air cleaner outlet duct. Refer to Air Cleaner Inlet Duct Replacement.
- Disconnect the cooling fan electrical connectors.
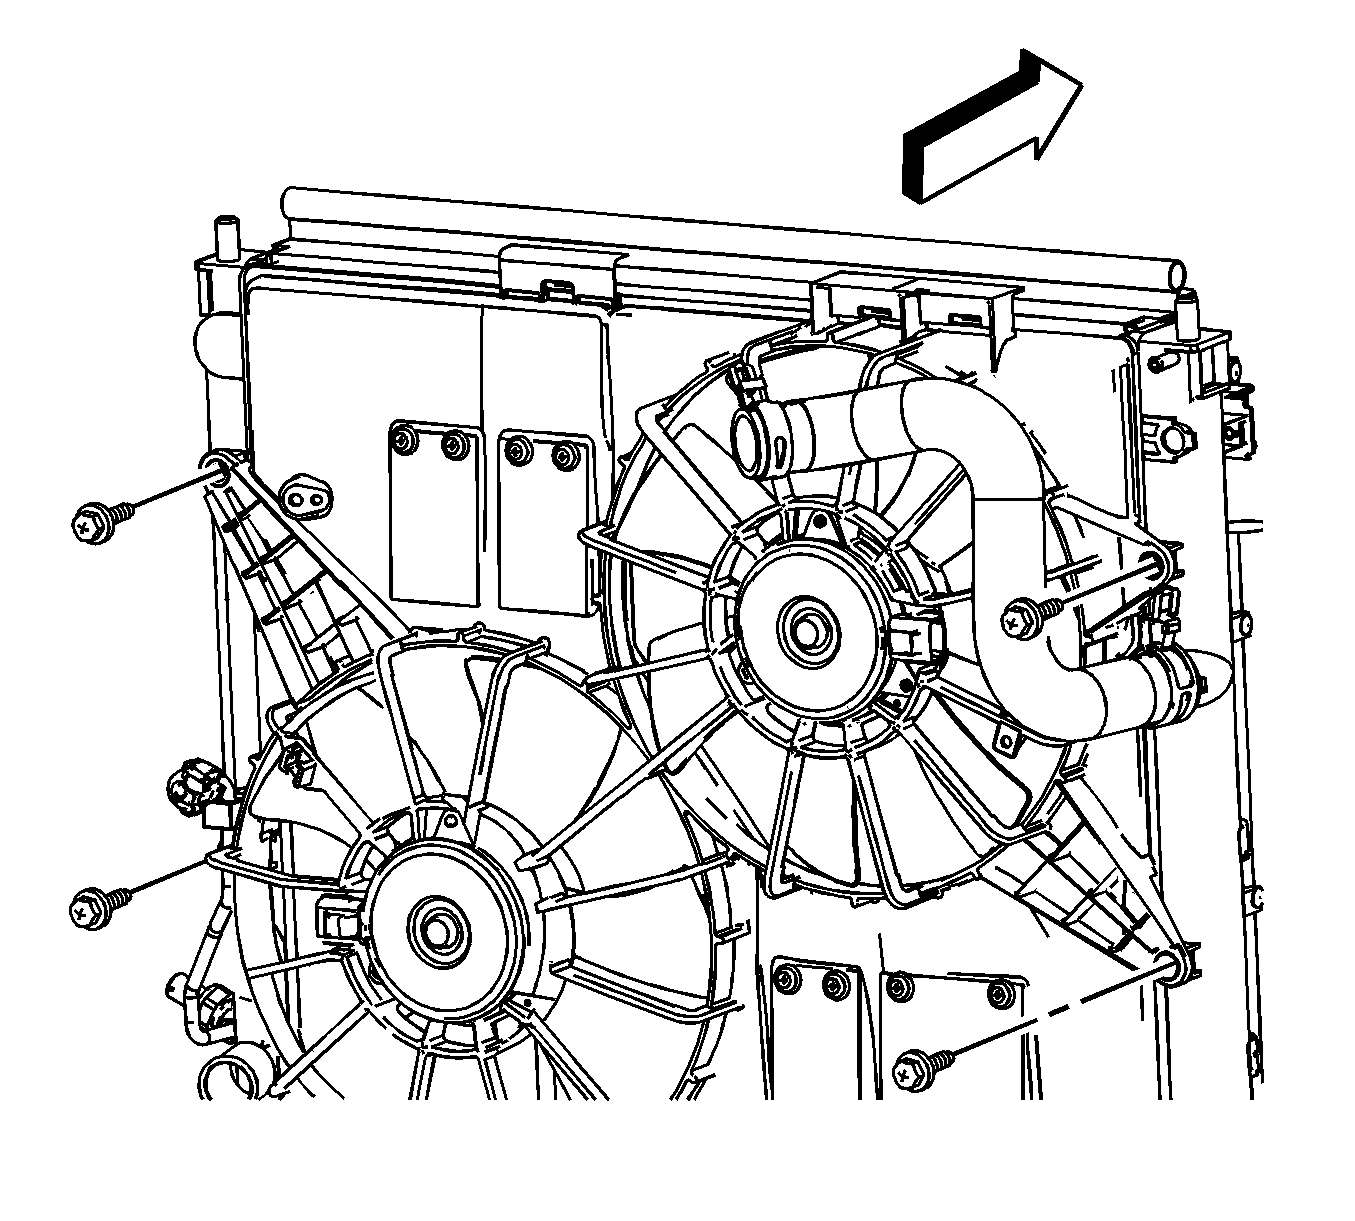
- Disconnect the condenser tube from the cooling fan shroud retainer clip.
- Disengage the surge tank inlet hose from the retaining features on the cooling fan shroud and reposition aside.
- Remove the cooling fan shroud to radiator retaining bolts.
- Remove the cooling fan assembly.
Caution: An electric fan under the hood can start up even when the engine is not running and can injure you. Keep hands, clothing and tools away from any underhood electric fan.
Caution: To help avoid personal injury or damage to the vehicle, a bent, cracked, or damaged fan blade or housing should always be replaced.

Installation Procedure
- Install the cooling fan assembly.
- Install the cooling fan shroud to radiator retaining bolts.
- Engage the surge tank inlet hose to the retaining features on the cooling fan shroud.
- Connect the condenser tube to the cooling fan shroud retainer clip.
- Connect the cooling fan electrical connectors.
- Install the air cleaner outlet duct. Refer to Air Cleaner Inlet Duct Replacement.

Notice: Use the correct fastener in the correct location. Replacement fasteners must be the correct part number for that application. Fasteners requiring replacement or fasteners requiring the use of thread locking compound or sealant are identified in the service procedure. Do not use paints, lubricants, or corrosion inhibitors on fasteners or fastener joint surfaces unless specified. These coatings affect fastener torque and joint clamping force and may damage the fastener. Use the correct tightening sequence and specifications when installing fasteners in order to avoid damage to parts and systems.
Tighten
Tighten the bolts to 6.5 N·m (58 lb in).
