For 1990-2009 cars only
Body Side Rear Trim Panel Replacement w/o TB5
Removal Procedure
- Lower the rear seats to assist in removal of the trim panel.
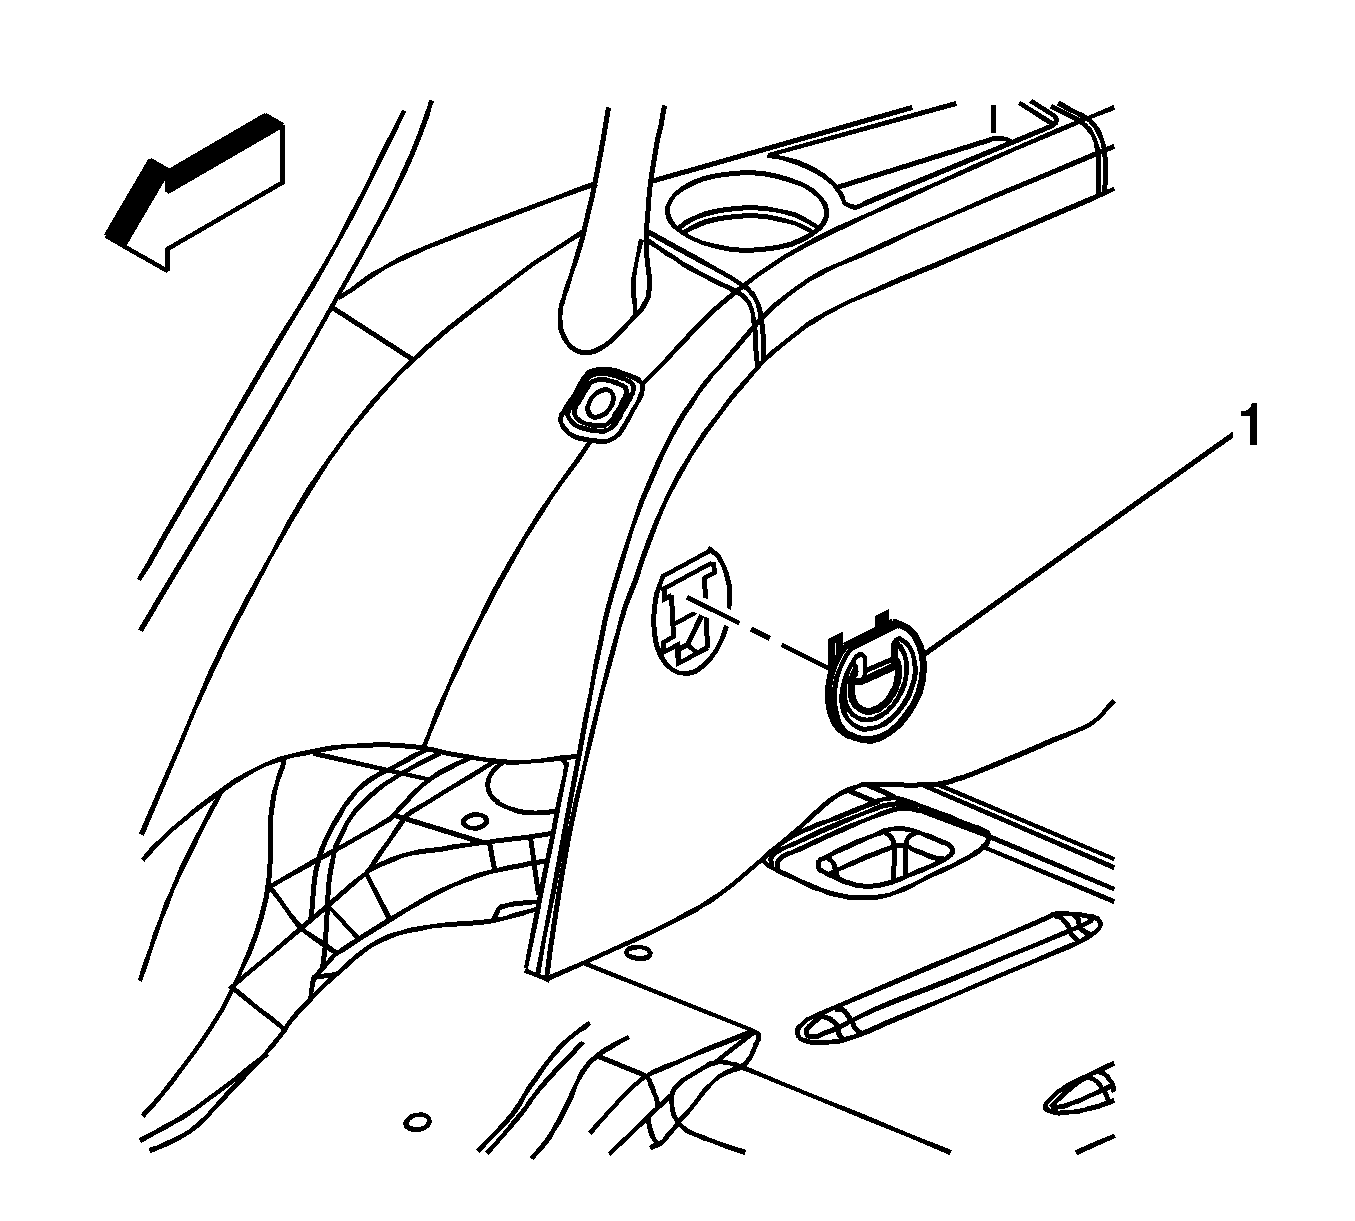
- Remove the rear quarter trim tie down bezel (1).
- Remove the side door garnish molding. Refer to Side Door Opening Frame Garnish Molding Replacement .
- Remove the body side rear upper garnish molding. Refer to Body Side Rear Upper Garnish Molding Replacement .
- Remove the rear compartment sill plate. Refer to Rear Compartment Sill Trim Plate Replacement .
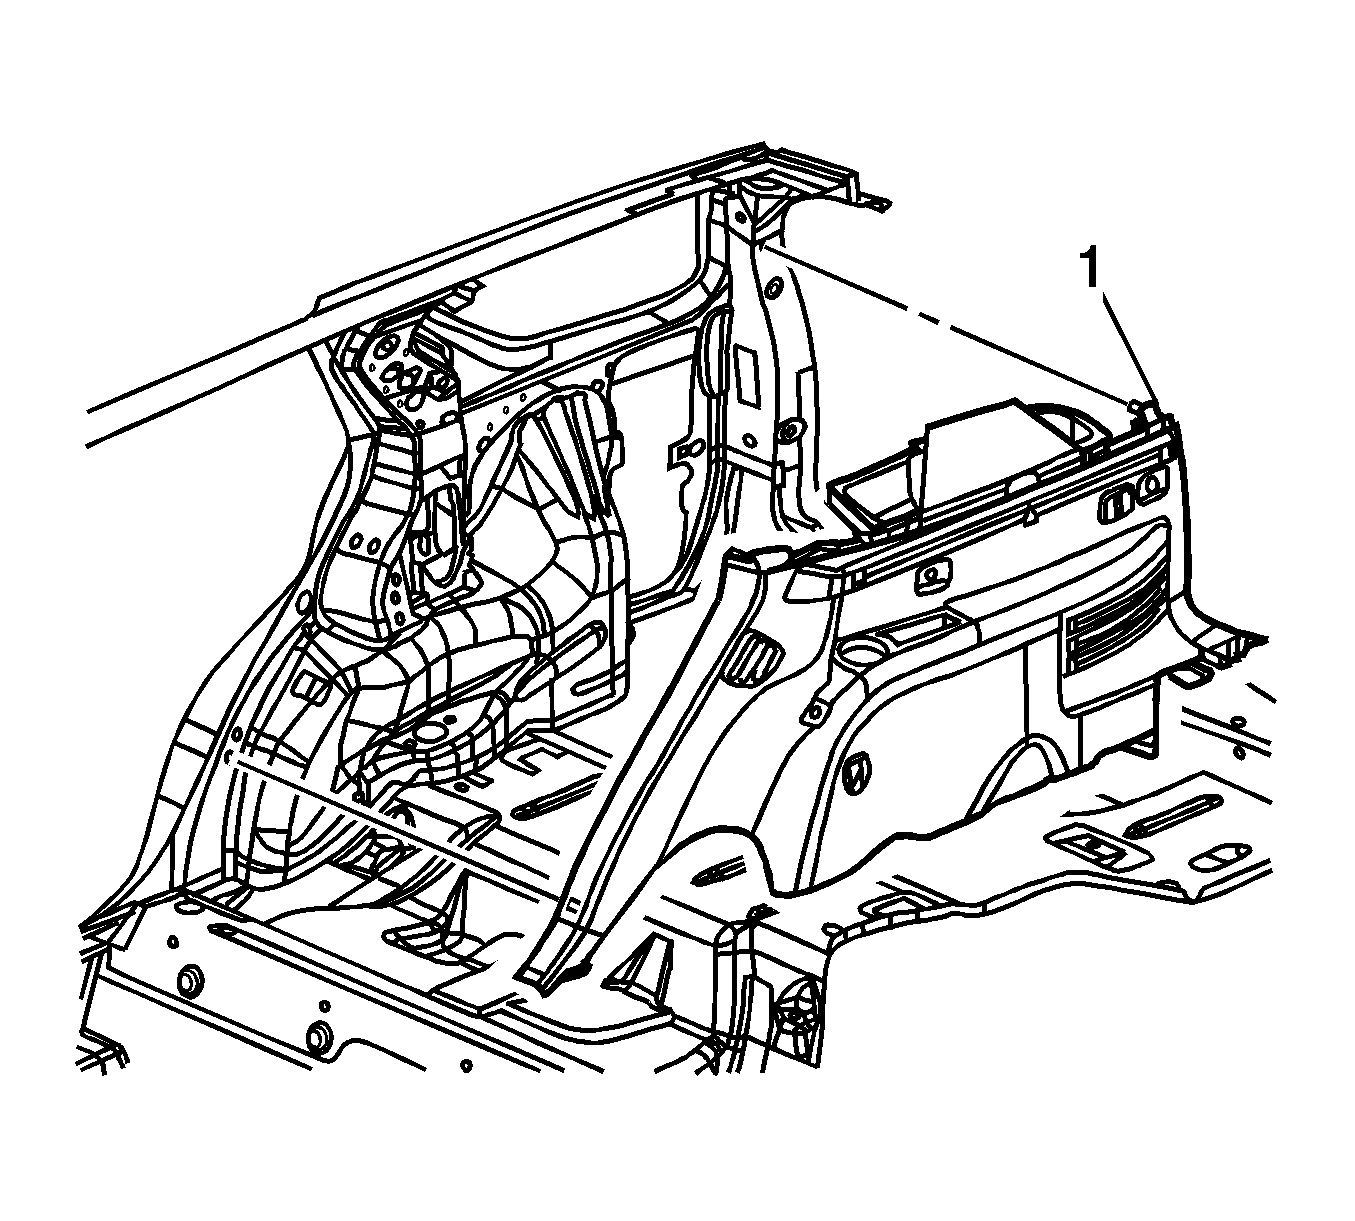
- Pull the trim panel (1) away from the body.
- Disconnect the electrical connectors from the trim panel.
- Remove the trim panel from the vehicle.
Installation Procedure
- Position the trim panel (1) to the vehicle.
- Position the seat belt over the top of the trim panel, ensuring that the buckle is not behind the trim panel.
- Connect the electrical connectors.
- Index the locating tabs on the trim panel to the holes in the body.
- Seat the clips the retain the trim panel to the body.
- Install the rear compartment sill plate. Refer to Rear Compartment Sill Trim Plate Replacement .
- Install the body side rear upper garnish molding. Refer to Body Side Rear Upper Garnish Molding Replacement .
- Install the side door garnish molding. Refer to Side Door Opening Frame Garnish Molding Replacement .
- Install the rear quarter trim tie down bezel (1).
- Put the rear seats in the upright position.
Body Side Rear Trim Panel Replacement w/TB5
Removal Procedure
- Lower the rear seats to assist in removal of the trim panel.
- Remove the rear quarter trim tie down bezel (1).
- Remove the side door garnish molding. Refer to Side Door Opening Frame Garnish Molding Replacement .
- Remove the body side rear upper garnish molding. Refer to Body Side Rear Upper Garnish Molding Replacement .
- Remove the rear compartment sill plate. Refer to Rear Compartment Sill Trim Plate Replacement .
- Remove the rear quarter trim cover from the trim panel by pulling away to disengage the retainers.
- Pull the trim panel (1) away from the body.
- Disconnect the electrical connectors from the trim panel.
- Remove the trim panel from the vehicle.
Installation Procedure
- Position the trim panel (1) to the vehicle.
- Position the seat belt over the top of the trim panel, ensuring that the buckle is not behind the trim panel.
- Connect the electrical connectors.
- Index the locating tabs on the trim panel to the holes in the body.
- Seat the clips that retain the trim panel to the body.
- Install the rear quarter trim cover to the rear quarter trim panel and push in to secure the retainers.
- Install the rear compartment sill plate. Refer to Rear Compartment Sill Trim Plate Replacement .
- Install the body side rear upper garnish molding. Refer to Body Side Rear Upper Garnish Molding Replacement .
- Install the side door garnish molding. Refer to Side Door Opening Frame Garnish Molding Replacement .
- Install the rear quarter trim tie down bezel (1).
- Put the rear seats in the upright position.
