For 1990-2009 cars only
Liquid Line Replacement LY7
Special Tools
J 39400-A Halogen Leak Detector
Removal Procedure
- Recover the refrigerant. Refer to Refrigerant Recovery and Recharging.
- Remove the air cleaner from the vehicle. Refer to Air Cleaner Assembly Replacement.
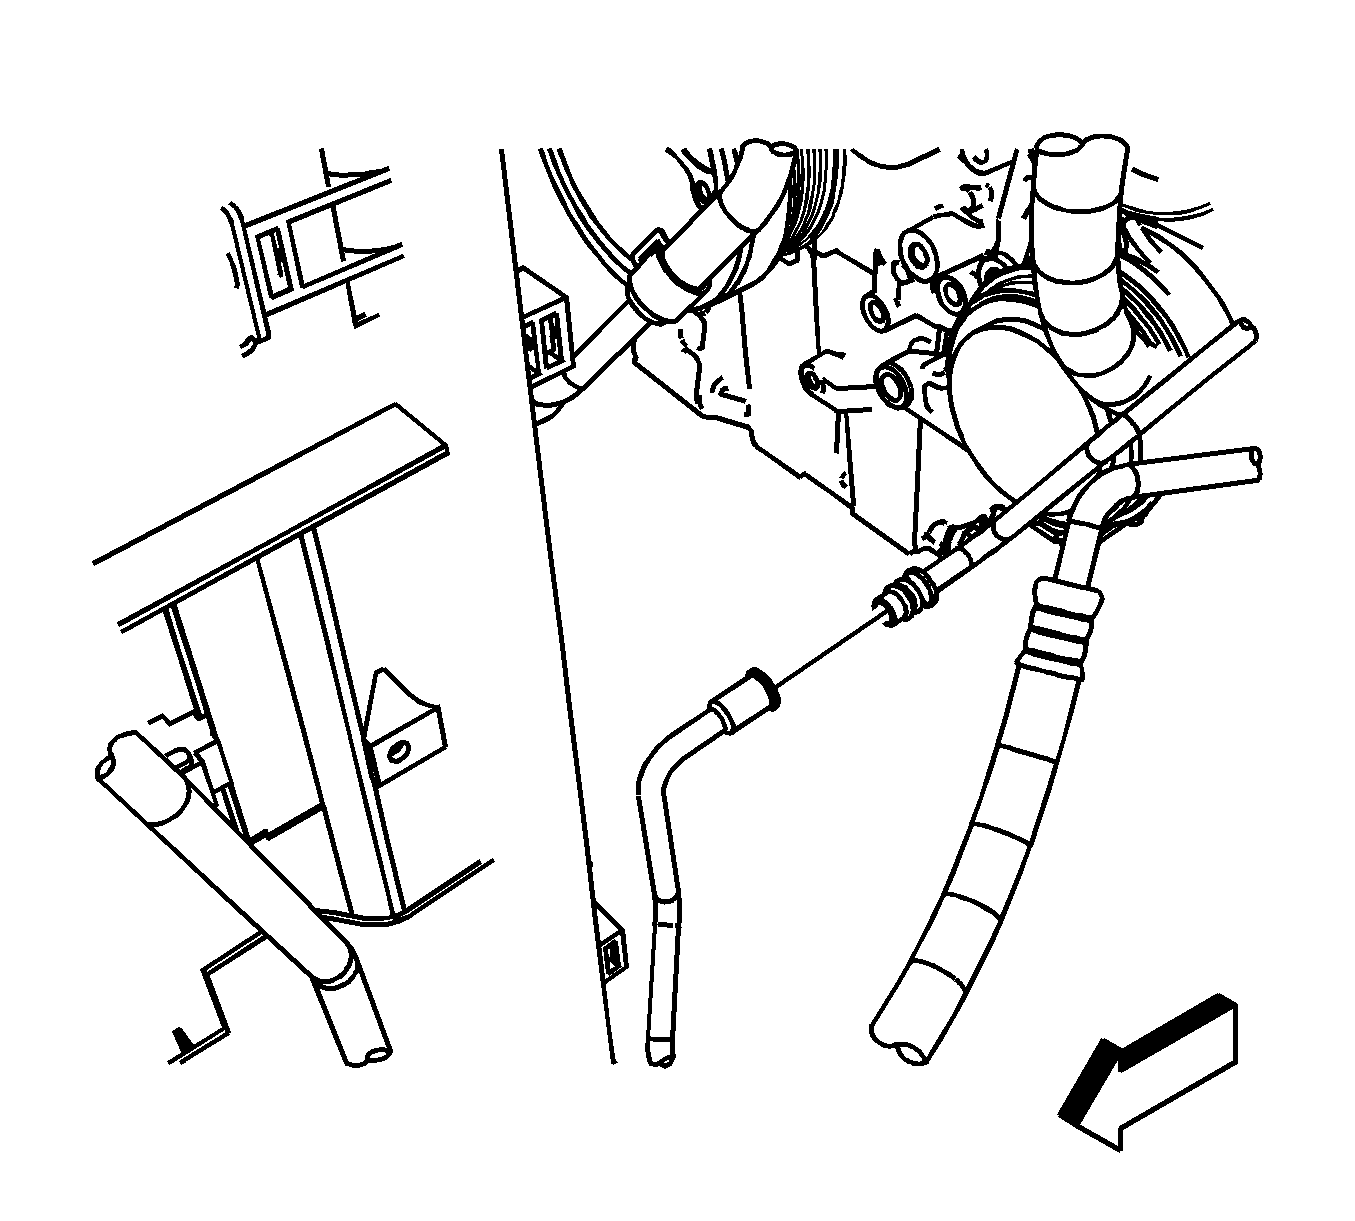
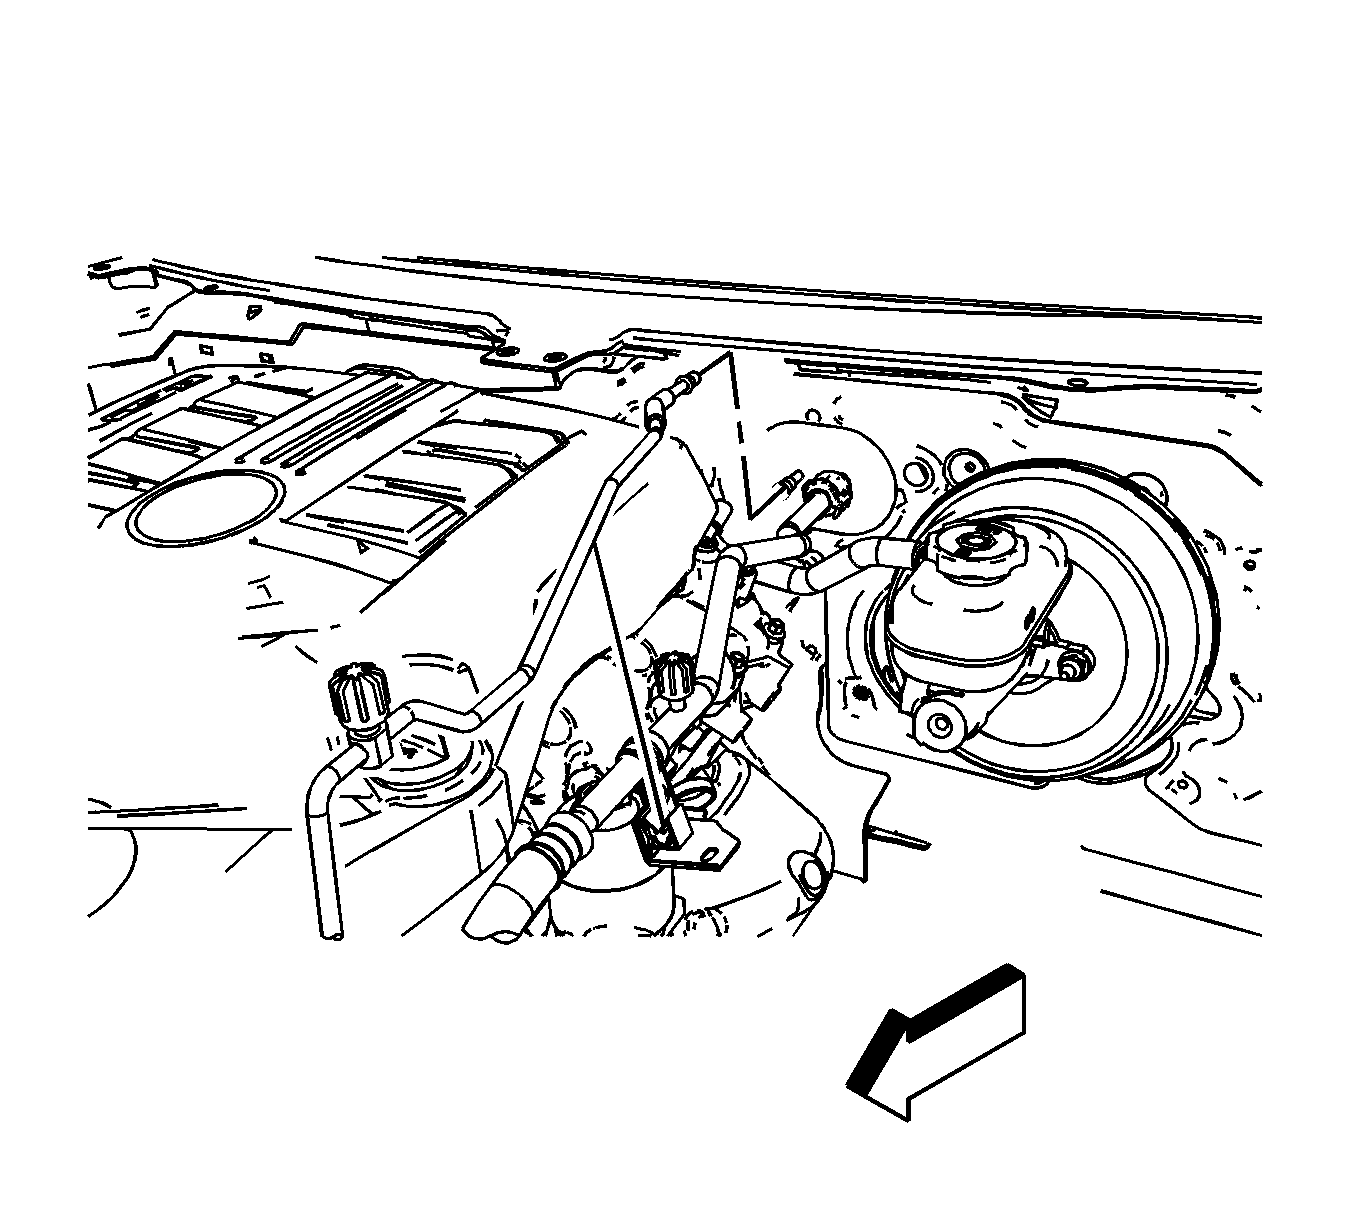
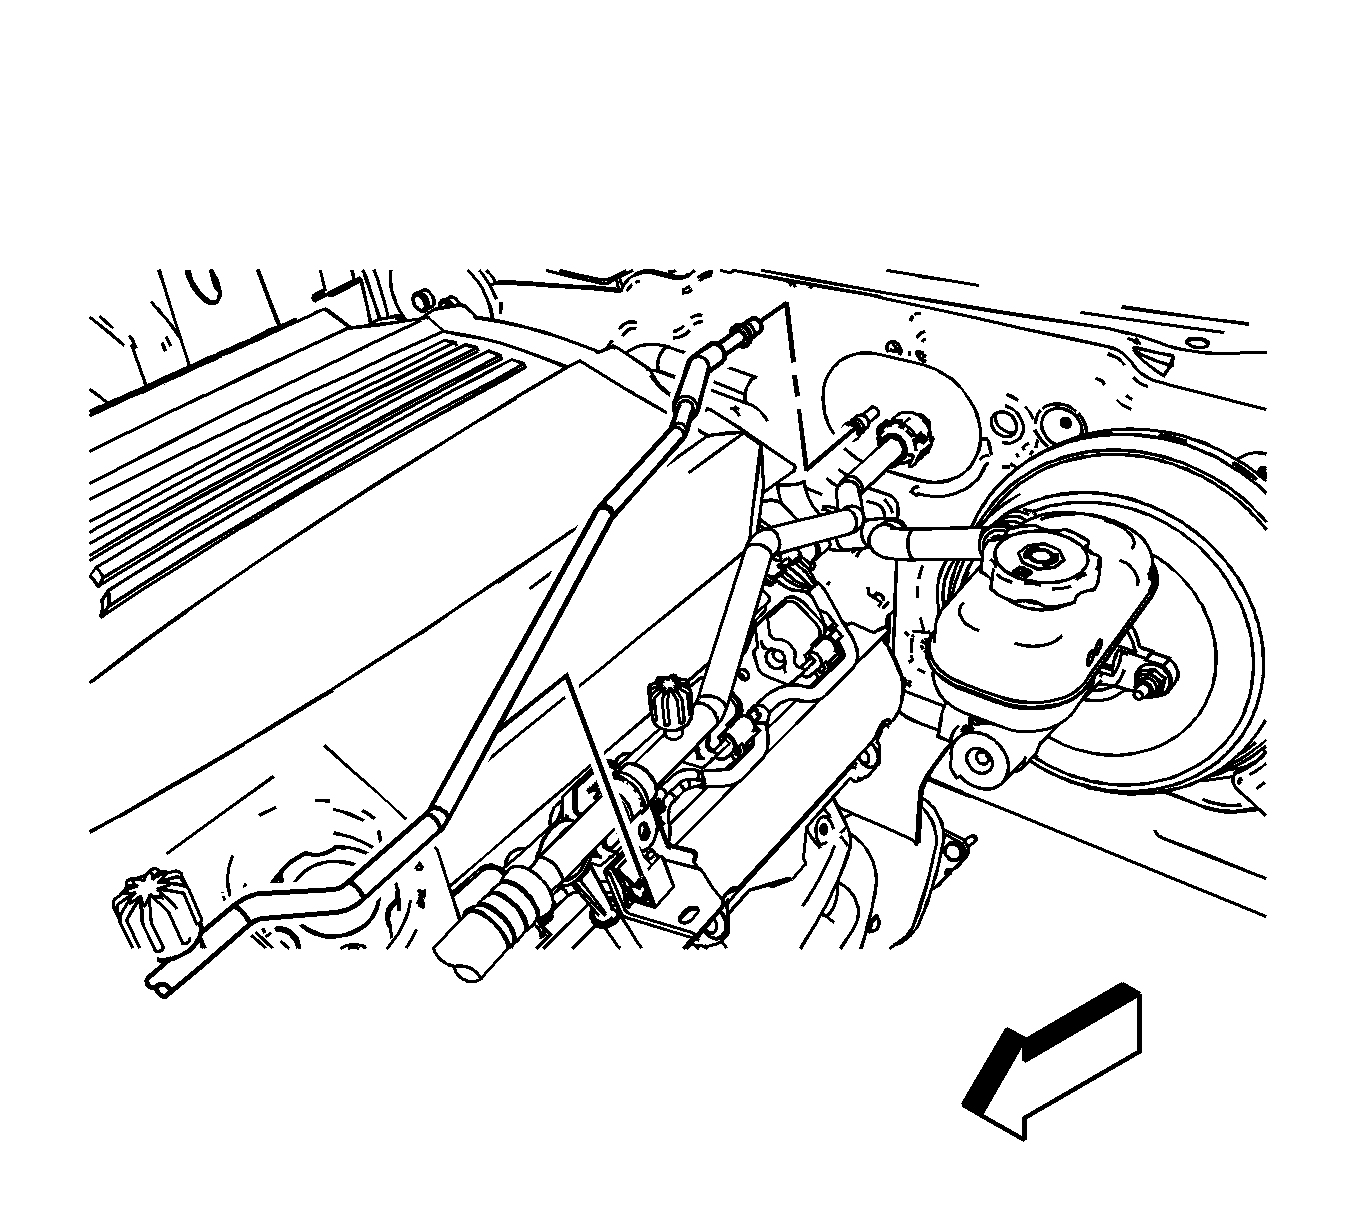
- Disconnect the quick connect fitting at the condenser tube. Refer to Air Conditioning Line/Tube Connector Removal/Replacement.
- Disconnect the liquid line from the strut tower retaining clip.
- Remove the wiper motor module assembly. Refer to Windshield Wiper System Module Replacement.
- Disconnect the quick connect fitting at the evaporator core. Refer to Air Conditioning Line/Tube Connector Removal/Replacement.
- Disconnect the liquid line from the evaporator core.
- Remove the liquid line from the vehicle.
- Remove and discard the O-ring seals.
Installation Procedure
- Install new O-rings to the liquid line. Refer to O-Ring Replacement.
- Install the liquid line in to the vehicle.
- Connect the liquid line to the evaporator core.
- Install the A/C quick connect fitting. Refer to Air Conditioning Line/Tube Connector Removal/Replacement.
- Install the wiper motor module assembly. Refer to Windshield Wiper System Module Replacement.
- Connect the liquid line to the strut tower retaining clip.
- Connect the liquid line to the condenser tube.
- Install the A/C quick connect fitting. Refer to Air Conditioning Line/Tube Connector Removal/Replacement.
- Install the air cleaner onto the vehicle. Refer to Air Cleaner Assembly Replacement.
- Evacuate and recharge the refrigerant system. Refer to Refrigerant Recovery and Recharging.
- Using J 39400-A leak test the fittings of the component.
Liquid Line Replacement LH2
Special Tools
J 39400-A Halogen Leak Detector
Removal Procedure
- Recover the refrigerant. Refer to Refrigerant Recovery and Recharging.
- Remove the air cleaner from the vehicle. Refer to Air Cleaner Assembly Replacement.
- Disconnect the quick connect fitting at the condenser tube. Refer to Air Conditioning Line/Tube Connector Removal/Replacement.
- Disconnect the liquid line from the strut tower retaining clip.
- Remove the wiper motor module assembly. Refer to Windshield Wiper System Module Replacement.
- Disconnect the quick connect fitting at the evaporator core. Refer to Air Conditioning Line/Tube Connector Removal/Replacement.
- Disconnect the liquid line from the evaporator core.
- Remove the liquid line from the vehicle.
- Remove and discard the O-ring seals.
Installation Procedure
- Install new O-rings to the liquid line. Refer to O-Ring Replacement.
- Install the liquid line in to the vehicle.
- Connect the liquid line to the evaporator core.
- Install the A/C quick connect fitting. Refer to Air Conditioning Line/Tube Connector Removal/Replacement.
- Install the wiper motor module assembly. Refer to Windshield Wiper System Module Replacement.
- Connect the liquid line to the strut tower retaining clip.
- Connect the liquid line to the condenser tube.
- Install the A/C quick connect fitting. Refer to Air Conditioning Line/Tube Connector Removal/Replacement.
- Install the air cleaner from the vehicle. Refer to Air Cleaner Assembly Replacement.
- Evacuate and recharge the refrigerant system. Refer to Refrigerant Recovery and Recharging.
- Using J 39400-A , leak test the fittings of the component.
