For 1990-2009 cars only
Battery Positive Cable Replacement LY7
Removal Procedure
Note:
• Always use replacement cables that are of the same type, diameter and length of the cables that you are replacing. • Always route the replacement cable the same way as the original cable.
- Disconnect the battery negative cable. Refer to Battery Negative Cable Disconnection and Connection.
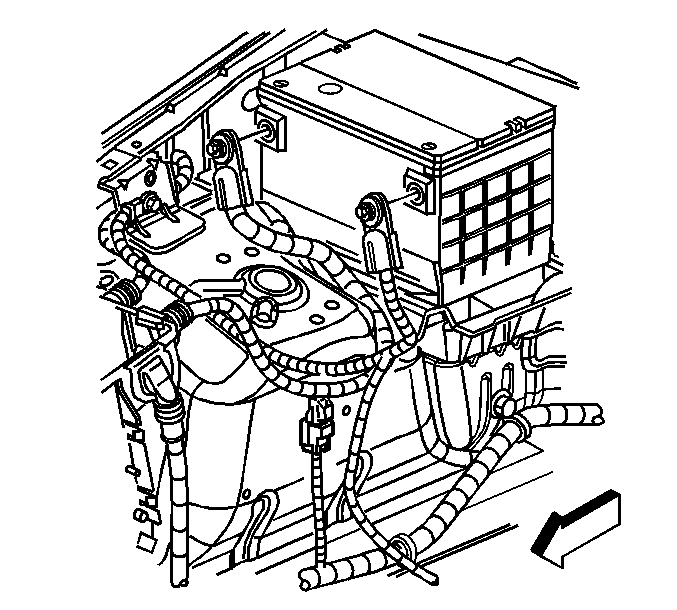
- Disconnect the battery positive cable from the battery.
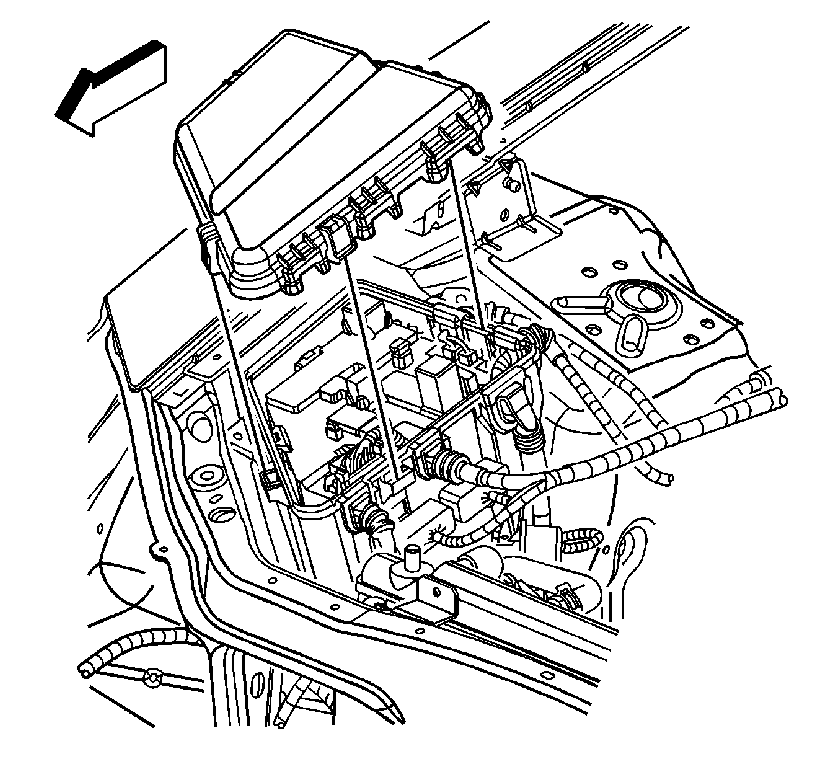
- Depress the tabs in order to remove the cover from the electrical center.
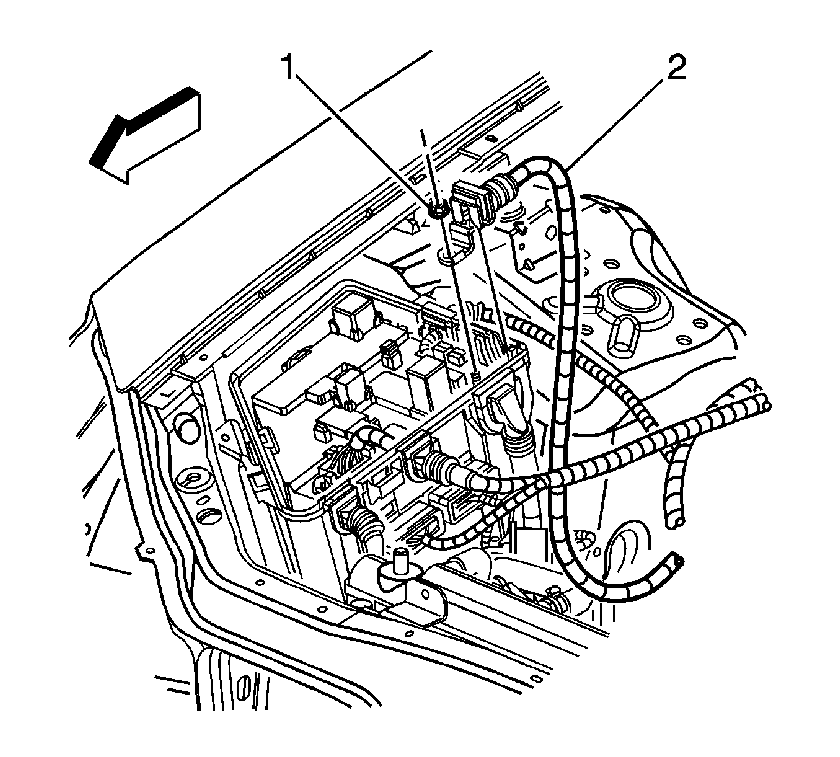
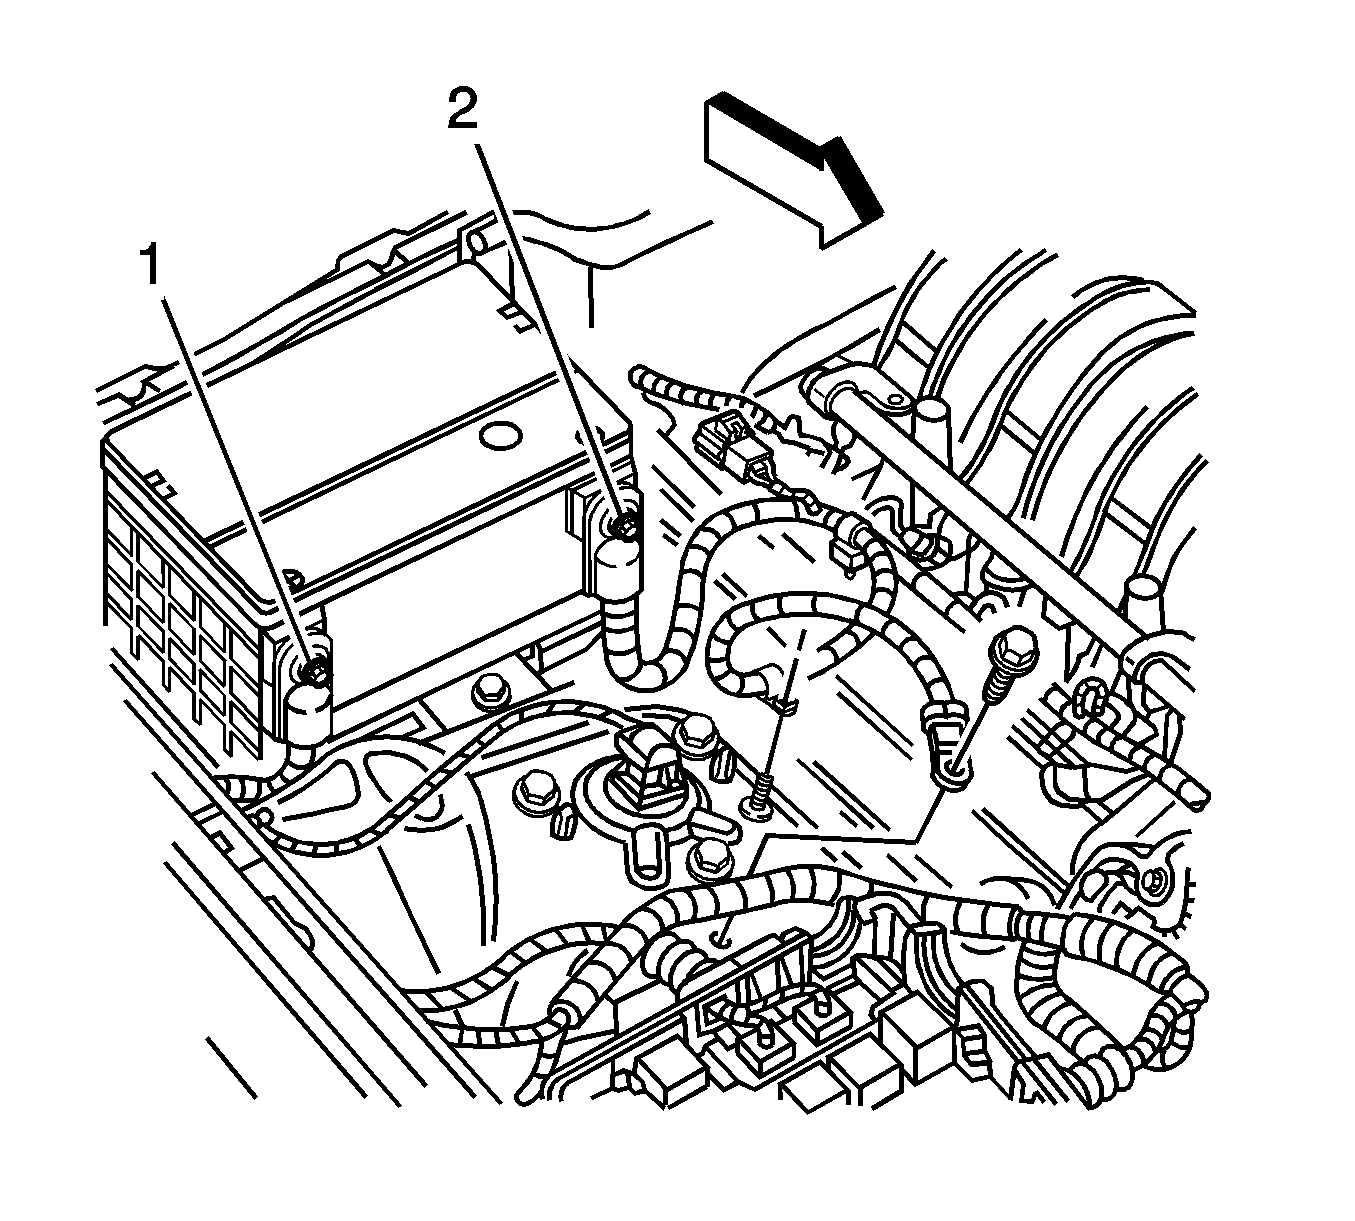
- Remove the nut (1) securing the battery positive cable (2) to the electrical center.
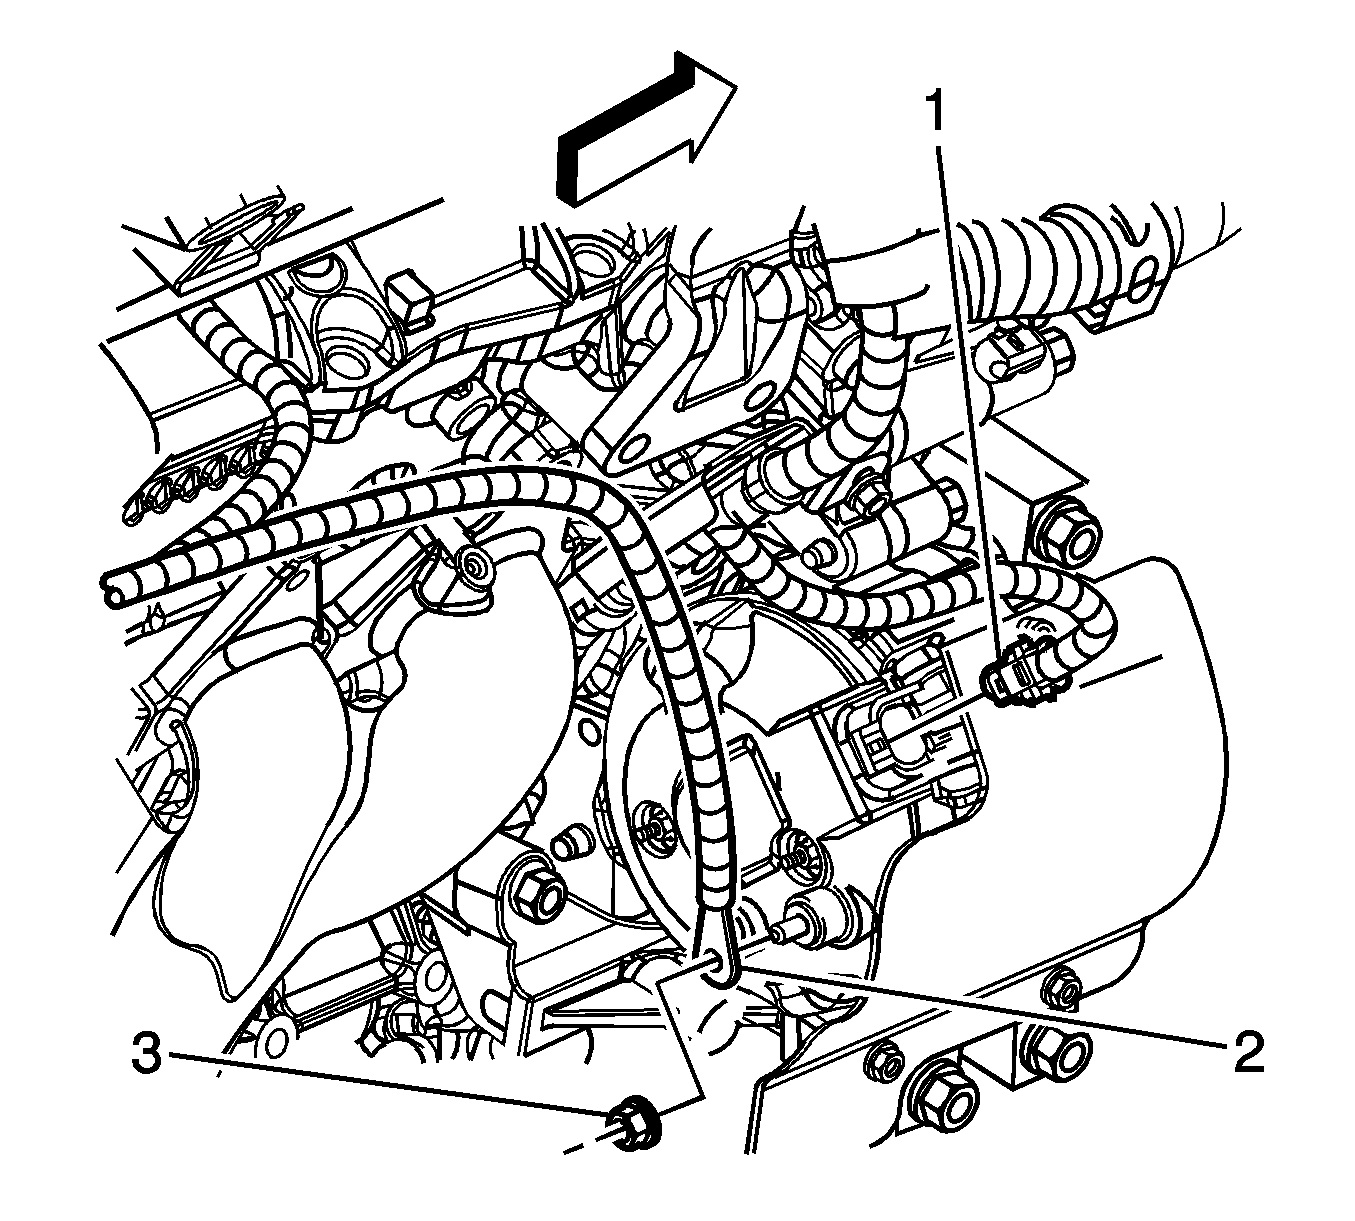
- Reposition the protective boot from the generator output battery terminal for access.
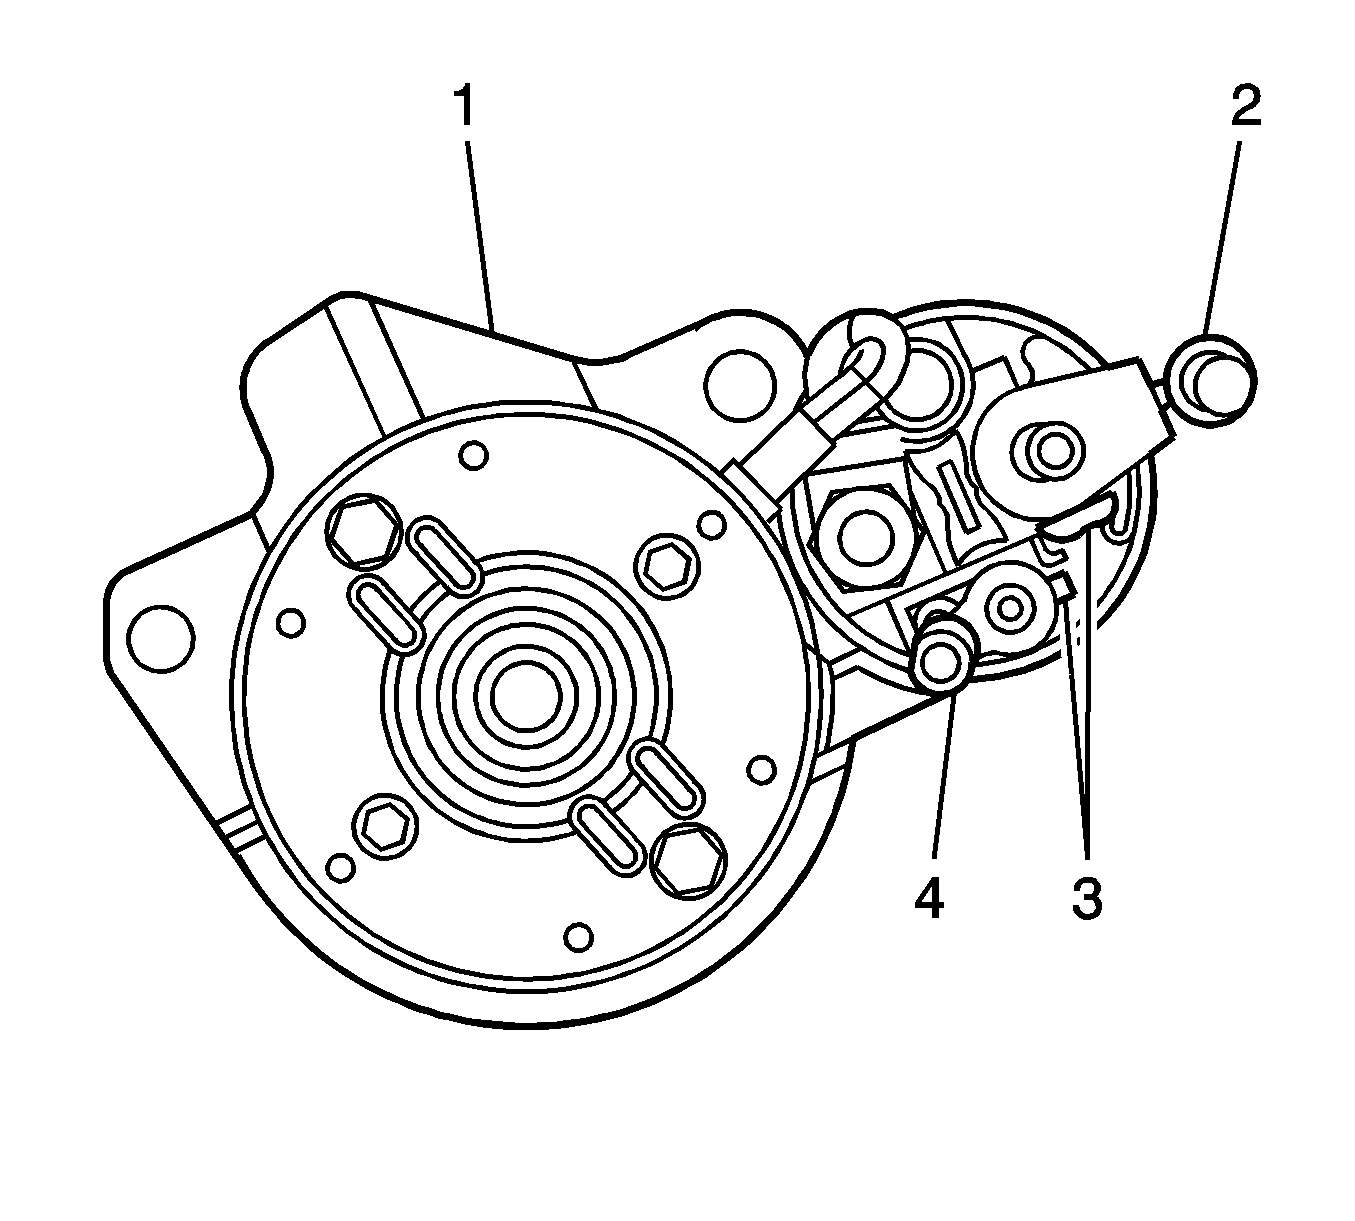
- Remove the generator output BAT terminal nut (3) and disconnect the battery positive lead (2) from the generator.
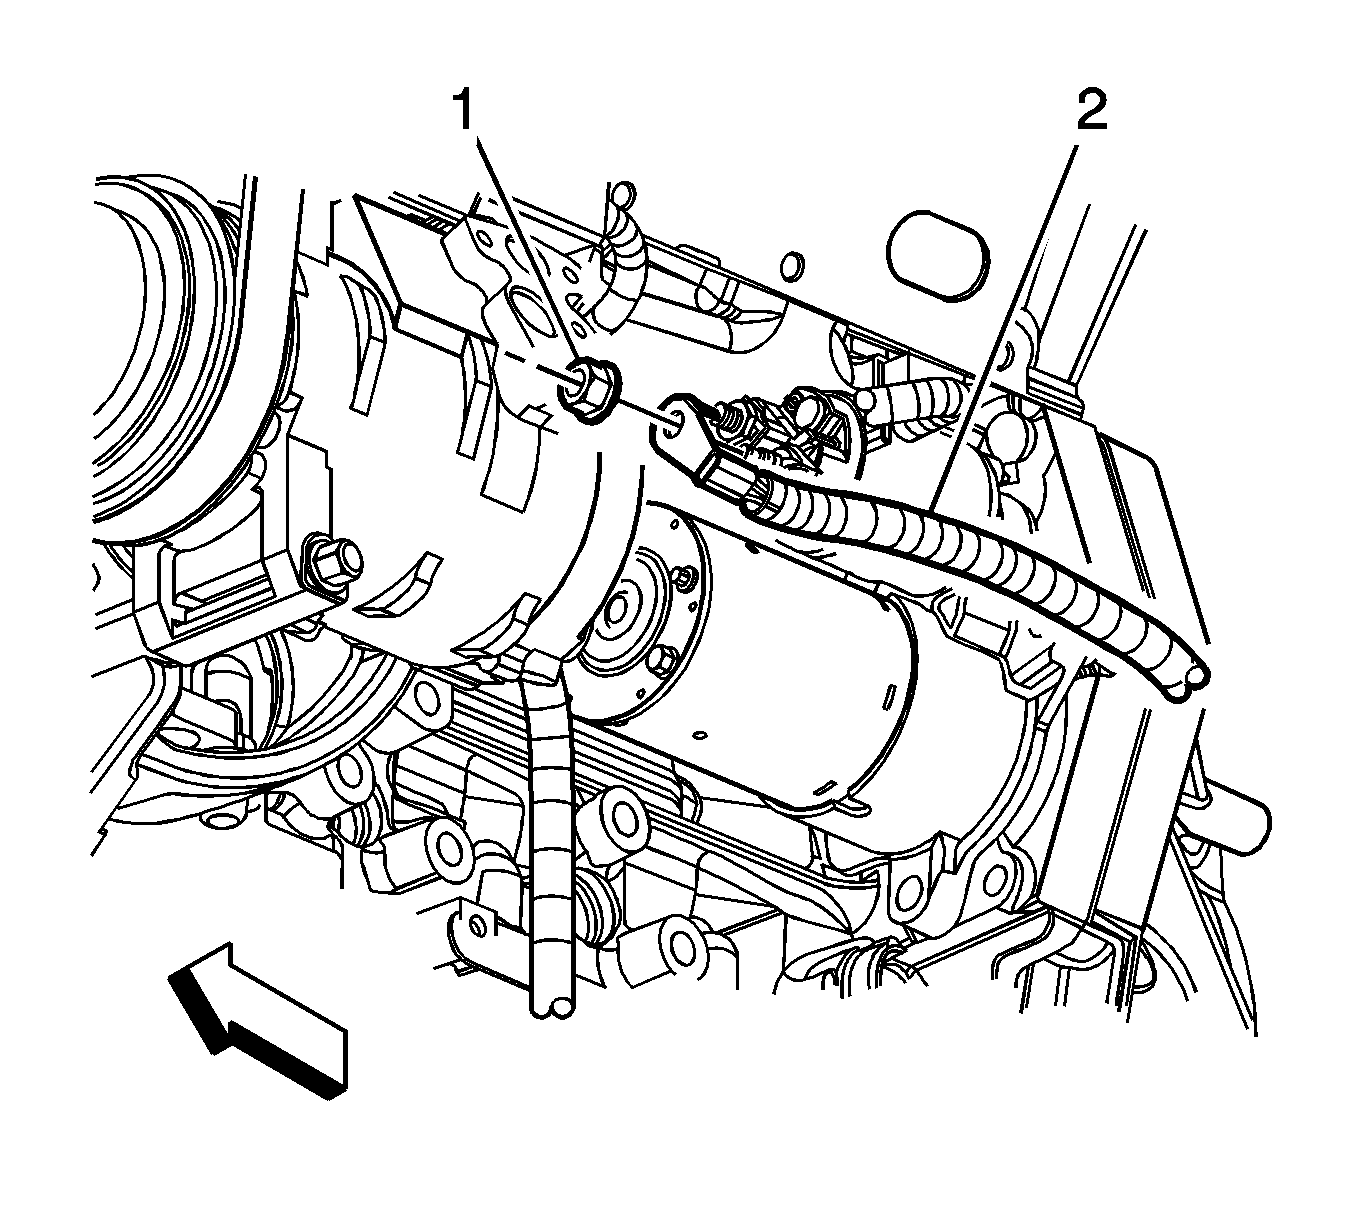
- Remove the starter terminal nut (1) and the battery positive cable (2) from the starter.
- Lower the vehicle.
- Remove the battery positive cable from the engine.
Installation Procedure
- Position the battery positive cable to the engine.
- Raise and support the vehicle. Refer to Lifting and Jacking the Vehicle.
- Connect the battery positive cable (2) to the starter and install the starter terminal nut (1) and tighten to 10 N·m (89 lb in).
- Connect the battery positive lead (2) to the generator and install the generator BAT terminal nut (3) and tighten to 13 N·m (115 lb in.
- Install the protective boot to the generator output BAT terminal.
- Lower the vehicle.
- Install the nut (1) securing the battery positive cable (2) to the underhood fuse block and tighten to 15 N·m (11 lb ft).
- Install the electrical center cover.
- Connect the battery positive cable to the battery and tighten to 17 N·m (13 lb ft).
- Connect the battery negative cable. Refer to Battery Negative Cable Disconnection and Connection.
Caution: Refer to Fastener Caution in the Preface section.
Battery Positive Cable Replacement LH2
Removal Procedure
Note:
• Always use replacement cables that are of the same type, diameter and length of the cables that you are replacing. • Always route the replacement cable the same way as the original cable.
- Disconnect the battery negative cable (2). Refer to Battery Negative Cable Disconnection and Connection.
- Disconnect the battery positive cable (1) from the battery.
- Remove the wiring harness from the retaining features on the underhood fuse block cover.
- Depress the tabs in order to remove the underhood fuse block cover from the underhood fuse block.
- Remove the nut (1) securing the battery positive cable (2) to the underhood fuse block.
- Disconnect the cable retaining clip from the stud.
- Remove the intake manifold. Refer to Intake Manifold Replacement.
- Remove the positive battery cable (2) from the starter motor.
- Remove the positive battery cable from the retaining features on the engine wiring harness bracket.
- Remove the positive battery cable from the vehicle.
Installation Procedure
- Position the battery positive cable to the engine.
- Install the positive battery cable to the retaining features on the engine wiring harness bracket.
- Connect the battery positive cable (2) to the starter then install the starter terminal nut and tighten to 10 N·m (89 lb in).
- Install the intake manifold. Refer to Intake Manifold Replacement.
- Connect the cable retaining clip to the stud.
- Install battery positive cable (2) and nut (1) to the underhood fuse block and tighten to 15 N·m (11 lb ft).
- Install the underhood fuse block cover to the underhood fuse block.
- Install the wiring harness to the retaining features on the underhood fuse block cover.
- Connect the battery positive cable to the battery and tighten to 17 N·m (13 lb ft).
- Connect the battery negative cable. Refer to Battery Negative Cable Disconnection and Connection.
Caution: Refer to Fastener Caution in the Preface section.
