For 1990-2009 cars only
Radiator Replacement LY7
Special Tools
J 38185 Hose Clamp Pliers
Removal Procedure
- Drain the coolant. Refer to Cooling System Draining and Filling.
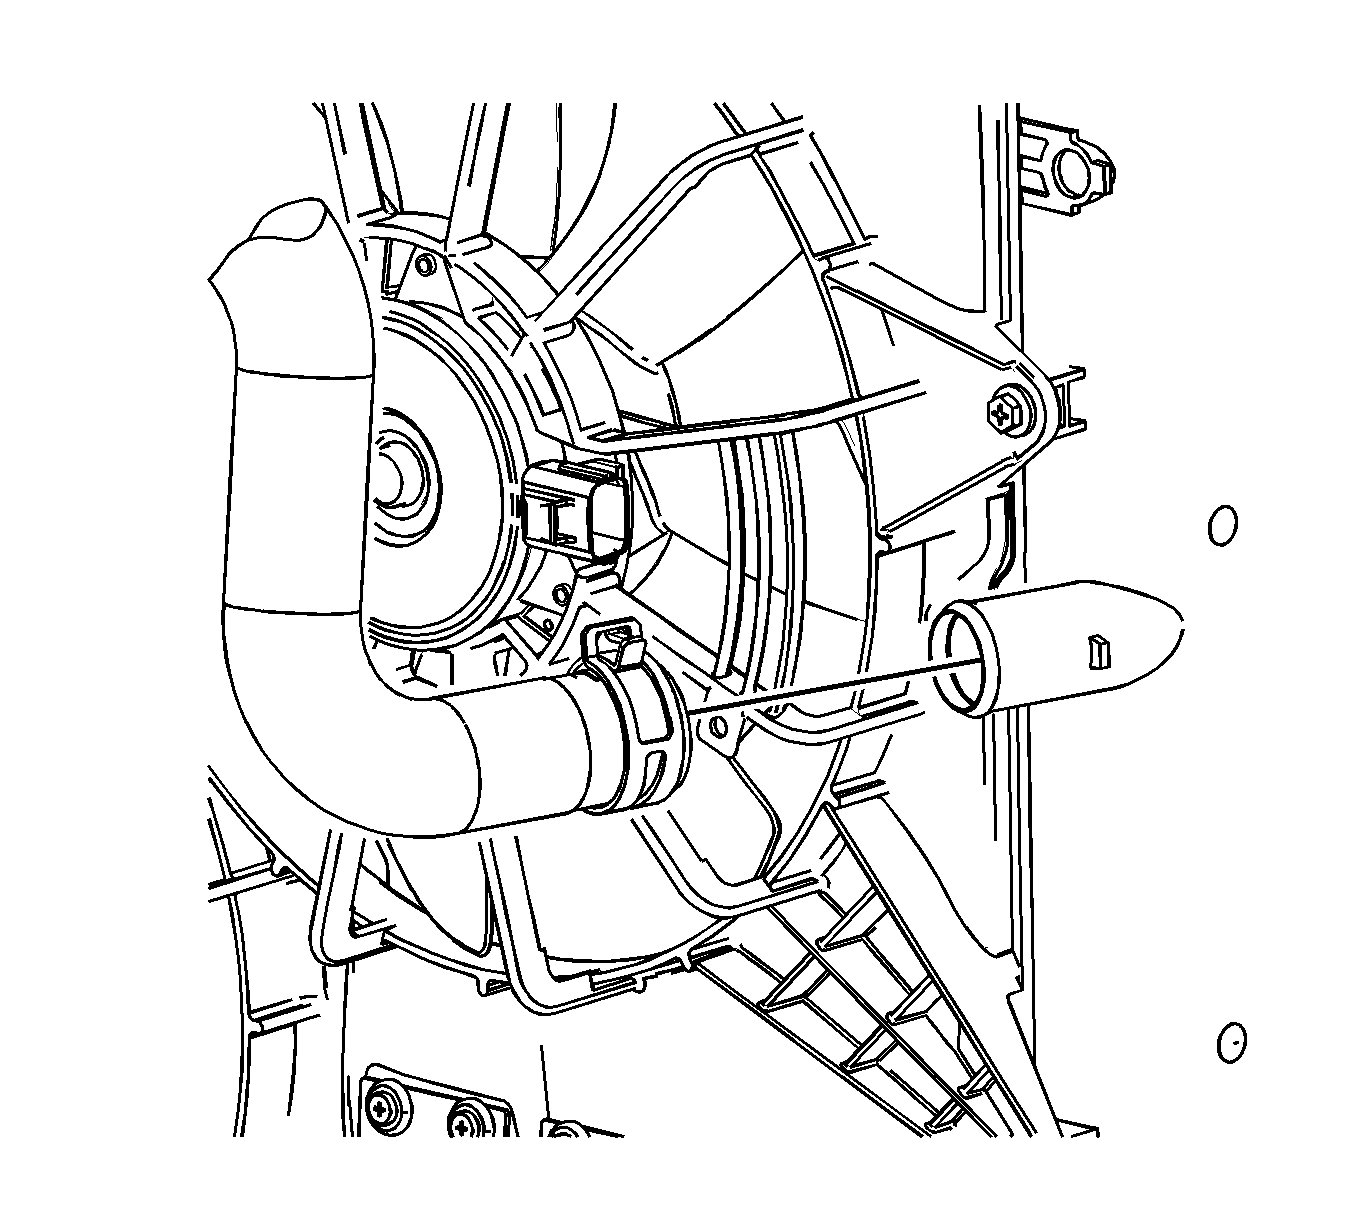
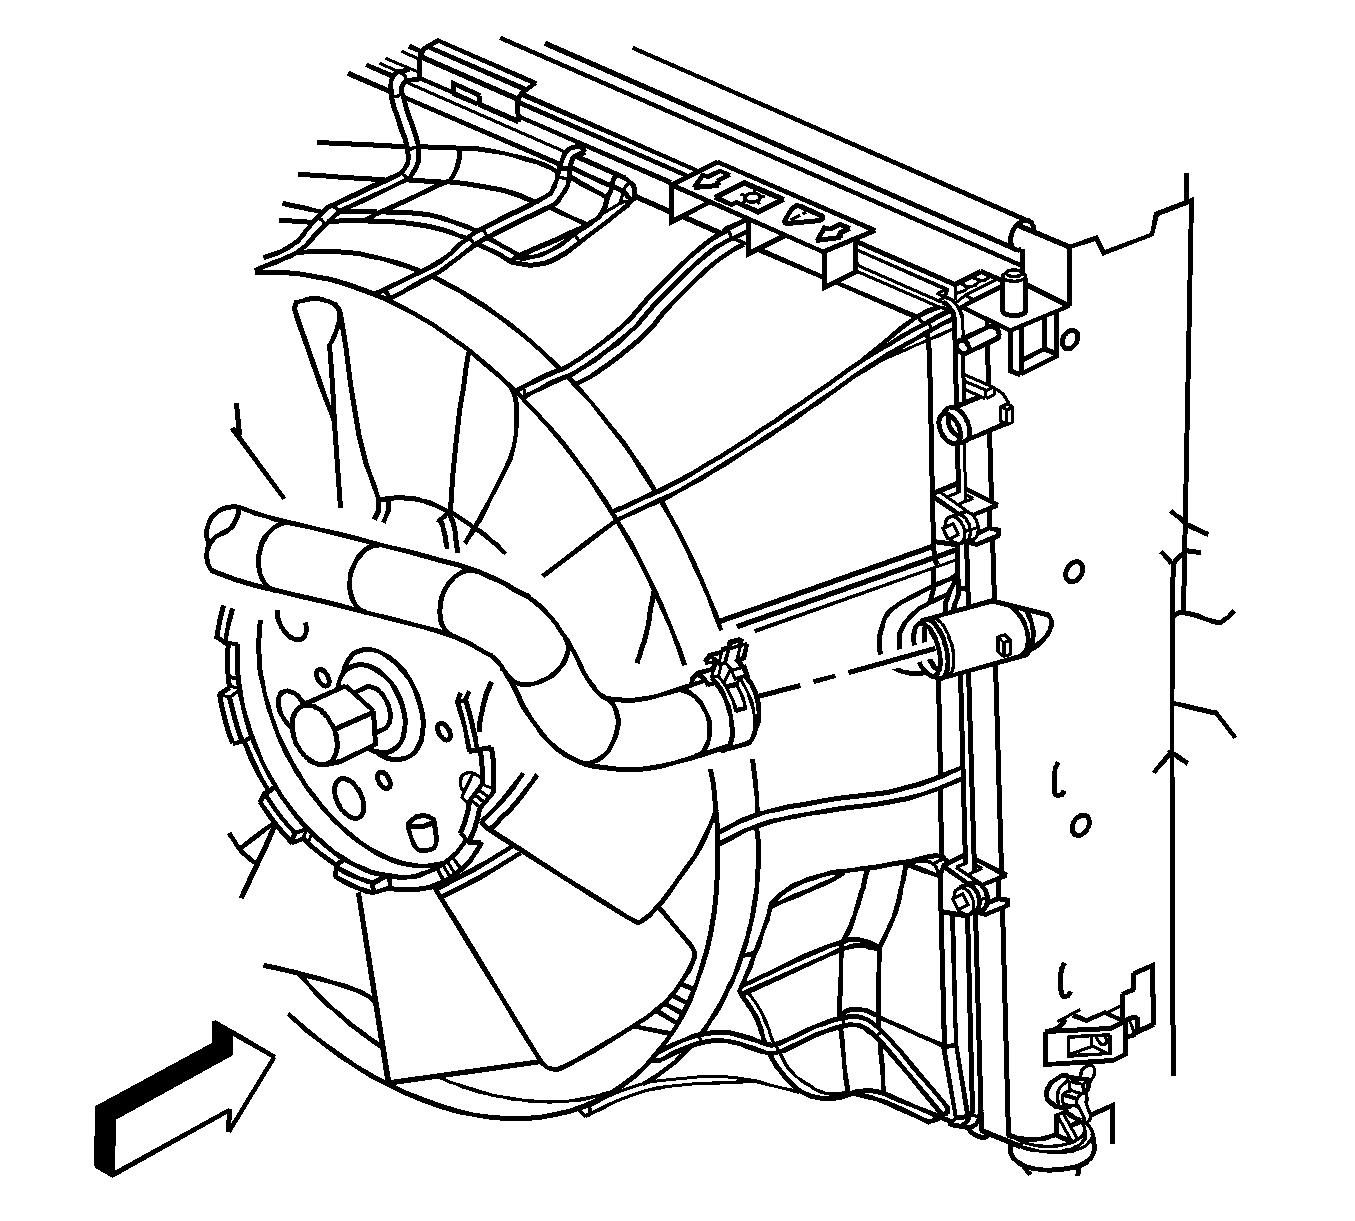
- Remove the electric cooling fan assembly. Refer to Air Cleaner Inlet Duct Replacement.
- Raise and support the vehicle. Refer to Lifting and Jacking the Vehicle.
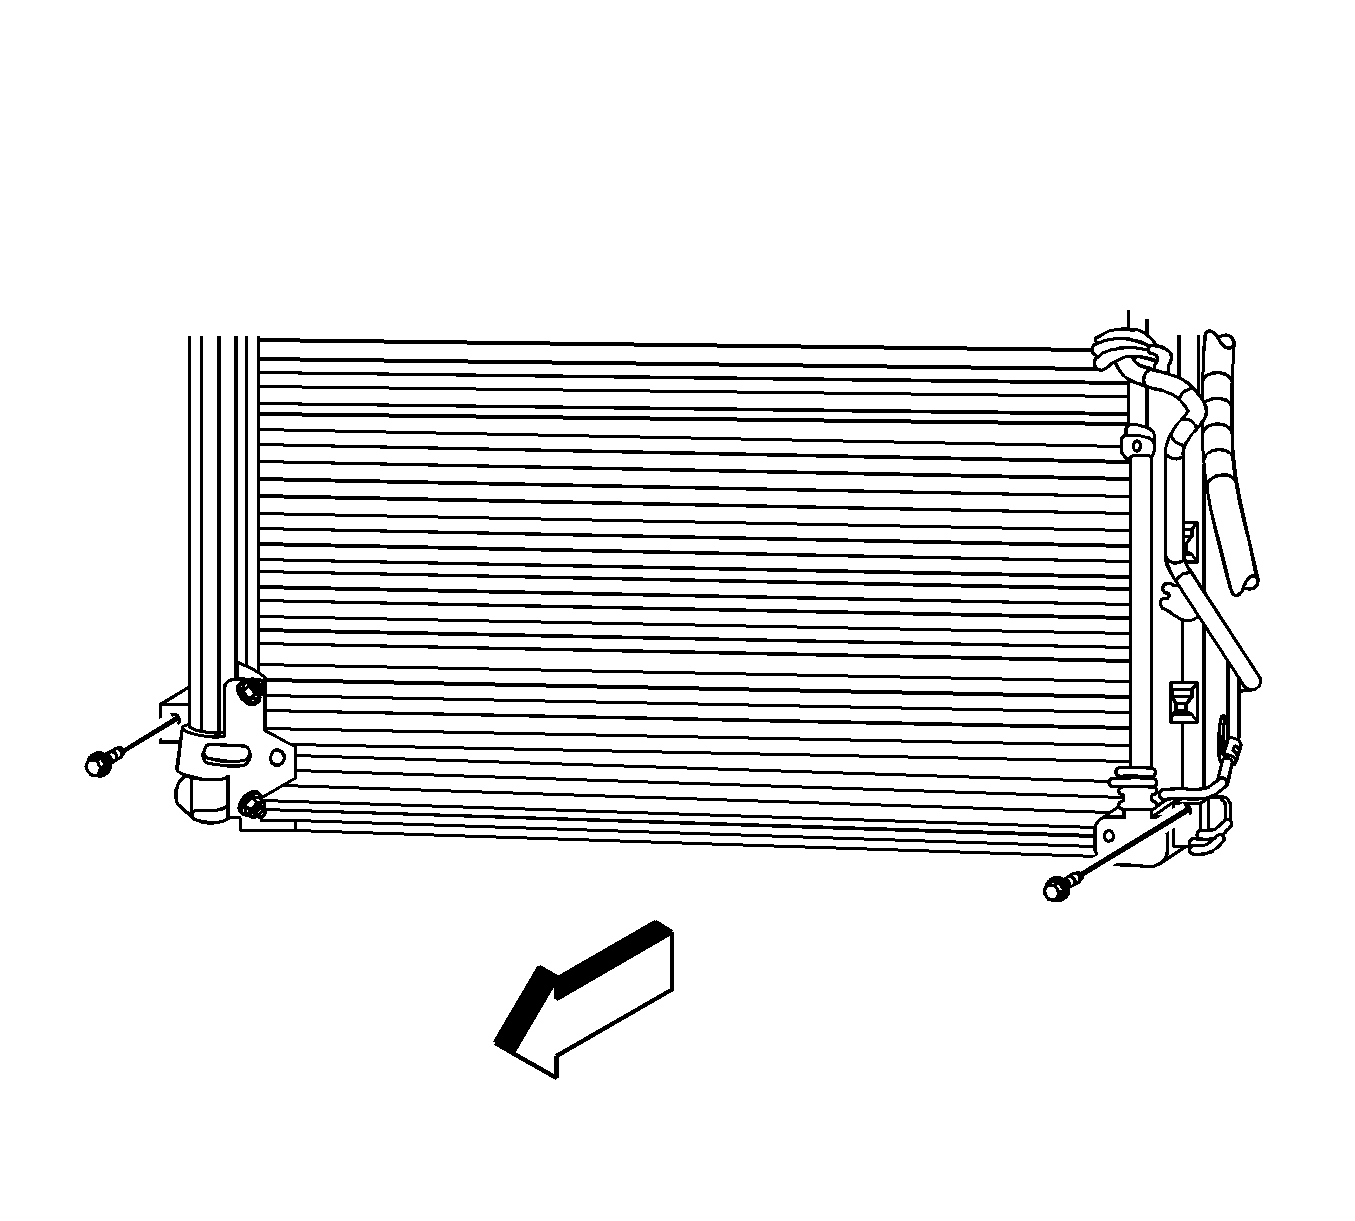
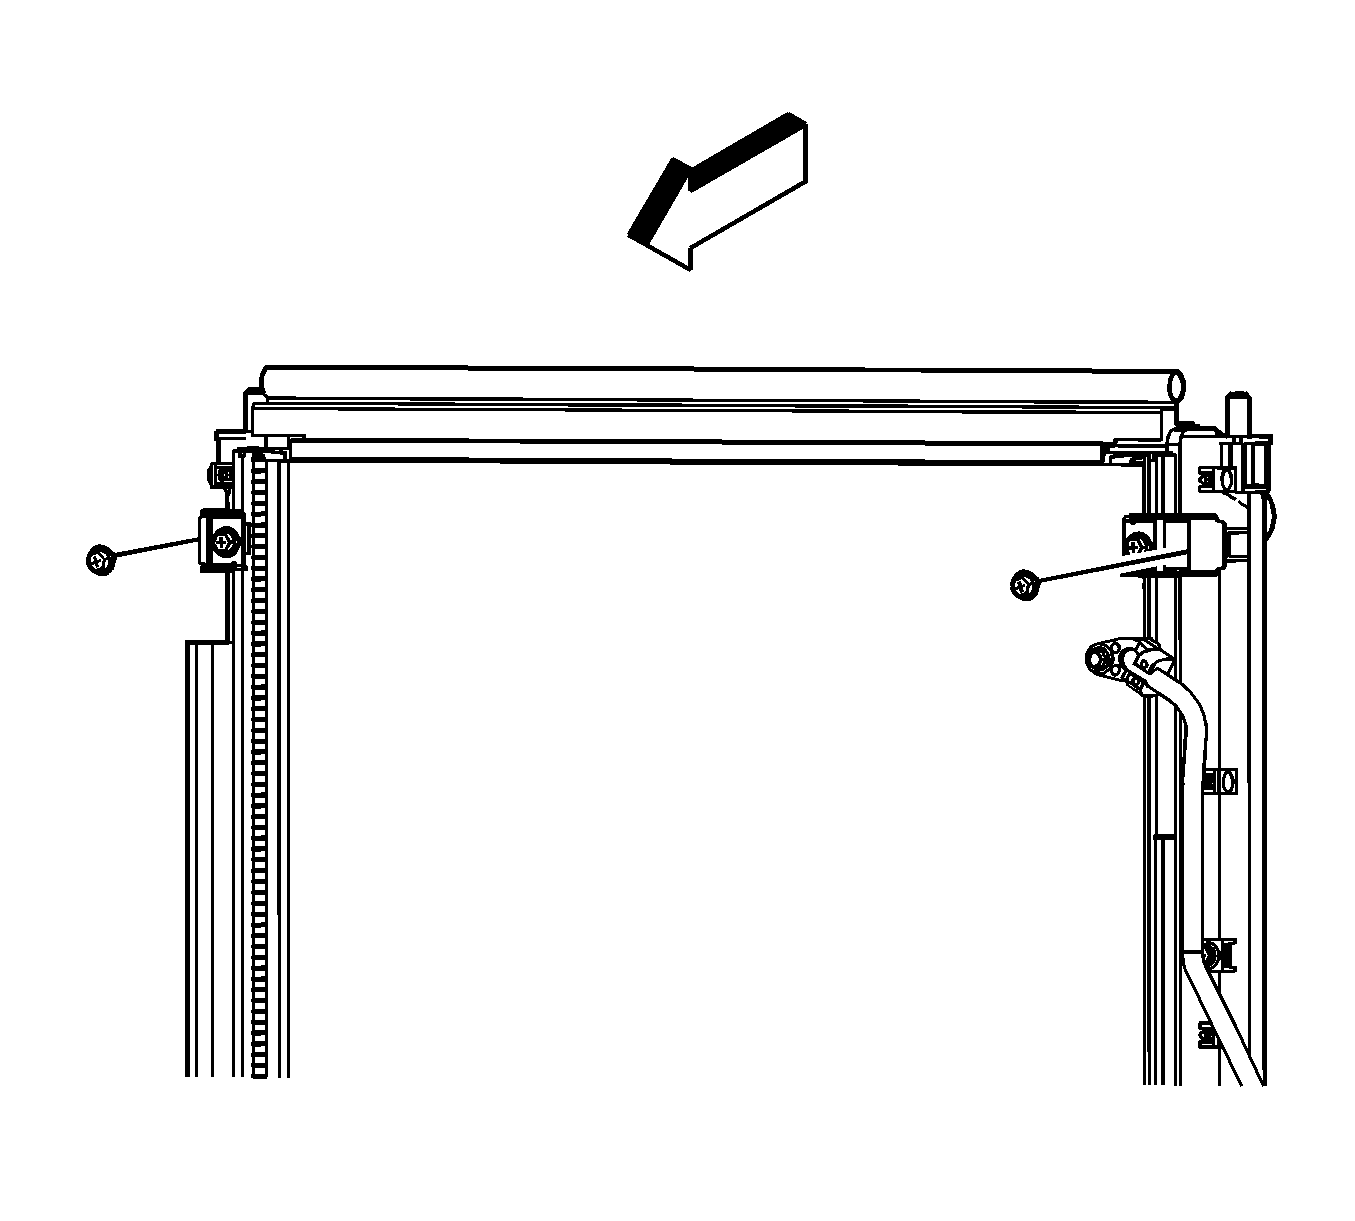
- Remove the lower condenser mounting bolts.
- Remove the upper condenser mounting bolts.
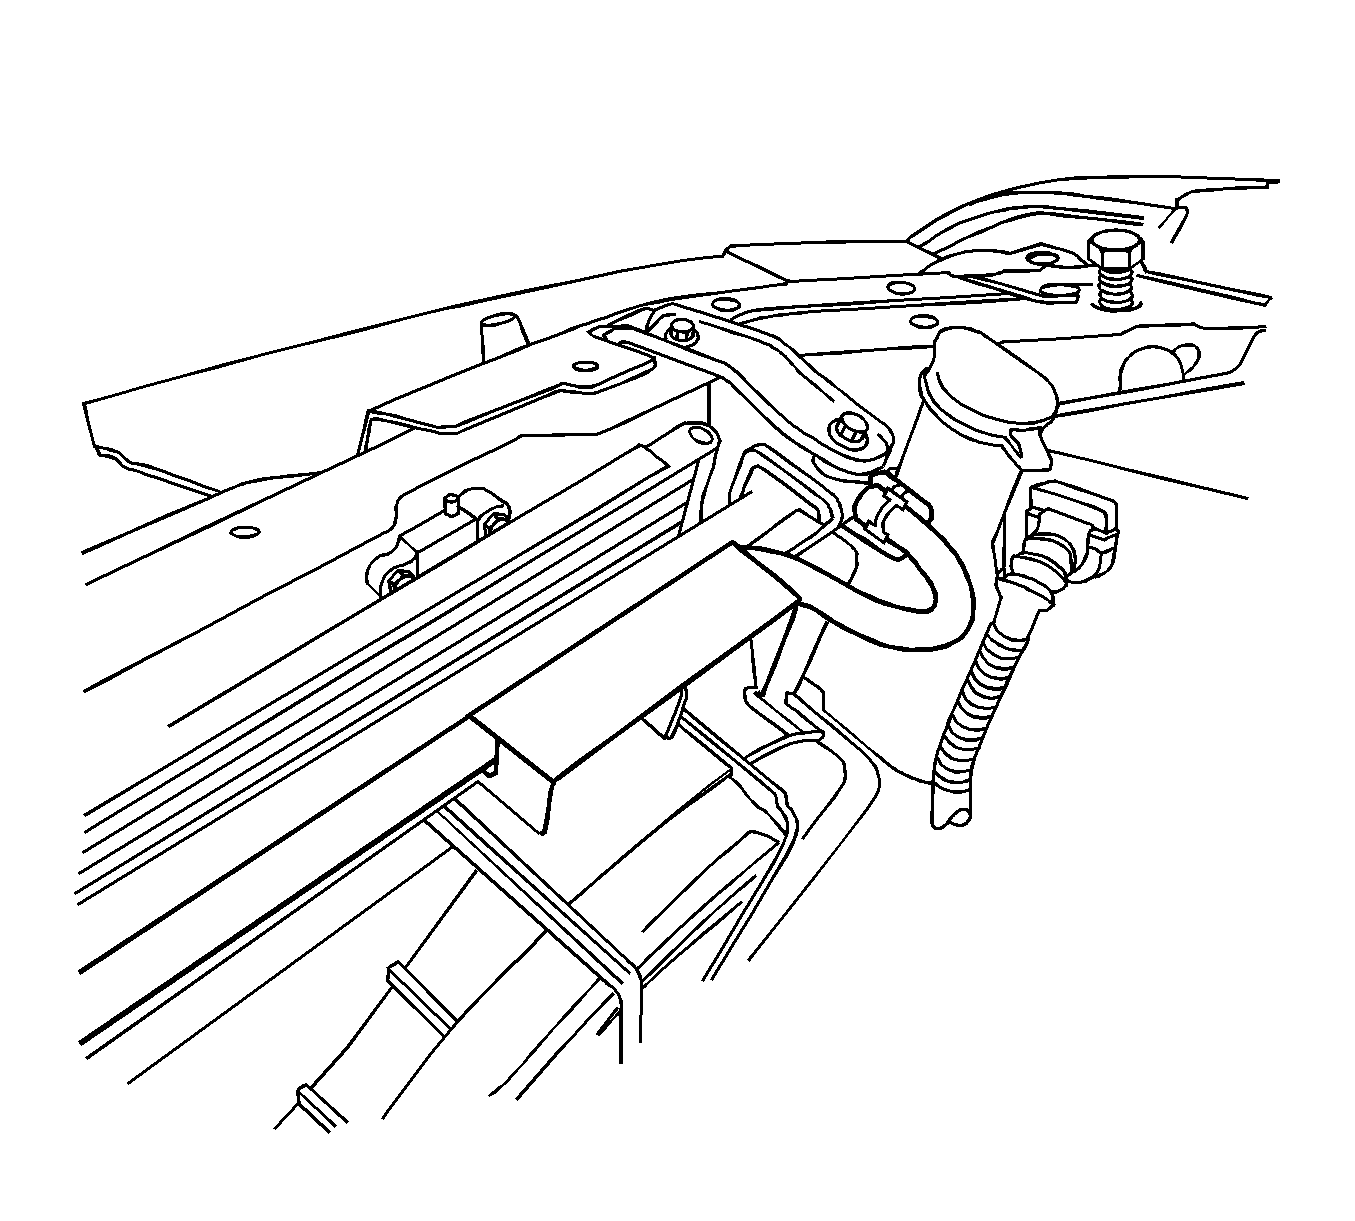
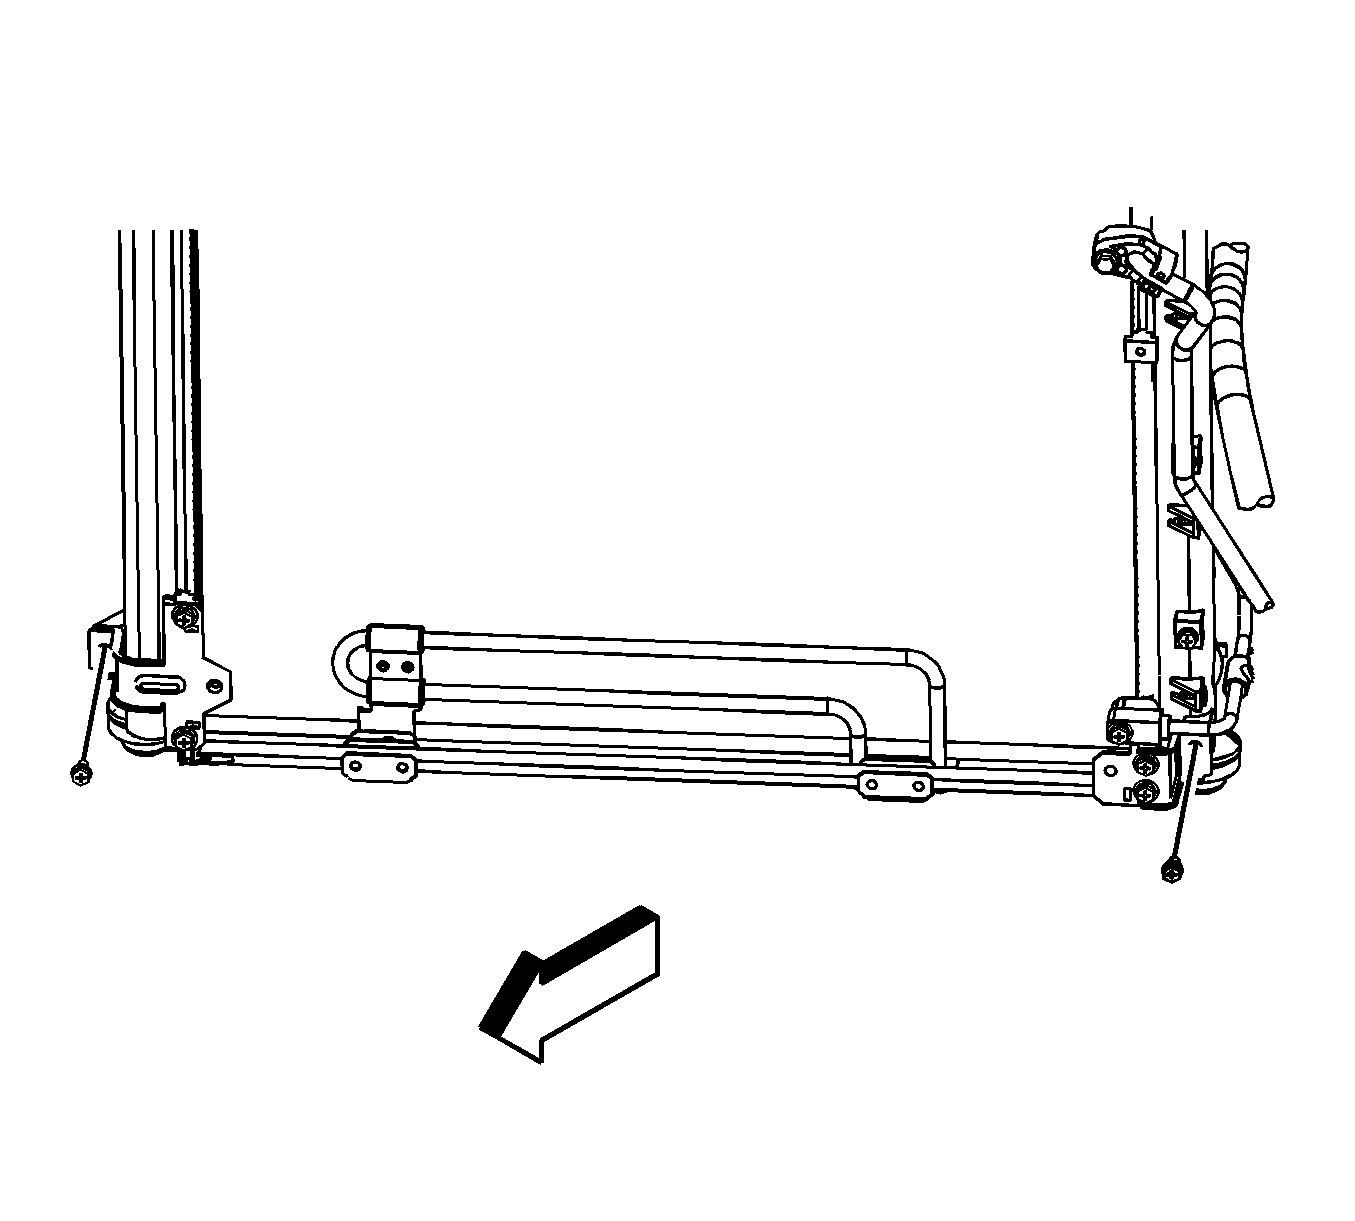
- Remove the transmission oil cooler (TOC) inlet pipe retaining bolt.
- Disconnect the transmission oil cooler inlet pipe from radiator.
- Remove the transmission oil cooler outlet pipe retaining bolt.
- Disconnect the transmission oil cooler outlet pipe from radiator.
- Disconnect the lower retainer pins of the side air baffle from the radiator.
- Lower the vehicle.
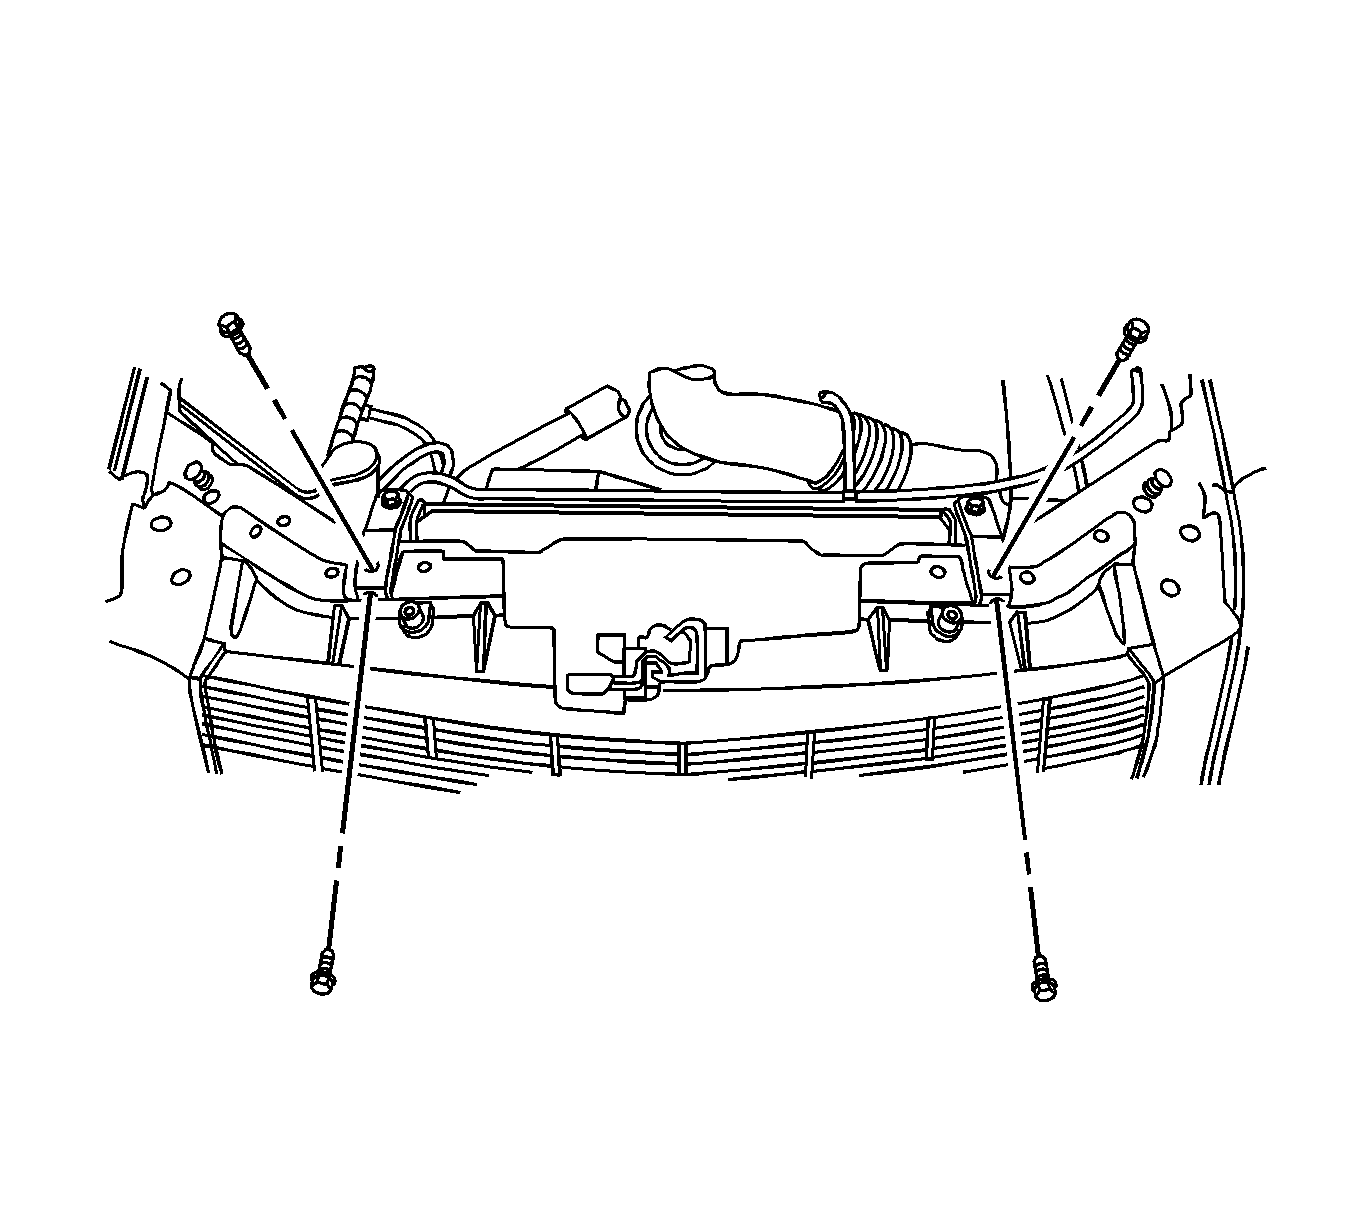
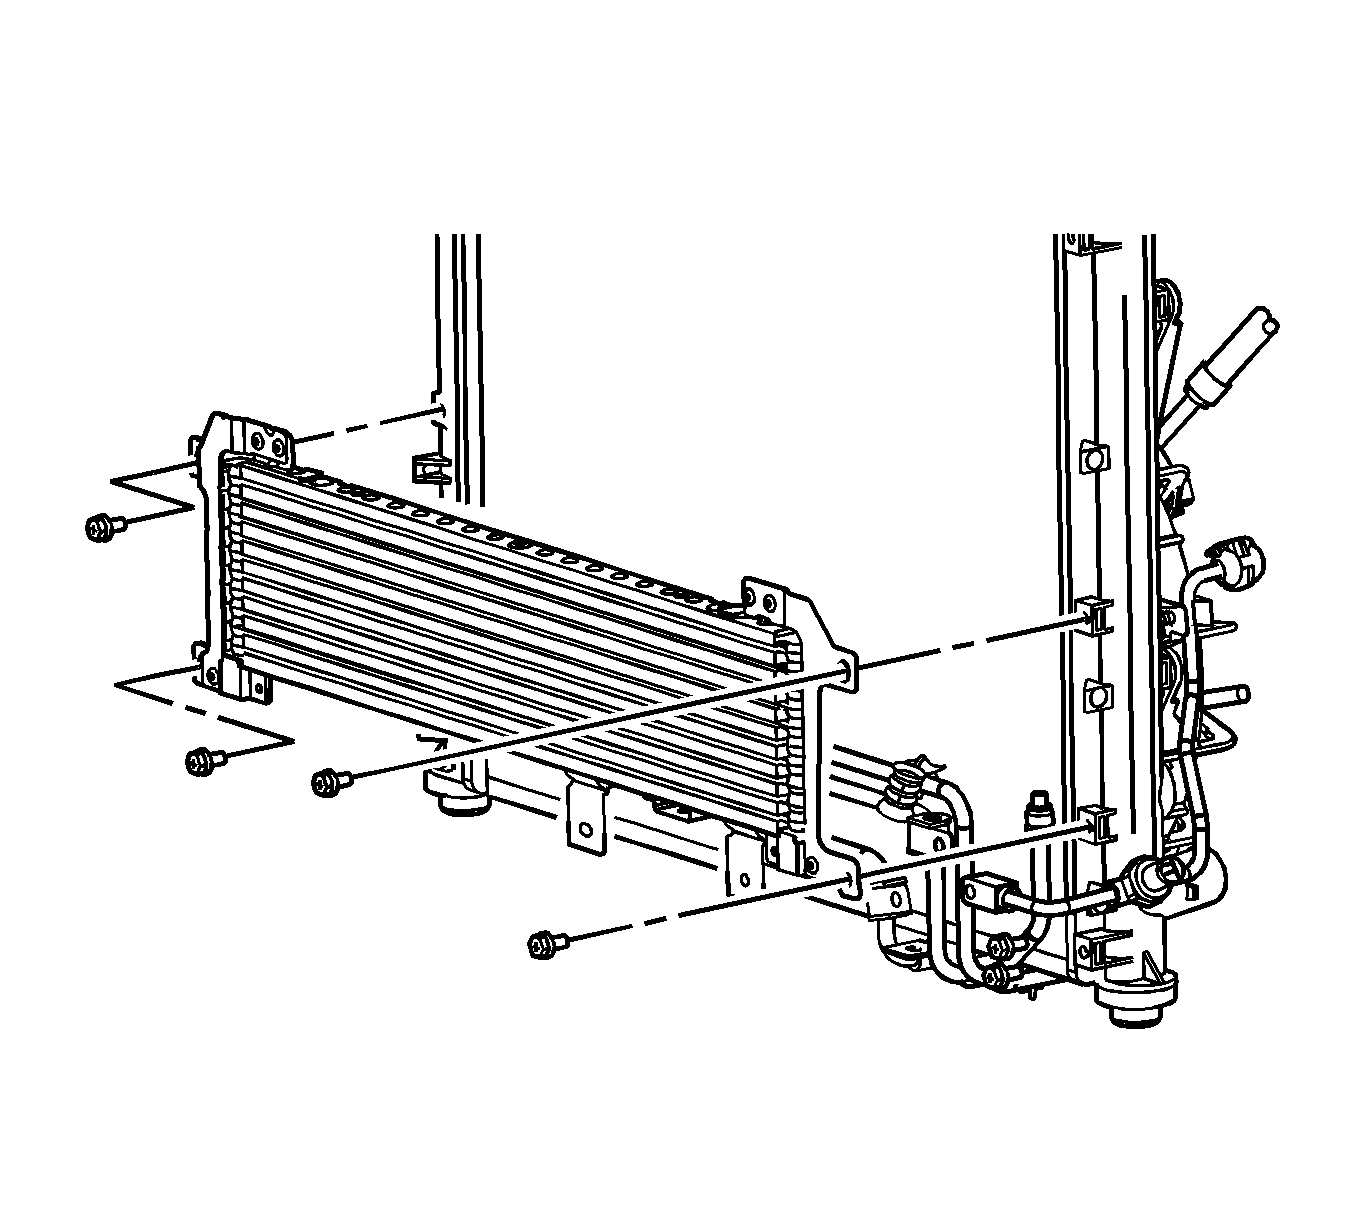
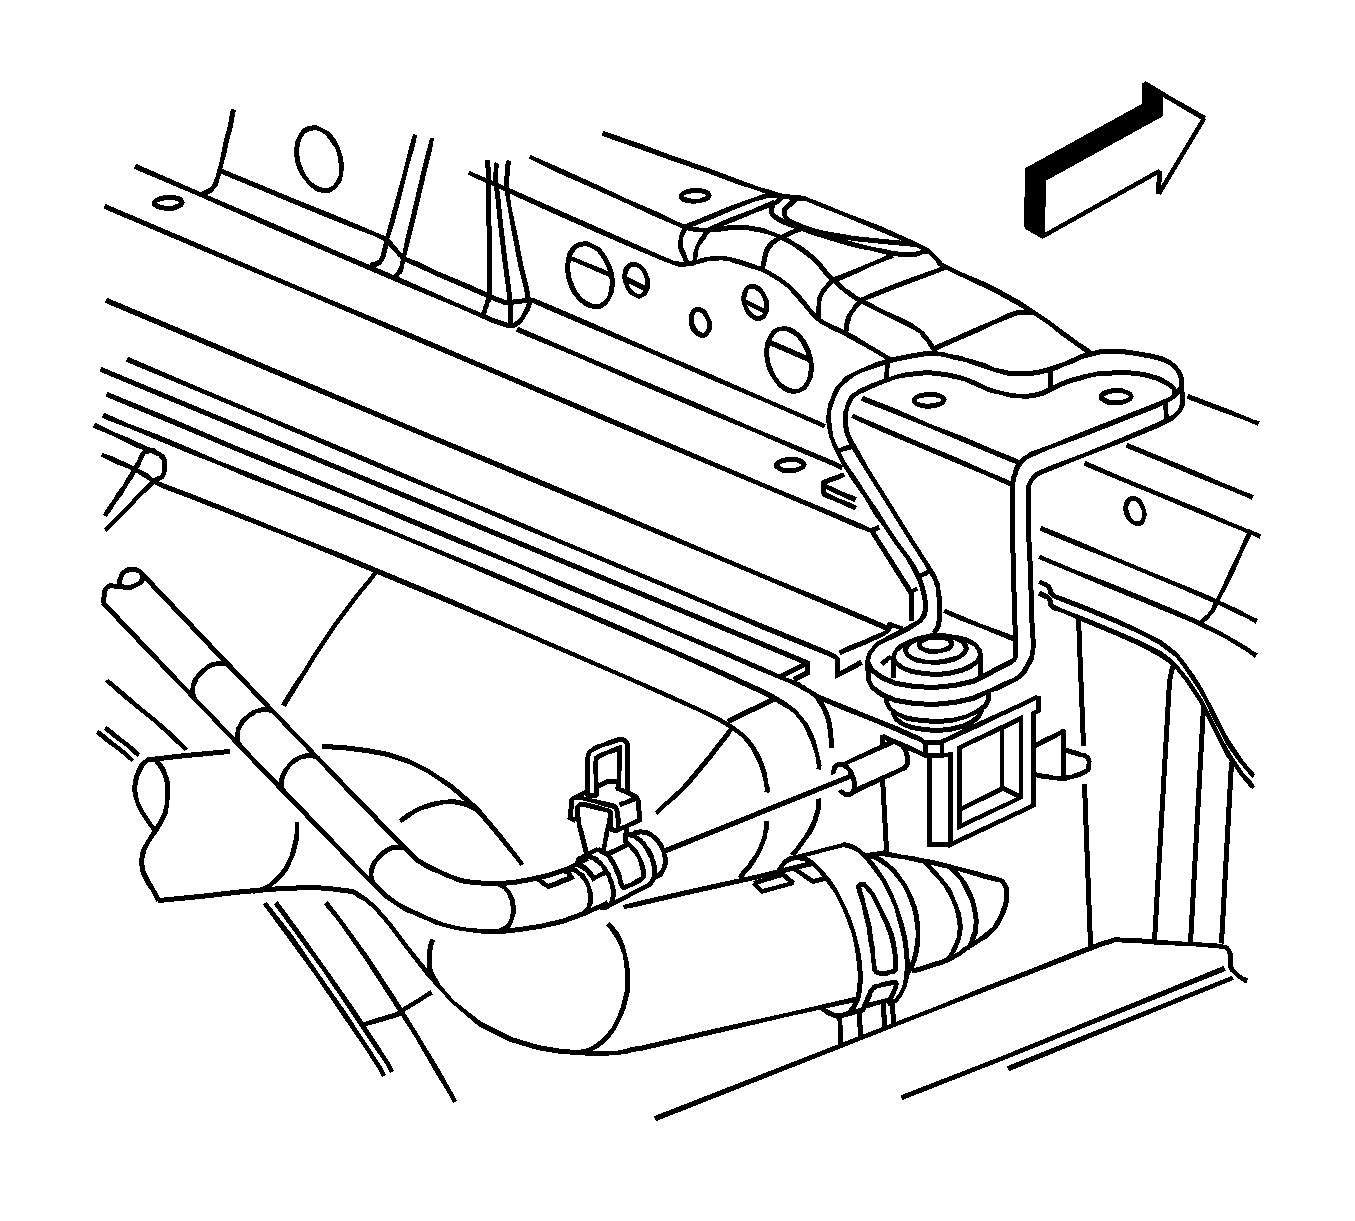
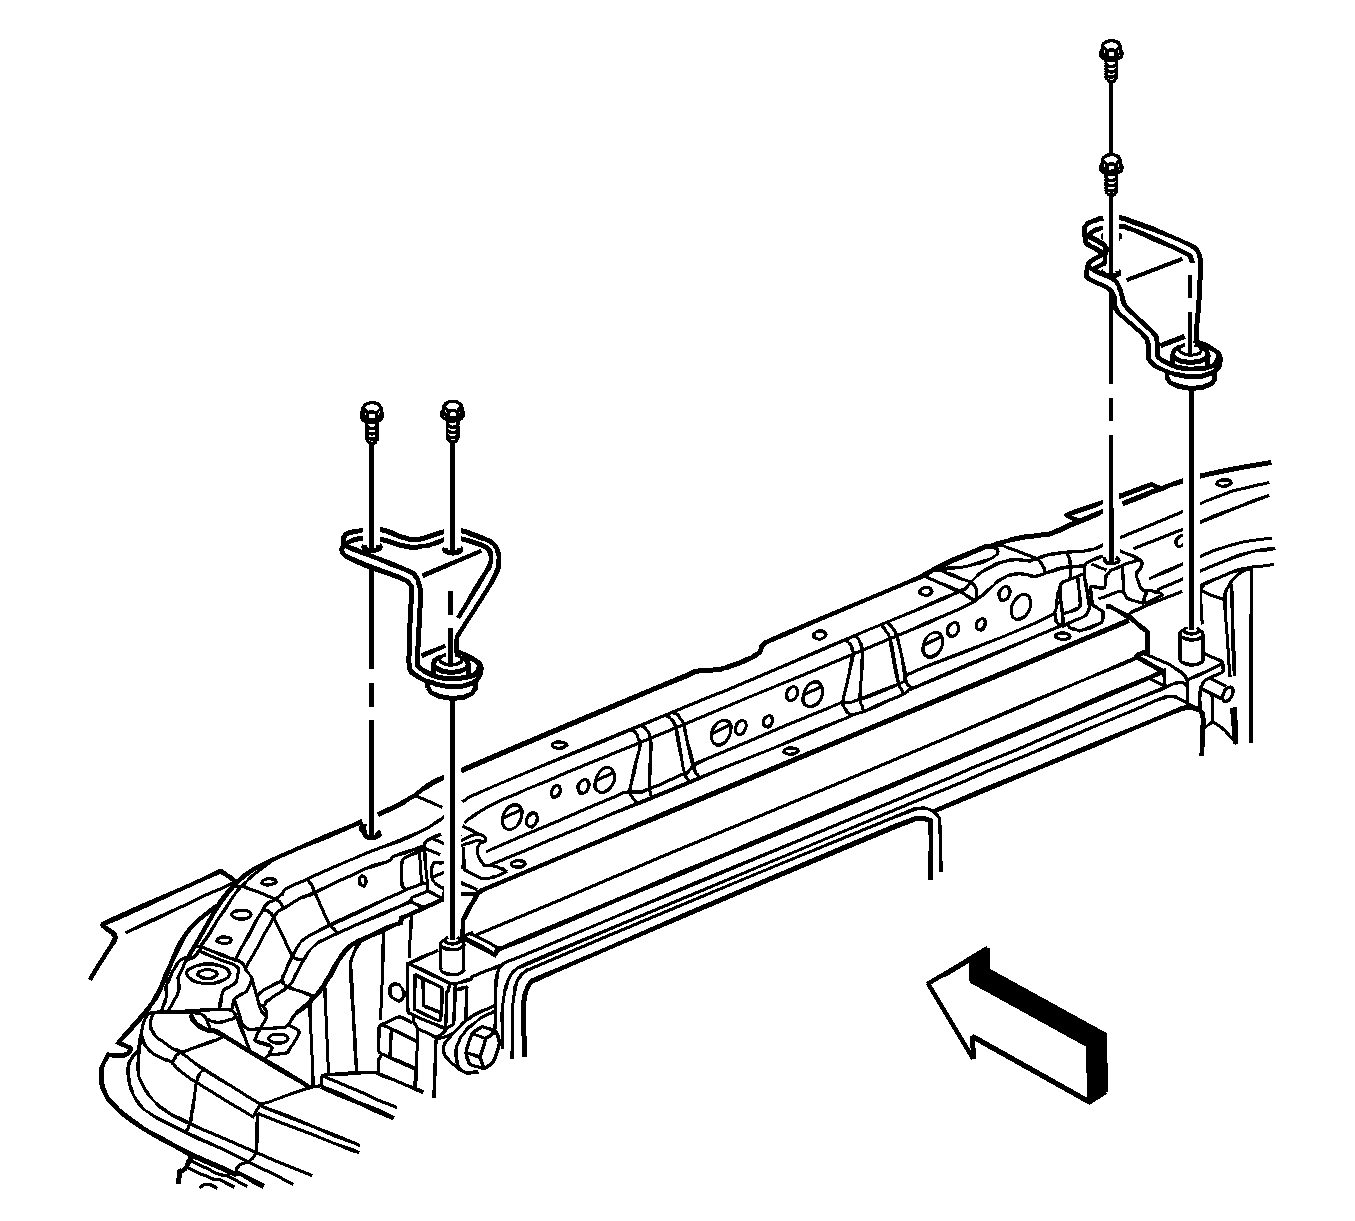
- Remove the radiator support bracket bolts.
- Remove the radiator support brackets.
- Use J 38185 to disconnect the surge tank inlet hose from the radiator. Reposition the hose aside.
- Using J 38185 , loosen tension on the radiator inlet hose clamp and disconnect the hose from the radiator.
- Using J 38185 , loosen tension on the radiator outlet hose clamp and disconnect the hose from the radiator.
- Disconnect the upper retainer pins on the side air baffle from the radiator.
- Remove the radiator.


Note: Reposition the condenser to access the transmission oil cooler mounting bolts.
Installation Procedure
- Install the radiator.
- Connect the upper retainer pins of the side air baffle to the radiator.
- Connect the radiator outlet hose to the radiator. Use J 38185 to position the radiator outlet hose clamp and secure the hose.
- Connect the radiator inlet hose to the radiator. Use J 38185 to position the radiator inlet hose clamp and secure the hose.
- Connect the surge tank inlet hose to the radiator. Use J 38185 to position the hose clamp and secure the hose.
- Install the radiator support brackets.
- Install the radiator support bracket bolts.
- Raise and support the vehicle.
- Connect the lower retainer pins of the side air baffle to the radiator.
- Install the transmission oil cooler (TOC) inlet pipe retaining bolt.
- Install the transmission oil cooler outlet pipe retaining bolt.
- Install the upper condenser mounting bolts.
- Install the lower condenser mounting bolts.
- Lower the vehicle.
- Install the electric cooling fan assembly. Refer to Air Cleaner Inlet Duct Replacement.
- Fill the cooling system. Refer to Cooling System Draining and Filling.
Caution: Refer to Fastener Caution in the Preface section.
Tighten
Tighten the bolts to 9 N·m (80 lb in).
Tighten
Tighten the bolts to 5 N·m (44 lb in).
Tighten
Tighten the bolts to 5 N·m (44 lb in).
Tighten
Tighten the bolts to 5.4 N·m (48 lb in).
Tighten
Tighten the bolts to 5.4 N·m (48 lb in).
Radiator Replacement LH2
Special Tools
J-38185 Hose Clamp Pliers
Removal Procedure
- Drain the coolant. Refer to Cooling System Draining and Filling.
- Remove the electric cooling fan. Refer to Fan Replacement.
- Remove the upper condenser mounting bolts.
- Remove the lower condenser mounting bolts.
- Disconnect the lower retainer pins of the side air baffle from the radiator.
- Remove the transmission oil cooler (TOC) mounting bolts.
- Remove the radiator upper oil cooler outlet pipe.
- Lower the vehicle.
- Remove the fan shroud. Refer to Engine Coolant Fan Shroud Replacement.
- Use J-38185 pliers to loosen the tension on the hose clamp. Remove the radiator outlet hose from the radiator.
- Use J-38185 pliers to loosen the tension on the hose clamp. Remove the radiator inlet hose from the radiator.
- Use J-38185 pliers to loosen the tension on the hose clamp. Remove the surge tank inlet hose from the radiator.
- Remove the oil cooler inlet pipe on the radiator.
- Remove the radiator support bracket bolts.
- Remove the radiator support brackets.
- Disconnect the upper air baffle retaining pins from the radiator.
- Remove the radiator.
Note: Reposition the condenser to access the transmission oil cooler mounting bolts.
Installation Procedure
- Install the radiator.
- Connect the upper air baffle retaining pins to the radiator.
- Install the radiator support brackets.
- Install the radiator support bracket bolts and tighten to 9 N·m (80 lb in).
- Connect the surge tank inlet hose to the radiator. Use J-38185 pliers to position the surge tank inlet hose clamp to secure the hose.
- Connect the radiator inlet hose to the radiator. Use J-38185 pliers to position the radiator inlet hose clamp and secure the hose.
- Connect the radiator outlet hose to the radiator. Use J-38185 pliers to position the radiator outlet hose clamp and secure the hose.
- Install the radiator upper oil cooler inlet pipe.
- Install the fan shroud. Refer to Engine Coolant Fan Shroud Replacement.
- Raise and Support the vehicle.
- Install the transmission oil cooler (TOC) mounting bolts and tighten to 5 N·m (44 lb in).
- Install the radiator upper oil cooler outlet pipe.
- Connect the lower retainer pins of the side air baffle to the radiator.
- Install the lower condenser mounting bolts and tighten to 5.4 N·m (48 lb in).
- Install the upper condenser mounting bolts and tighten to 5.4 N·m (48 lb in).
- Install the electric auxiliary cooling fan. Refer to Fan Replacement.
- Filling the cooling system. Refer to Cooling System Draining and Filling.
Caution: Refer to Fastener Caution in the Preface section.
