For 1990-2009 cars only
Removal Procedure
- Remove the front seats. Refer to Driver or Passenger Seat Replacement .
- Remove the instrument panel (I/P). Refer to Instrument Panel Assembly Replacement .
- Remove the nuts securing the steering column, lower the steering column. Refer to Steering Column Replacement .
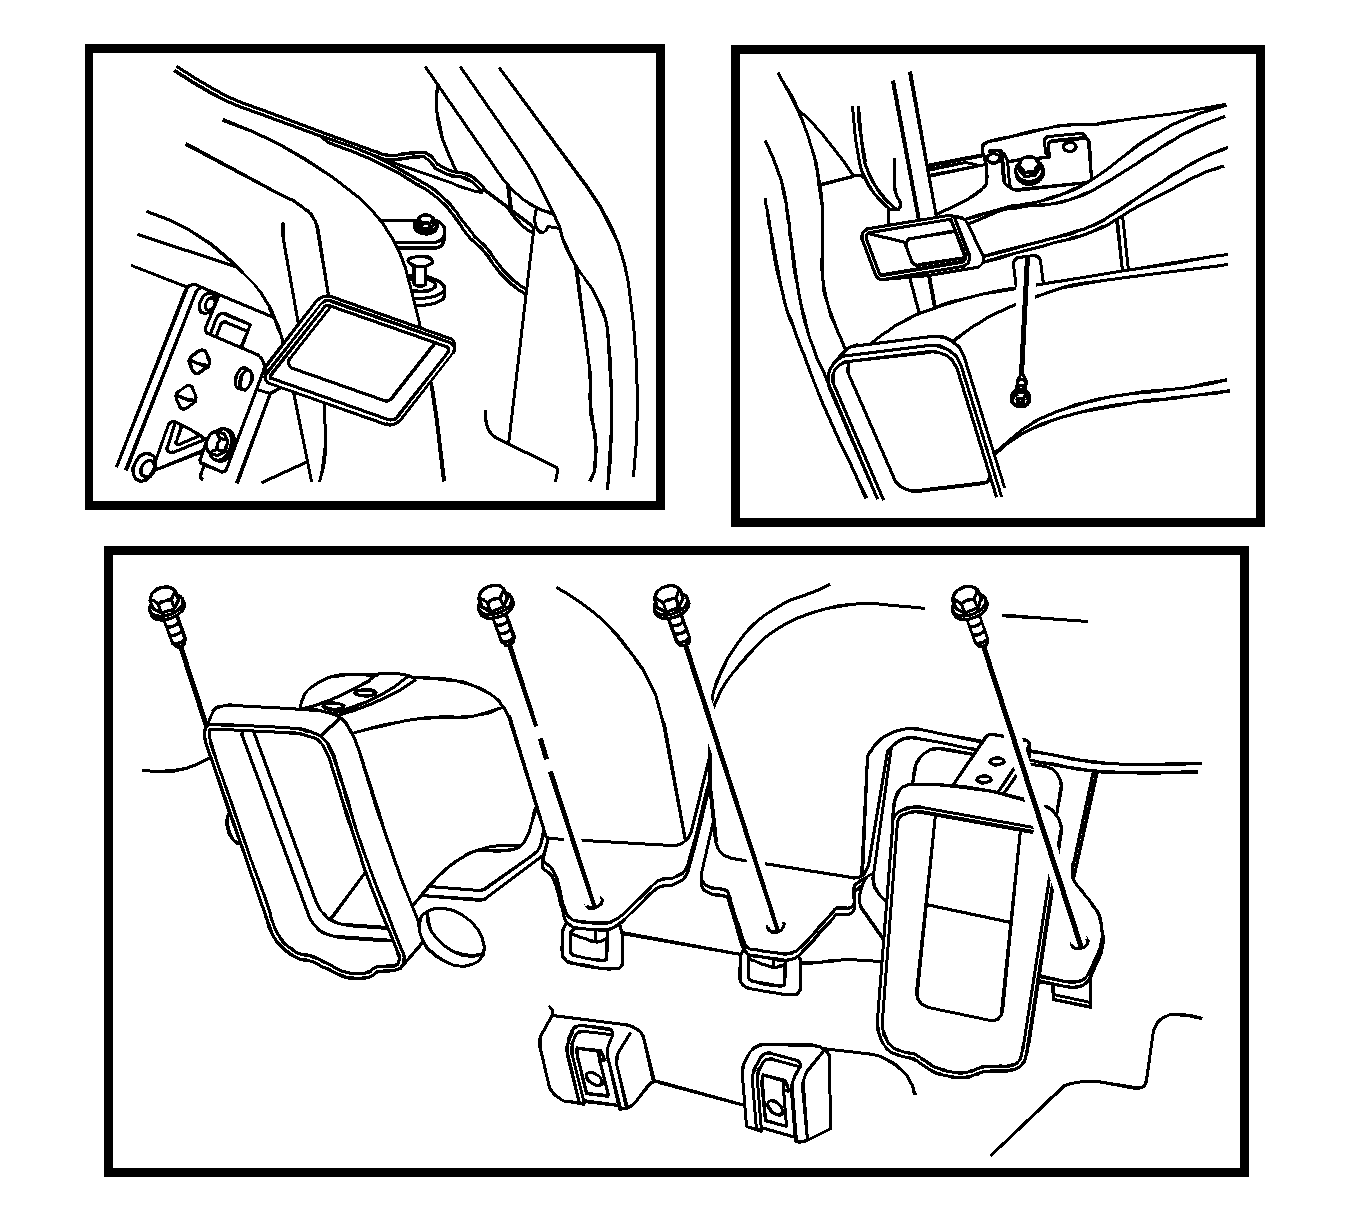
- Remove the bolts securing the air outlet duct.
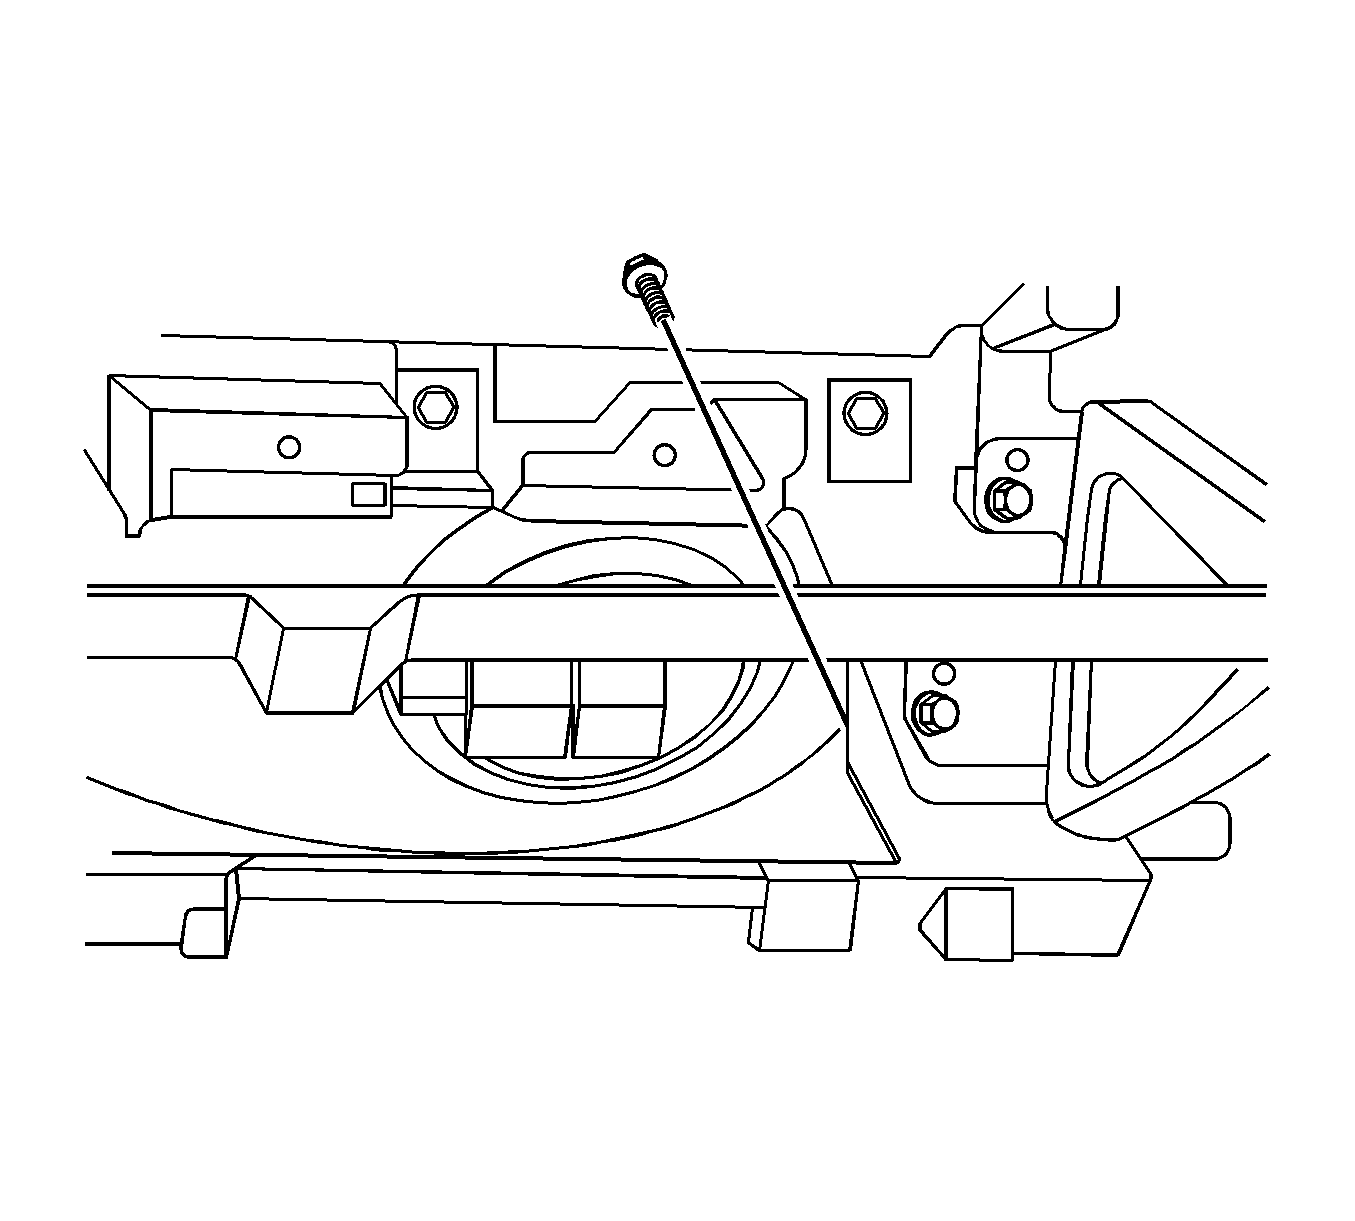
- Remove the bolts securing the diagnostic connector.
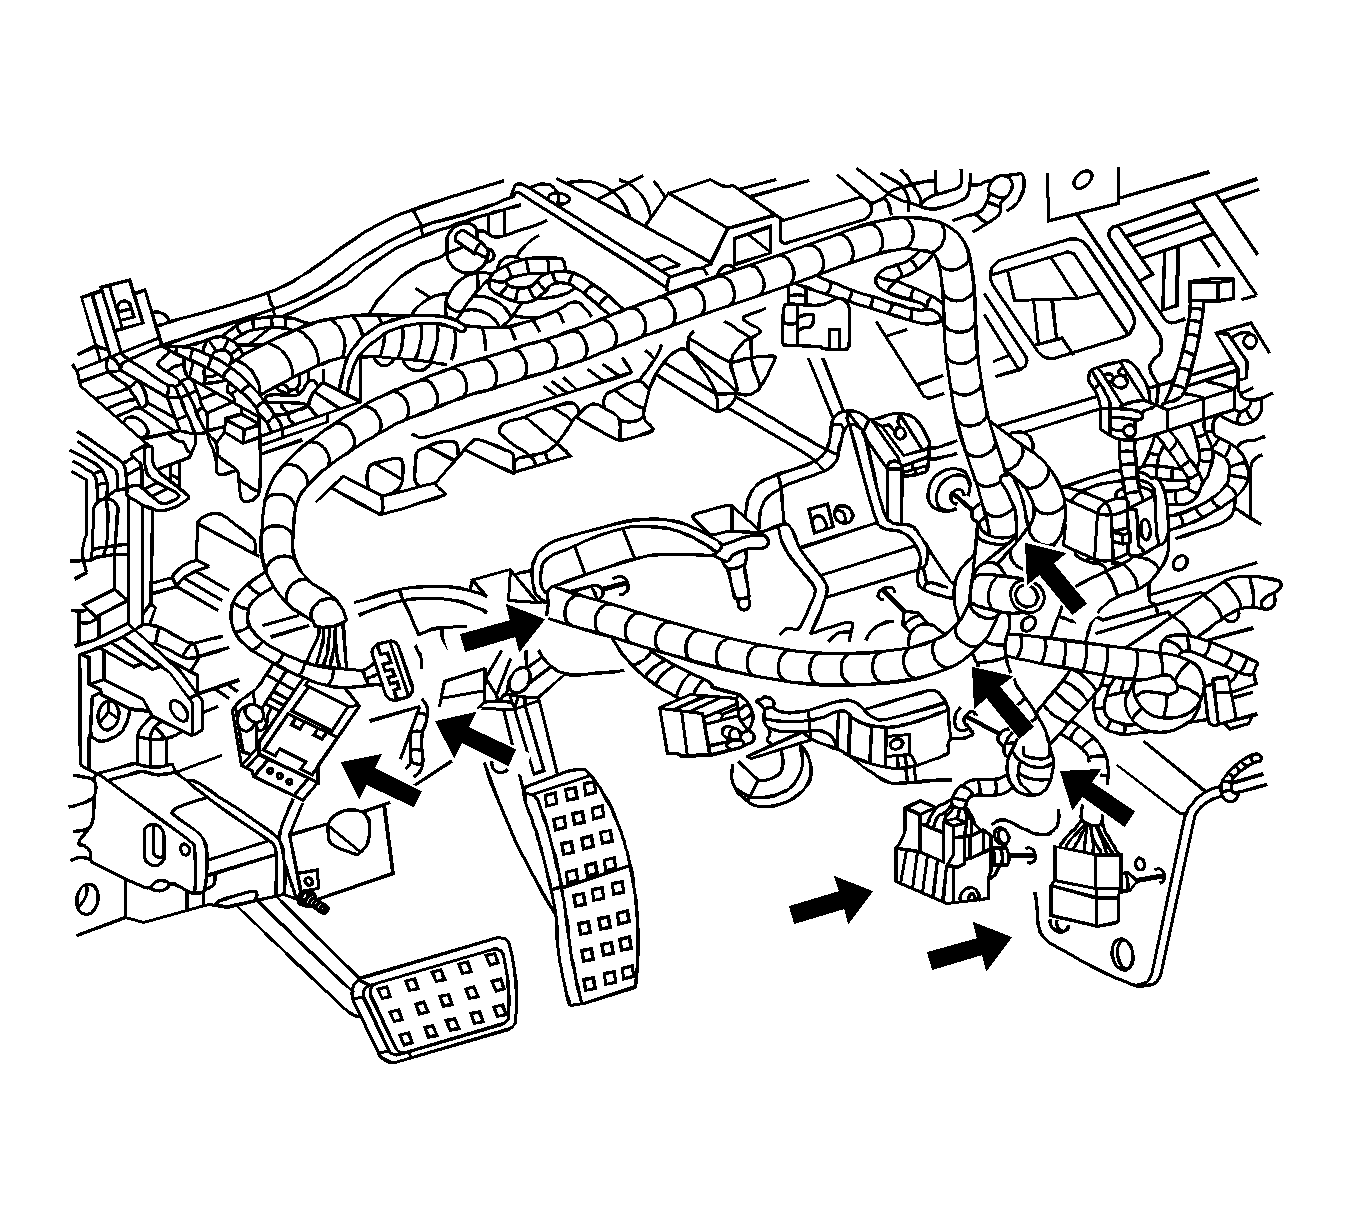
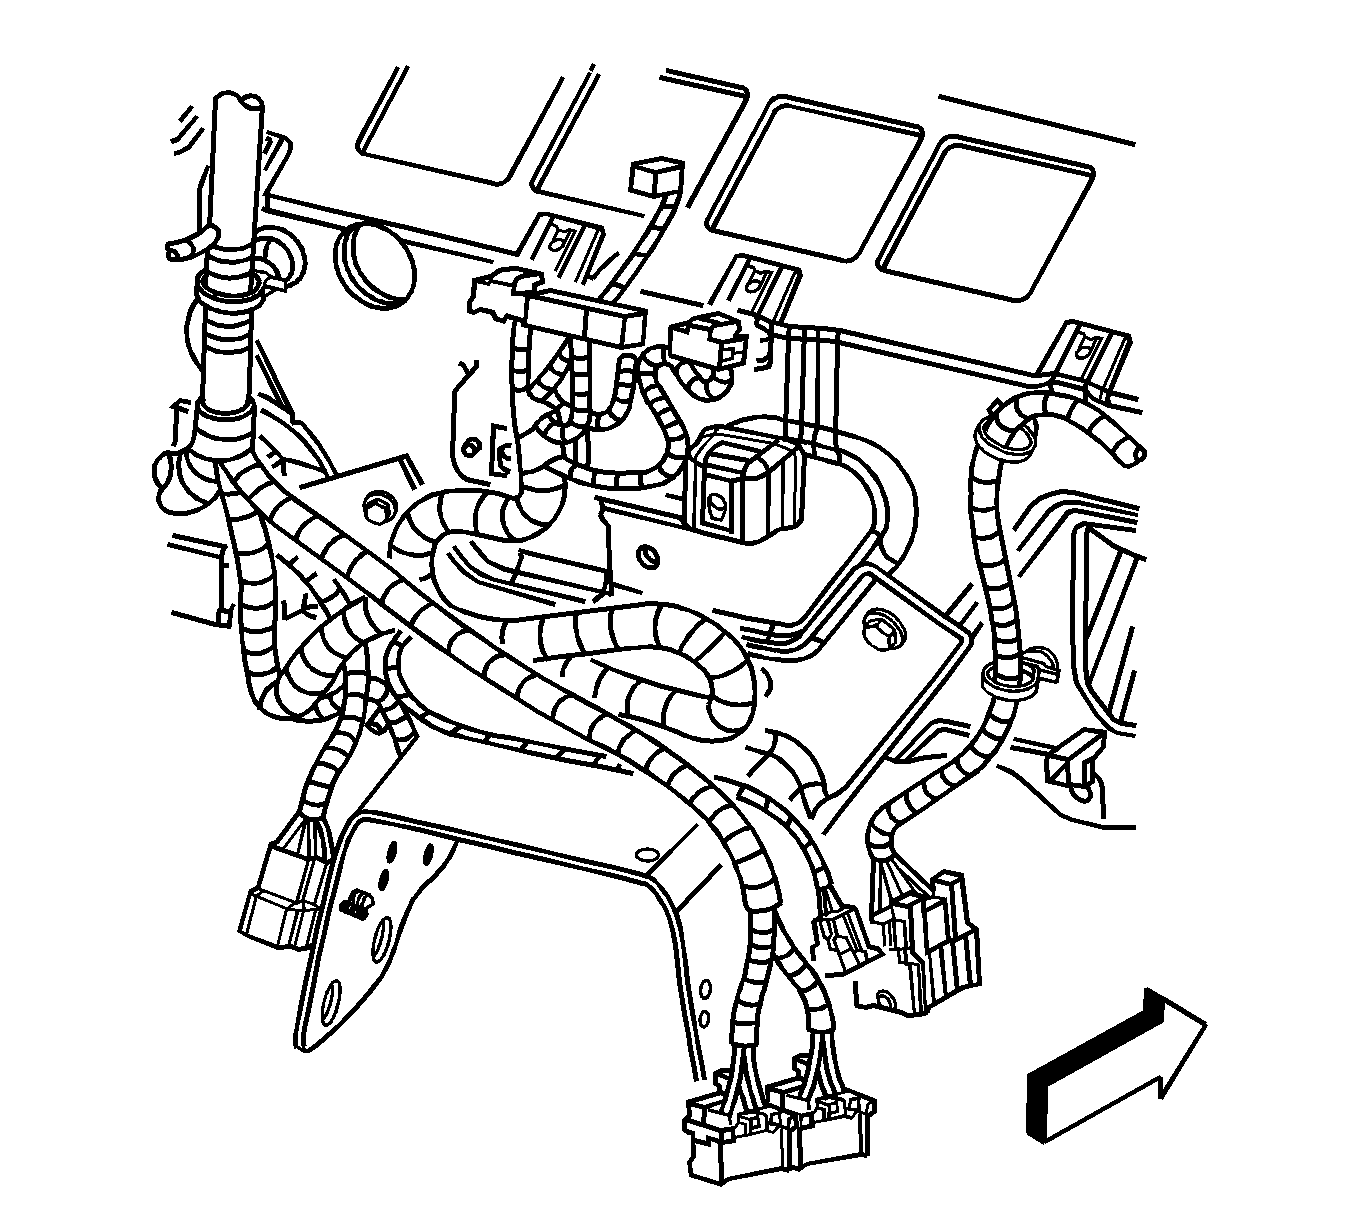
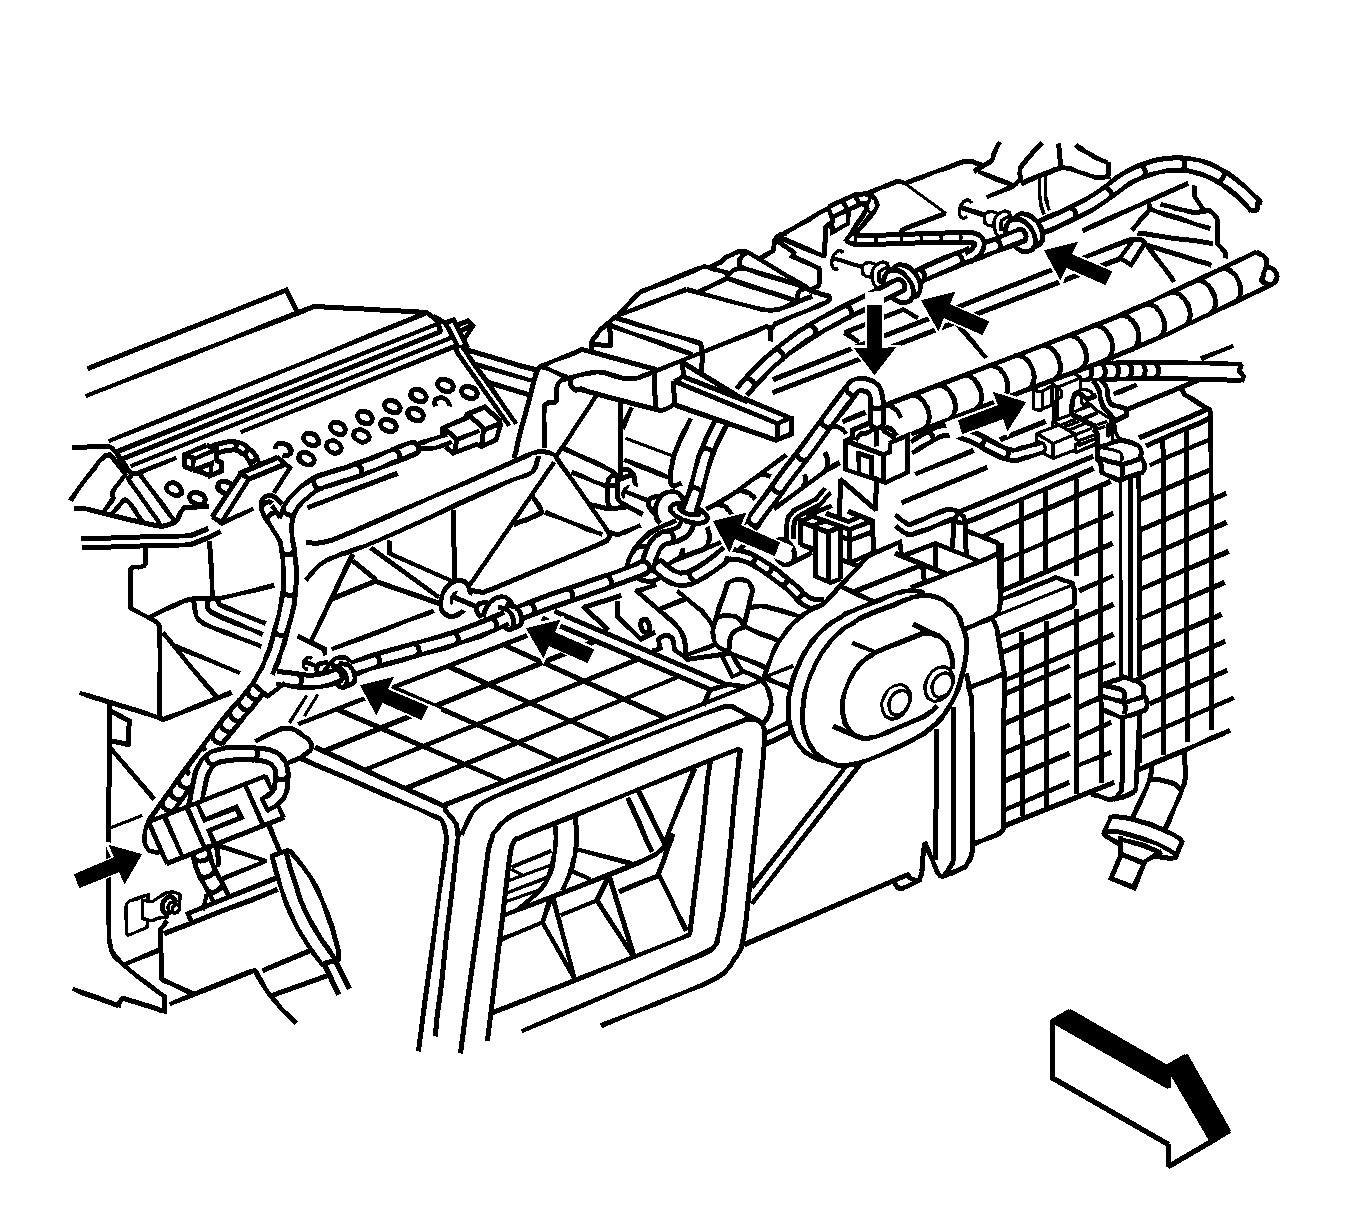
- Disconnect the wire harness connectors and the harness clips on the driver side of the vehicle.
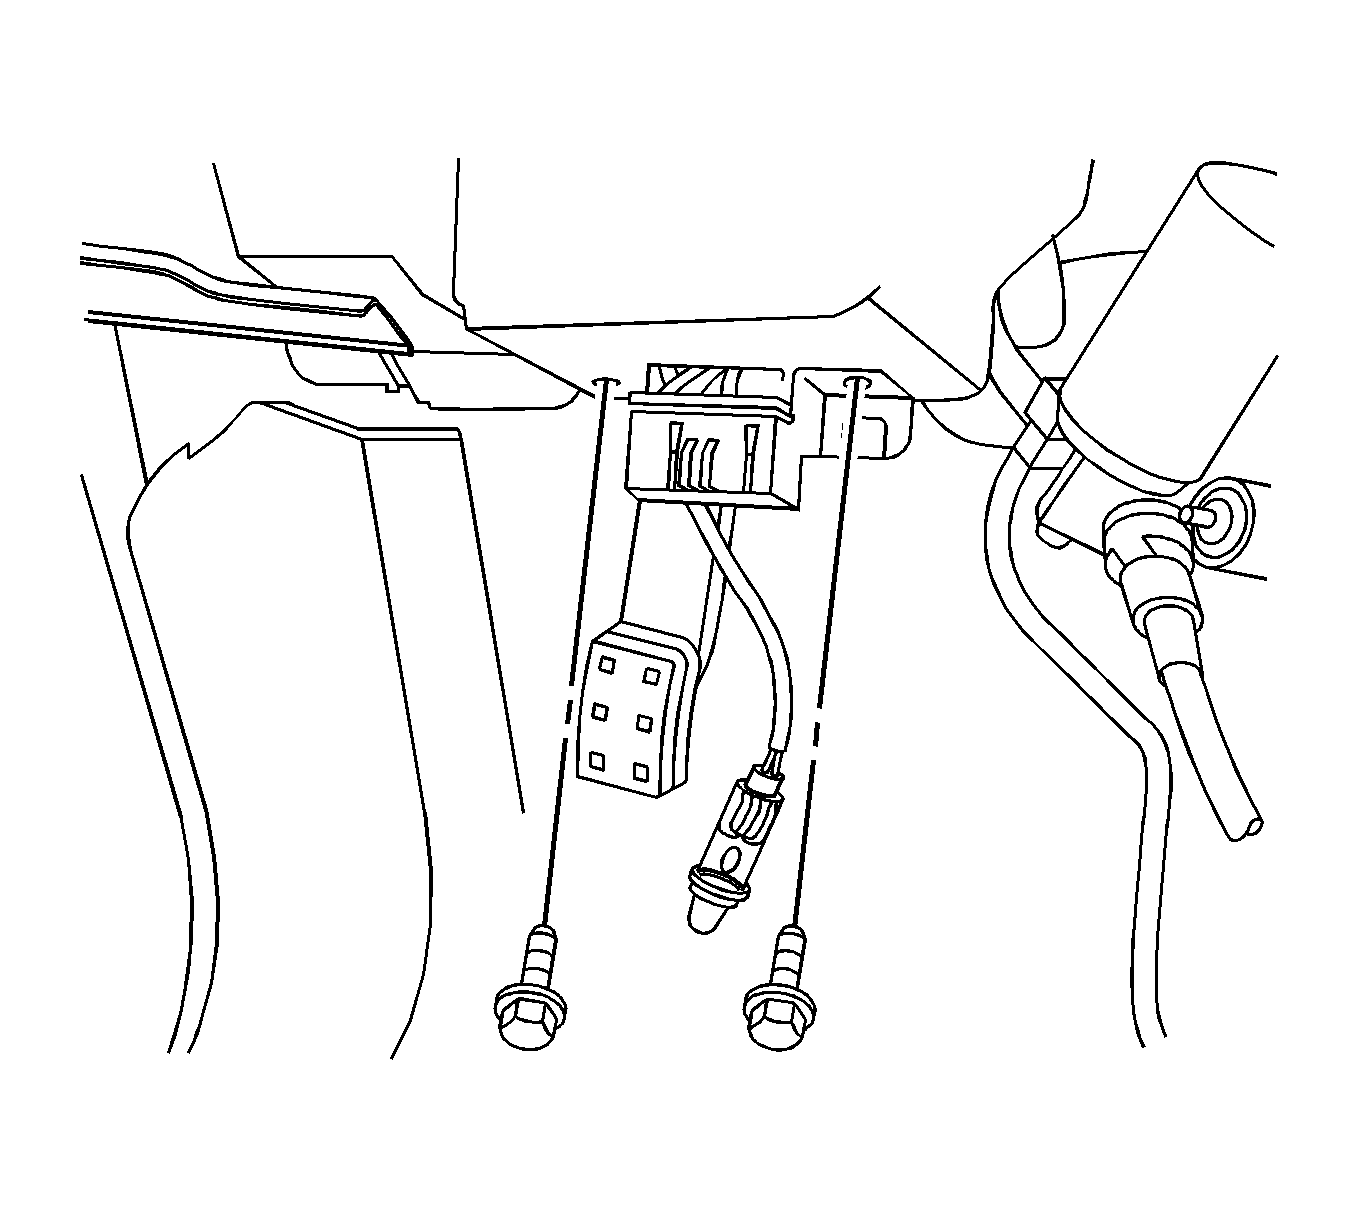
- Remove the nuts and bolts securing the brake pedal.
- Remove the wire harness clips in the center from the instrument panel.
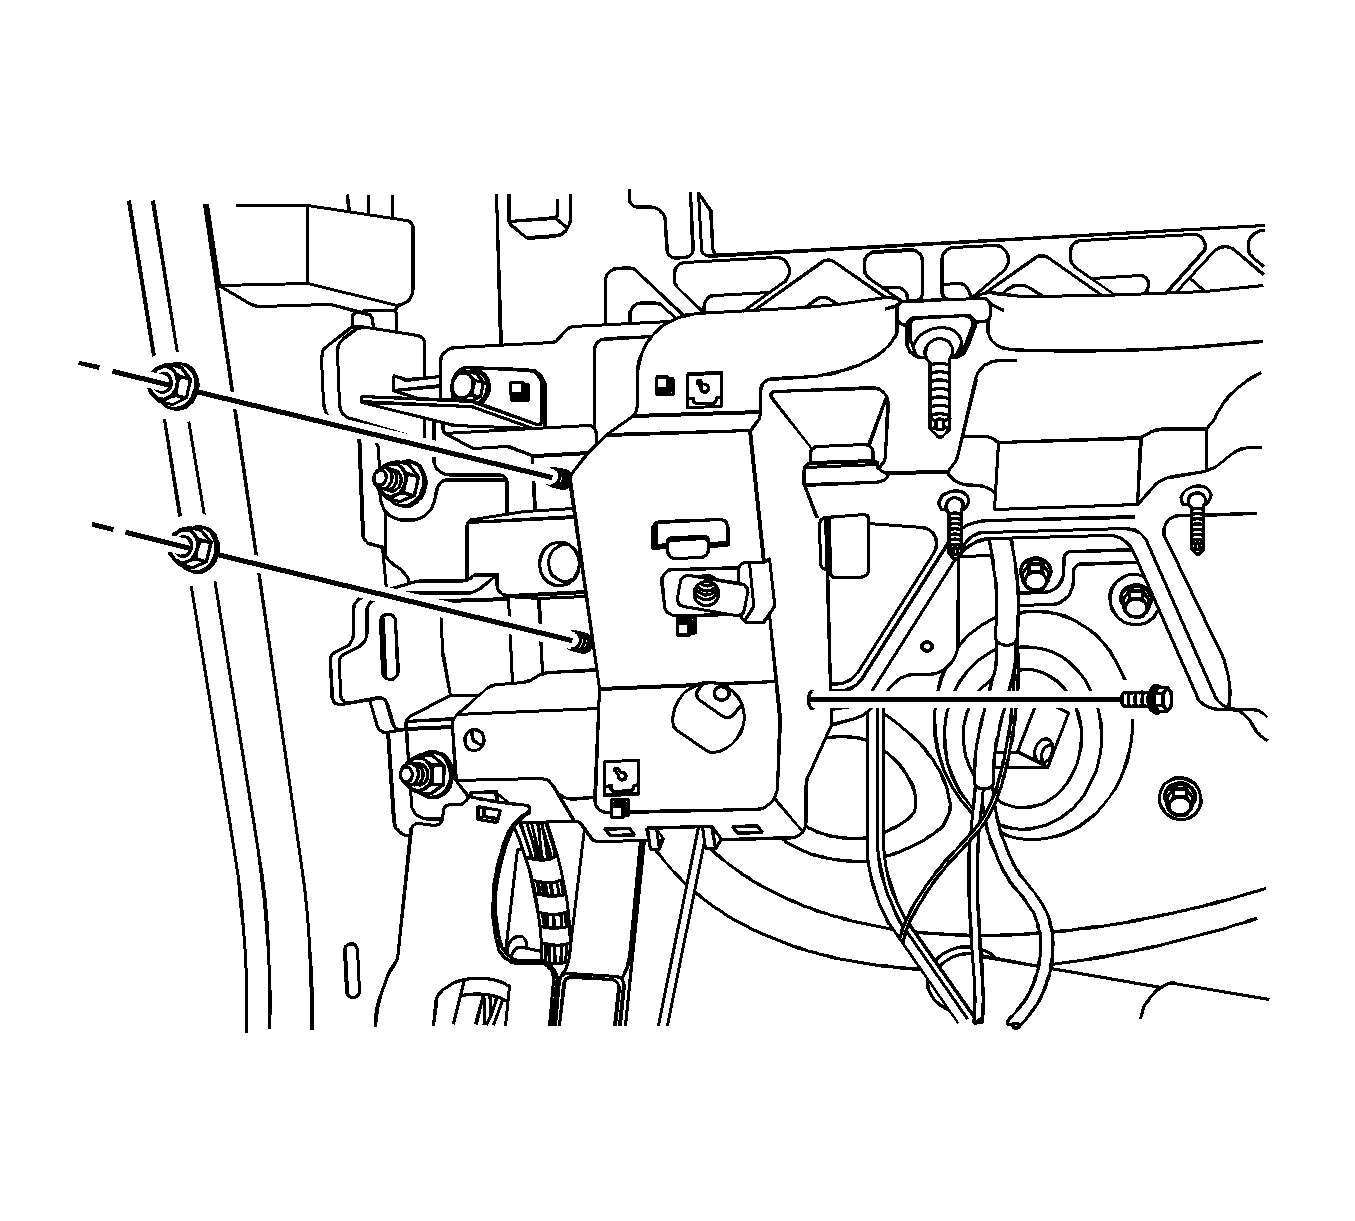
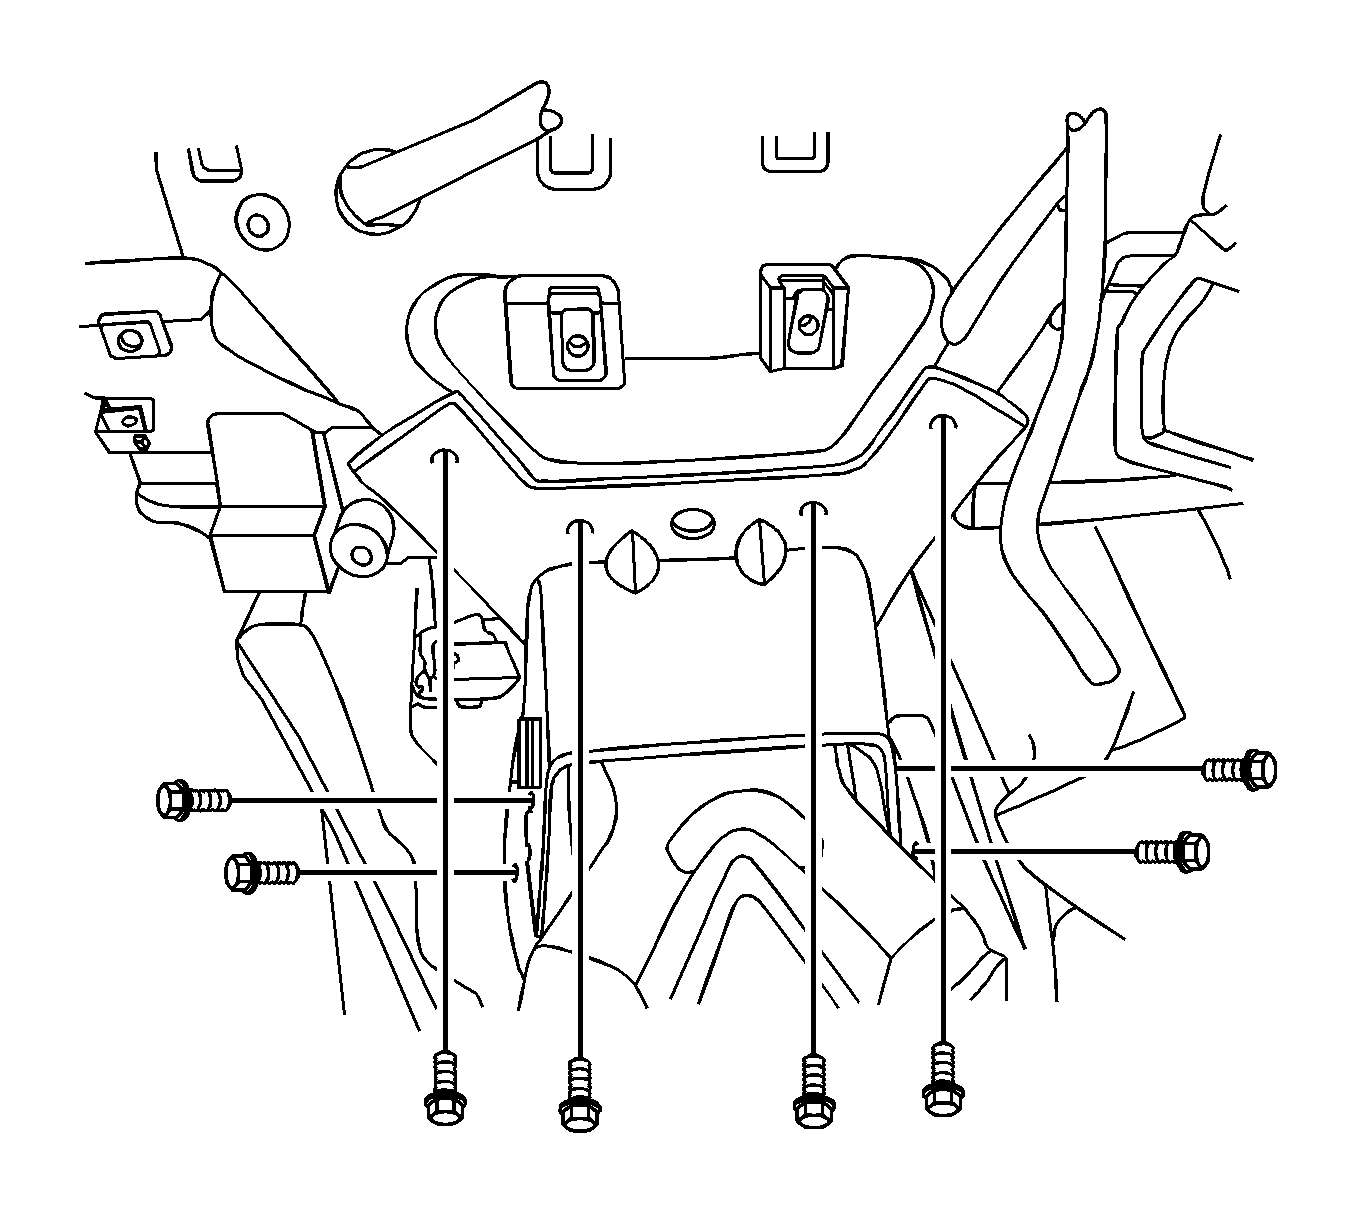
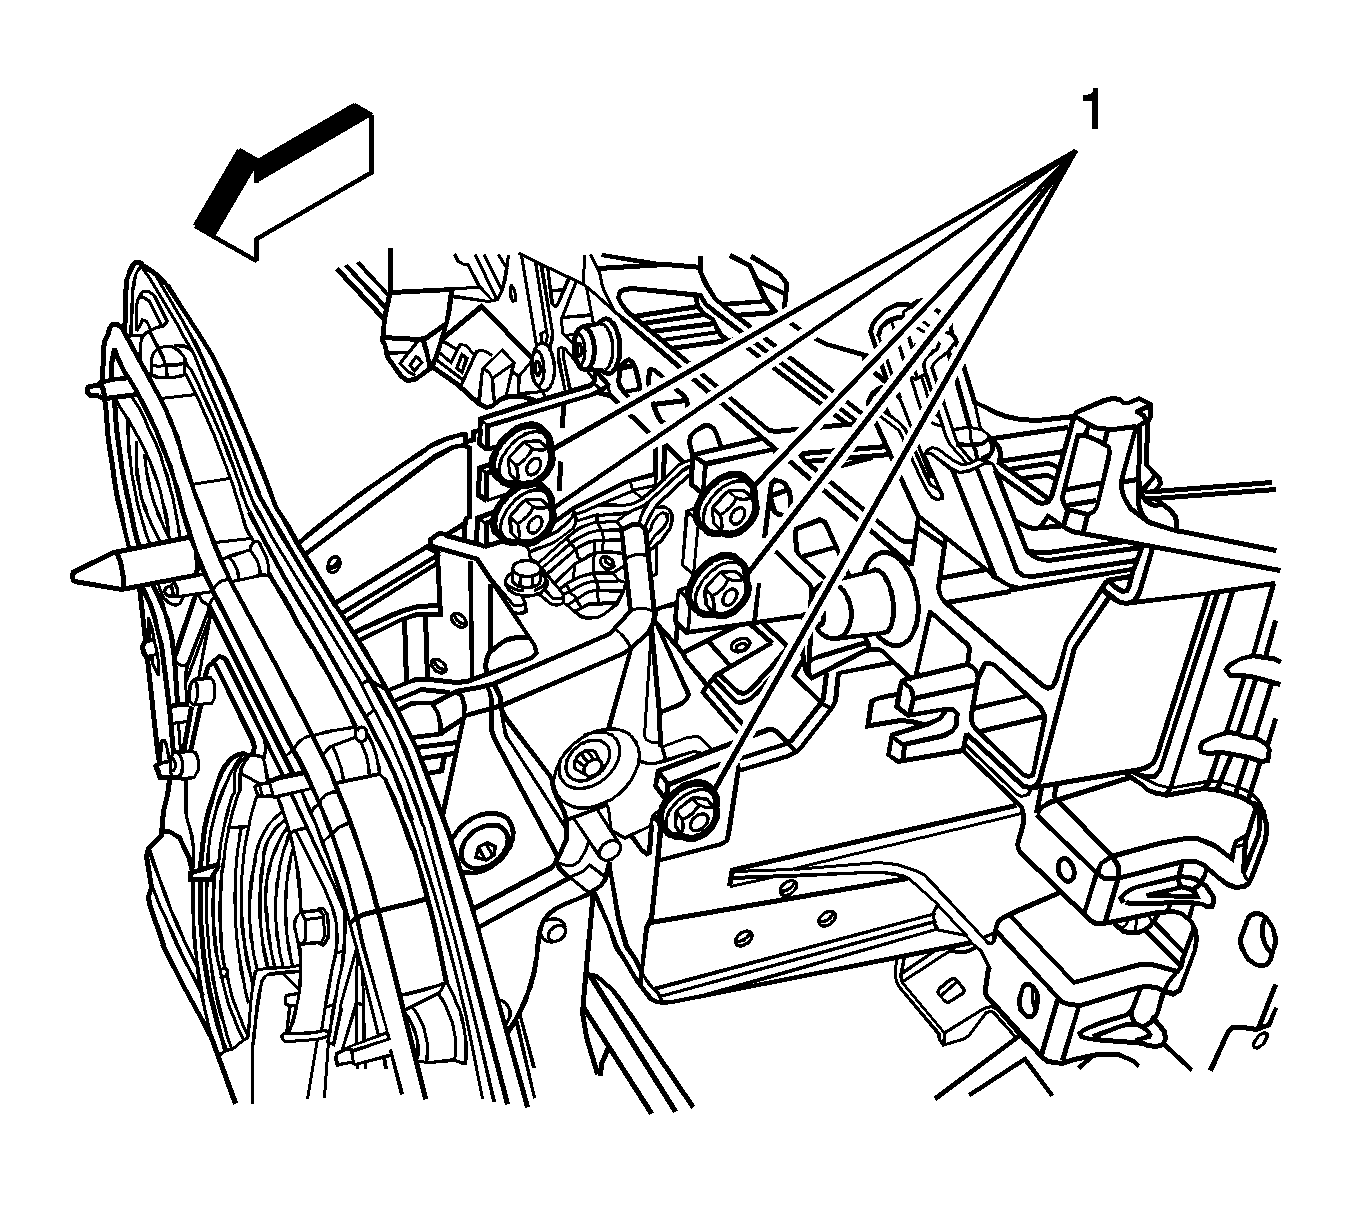
- Remove the bolts securing the instrument panel carrier to the floor, and remove the carrier.
- Remove the screws securing the center HVAC assembly to the carrier.
- Disconnect the wire harness connector and the harness clips on the passenger side of the instrument panel.
- Remove the bolts securing the passenger side blower to the carrier.
- Loosen the nuts securing the instrument panel carrier to the pedal assembly. The nuts do not have to be removed.
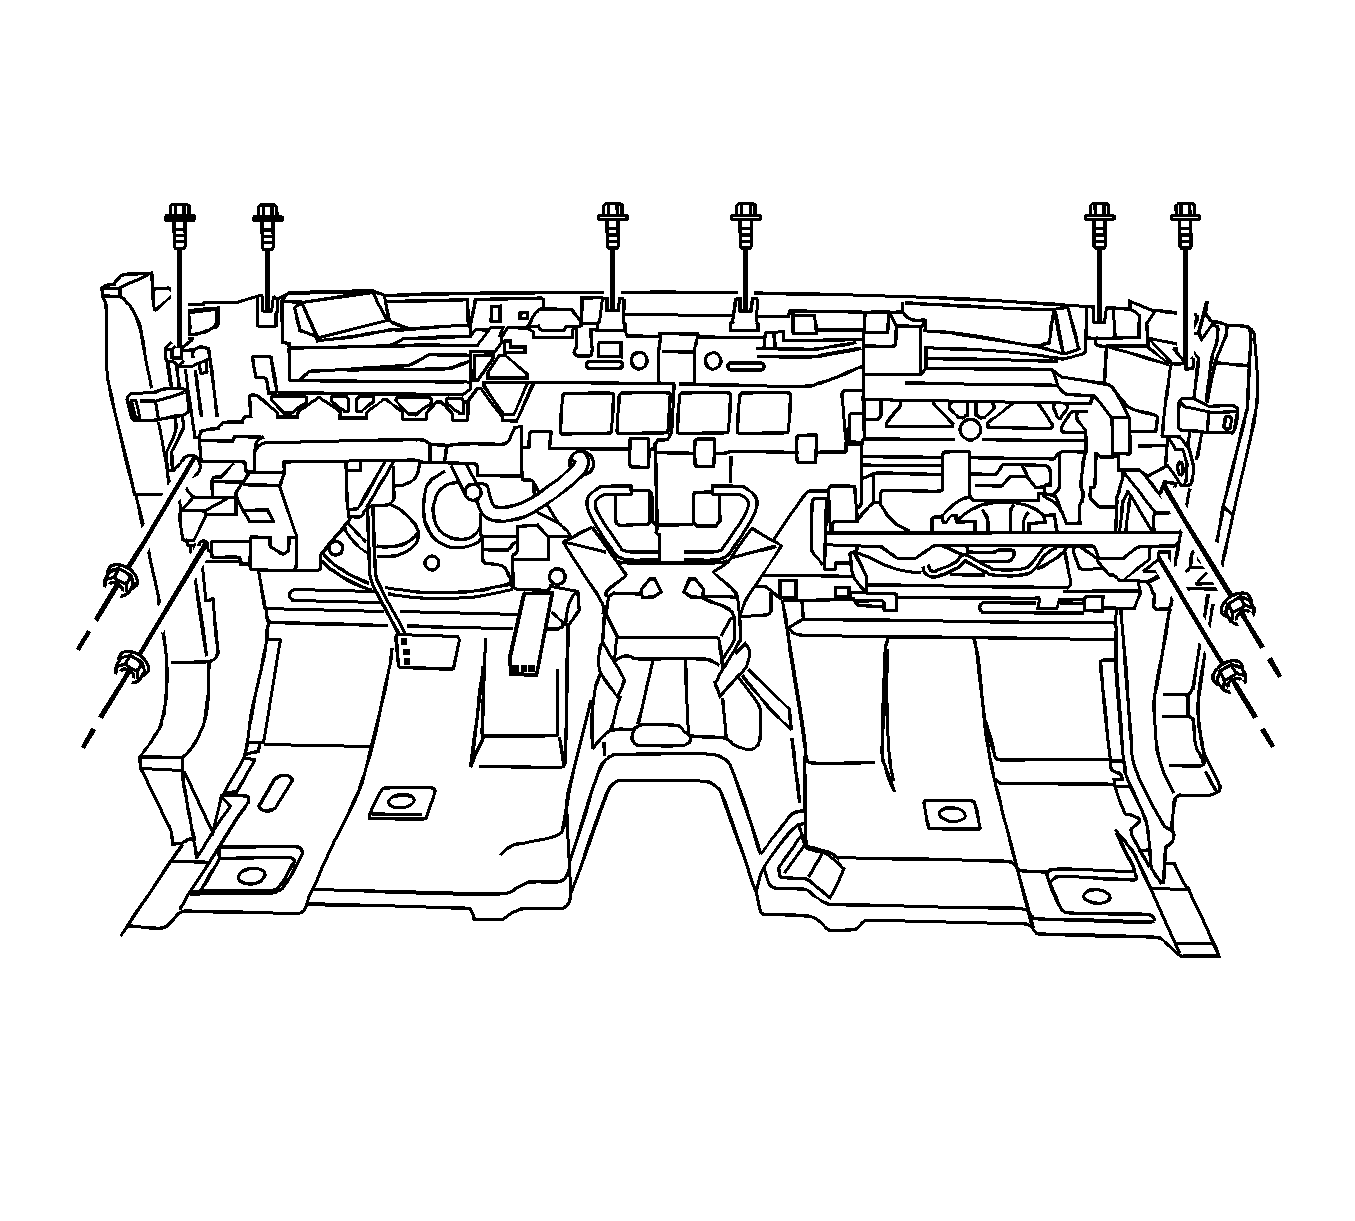
- Remove the fasteners securing the instrument panel carrier to the cowl.
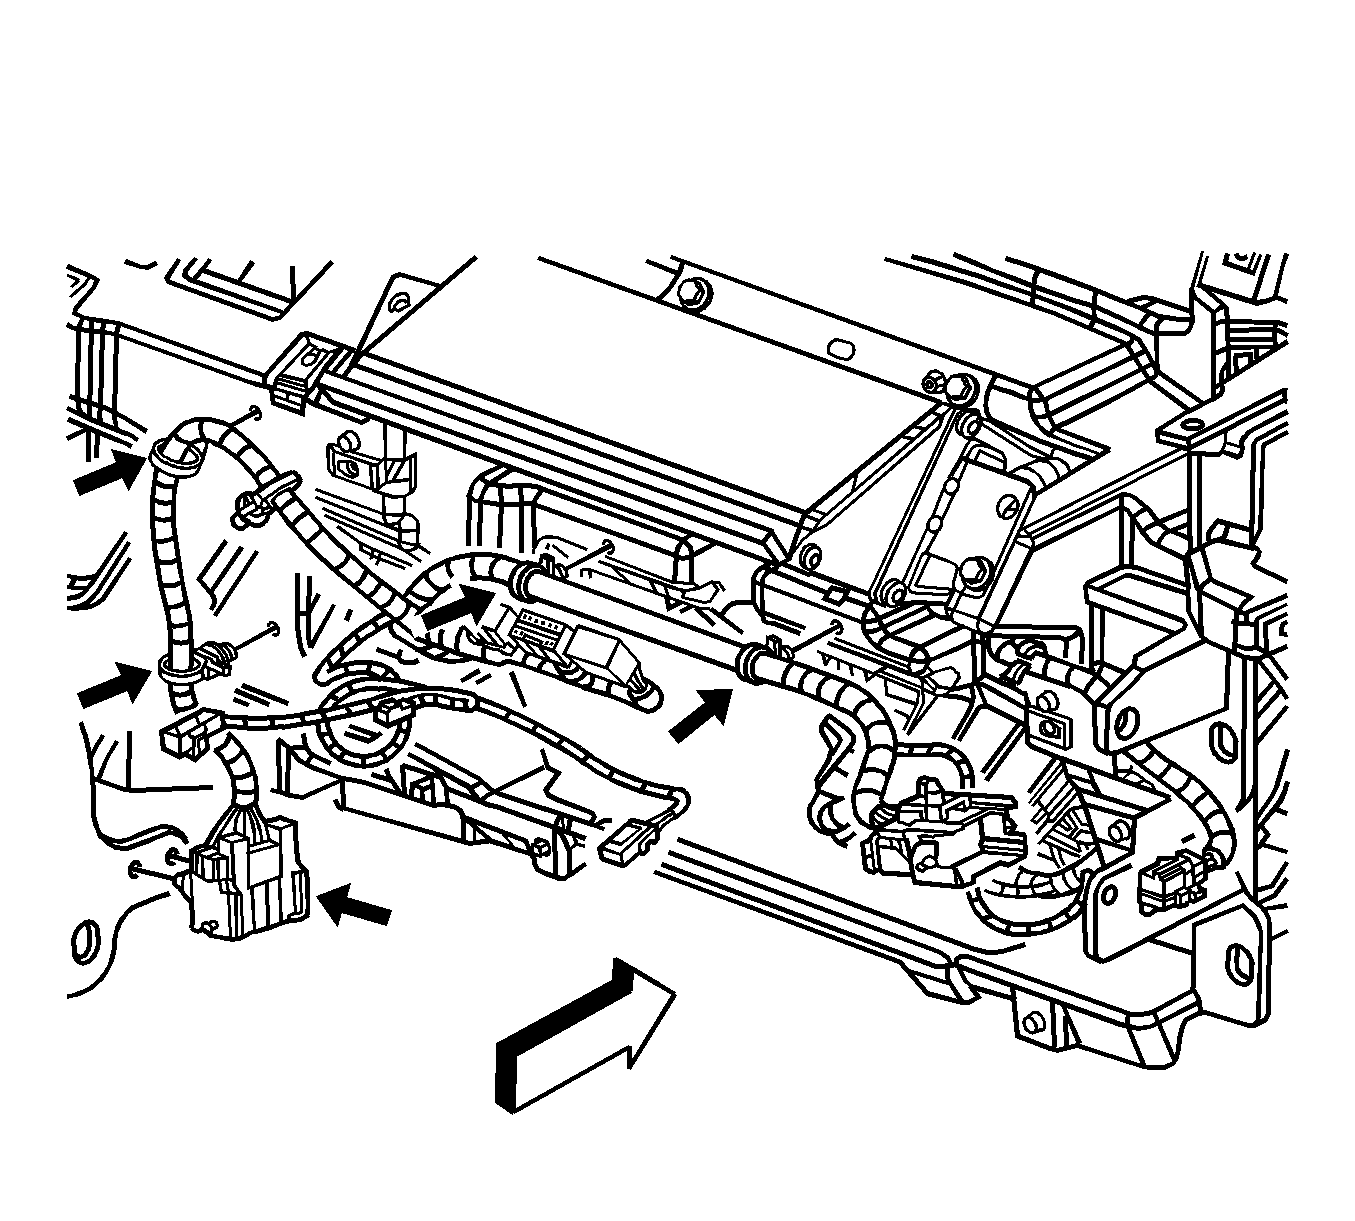
- Move the carrier back away from the cowl far enough to disconnect the wire harness retaining clips off the carrier.
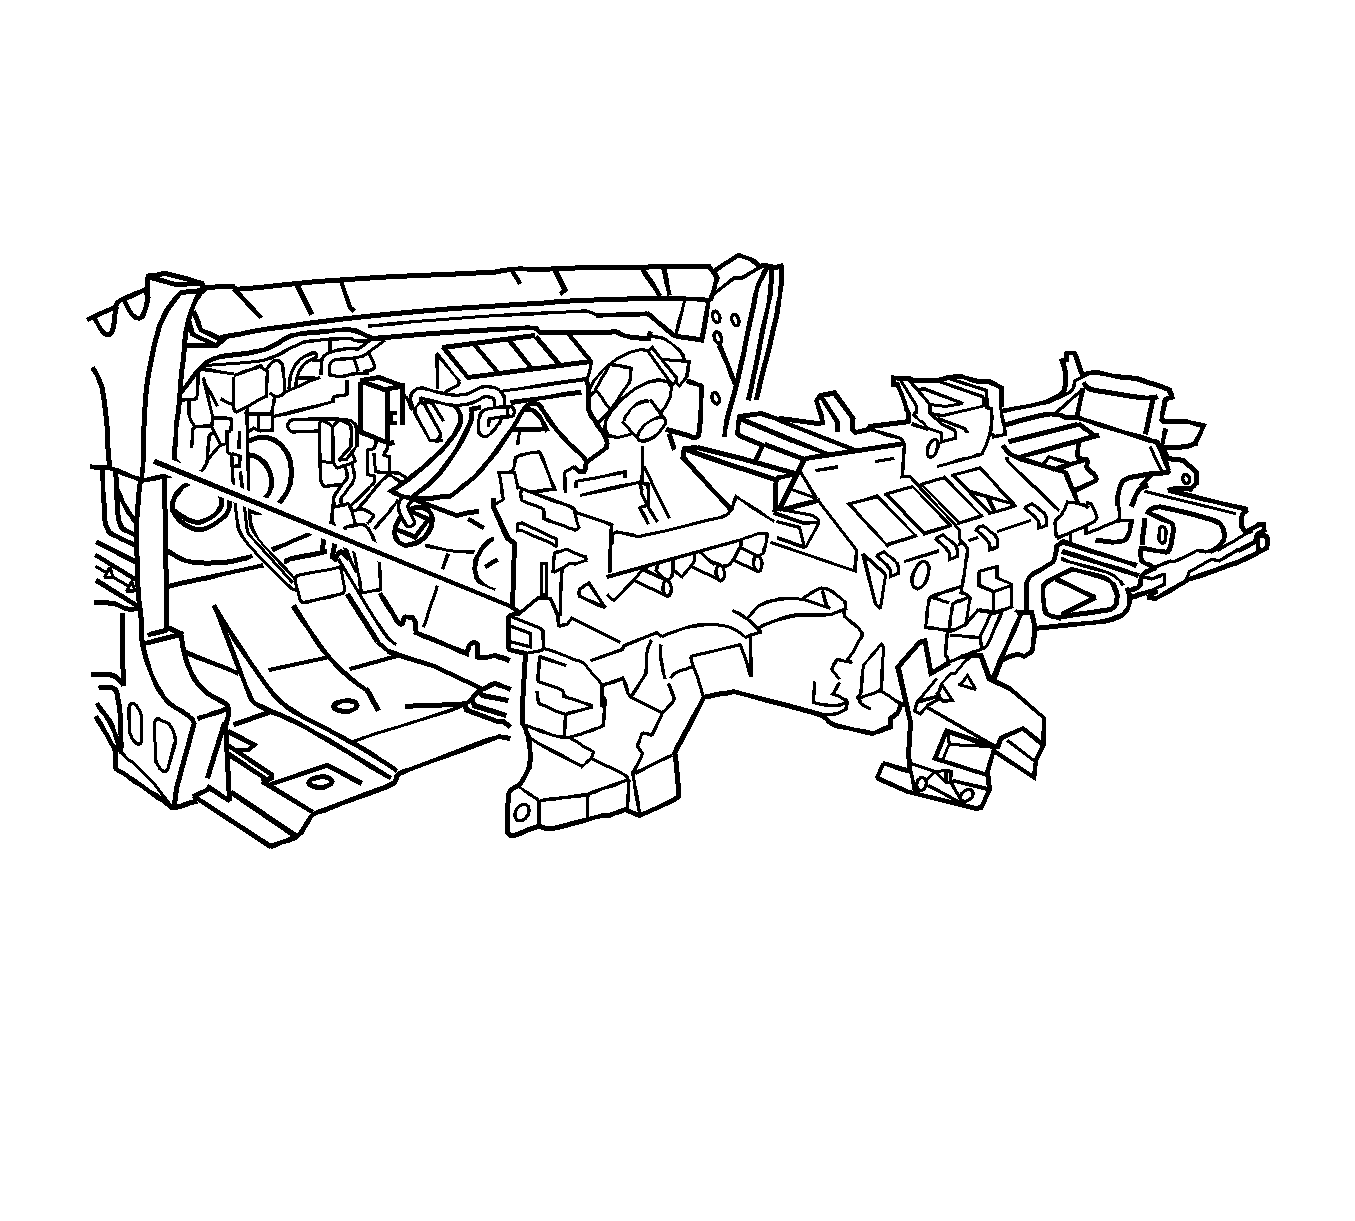
- Remove the carrier from the vehicle.

Installation Procedure
- Connect the wire harness retaining clips to the rear of the carrier.
- Install the carrier to the vehicle.
- Install the wire harness back into the noted position.
- Install the fasteners securing the carrier to the cowl.
- Locate the carrier on to the pedal assembly bracket.
- Install the bolts securing the passenger side blower to the carrier.
- Connect the wire harness connector and the harness clips on the passenger side of the instrument panel.
- Install the bolts securing the center HVAC assembly to the carrier.
- Install the bracket bolts securing the instrument carrier to the floor.
- Connect the wire harness clips in the center of the instrument panel.
- Install the nuts and bolts securing the brake pedal.
- Connect the wire harness connector and the harness clips on the driver side of the vehicle.
- Install the bolts securing the diagnostic connector.
- Install the bolts securing the air outlet duct.
- Install the nut securing the steering column, lower the steering column. Refer to Steering Column Replacement .
- Install the instrument panel. Refer to Instrument Panel Assembly Replacement .
- Install the front seats. Refer to Driver or Passenger Seat Replacement .
Notice: Refer to Fastener Notice in the Preface section.
Tighten
Tighten the bolts to 25 N·m (18 lb ft).
Tighten
Tighten the bolts to 25 N·m (18 lb ft).
Tighten
Tighten the bolts to 10 N·m (90 lb in).
Tighten
Tighten the bolts to 10 N·m (90 lb in).
Tighten
Tighten the bolts to 25 N·m (18 lb ft).
