W/S WIPER CHATTER ITEMS TO CHECK AND REPAIR

VEHICLES AFFECTED: ALL MODELS
Some vehicles may exhibit a condition where the windshield wipers chatter and/or wipe unevenly. Several items may contribute to this condition. To completely repair this condition, all items listed in this bulletin should be checked and repaired as necessary.
CLEAN WINDSHIELD GLASS
Clean windshield glass with GM glass cleaner, Bon Ami TRADEMARK, or equivalent. The cleaner used should be one which will not harm paint finish or scratch glass. The glass is cleaned when water no longer "beads up", but "sheets" across the entire glass surface.
CLEAN WIPER BLADE ELEMENTS
Remove wiper blade assembly from wiper blade arms. Clean rubber elements with a cloth which has been saturated in a solution of 50% water and 50% GM Opti Kleen, or a solution o f50% water and 50% methyl alchol. Rinse blade assemblies with water and reinstall on wiper arms.
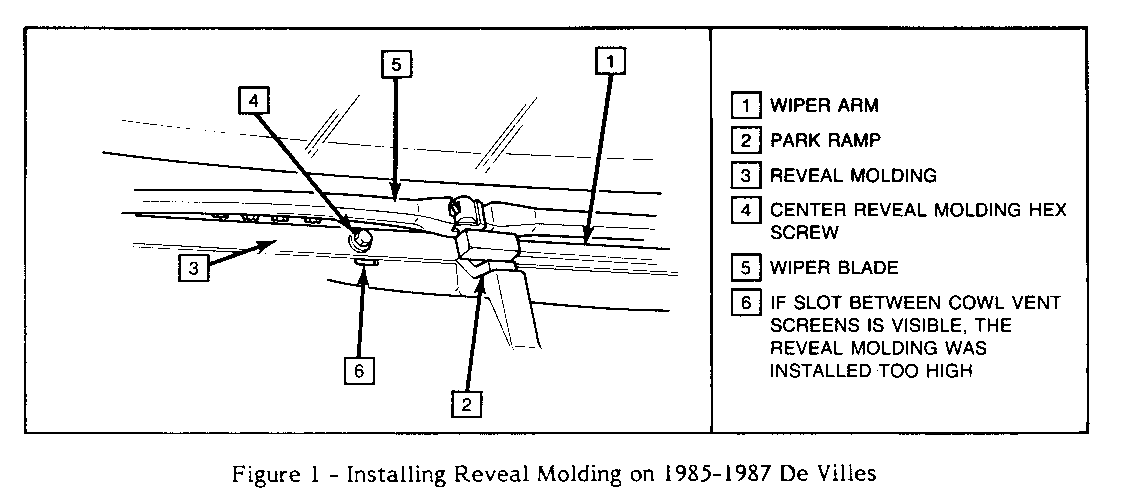
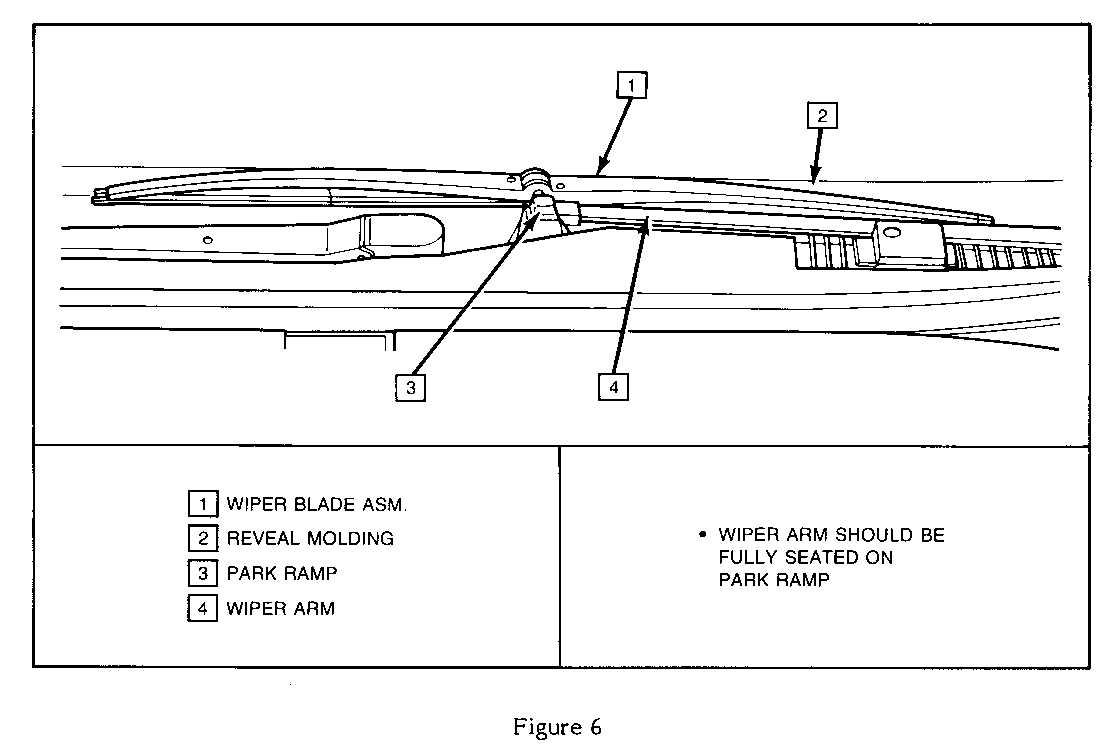
CHECK FIT OF WINDSHIELD REVEAL MOLDING, FIGURE 1
On vehicles equipped with depressed park (hidden) wiper blades and a windshield lower reveal molding, check the fit of the reveal molding across the base of the windshield. The lower reveal molding must fit uniformally along the glass surface to allow the wiper blades to move freely from the glass wipe area to the park position when the wipers are turned off. Gaps in excess of l.Omm (.040 in.) should be corrected using the following procedure.
1. Remove both wiper arm assemblies.
2. Remove self drilling screws (7mm) which retain the reveal molding.
3. Clean the underside of the lower reveal molding and the windshield glass. Remove any obstructions which prevent the reveal molding from matching the glass contour.
4. If necessary, the lower reveal molding should be reformed as required to improve the fit. Care should be used to prevent marring the molding surface.
5. Install the lower reveal molding. NOTE: IF THE ATTACHING SCREWS, (HEX HEAD DESIGN - FIGURE 1, ITEM 4), INTERFERE WITH THE BLADE OPERATION, REPLACE WITH FLUSH ROUND HEAD SCREWS. USE OVERSIZED SCREWS IF NECESSARY.
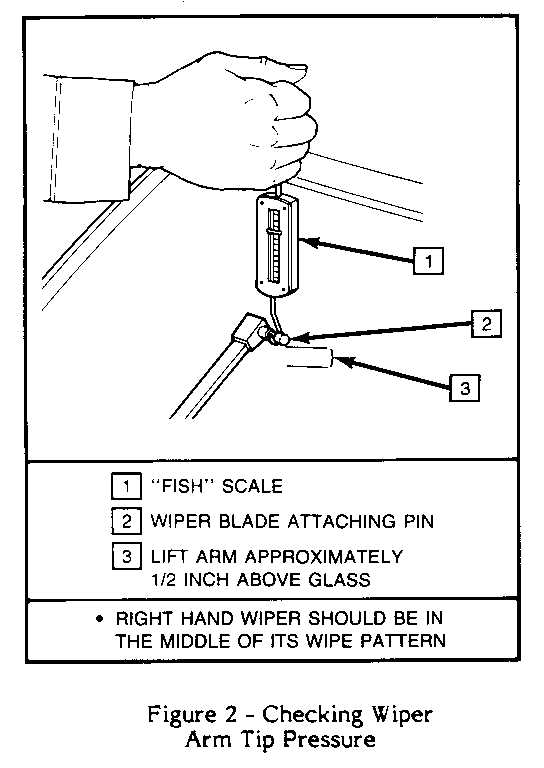
CHECK WINDSHIELD WIPER ARM PRESSURE, FIGURE 2
1. Turn on ignition switch and wipers. When the right hand wiper is in the middle of a wipe stroke, stop the wiper system by turning off the ignition switch. (The driver's door should remain open on vehicles equipped with retained accessory power.) Procede with the following steps to measure the right hand arm pressure. Prior to measuring the left hand arm pressure be sure the left hand arm is in the middle of the wipe stroke.
2. Remove the wiper blade assembly from the wiper arm.
3. Attach a scale to the wiper arm (Figure 2, Item 1) attaching pin and measure the force required to lift the wiper arm perpendicular to the windshield to the normal working height (i.e., the height with the blade attached).
4. If the force required is not within the specifications given below, the wiper arm assembly should be replaced.
TIP PRESSURE - CAR LINE NEUTONS (OUNCES) -------- ---------------- C,H 7.6 to 9.4 (28 to 34) D 7.2 to 8.8 (26 to 32) E/K 7.6 to 9.4 (28 to 34) A,F,P,T,J,S,G,B 6.0 to 8.0 (22 to 29) N,L 6.9 to 8.5 (25 to 31) Y 7.4 to 9.1 (27 to 33) V 7.0 to 8.6 (25 to 31)
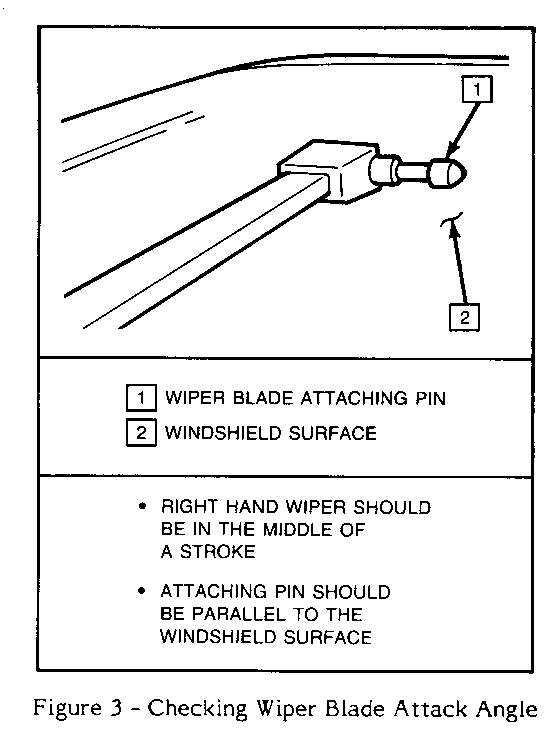
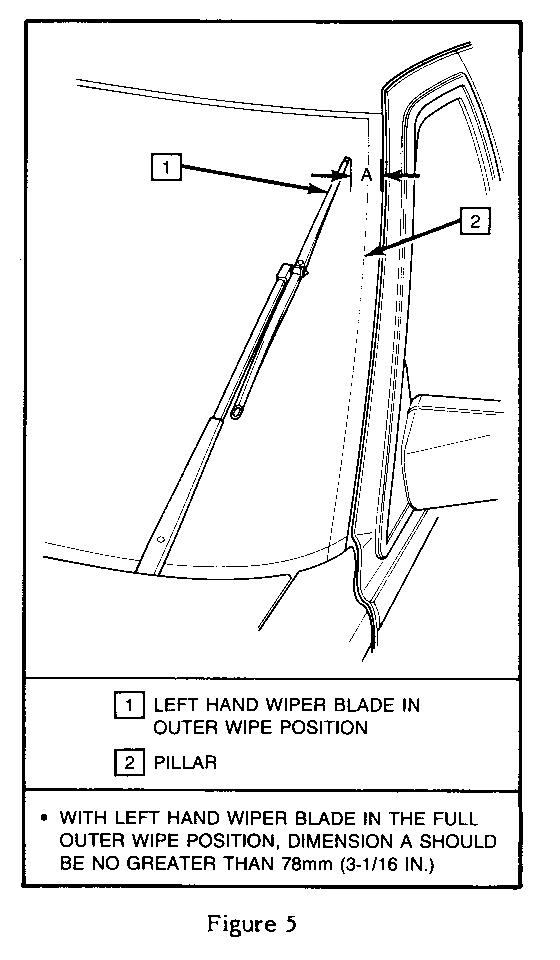
CHECK WIPER BLADE MOUNTING ANGLE, FIGURE 3
With the right hand wiper arm assembly in the middle of a wipestroke and the wiper blade assemblies removed, visually check that the blade assembly mounting pin on each wiper arm is parallel to the windshield. Replace the wiper arm if necessary.
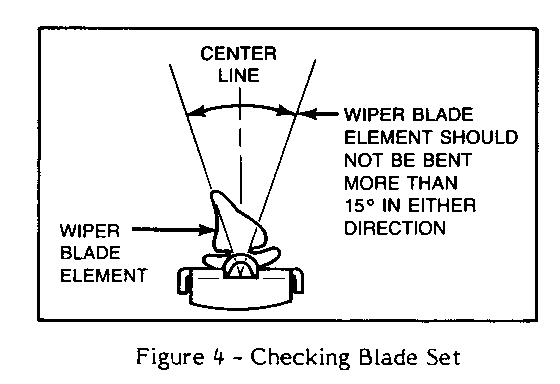
CHECK FOR BLADE SET, FIGURE 4
Remove the wiper blade assemblies from the wiper arms being careful to note orientation for reassembly. Look down the length of the blade element. The rubber element which contacts the glass must be on the center line of the blade assembly +/- 15 degrees. Replace the element if necessary.
General Motors bulletins are intended for use by professional technicians, not a "do-it-yourselfer". They are written to inform those technicians of conditions that may occur on some vehicles, or to provide information that could assist in the proper service of a vehicle. Properly trained technicians have the equipment, tools, safety instructions and know-how to do a job properly and safely. If a condition is described, do not assume that the bulletin applies to your vehicle, or that your vehicle will have that condition. See a General Motors dealer servicing your brand of General Motors vehicle for information on whether your vehicle may benefit from the information.
