For 1990-2009 cars only
Removal Procedure
- Disconnect the negative battery cable. Refer to Battery Negative Cable Disconnection and Connection.
- Raise and support the vehicle. Refer to Lifting and Jacking the Vehicle.
- Remove the oil pan skid plate if equipped. Refer to Oil Pan Skid Plate Replacement.
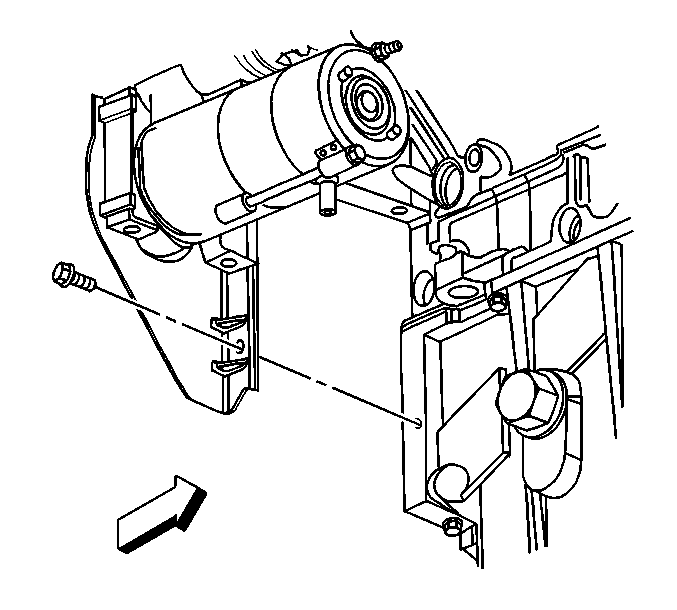
- Remove the transmission cover bolt.
- Remove the starter bolts.
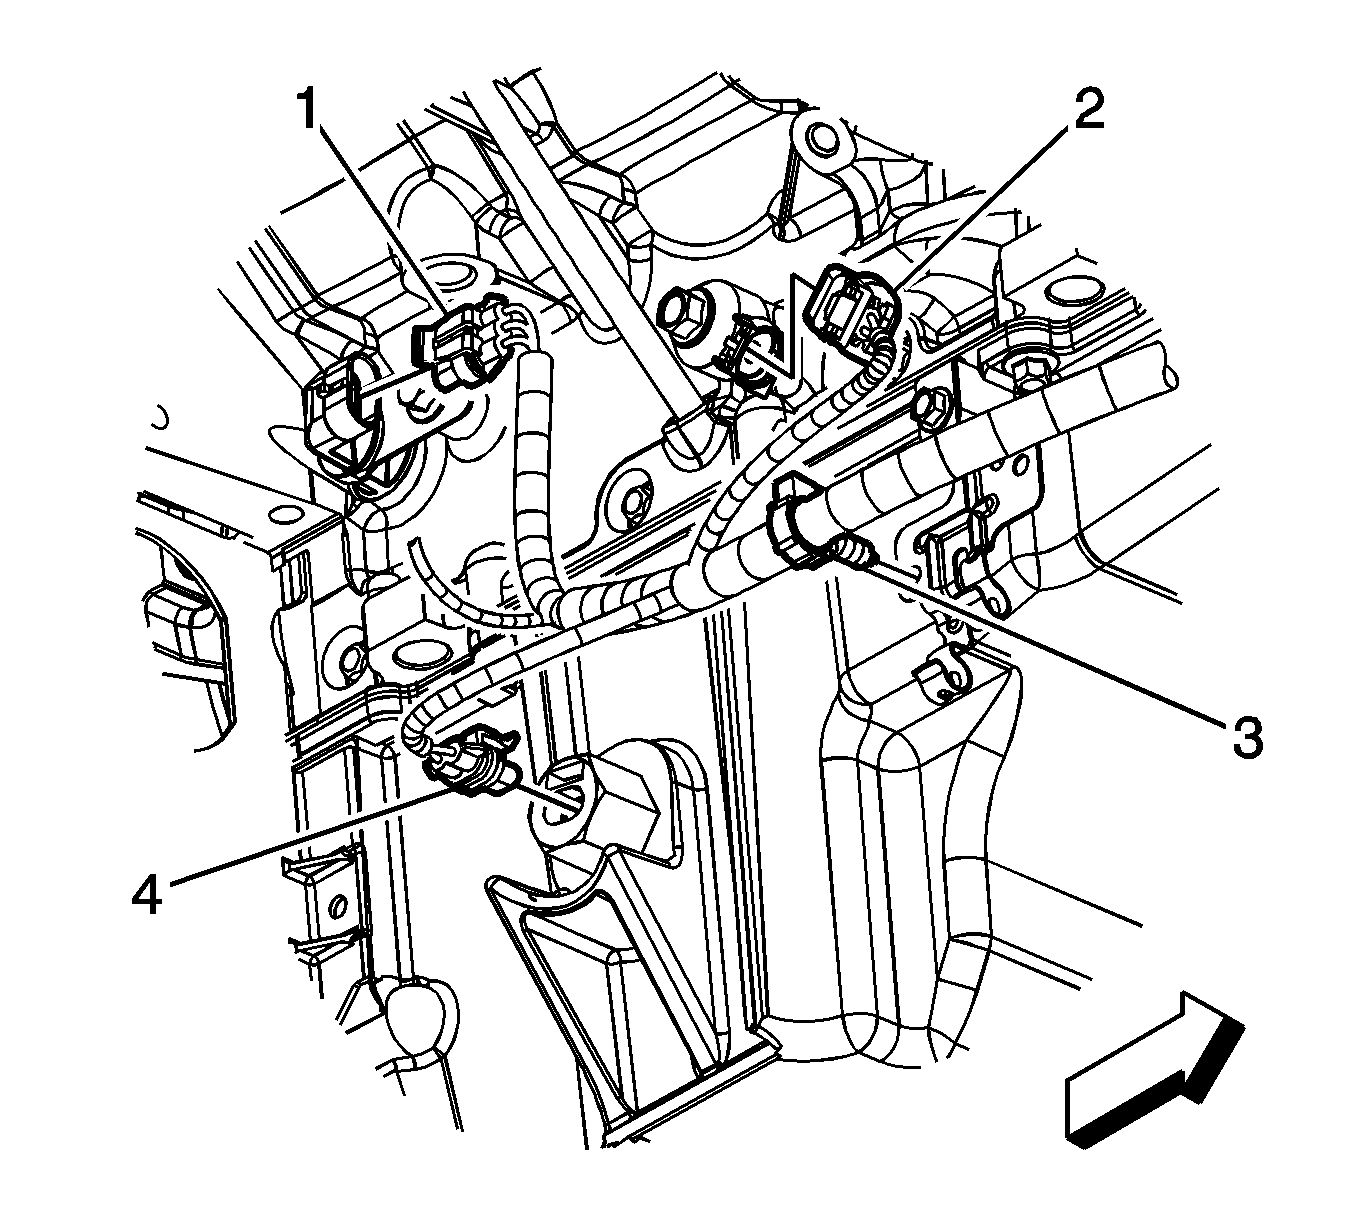
- Disconnect the engine wiring harness electrical connector (4) from the oil level sensor.
- Slide the starter forward until the starter clears the transmission and properly support the starter.
- Lower the vehicle half way.
- Remove the right front wheel and tire. Refer to Tire and Wheel Removal and Installation.
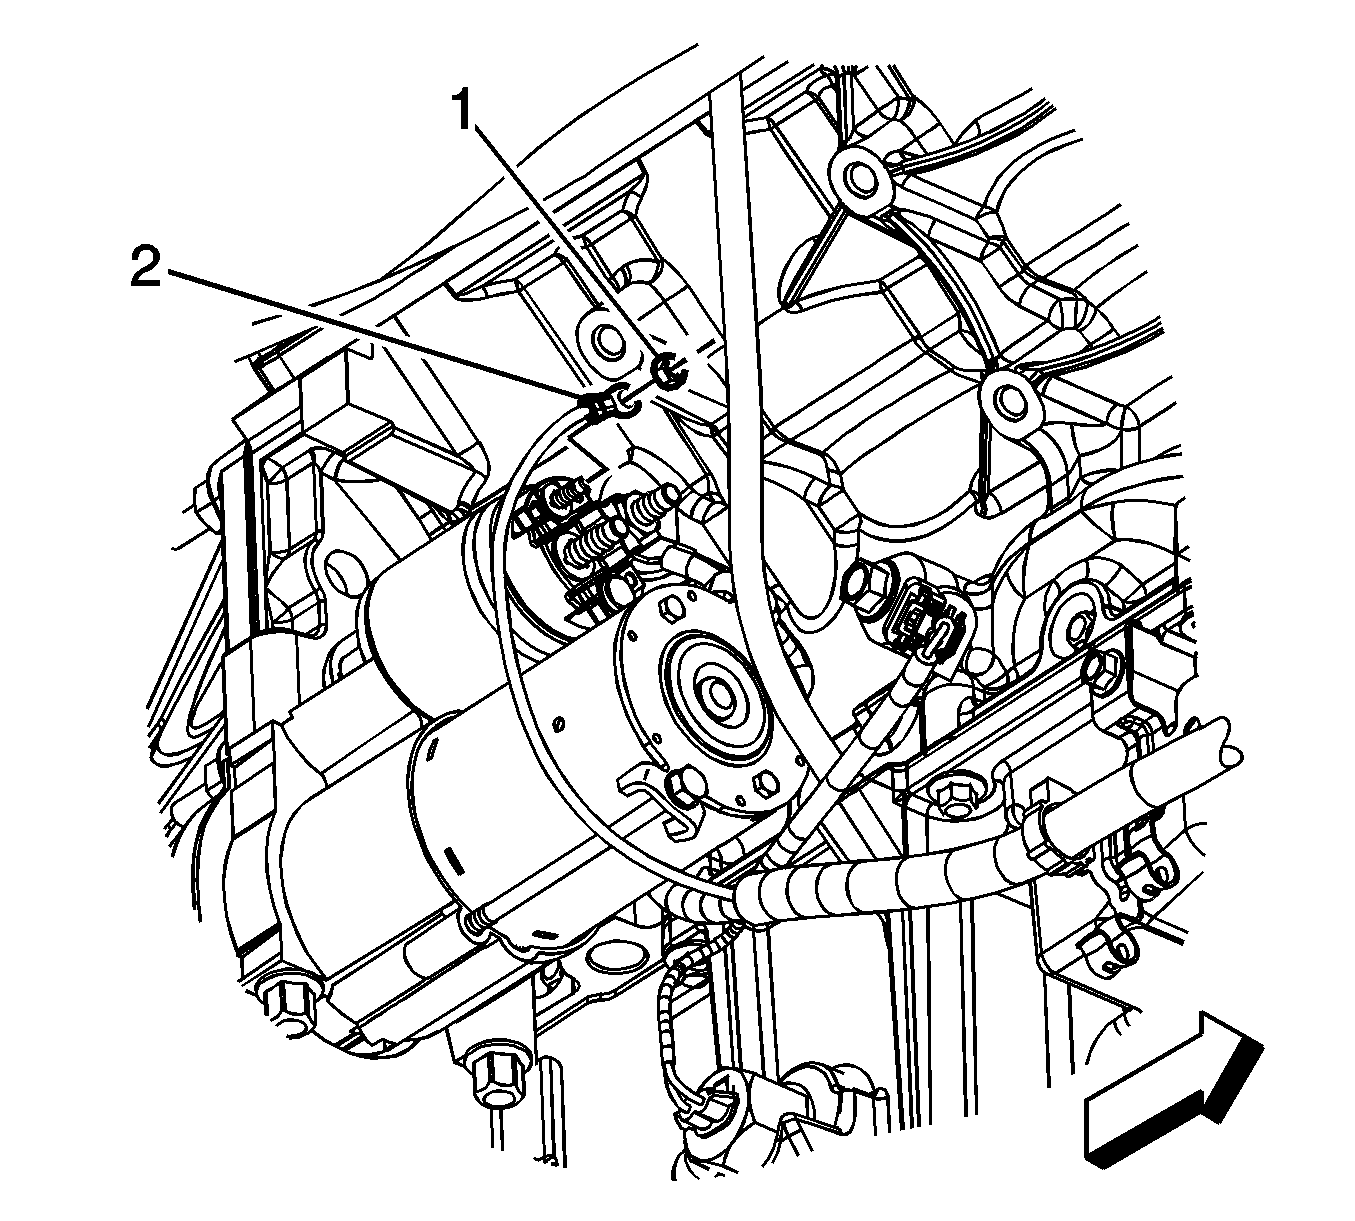
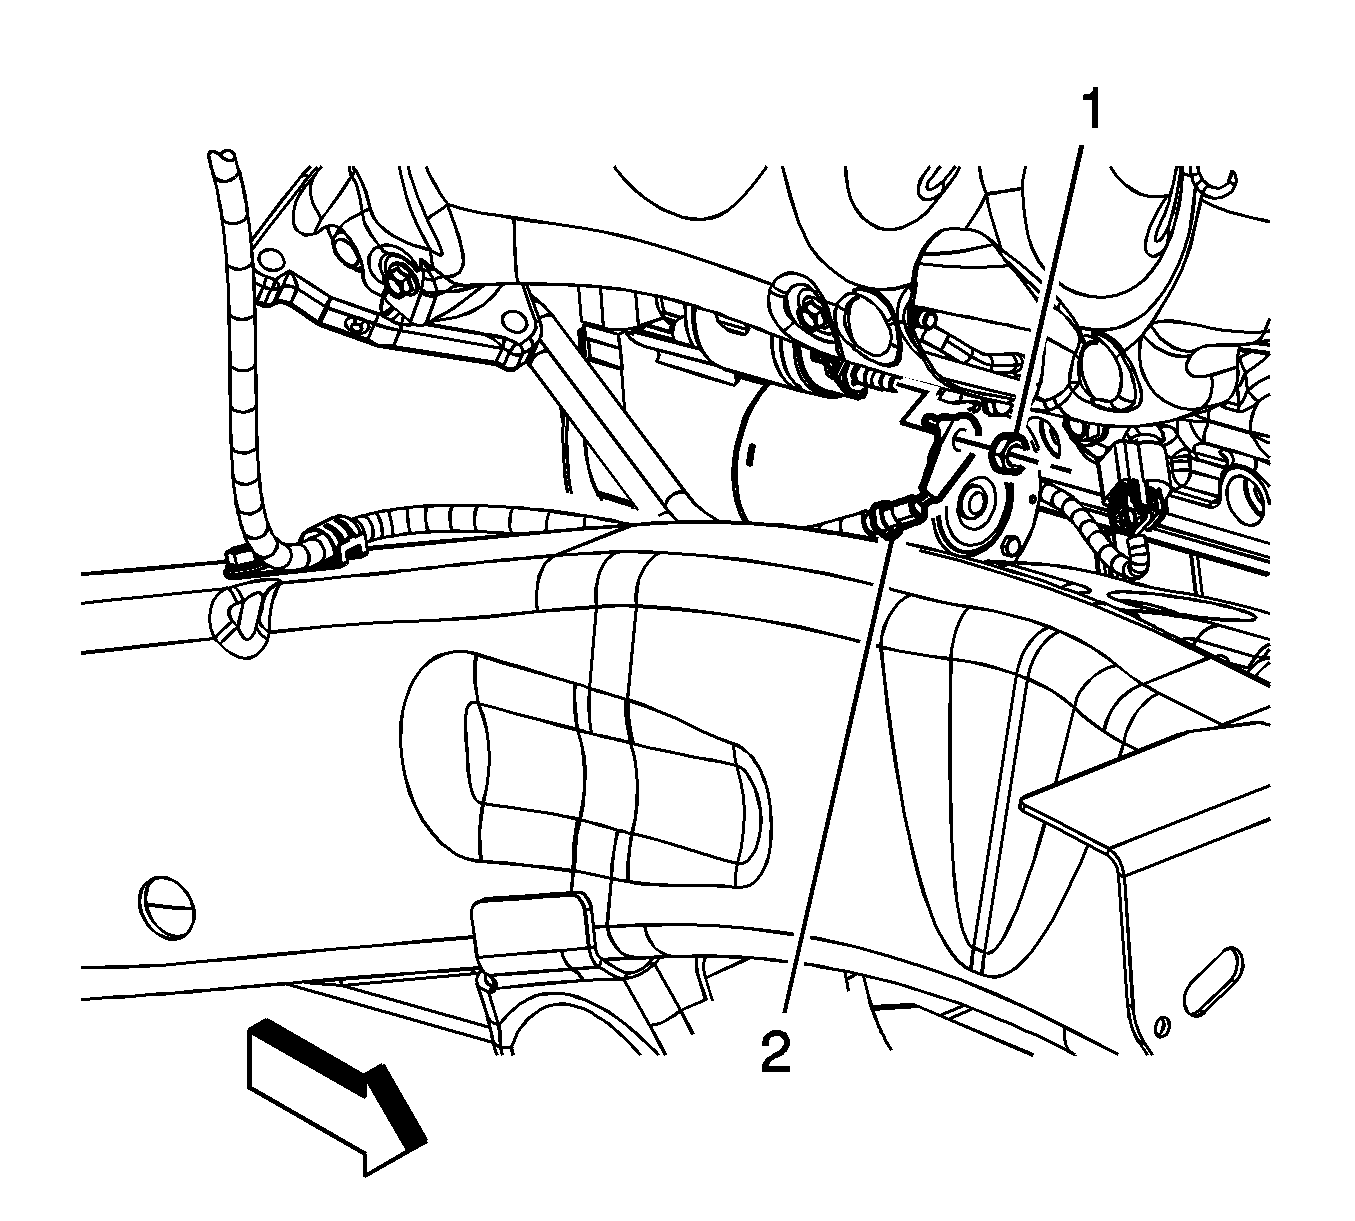
- Working through the right wheel well opening, remove the engine wiring harness lead nut (1).
- Remove the engine wiring harness lead terminal (2) from the starter.
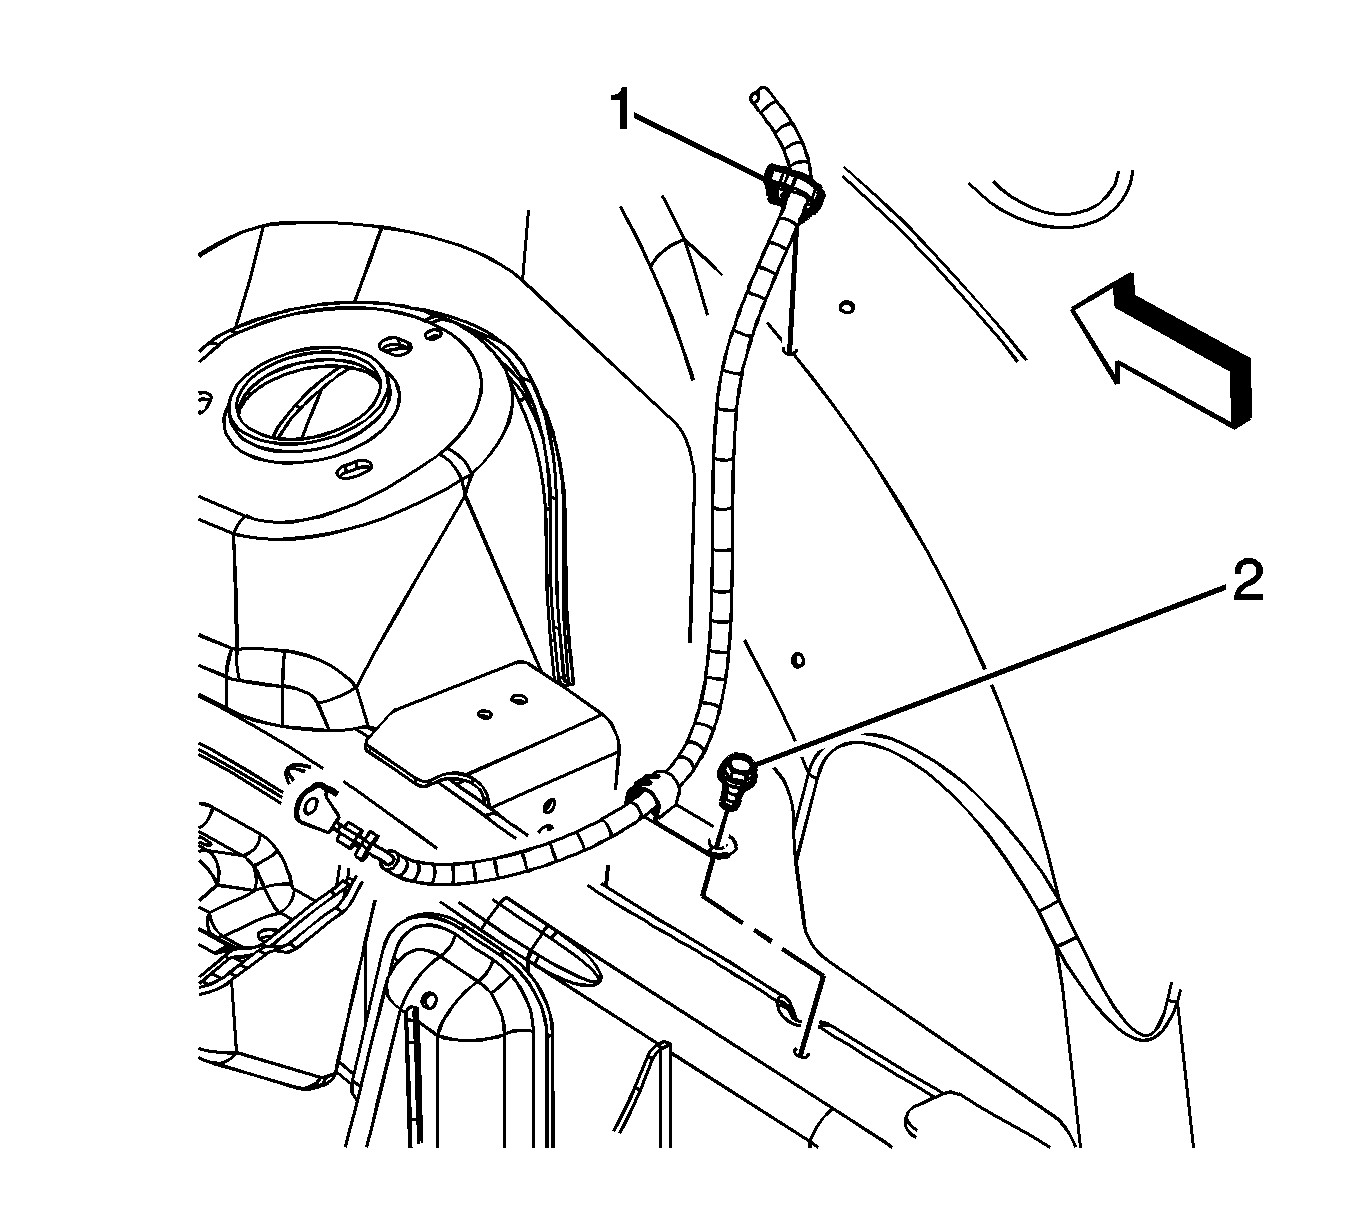
- Remove the starter solenoid cable clip bolt (2) from the frame.
- Remove the starter solenoid cable nut (1).
- Remove the starter solenoid cable (2) from the starter.
- Remove the starter through the wheel well opening.
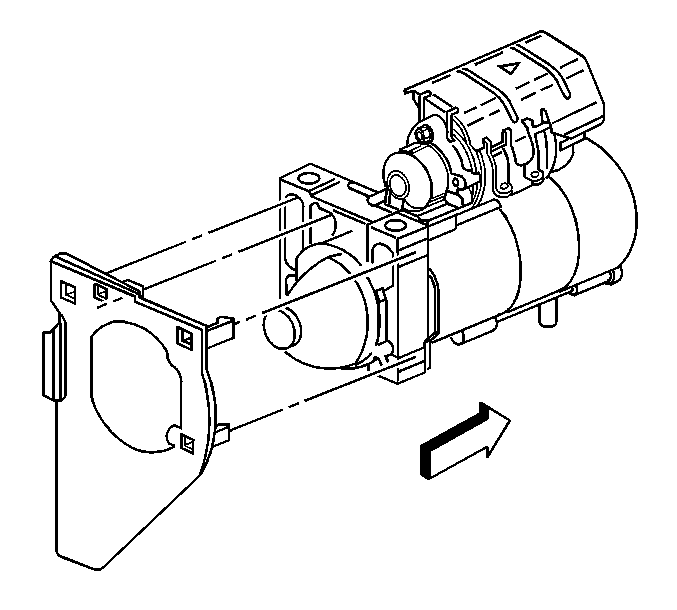
- If replacing the starter, unsnap the transmission cover from the starter.
- If replacing the starter, remove the starter heat shield.

Caution: Avoid cable and wiring damage. DO NOT suspend the starter by the cables or wires attached to the solenoid terminals. Use a rope or mechanics wire to suspend the starter.

Installation Procedure
- If the starter was replaced, install the starter heat shield.
- If the starter was replaced, snap the transmission cover onto the starter.
- Install the starter through the wheel well opening.
- Install the starter solenoid cable to the starter.
- Install the starter solenoid cable nut (1).
- Position the starter solenoid cable clip to the frame and install the starter solenoid cable clip bolt (2).
- Install the engine wiring harness lead terminal (2) to the starter.
- Install the engine wiring harness lead nut (3).
- Position the starter into place.
- Install the starter bolts.
- Install the right front wheel and tire. Refer to Tire and Wheel Removal and Installation.
- Raise the vehicle.
- Connect the engine wiring harness electrical connector (4) to the oil level sensor.
- Install the transmission cover bolt.
- Install the oil pan skid plate if equipped, Refer to Oil Pan Skid Plate Replacement.
- Connect the negative battery cable. Refer to Battery Negative Cable Disconnection and Connection.
Caution: Refer to Fastener Caution in the Preface section.
Tighten
Tighten the cable nut to 9 N·m (80 lb in).
Tighten
Tighten the clip bolt to 10 N·m (89 lb in).
Tighten
Tighten the lead nut to 3.4 N·m (30 lb in).
Tighten
Tighten the starter bolts to 50 N·m (37 lb ft).
Tighten
Tighten the cover bolt to 9 N·m (80 lb in).
