Caution: It can be dangerous to drive with the cargo area
covered and the tailgate and the Midgate® open because carbon monoxide (CO) gas
can come into your vehicle. You can not see or smell CO. It can cause unconsciousness
and even death. If you must drive with the cargo covers on and the tailgate and Midgate®
open or if electrical wiring or other cable connections must pass through the seal
between the body and the Midgate®:
• Make sure all windows are shut. • Turn the fan on your heating or cooling system to its highest speed on
the setting that brings in outside air. This will force outside air into your vehicle.
See
Dual Automatic Climate Control System
. • If you have air outlets on or under the instrument panel,
open them all the way. See
Engine Exhaust
.
Midgate® Operation
Your vehicle is equipped with a Midgate® and a removable rear glass panel. The Midgate® allows you to extend the length of your vehicle's cargo area.
The following are the main components of the Midgate® system:
-
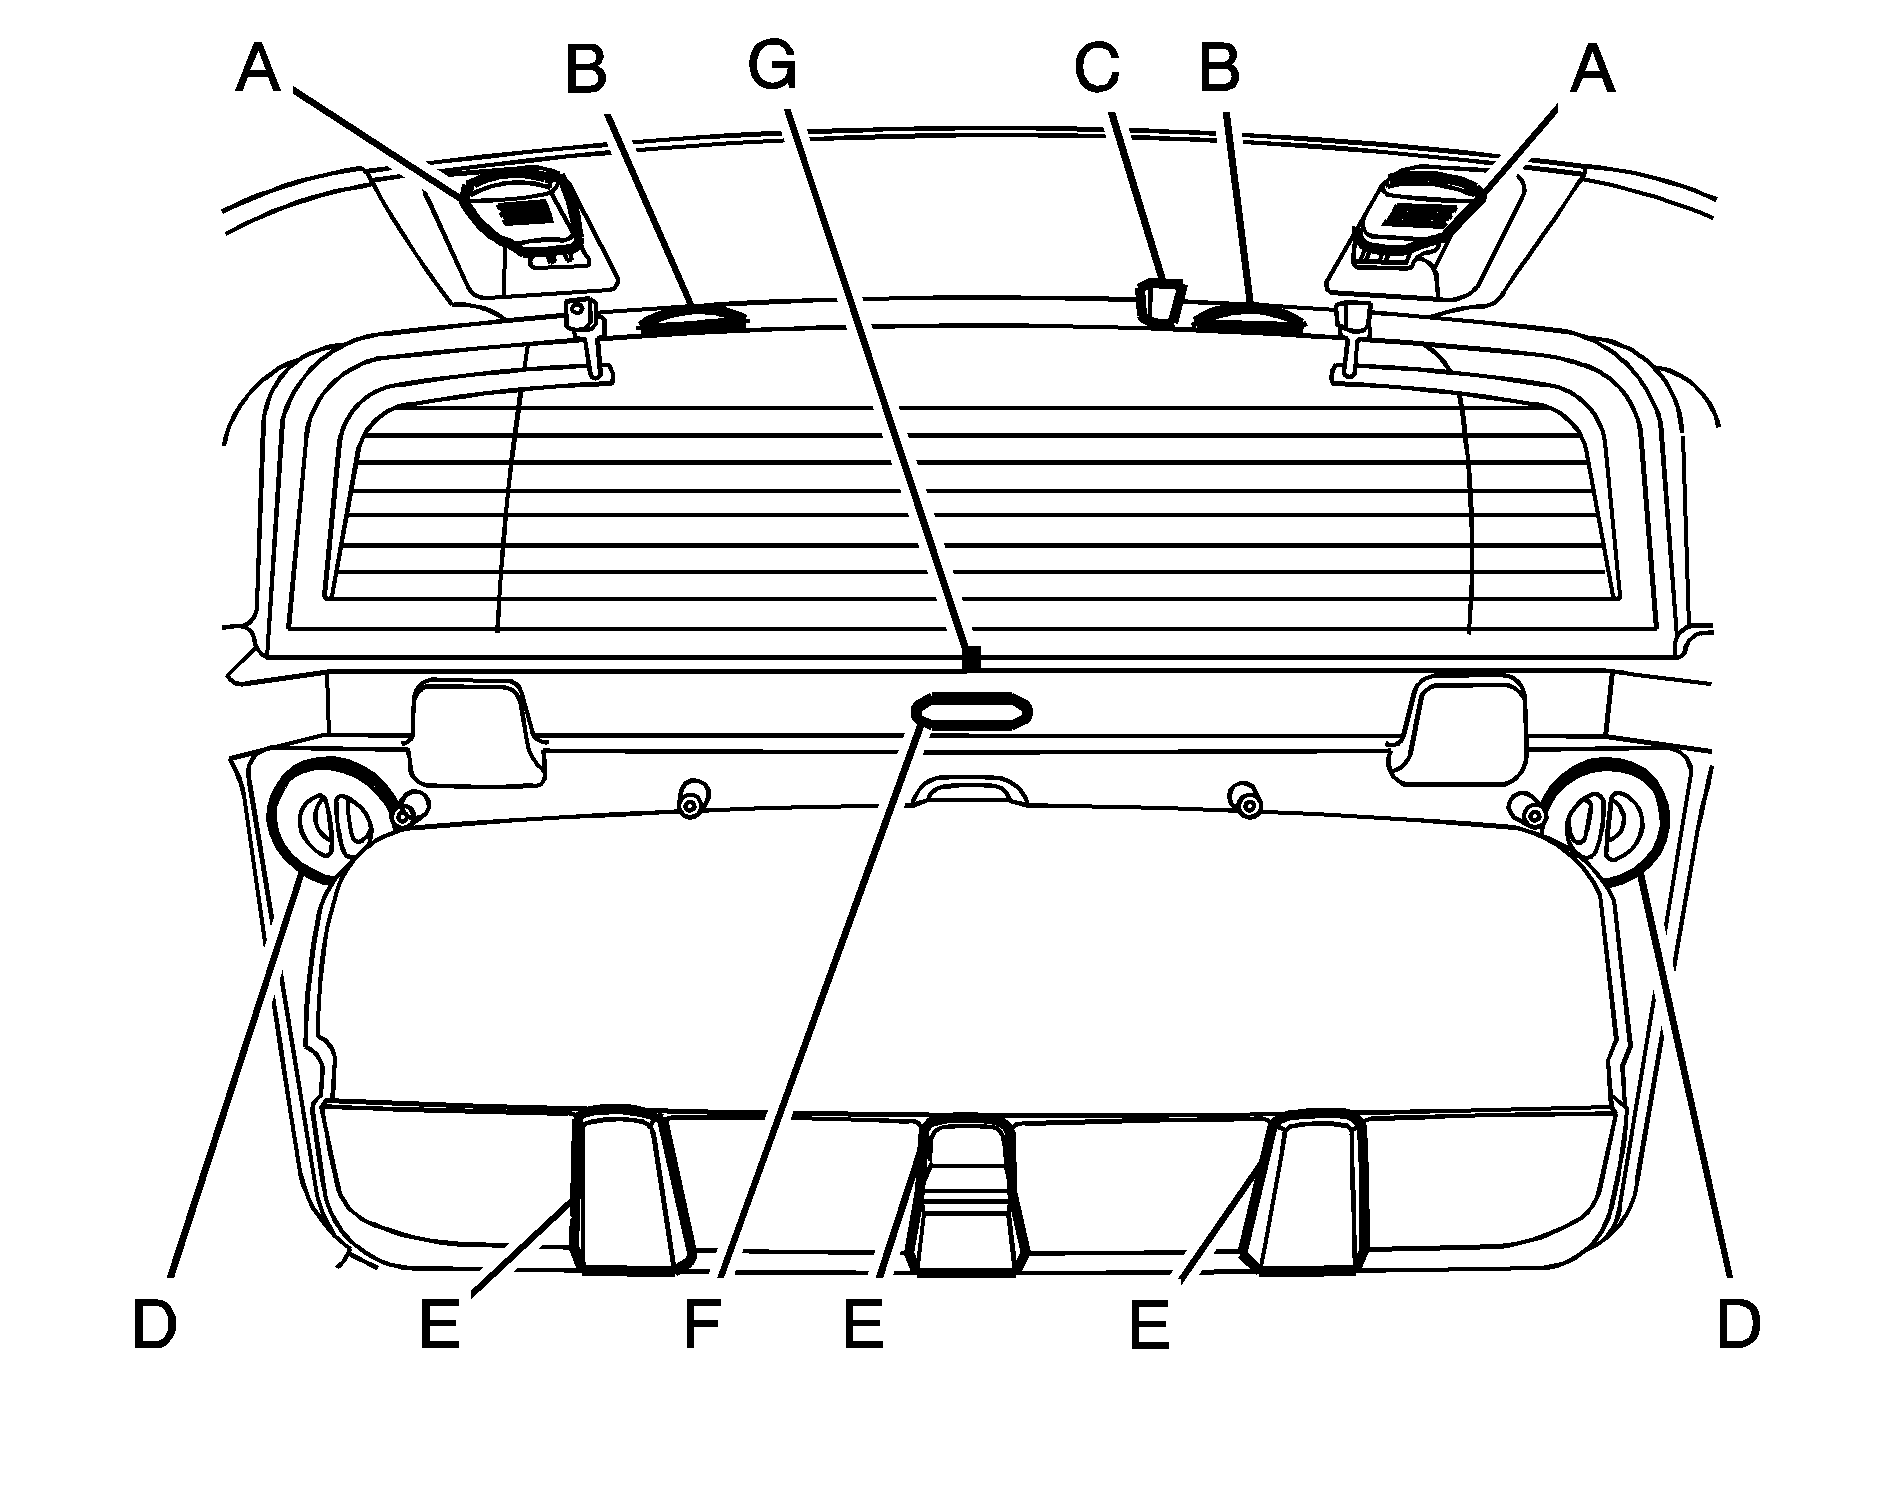
Latch Levers
Grab Handles
Glass-Catch Release Button
Glass Lock Knobs
Window Retaining Tabs
Midgate® Release Handle
Window Alignment Arrows
Rear Glass Removal and Storage
Caution:
If the removable rear glass is not stored properly, it could be thrown about the vehicle in a crash or sudden maneuver. People in the vehicle could be injured. Whenever you store the rear glass in the vehicle, always be sure that it is stored securely in the Midgate® storage pocket.Do not remove the rear glass when the rear defroster is on. If you remove the rear glass with the rear defroster on, you may see a discharge spark coming from the latch area.
To remove the rear glass do the following:
- Fold the rear seats. See Rear Seat Operation for more information. The front seats may have to be moved forward slightly to allow the rear seats to fold completely.
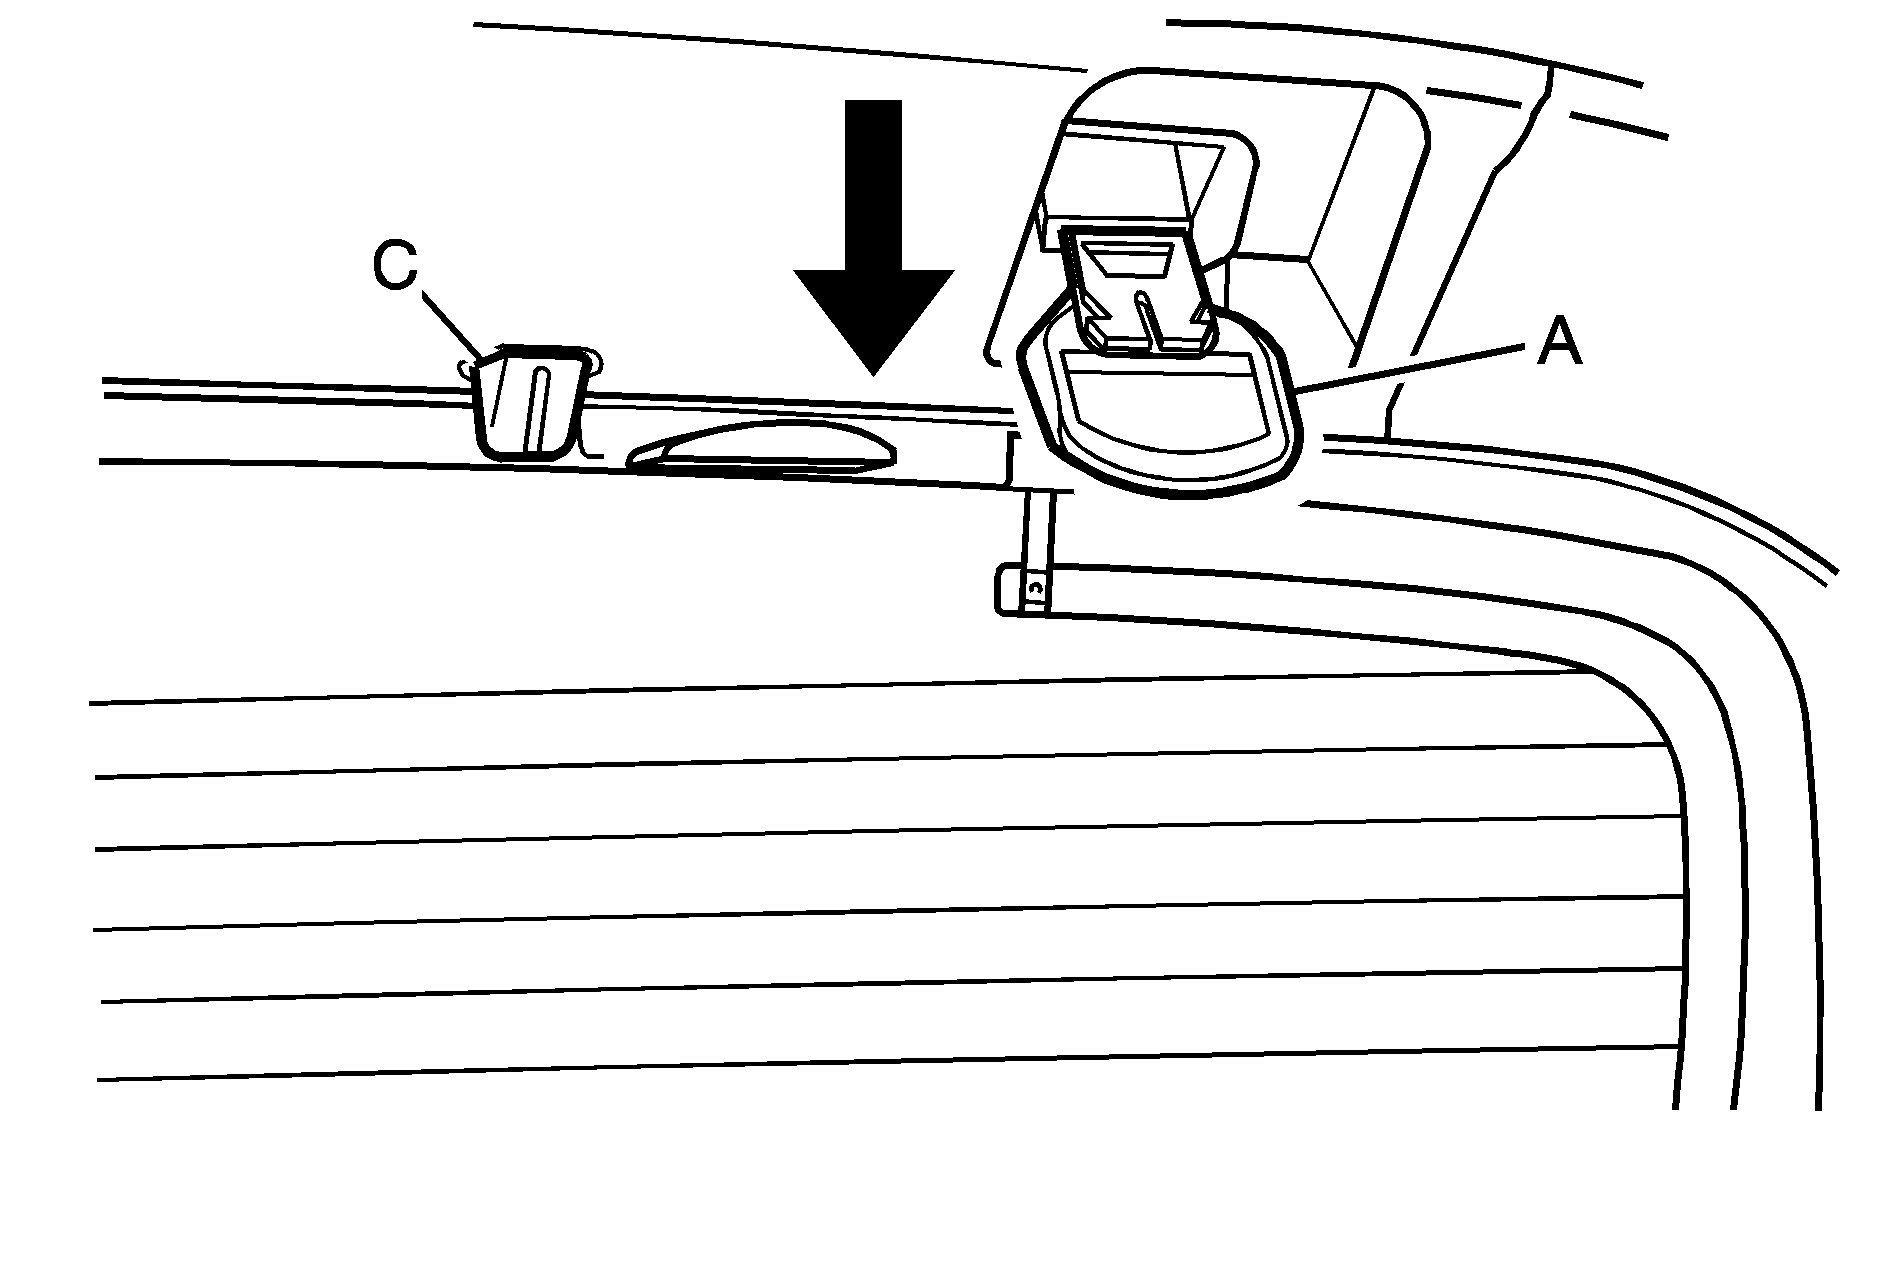
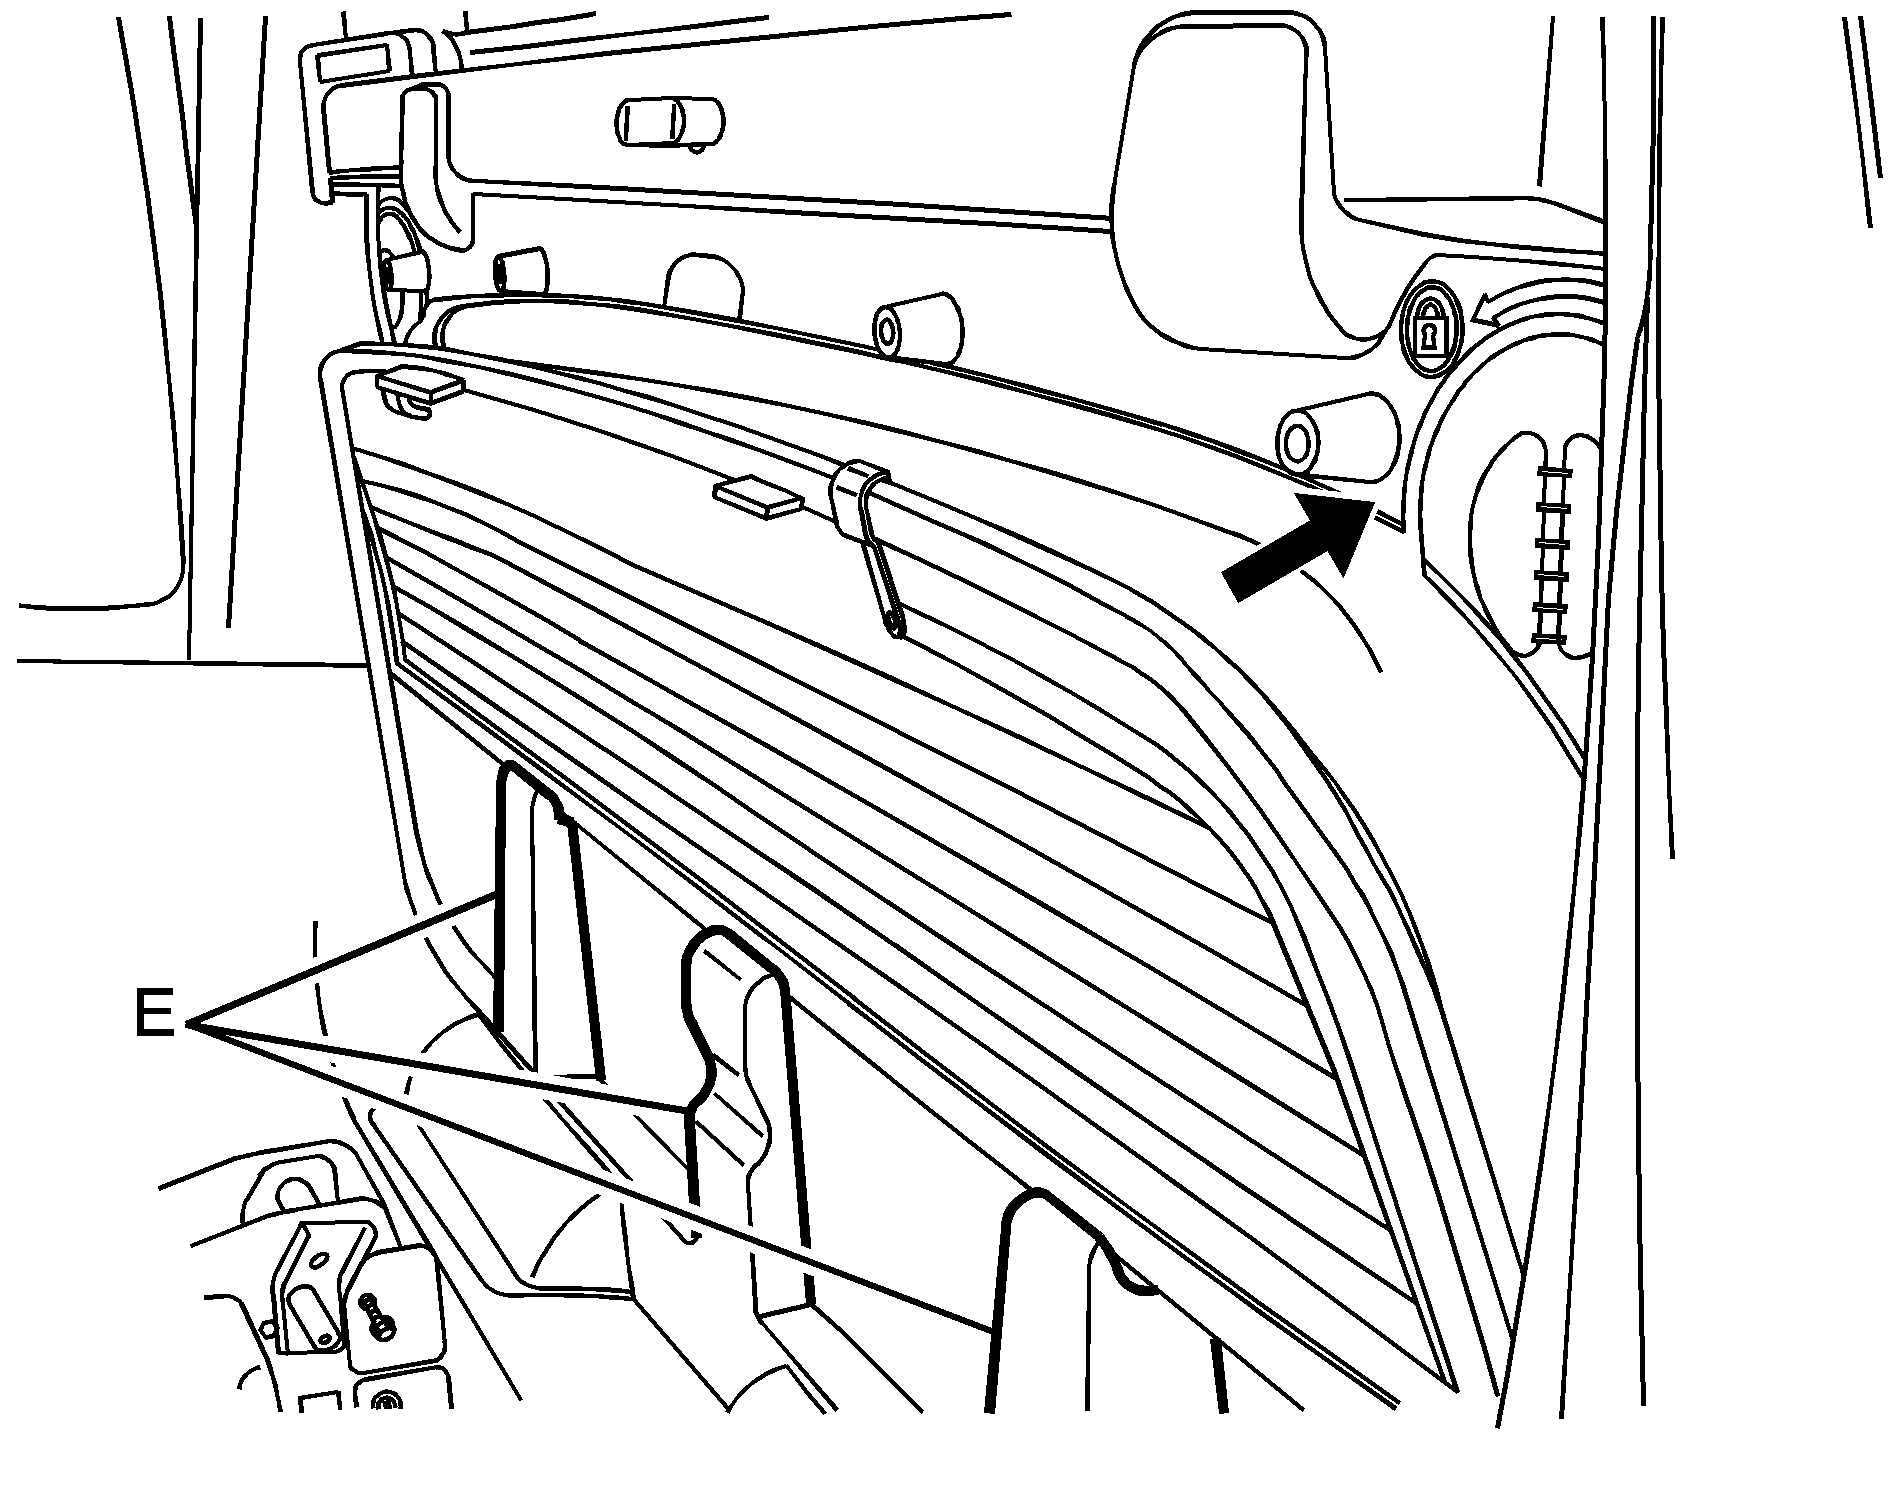
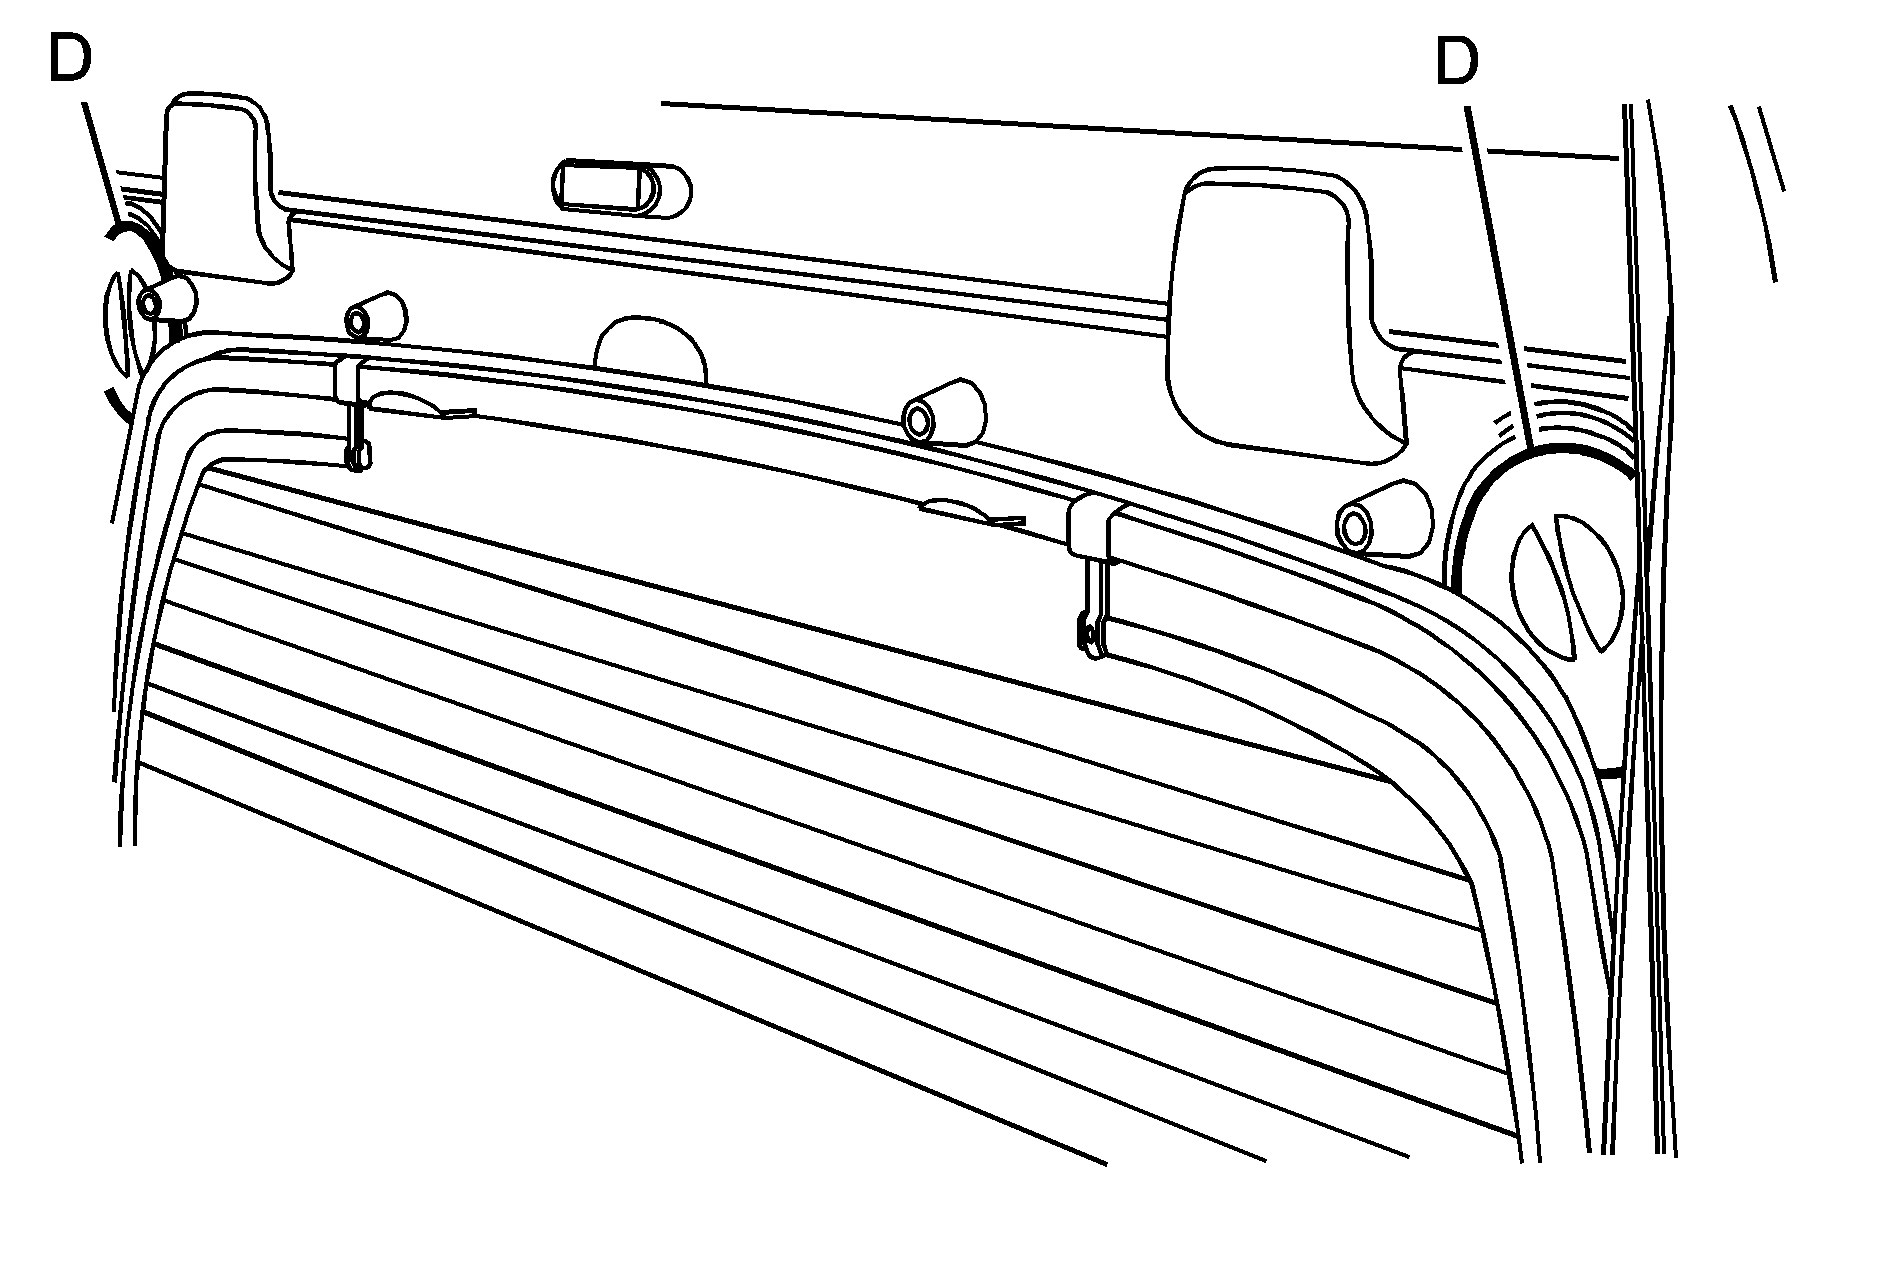
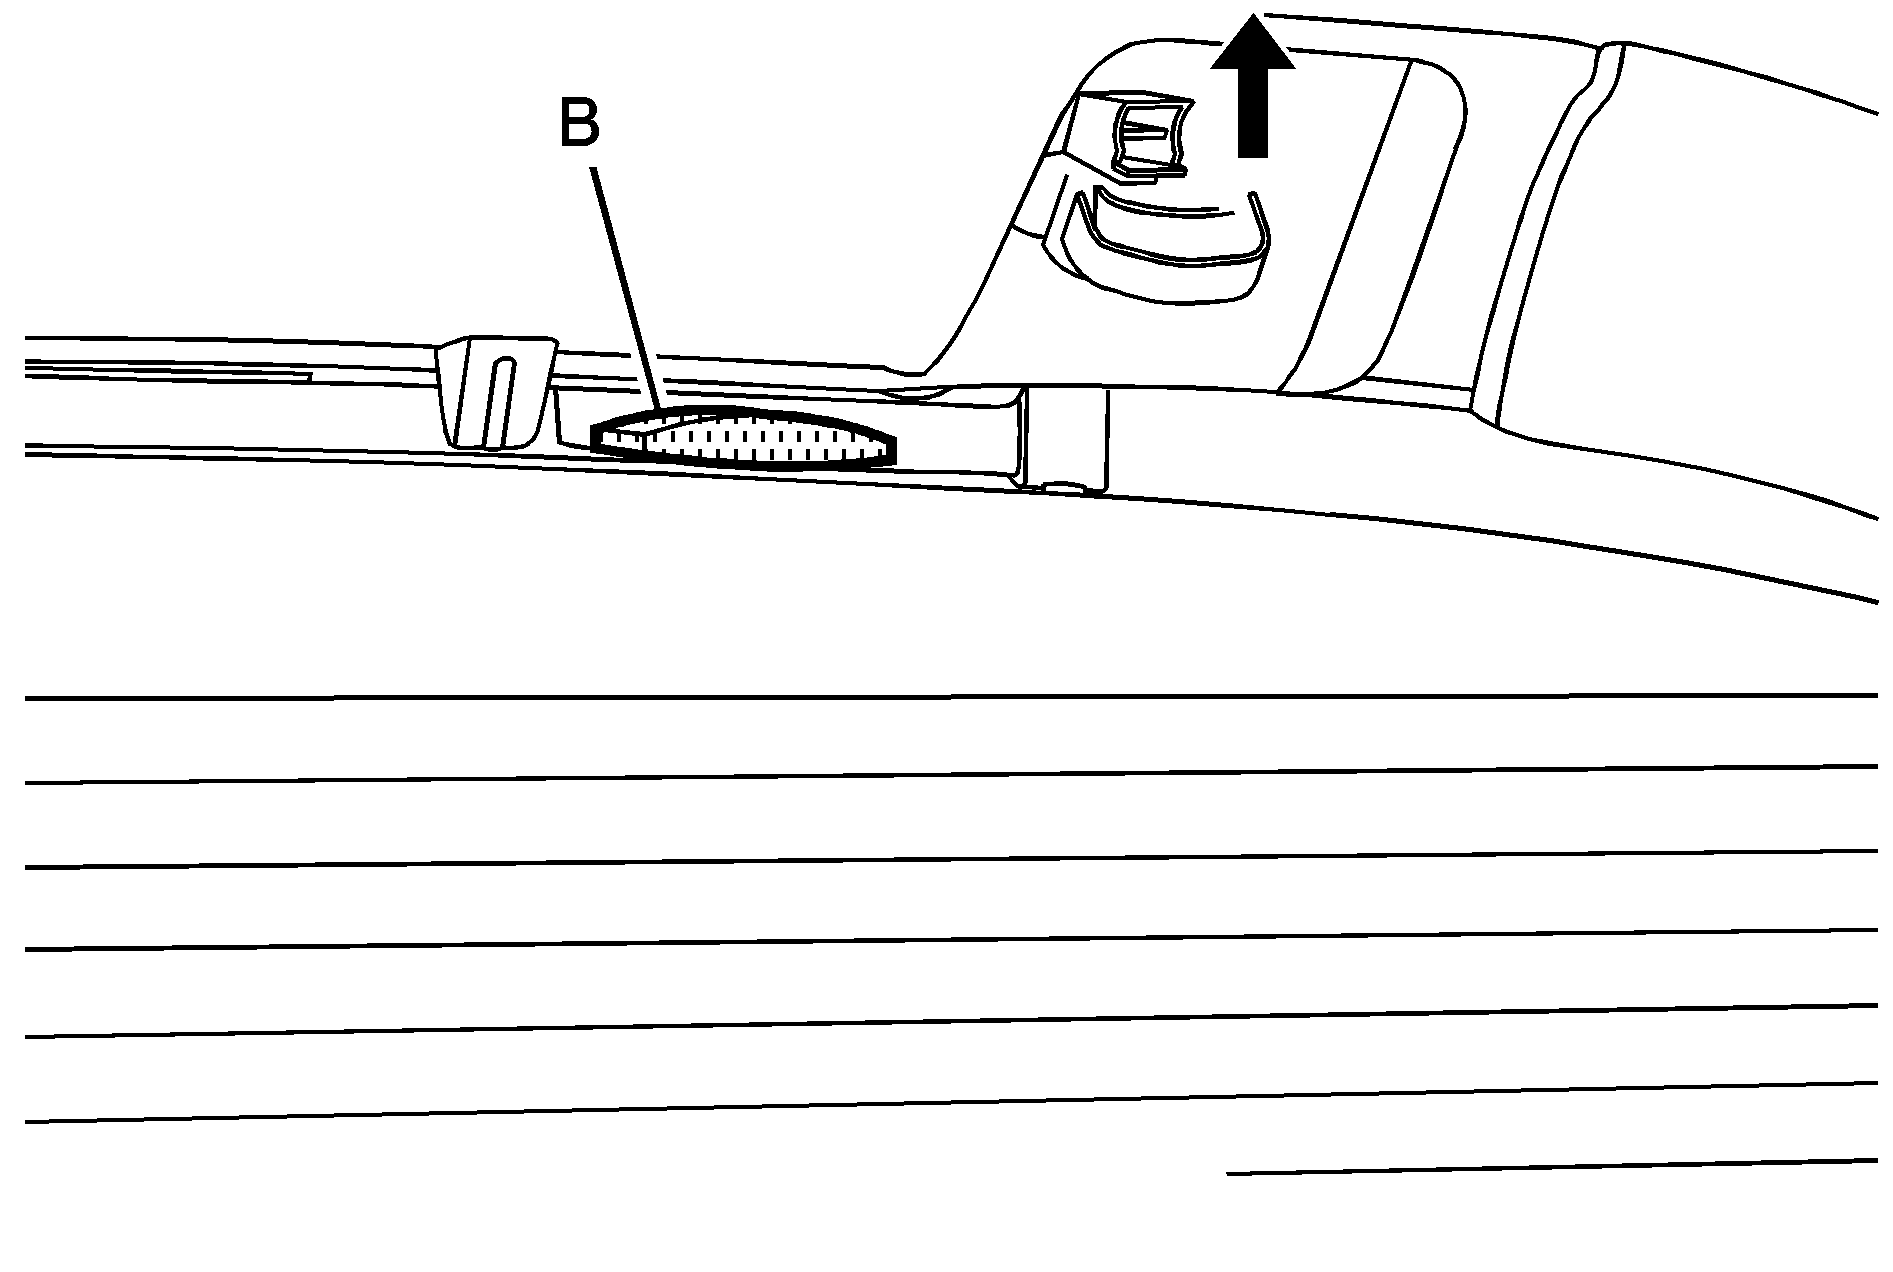
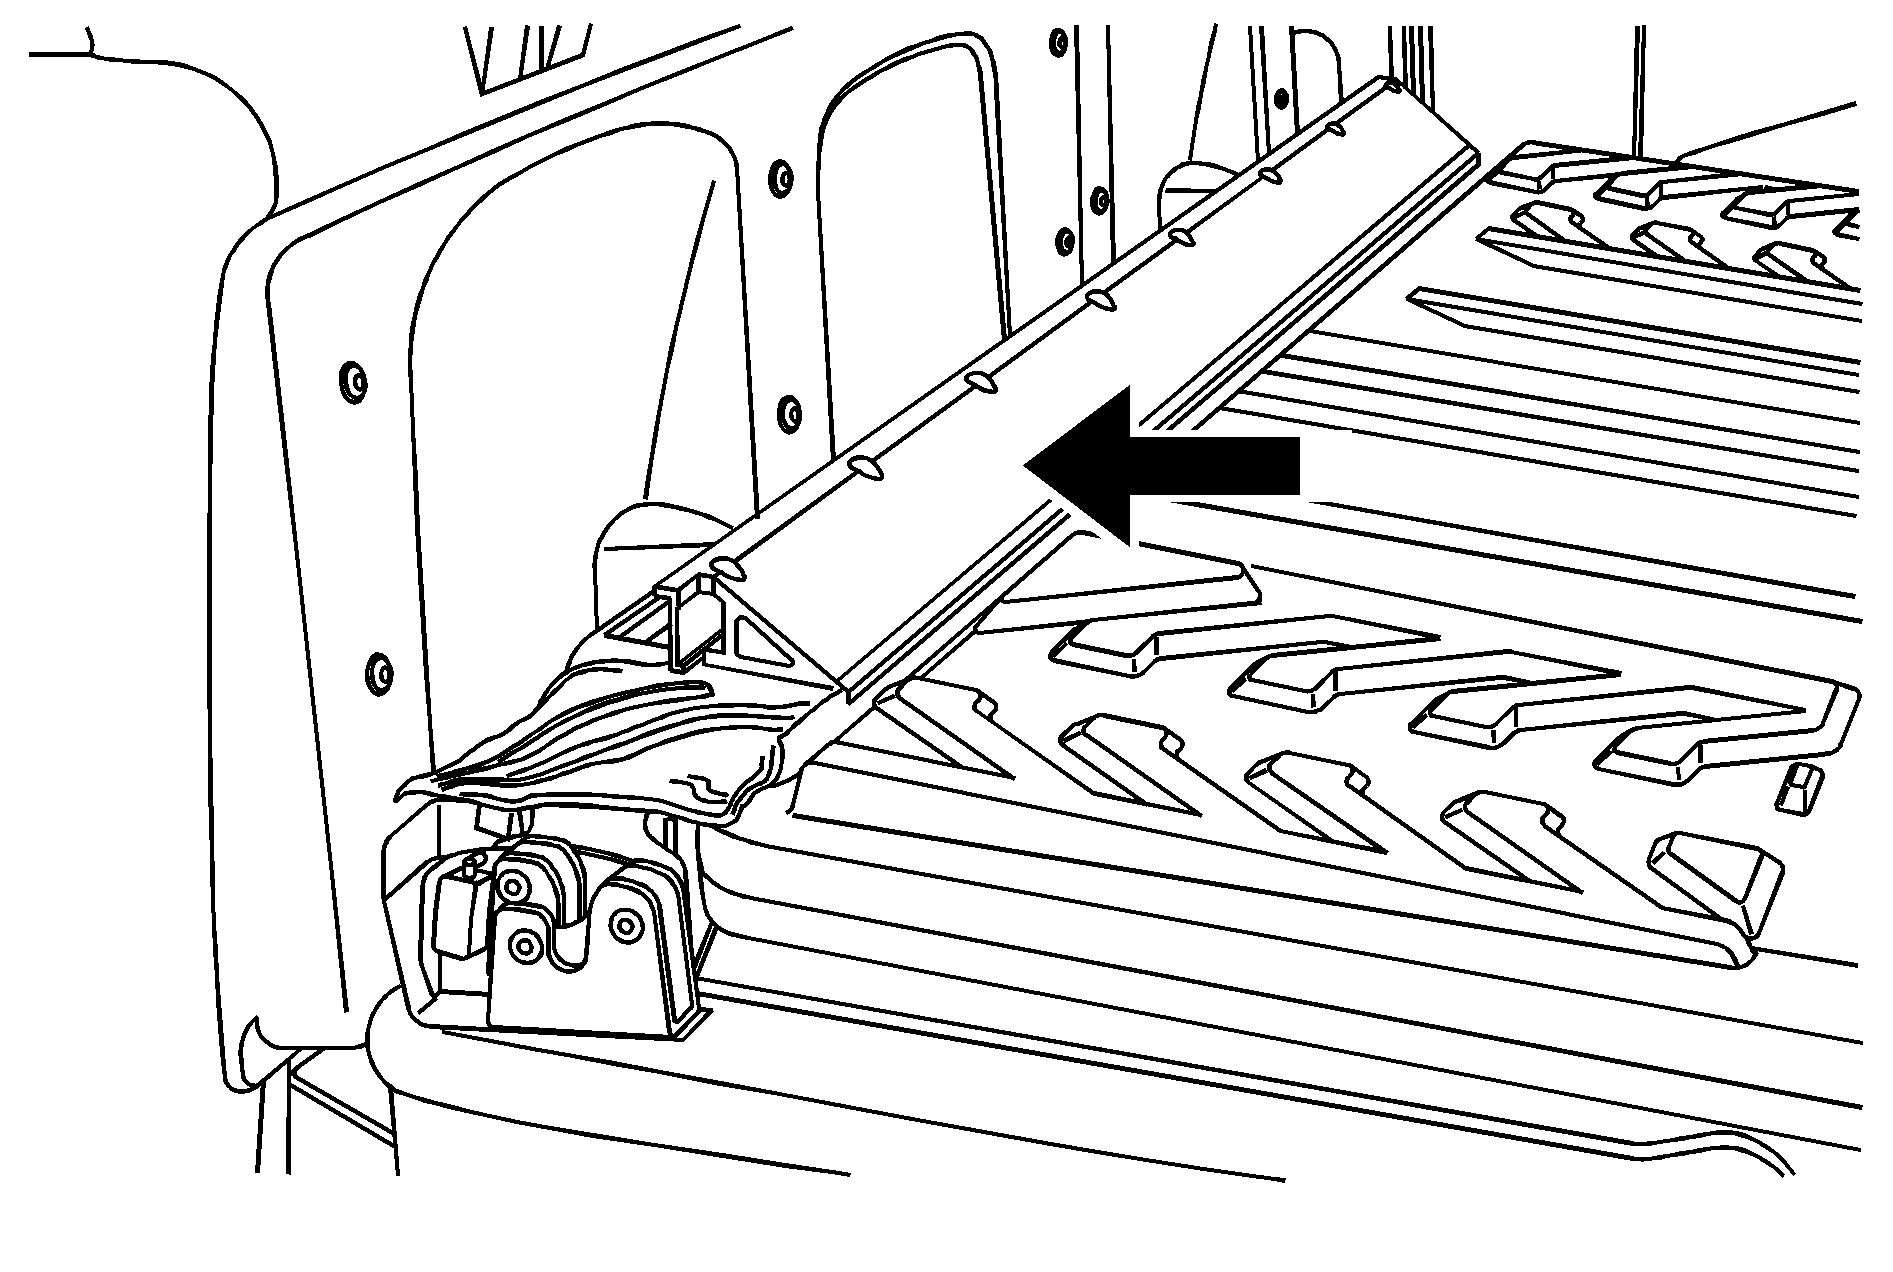
- Squeeze and pull down the latch levers (A), located near the upper corners of the rear glass, to unlatch. Once unlatched, the glass-catch release button (C) will catch the rear glass and prevent it from falling forward.
- While holding the rear glass in place, press the glass-catch release button (C) and pull the top of the rear glass toward you using the grab handle(s) (B) located at the top of the rear glass.
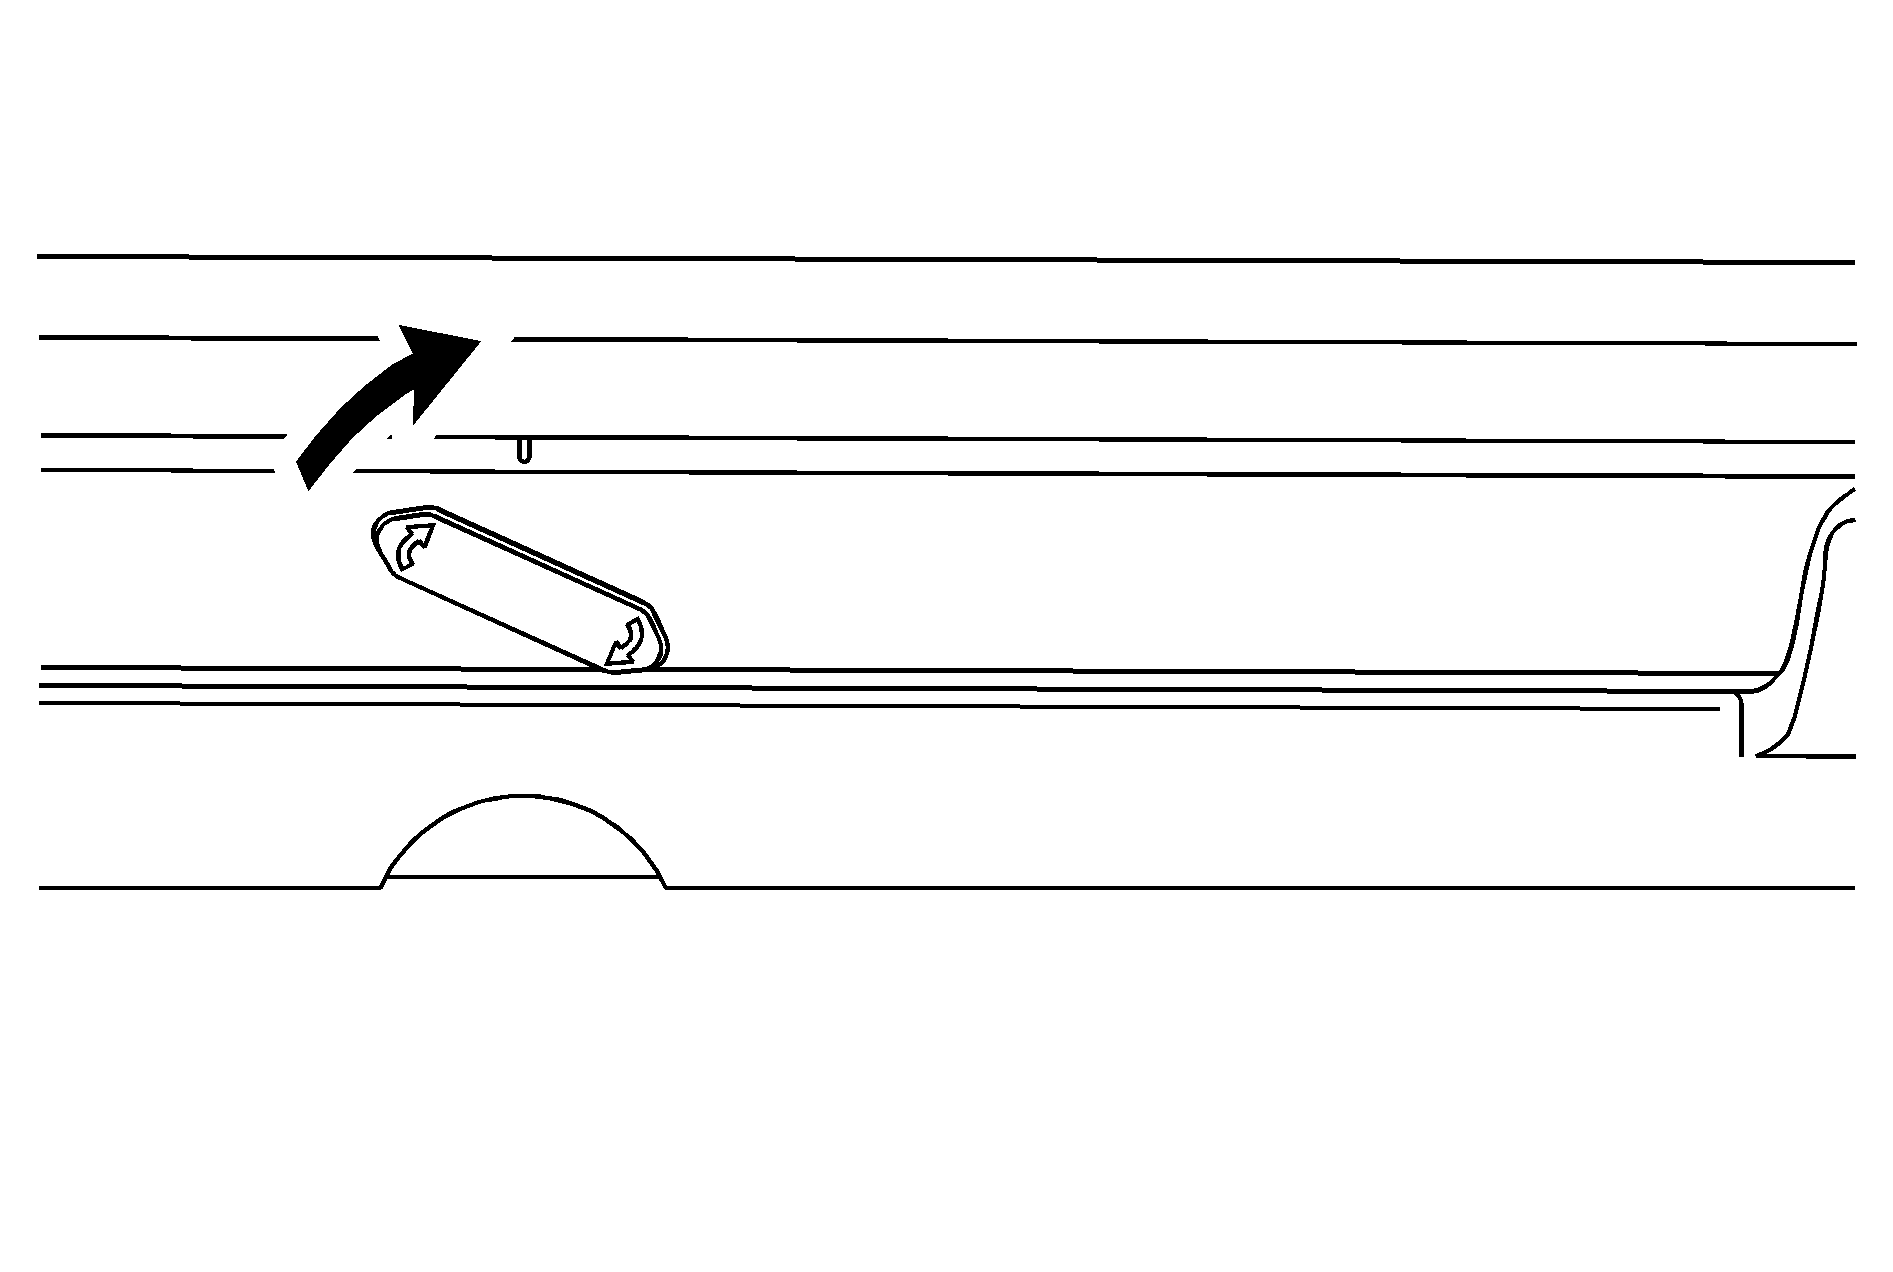
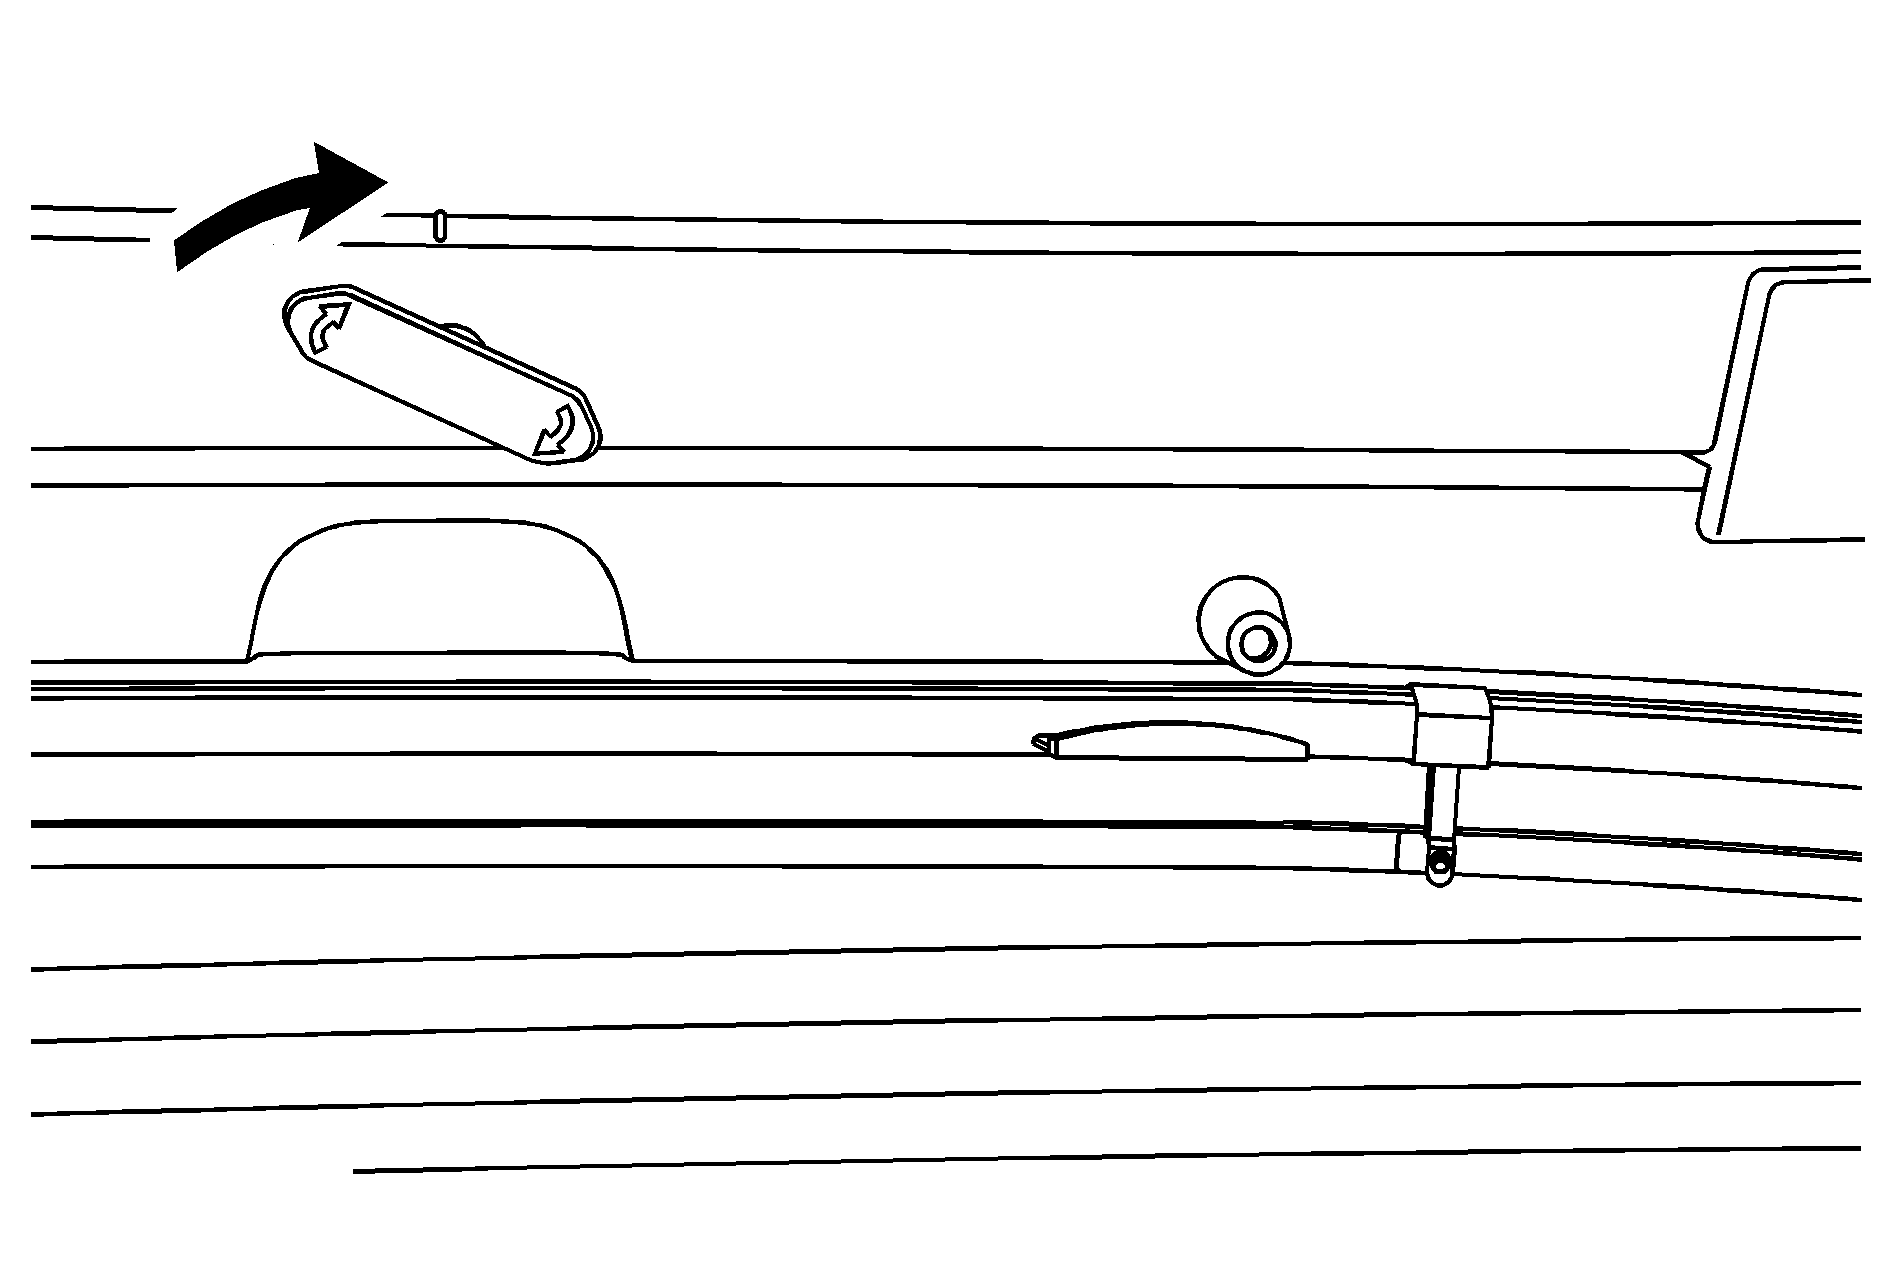
- With the rear glass tilted toward you, lift it out from the lower window frame channel. Use the grab handles to assist you in removing the rear glass.
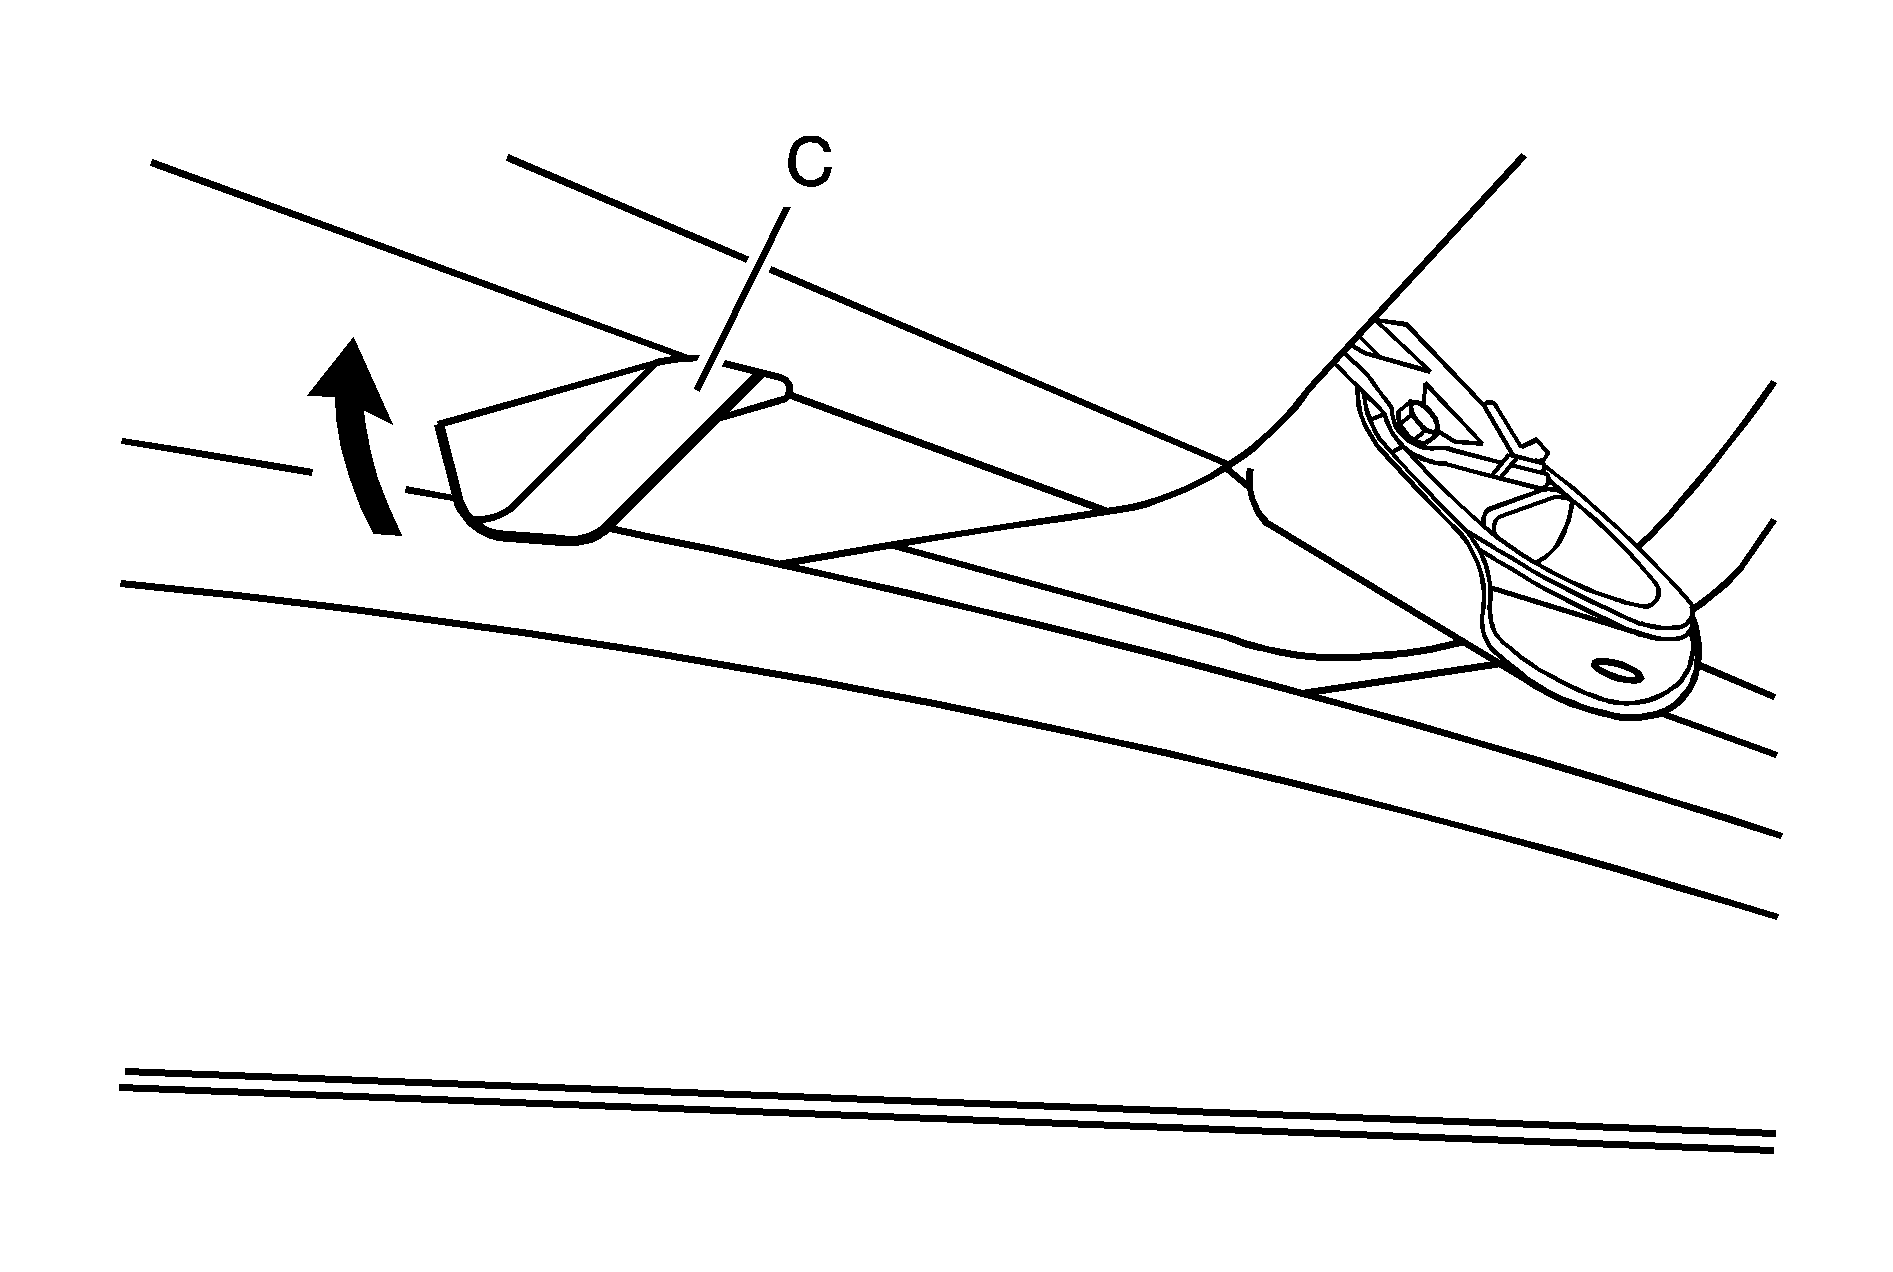
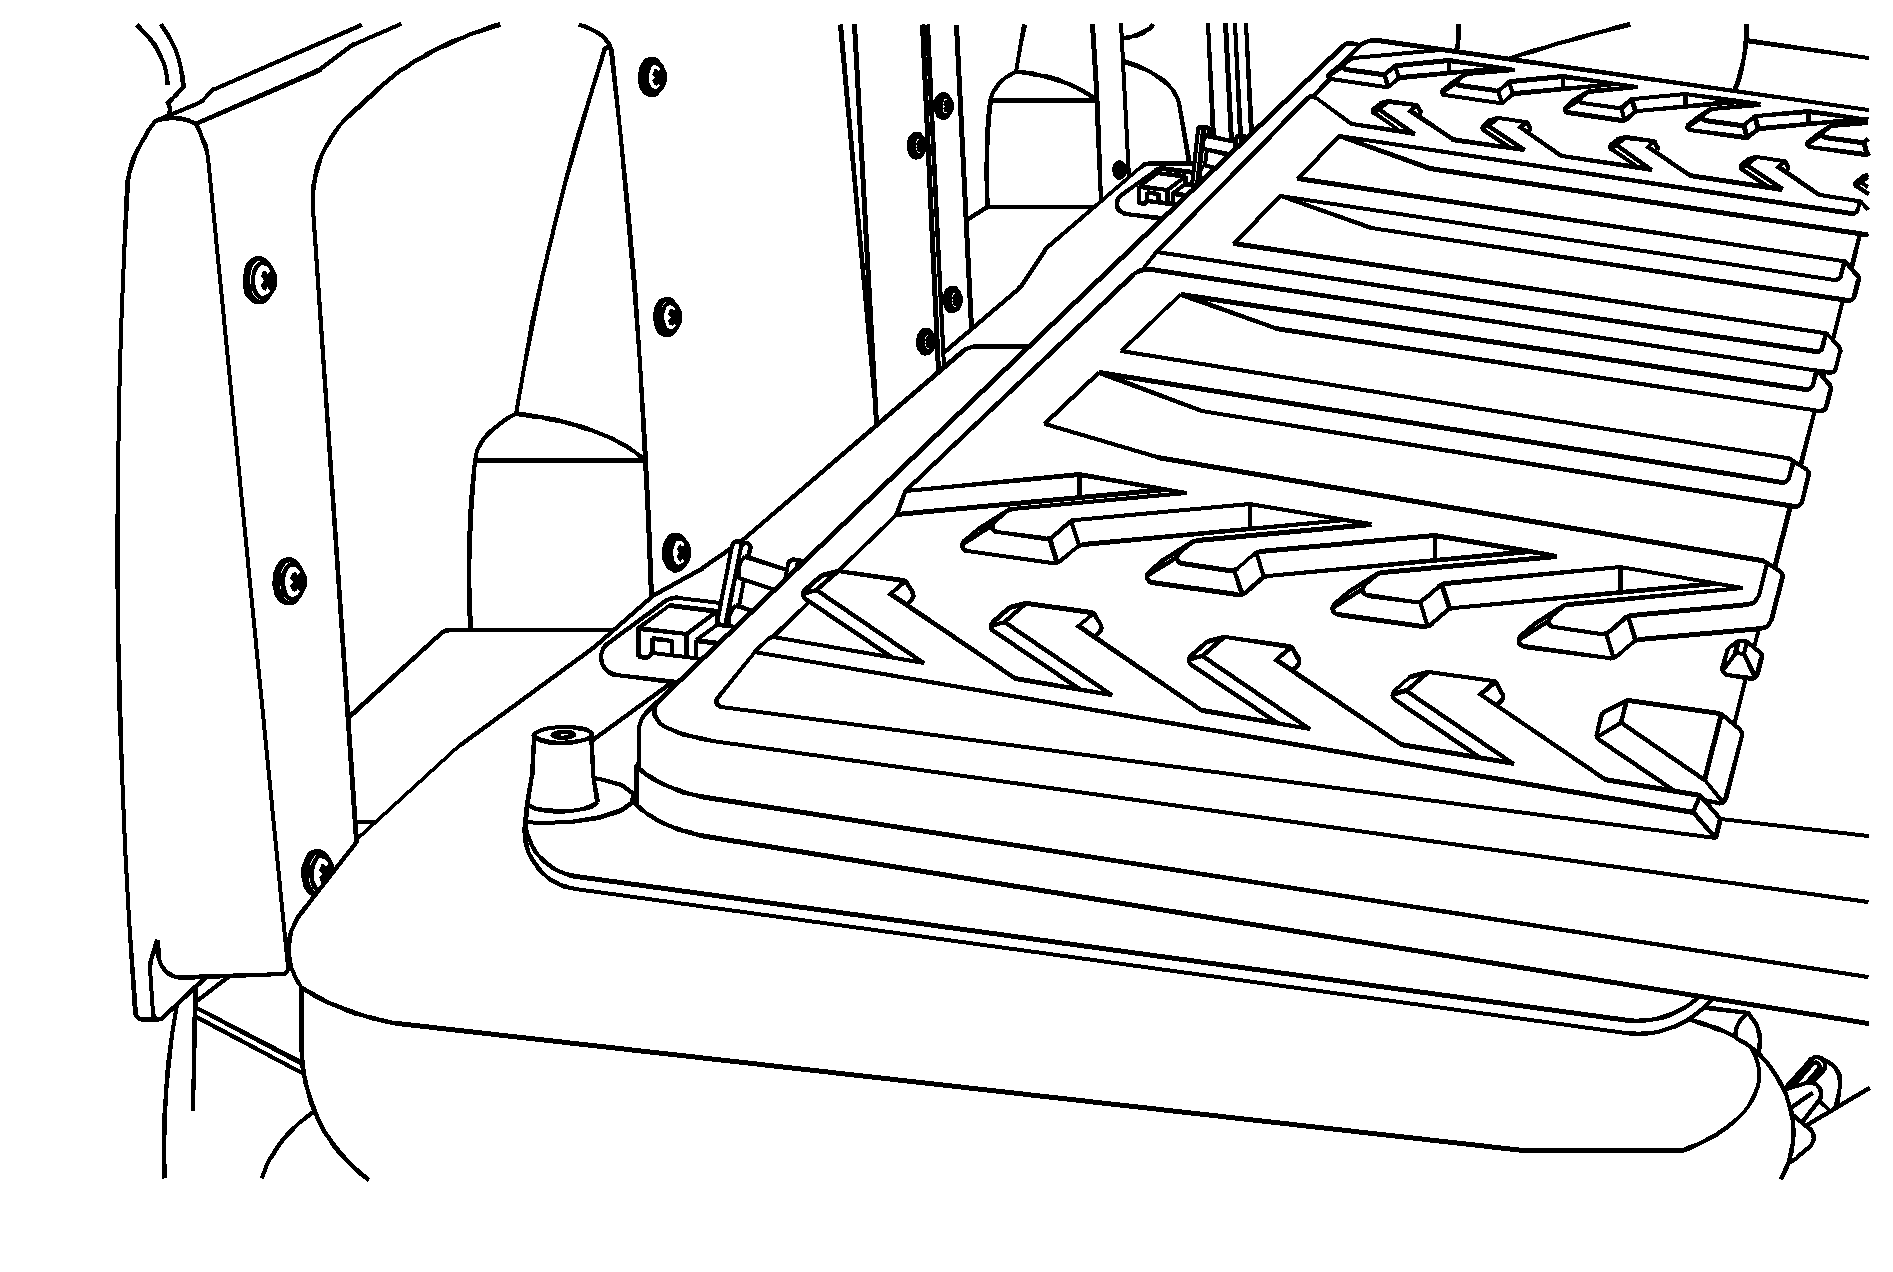
- Load the rear glass into the storage pocket in the Midgate®, guiding the lower edge of the rear glass behind the three rear glass retaining tabs (E).
- Turn both glass lock knobs (D), located at both top corners of the storage pocket, to the locked position. Push in on the corner of the rear glass to allow the lock knob to engage more easily.
- Once both glass lock knobs are in the locked position, the rear glass is securely stored.
- Push both latch levers up to the locked position. You should hear a click when each latch lever locks correctly.
Although the rear glass can be removed without folding the rear seats, you will not be able to access the rear glass storage pocket. Be sure to fold the seats before removing the rear glass.
Hold the rear glass flat against the storage pocket, with grab handles facing you, until the next step.
The rear seats can be returned to the normal position when the rear glass is out and stored properly in the storage pocket.
Reinstalling the Rear Glass
To reinstall the rear glass, do the following:
- Squeeze and pull down the latch levers (A), located near the upper corners of the rear glass, to unlatch.
- Hold the rear glass in place with one hand and turn the glass lock knobs, located at both top corners of the glass storage pocket, to the unlocked position.
- Pull the rear glass out from the storage pocket using the grab handles.
- With the rear glass tilted at an angle, place the bottom edge in the lower channel of the window frame.
- Apply a firm downward pressure and then push the rear glass flat against the window frame. Use the grab handles at the top of the rear glass to assist you.
- Push the rear glass flat against the window frame and push each latch lever up until it locks. You should hear a click when each latch lever locks correctly.

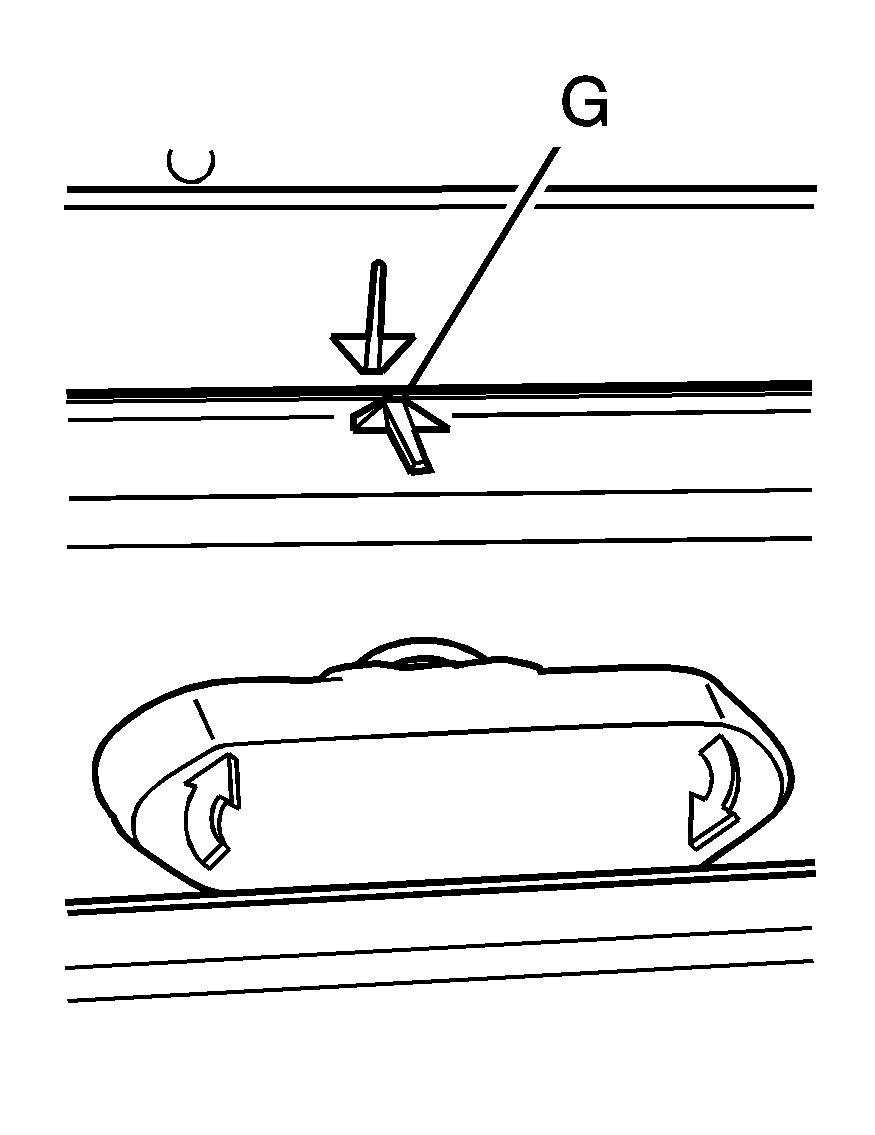
Be sure to align the rear glass side-to-side using the alignment arrows (G).
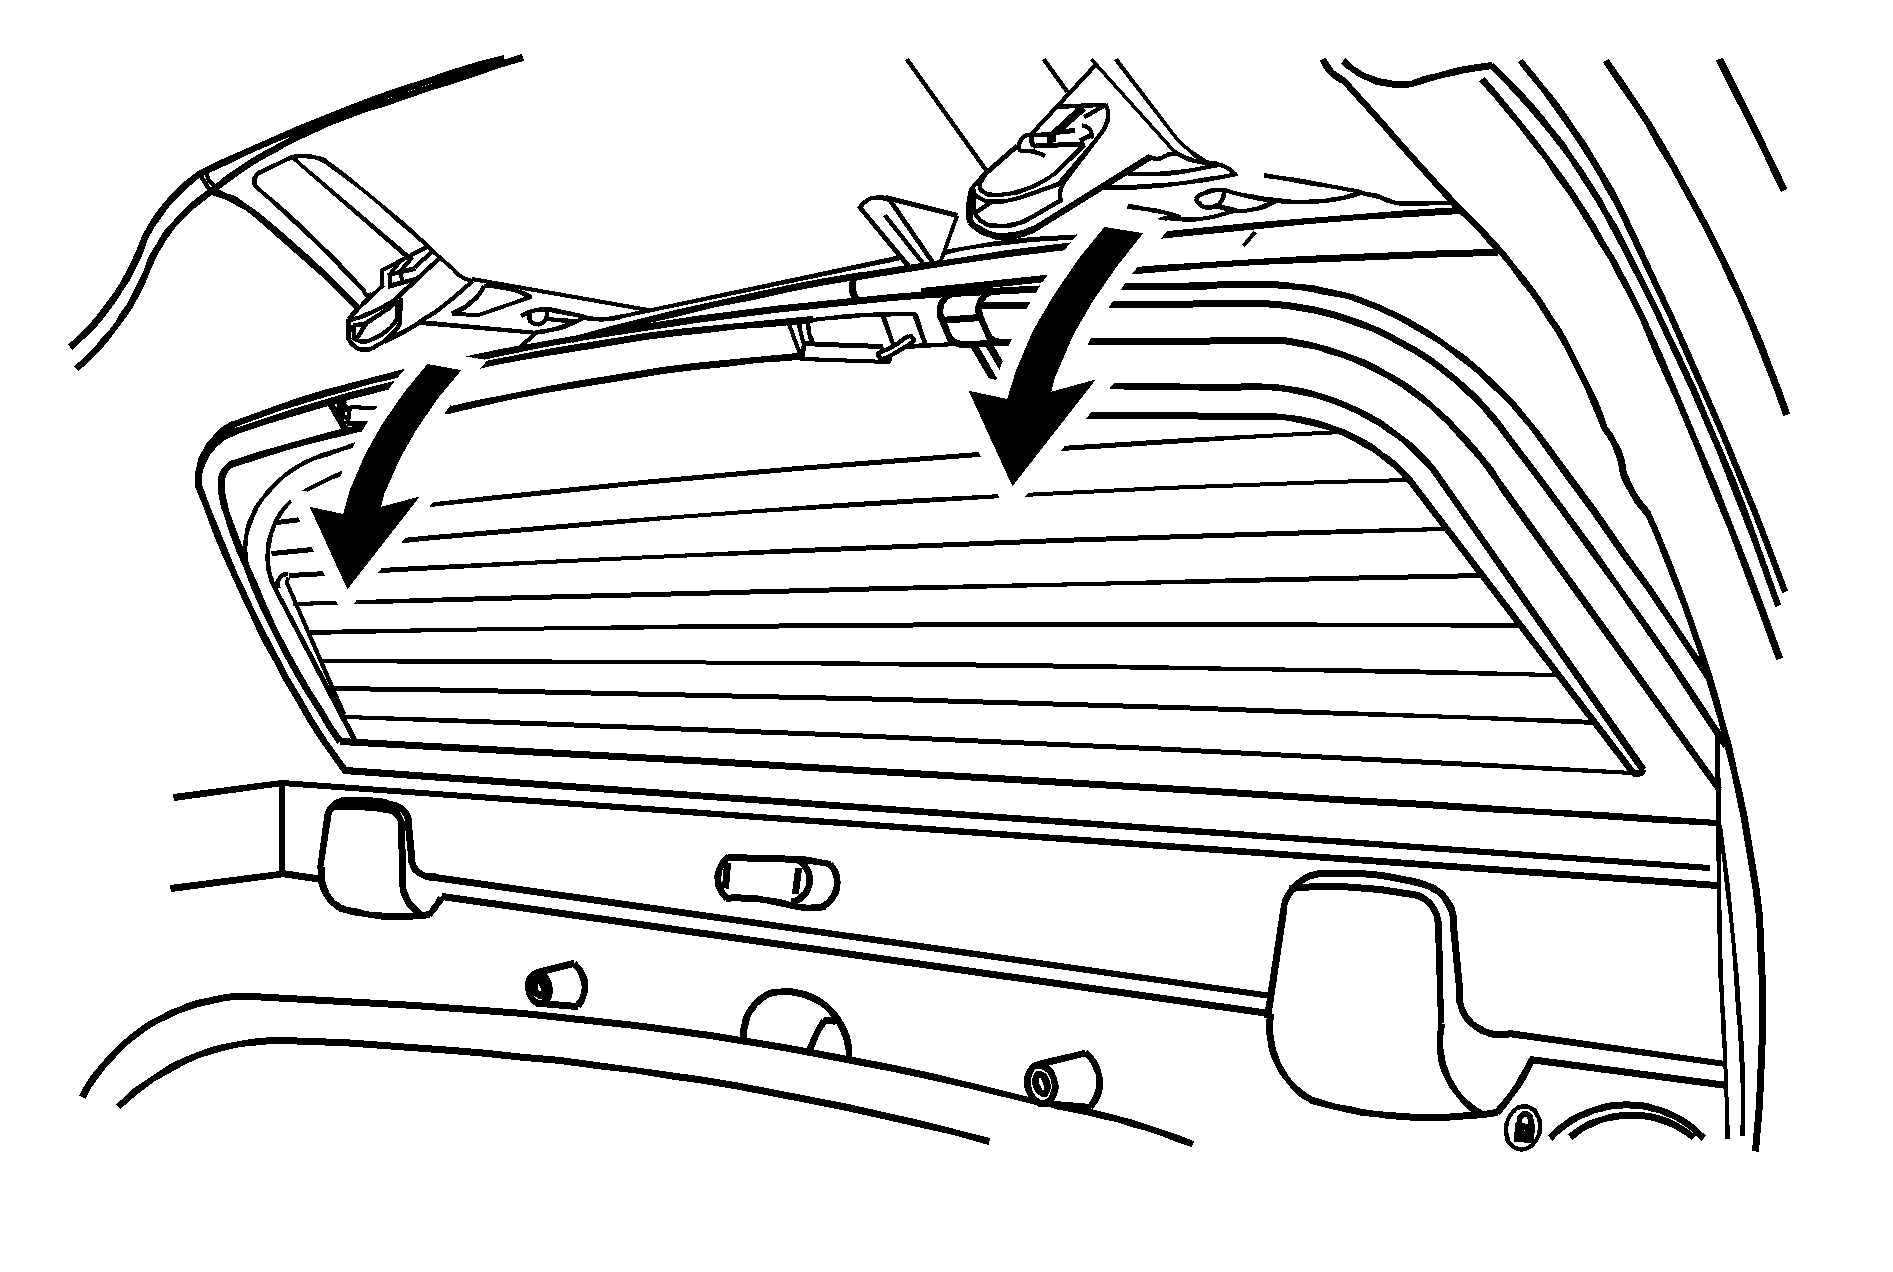
Lowering the Midgate® with the Rear Glass in Place
The Midgate® can be lowered to allow the cargo area of your vehicle to extend into the cab. The rear glass can be either installed in its normal position, or it can be removed and stored in the rear glass storage pocket.
To lower the Midgate®, do the following:
- Fold the rear seats. The front seats might have to be moved forward slightly to allow the rear seats to fold. See Rear Seat Operation for more information.
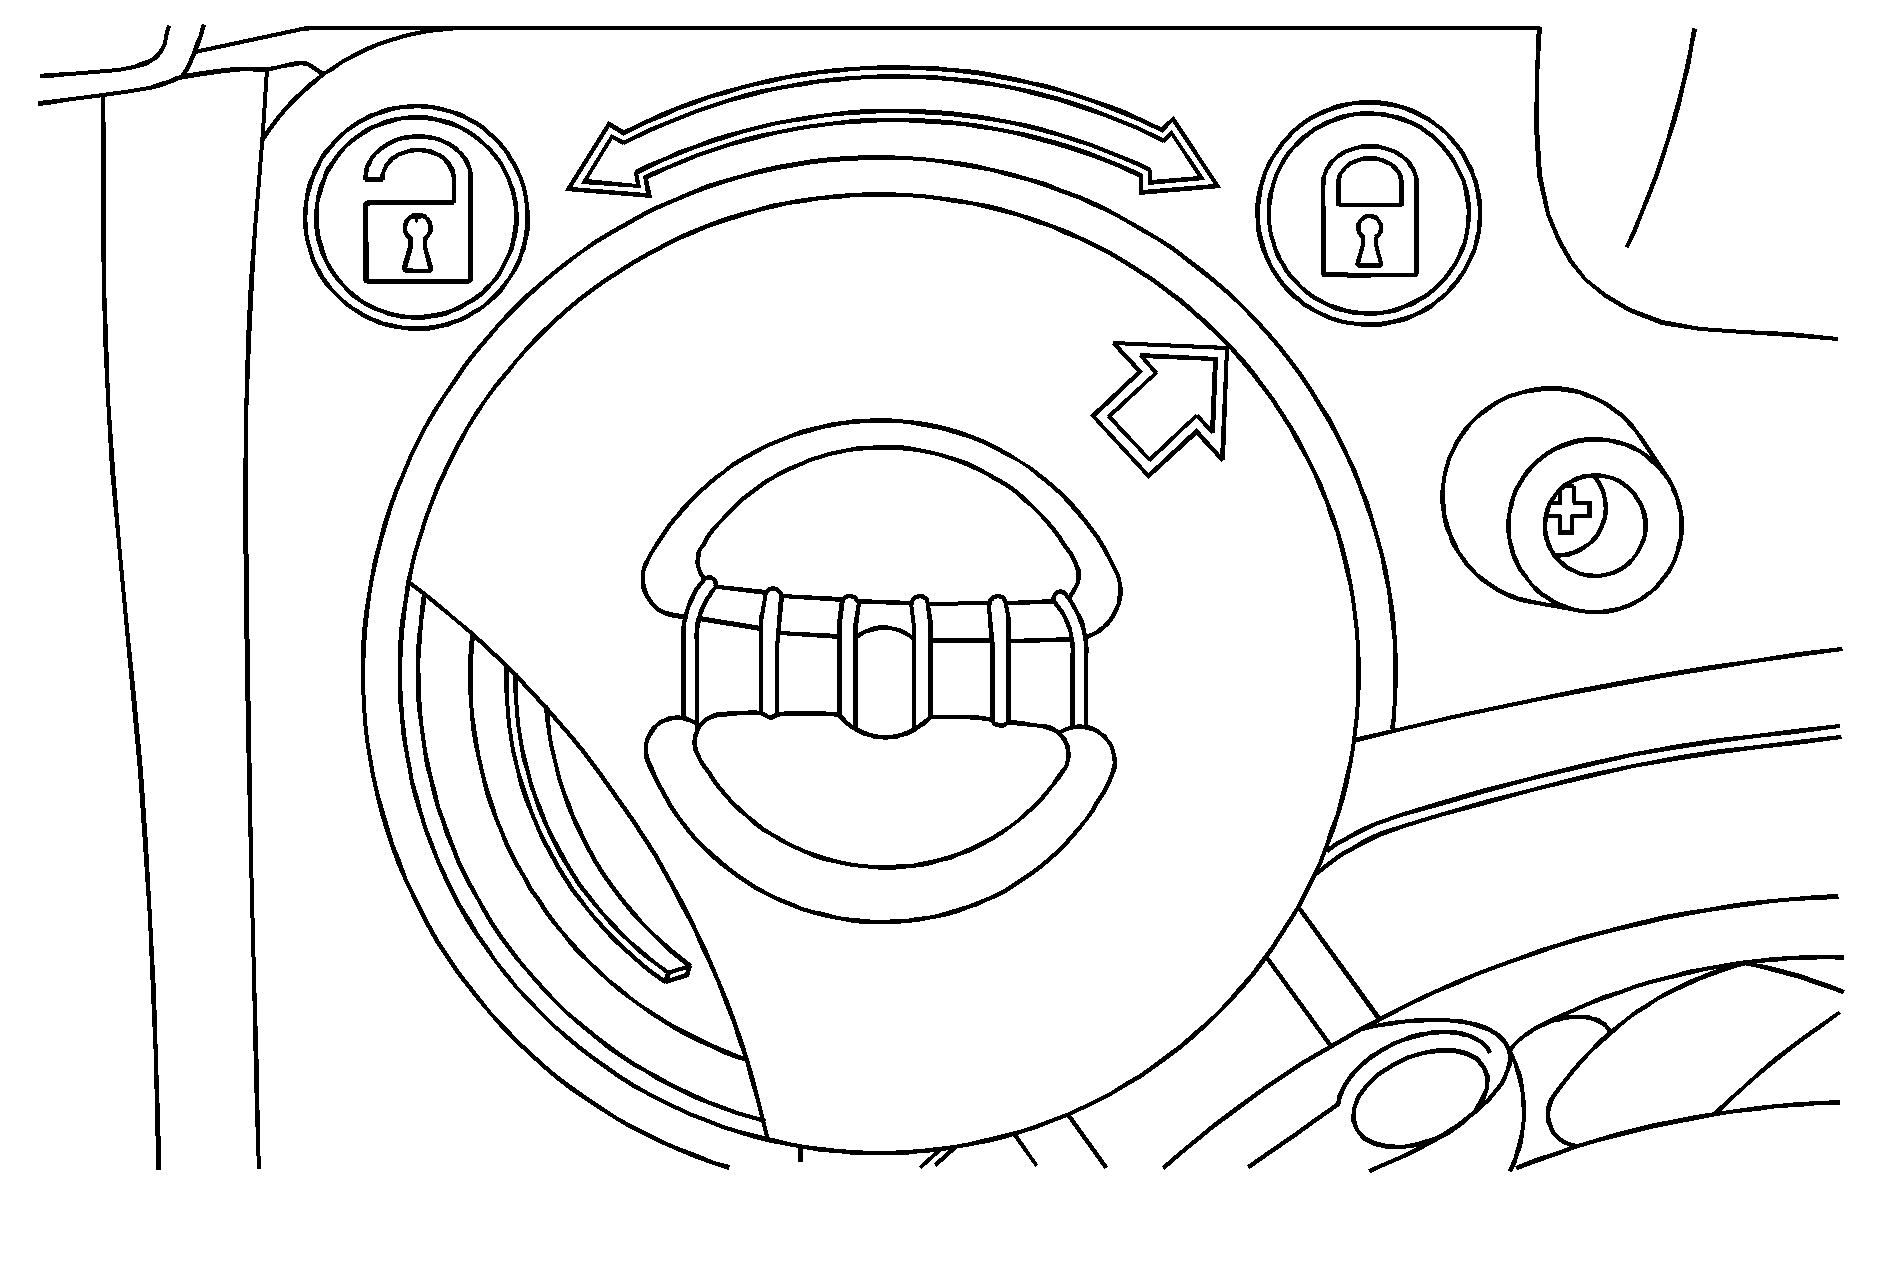
- Standing outside of the vehicle, hold the Midgate® securely so it does not fall forward. Turn the Midgate® handle clockwise and pull the Midgate® toward you.
- Lower the Midgate® until it is flat.
Rear Glass in Normal Position
Lowering the Midgate® with the Rear Glass in the Storage Pocket
Rear Glass Stored in Glass Storage Pocket
Midgate® Lowered with Crossbar Attached
This procedure works the same as the procedure described previously, but when you lower the Midgate® with the rear glass in the stored position, you will notice that the entire crossbar will lower with the Midgate®. This is completely normal; however, since the crossbar lowers with the Midgate®, it will be heavier. As you lower the Midgate® be ready for the extra weight and do not let the Midgate® fall as you lower it.
Raising the Midgate®
To return the Midgate® to its normal position, raise the Midgate® up with a firm swinging motion until it latches into place securely. This will help to ensure that the Midgate® closes with enough force to engage the latches.
If the rear glass is removed and you would like to put it back, do so using the instructions given previously.
