Tools Required
| • | J 42385-200 Thread Repair Kit |
| • | J 45059 Angle Meter |
Removal Procedure
- Remove the generator bracket. Refer to Generator Replacement .
- Remove the intake manifold. Refer to Intake Manifold Replacement .
- Remove the coolant air bleed pipe. Refer to Coolant Air Bleed Pipe Assembly Replacement .
- Remove the left exhaust manifold. Refer to Exhaust Manifold Replacement - Left Side .
- Remove the pushrods. Refer to Valve Rocker Arm and Push Rod Replacement .
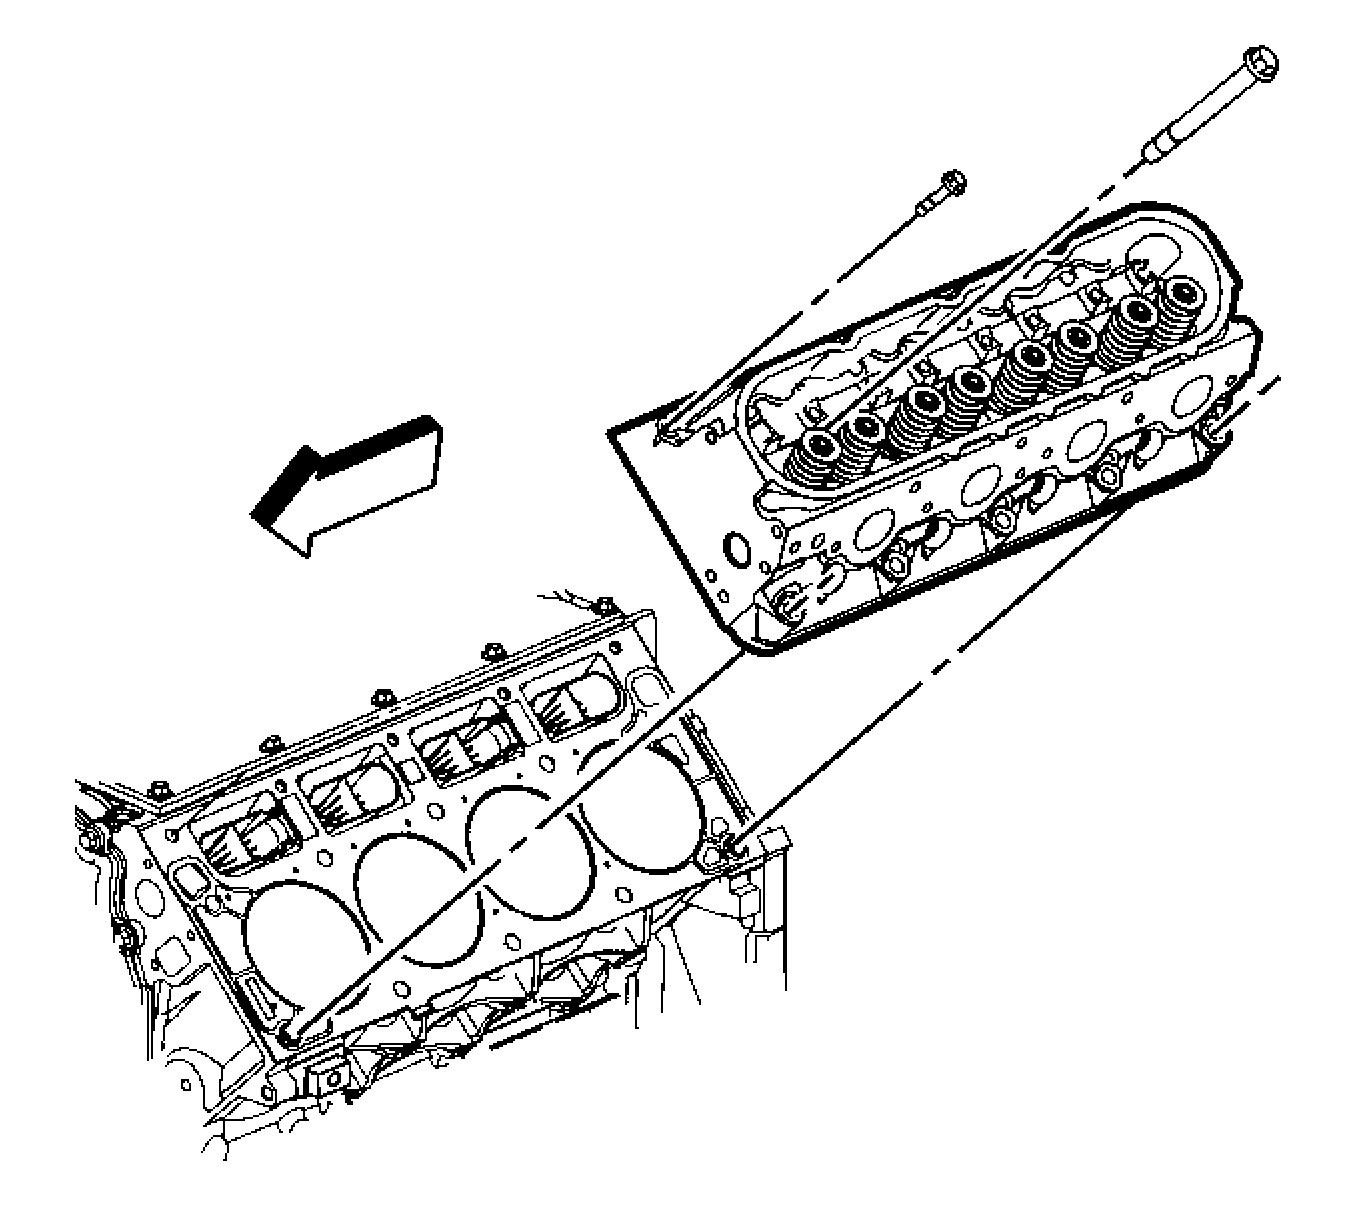
- Remove the cylinder head bolts.
- Remove the cylinder head.
- Remove and discard the cylinder head gasket.
- If required, clean and inspect the cylinder head. Refer to Cylinder Head Cleaning and Inspection .
Important: The cylinder head bolts are NOT reusable.
Notice: After removal, place the cylinder head on 2 wood blocks in order to prevent damage to the sealing surfaces.
Installation Procedure
Caution: Wear safety glasses in order to avoid eye damage.
Notice: Clean all dirt, debris, and coolant from the engine block cylinder head bolt holes. Failure to remove all foreign material may result in damaged threads, improperly tightened fasteners or damage to components.
Important:
• Do not reuse the cylinder head bolts. Install NEW cylinder head bolts during assembly. • Do not use any type of sealant on the cylinder head gasket (unless specified). • The cylinder head gaskets must be installed in the proper direction and position.
- Clean the engine block cylinder head bolt holes (if required).
- Use spray cleaner to clean out the hole. Refer to Adhesives, Fluids, Lubricants, and Sealers for the correct part number.
- Clean the cylinder head bolt holes with compressed air.
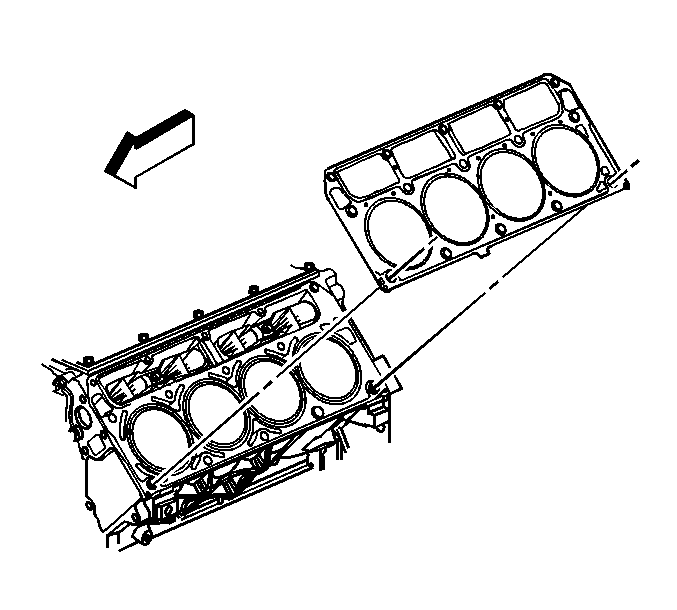
- Check the cylinder head locating pins for proper installation, location (a) 8.3 mm (0.327 in).
- When properly installed, with FRONT on the left side, the tab on the cylinder head gasket should be located left of center or closer to the front of the engine.
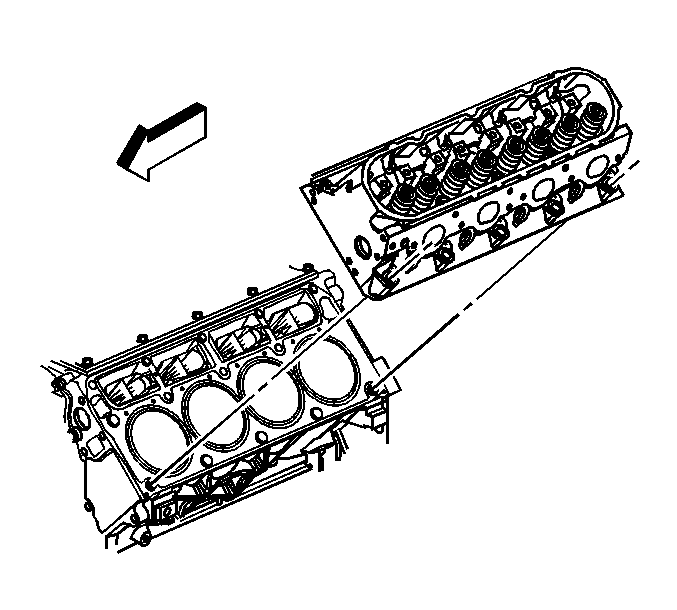
- Install the NEW cylinder head gasket.
- Install the cylinder head.
- Install NEW cylinder head bolts.
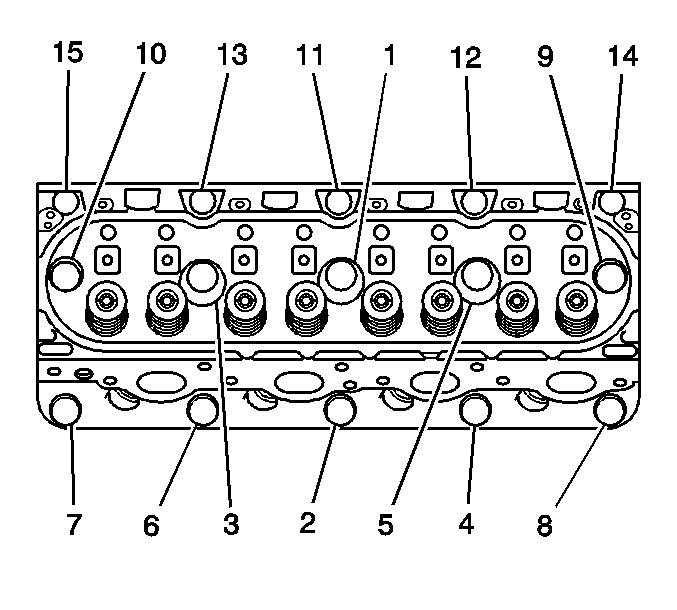
- Tighten the cylinder head bolts.
- Tighten the M11 cylinder head bolts (1-10) a first pass in sequence to 30 N·m (22 lb ft).
- Tighten the M11 cylinder head bolts (1-10) a second pass in sequence to 90 degrees using J 45059 .
- Tighten the M11 cylinder head bolts (1-10) a final pass to 70 degrees using J 45059 .
- Tighten the M8 cylinder head bolts (11-15) to 30 N·m (22 lb ft). Begin with the center bolt (11) and alternating side-to-side, work outward tightening all of the bolts.
- Install the pushrods. Refer to Valve Rocker Arm and Push Rod Replacement .
- Install the left exhaust manifold. Refer to Exhaust Manifold Replacement - Left Side .
- Install the coolant air bleed pipe. Refer to Coolant Air Bleed Pipe Assembly Replacement .
- Install the intake manifold. Refer to Intake Manifold Replacement .
- Install the generator bracket. Refer to Generator Replacement .

Thread repair tool J 42385-107, found in J 42385-200 may be used to clean the threads of old threadlocking material.

Notice: Refer to Fastener Notice in the Preface section.
Tighten
