Removal Procedure
- Remove all related panels and components.
- Restore as much of the damage as possible to factory specifications.
- Note the location and remove the following as necessary:
- Measure 80 mm (3 1/8 in) down from the large wiring harness hole in the hinge pillar (1) and mark a horizontal line.
- Perform additional sectioning procedures as necessary. Refer to the following procedures:
- Cut the pillar in the locations where sectioning is to be performed.
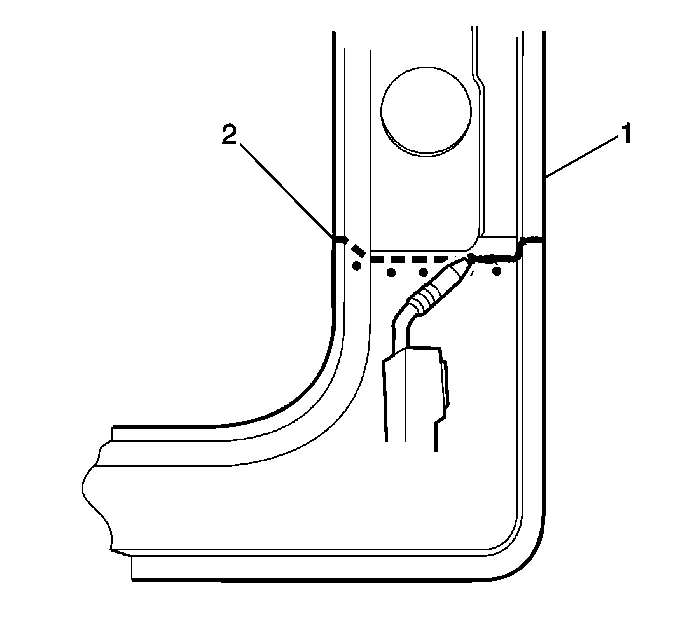
- Locate and drill out all factory welds. Note the number and location of the welds for installation of the service part.
- Remove the damaged section of the door frame opening.
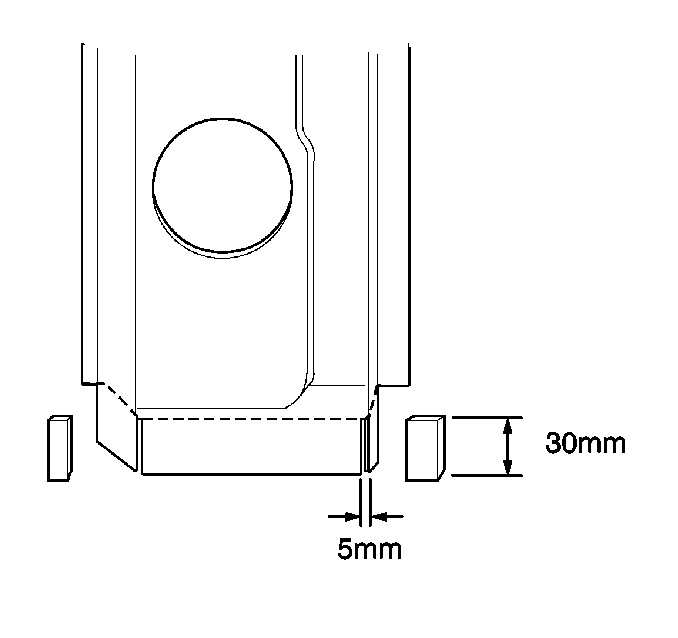
- Cut and remove 30 mm (1 3/16 in) from the flanges on either side of the remaining section of the original hinge pillar to create 30 mm (1 3/16 in) tabs. Cut 5 mm (3/16 in) wide gaps in the bottom corners.
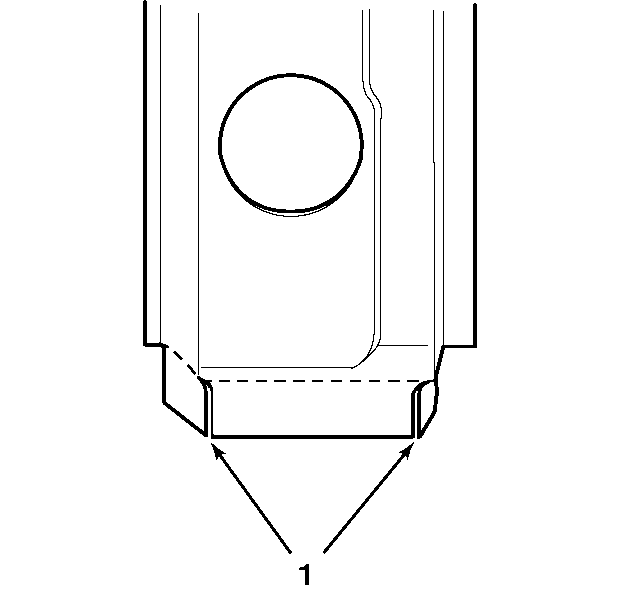
- Step the tabs (1) inward to allow the door frame opening service section to fit over the original hinge pillar. Weld the tabs together along the edges.

| • | The sealers |
| • | The sound deadeners |
| • | The anti-corrosion materials |
Important: Refer to Outer Door Frame Sectioning for specified sectioning location. Sectioning outside of these areas may compromise the structural integrity of the vehicle.
Important: Do not damage the inner panels or reinforcements.
Important: The metal of the hinge pillar is of a heavy gauge. However, the tabs can be created using the appropriate tools.
Installation Procedure
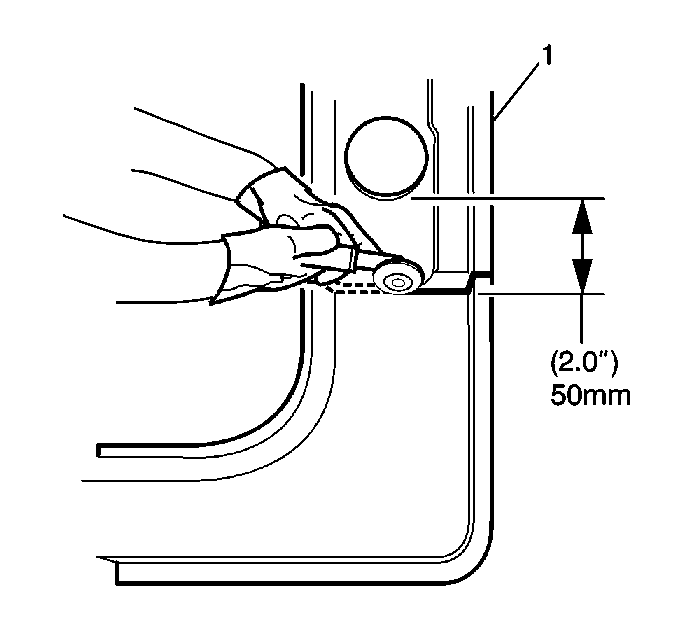
- On the service part (1), measure 50 mm (2 in) down from the large wiring harness hole in the hinge pillar and mark horizontal line. Cut the hinge pillar along this line.
- Perform additional sectioning procedures as necessary to remove the unused areas of the service part.
- Drill 8 mm (5/16 in) plug weld holes along the hinge pillar sectioning cut on the service part. Locate these holes approximately 15 mm (9/16 in) from the edge and spaced 40 mm (1 ½ in) apart.
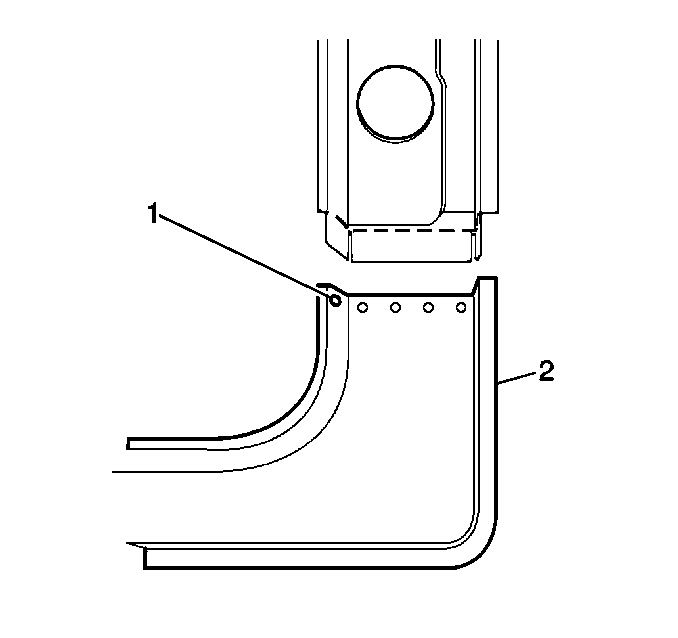
- Drill 8 mm (5/16 in) plug weld holes (1) in the service part (2) , in the locations noted from the original panel.
- Prepare all mating surfaces as necessary.
- Apply 3M Weld-Thru Coating P/N 05916 or equivalent to all mating surfaces.
- Align the service section over the stepped tab on the original hinge pillar, allowing 30 mm (1 3/16 in) of overlap. Check fit using 3-dimensional measuring.
- Plug weld service part in position (1).
- To create a solid weld with minimum heat distortion, make 25 mm (1 in) welds along the seam with 25 mm (1 in) gaps between them (2). Then, go back and complete the stitch weld.
- Clean and prepare all welded surfaces.
- Apply the following as necessary:
- Install all related panels and components.
Important: If the location of the original plug weld holes cannot be determined, space the plug weld holes every 40 mm (1 1/2 in) apart.
Caution: Foam sound deadeners must be removed from areas within 152.4 mm (6 in) of where flame is to be used for body repairs. When reinstalling foam sound deadeners, avoid inhaling fumes as bodily injury may result.
Important: Prior to refinishing, refer to the publication GM4901M-D-2000 GM Approved refinish materials for recommended products. Do not combine paint systems. Refer to paint manufacturer's recommendations.
| • | An approved anti-corrosion primer |
| • | The sound deadening materials |
| • | The sealers and the refinish materials |
