For 1990-2009 cars only
Front Case Half
- Clean the front case half in cleaning solvent and air dry.
- Remove the metal shavings from the case half bolt holes.
- Remove the sealer from the case sealing surfaces.
- Inspect the case for being broken or cracked.
- Inspect the front output shaft front bearing bore (5) for the following conditions:
- Inspect the input shaft bearing bore (4) for the following conditions:
- Replace the front case half if any of the above conditions are found.
- Inspect the sealing surfaces (1) for damage.
- Repair small scratches or nicks with a soft stone.
- Inspect the front case to transmission case mounting surface for damage.
- Inspect the case threaded bolt holes (2) for damage.
- Repair any damaged threads.
- Inspect the transmission to transfer case studs for damage.
- Replace any damaged studs. Refer to Transfer Case Disassemble and Transfer Case Assemble.
- Inspect the location pins (3) for being loose or missing.
- Repair or replace any damaged location pins.
- Inspect the front output shaft front bearing and the input shaft bearing for the following conditions:
- Replace the bearings if any of the above conditions are found. Refer to Transfer Case Disassemble and Transfer Case Assemble.
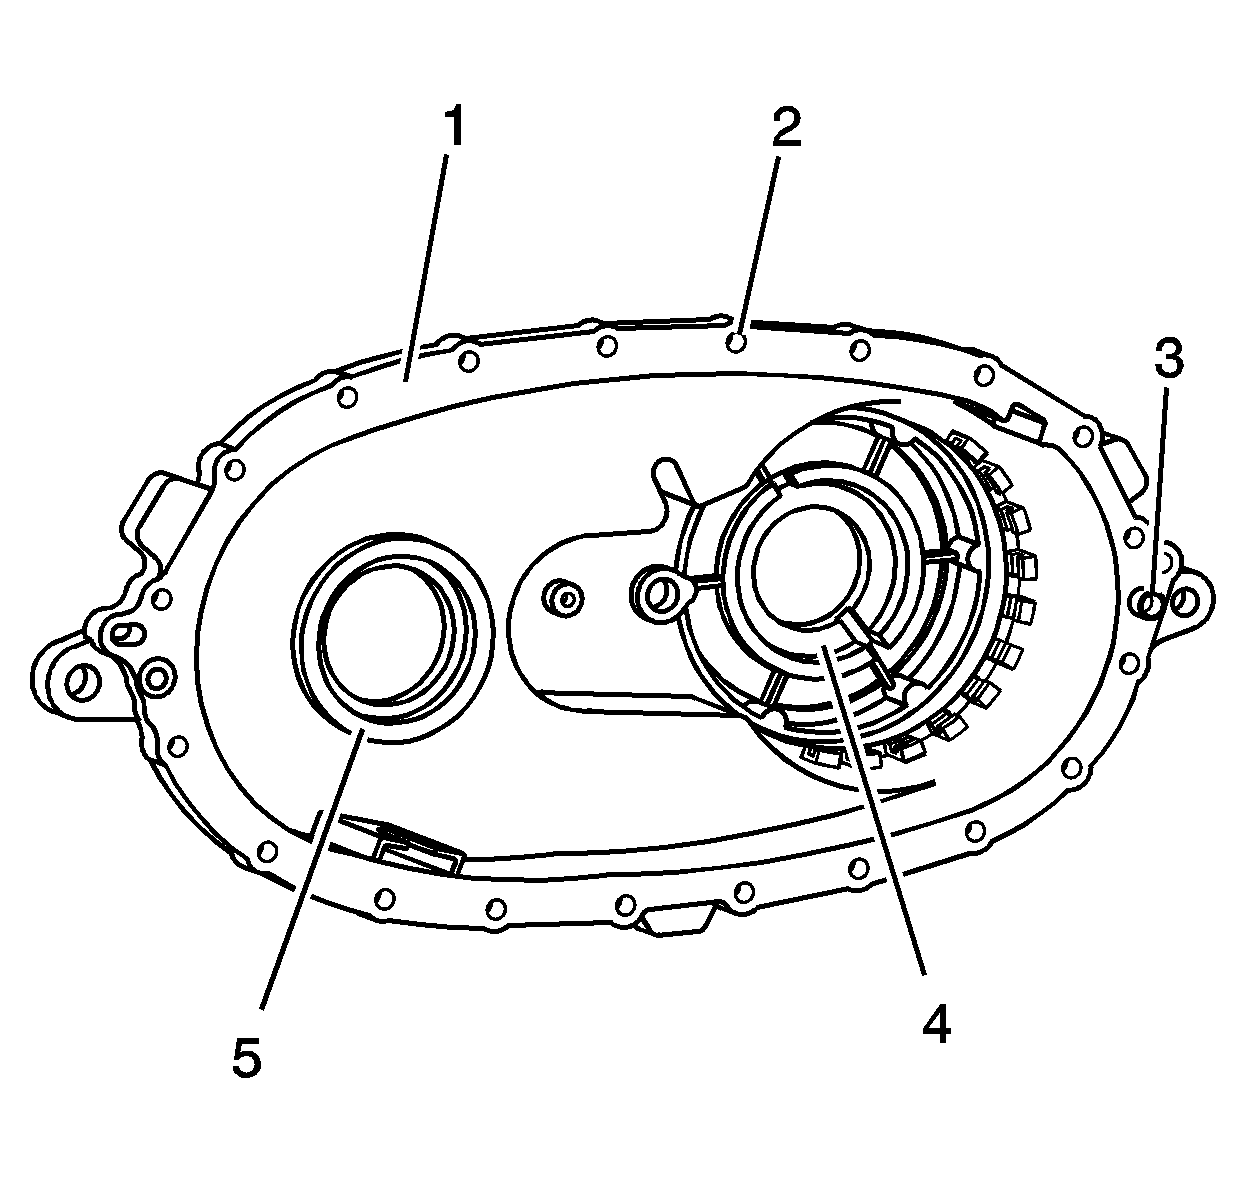
Caution: Refer to Machined Surface Damage Caution in the Preface section.
| • | A spun bearing |
| • | Cracks |
| • | A spun bearing |
| • | Cracks |
| • | Roughness |
| • | Brinelling |
| • | Pitting |
Rear Case Half
- Clean the rear case half in cleaning solvent and air dry.
- Remove the sealer from the case sealing surfaces.
- Inspect the case for being broken or cracked.
- Replace the case if it is broken or cracked.
- Inspect the sealing surfaces (1) for damage.
- Repair small scratches or nicks with a soft stone.
- Inspect the case threaded bolt holes for damage.
- Repair any damaged threads.
- Inspect the front output shaft rear bearing bore (2) for the following conditions:
- Inspect the rear output shaft rear bearing bore (4) for the following conditions:
- Replace the case if the bearing has spun. Refer to Transfer Case Disassemble and Transfer Case Assemble.
- Inspect the retaining ring (5) for the rear output shaft rear bearing for being bent or twisted.
- Replace a faulty retaining ring.
- Inspect the rear output shaft bushing (3) for scoring or wear.
- Replace the case if the rear output shaft bushing is faulty. Refer to Transfer Case Disassemble and Transfer Case Assemble.
- Replace the case if the control actuator lever shaft bore is faulty. Refer to Transfer Case Disassemble and Transfer Case Assemble.
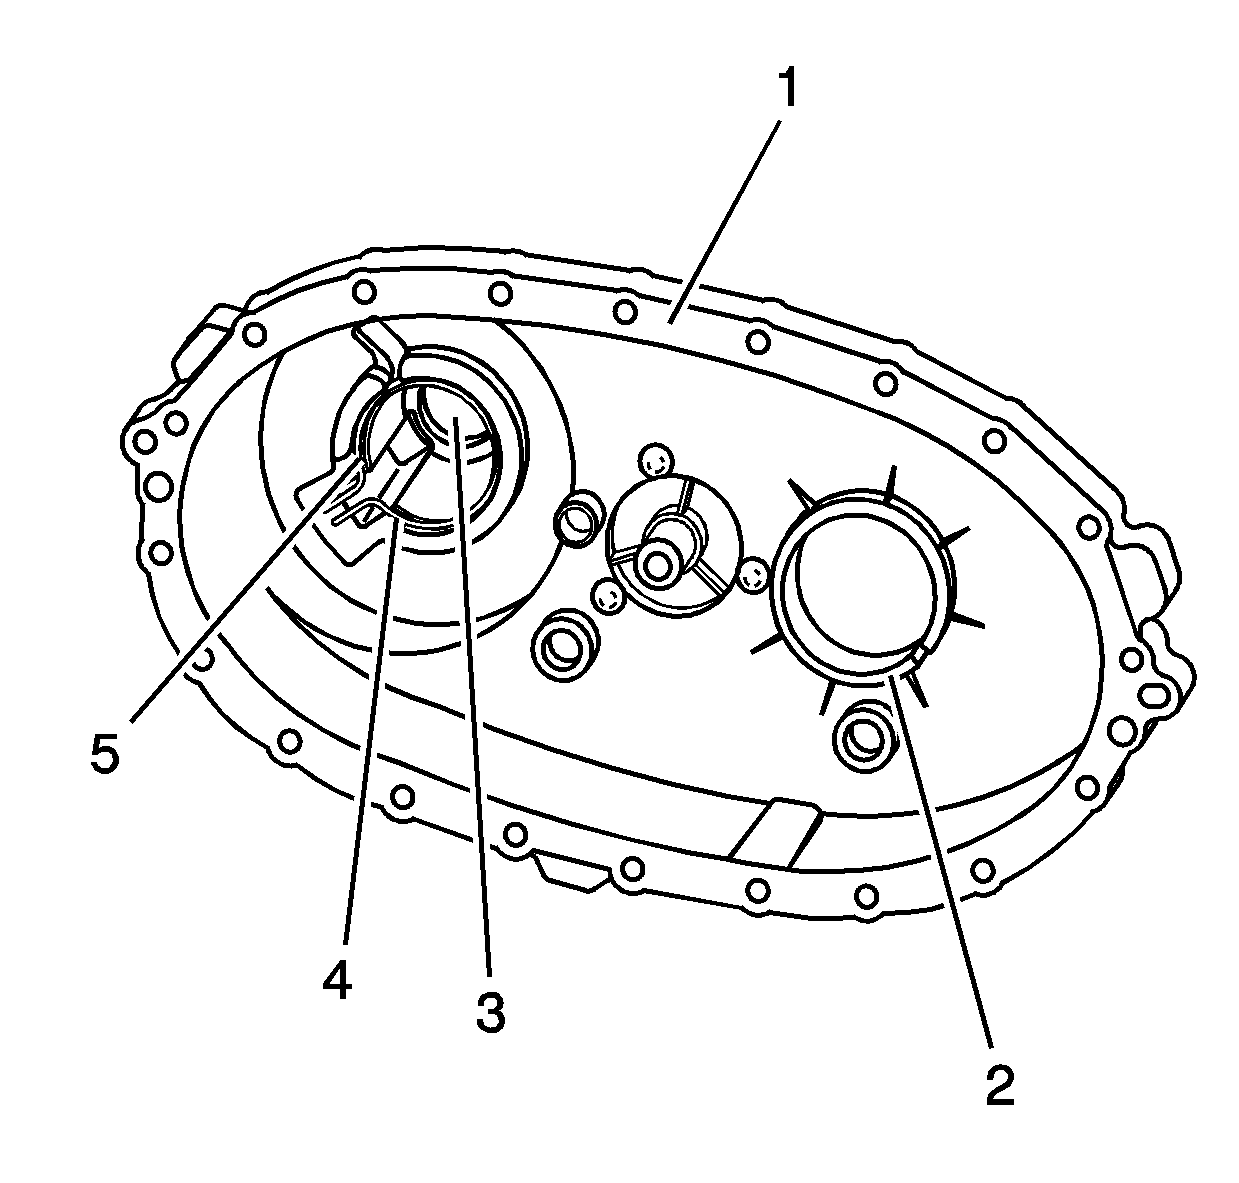
Caution: Refer to Machined Surface Damage Caution in the Preface section.
| • | Spun bearing |
| • | Cracks |
| • | Spun bearing |
| • | Cracks |
Differential Components
- Clean the planetary differential in cleaning solvent. Do not disassemble the planetary differential.
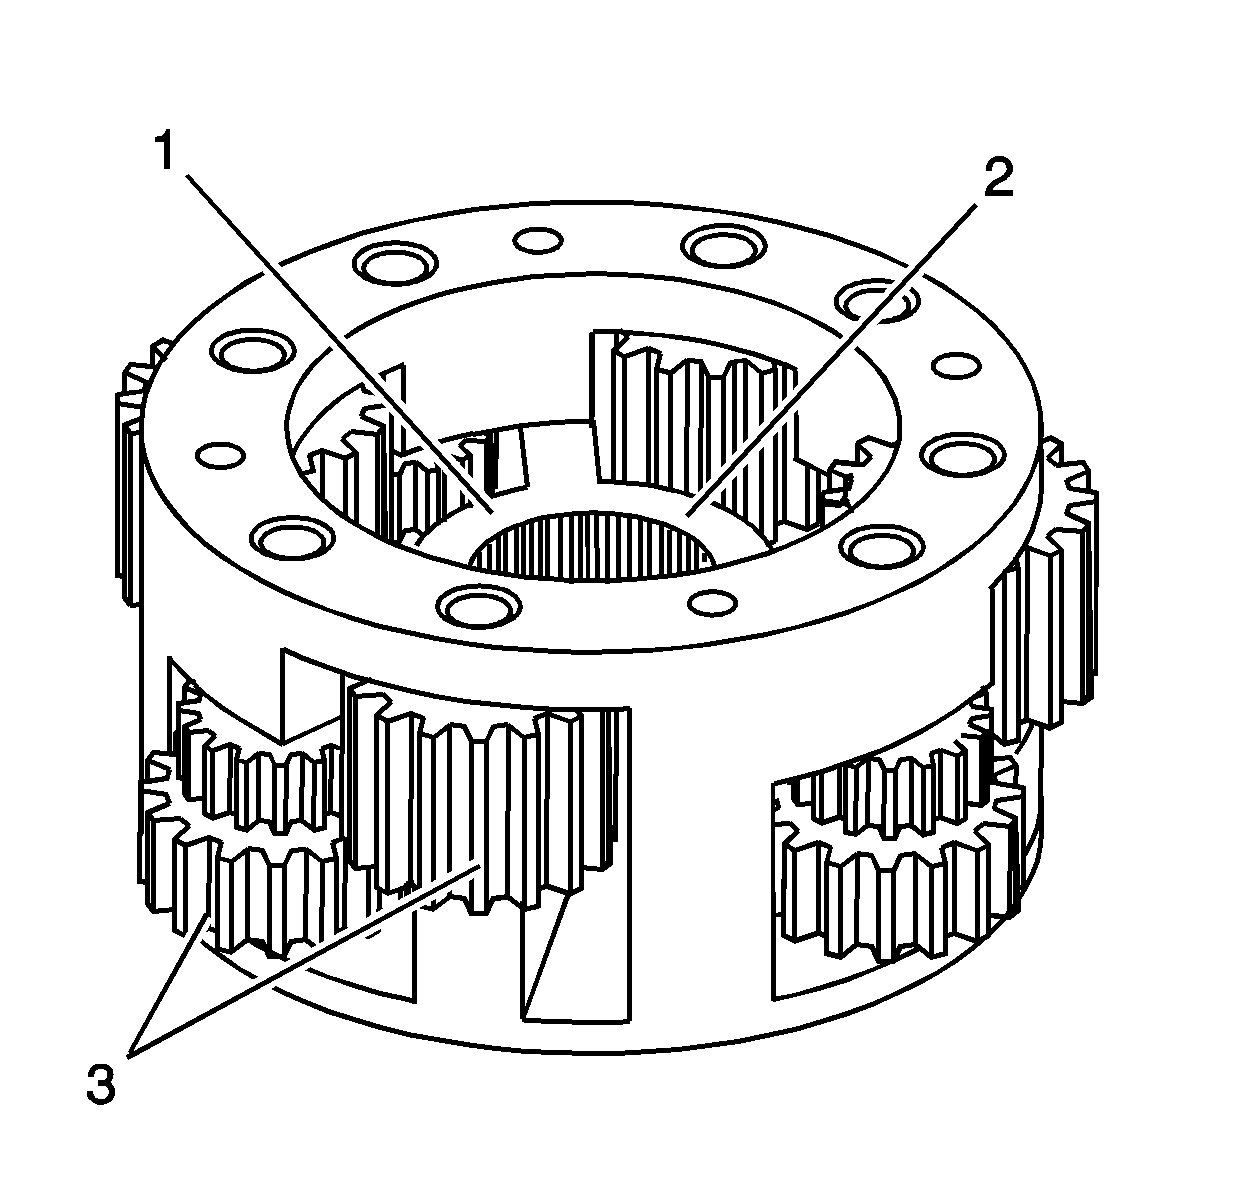
- Air dry and ensure all cleaning solvent is removed from the bearings in the pinion gears (3). Do not spin the pinion gears with compressed air.
- Inspect the pinion gears for chipped teeth.
- Inspect the pinion gears for debris embedded in the root of the teeth.
- Inspect the pinion gears for excessive side movement from worn bushings or shafts.
- Inspect the planetary housing for cracks at the web (1) of the housing.
- Inspect the thrust washer surface (2) for scoring or excessive wear.
- Inspect the planetary housing for distortion.
- Inspect the planetary housing to mainshaft splines for excessive wear.
- Replace the planetary differential if any of the above conditions are found.
- Inspect the planetary thrust washers for excessive wear or scoring.
- Replace the thrust washers if they are faulty.
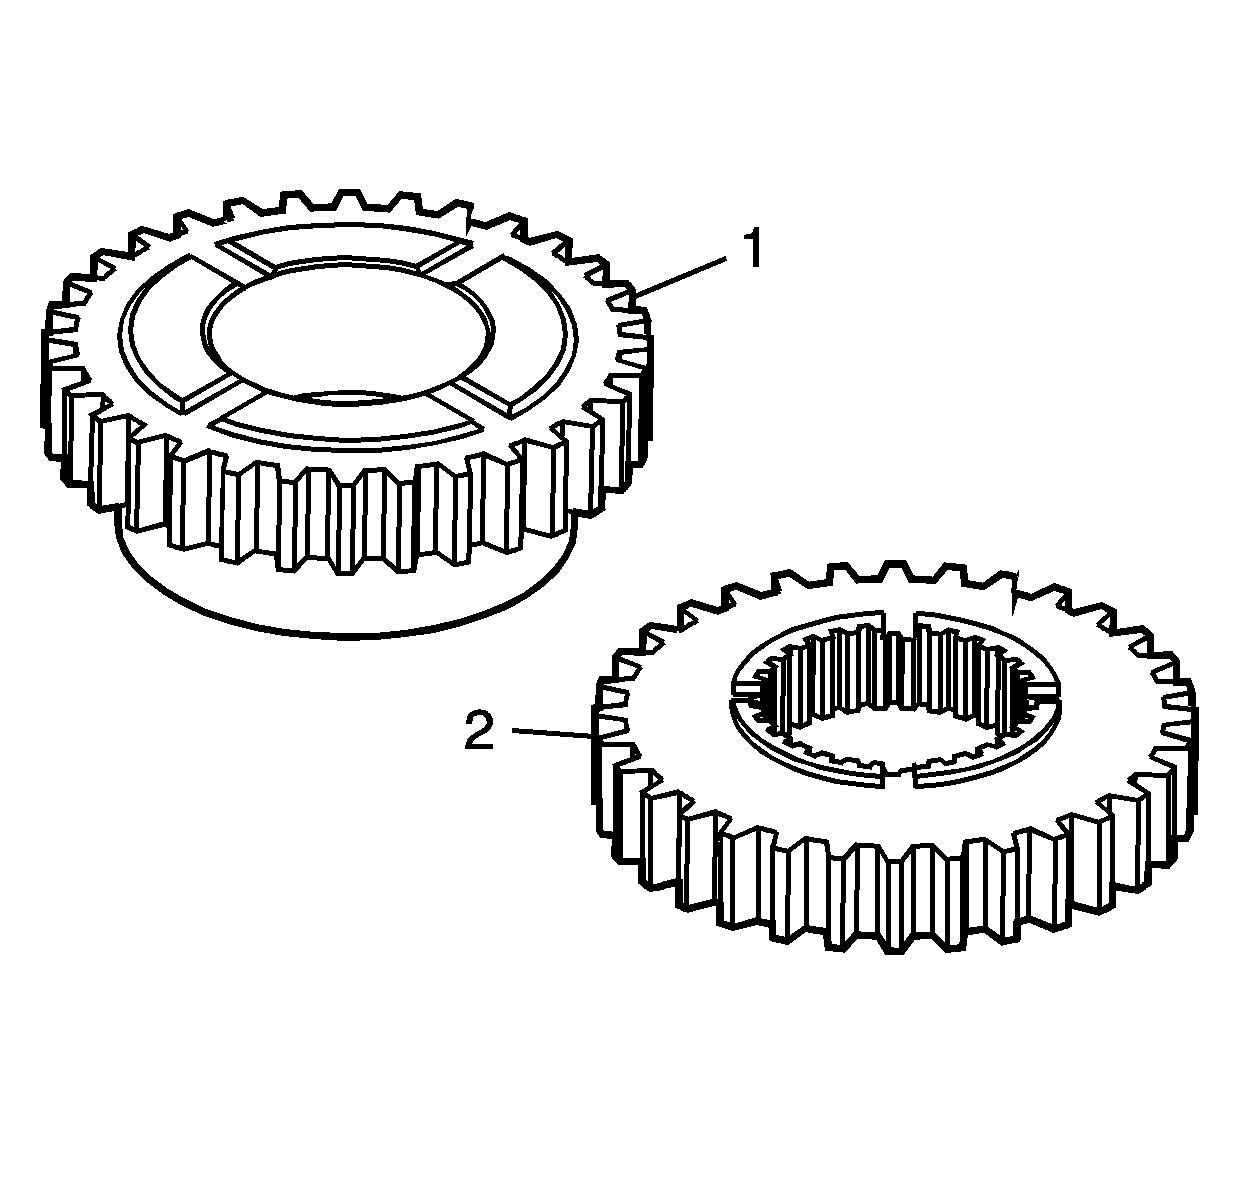
- Clean the front sun gear (1) and the rear sun gear (2) in cleaning solvent and air dry.
- Inspect the teeth on the front sun gear (1) and the rear sun gear (2) for the following conditions:
- Inspect the thrust washer surfaces for excessive wear or scoring.
- Replace the front sun gear (1) and the rear sun gear (2) if they are faulty.
| • | Chipped teeth |
| • | Excessively worn gear surfaces |
| Slight wear marks are normal. |
| • | Debris embedded in the root of the teeth |
Drive Chain and Sprockets
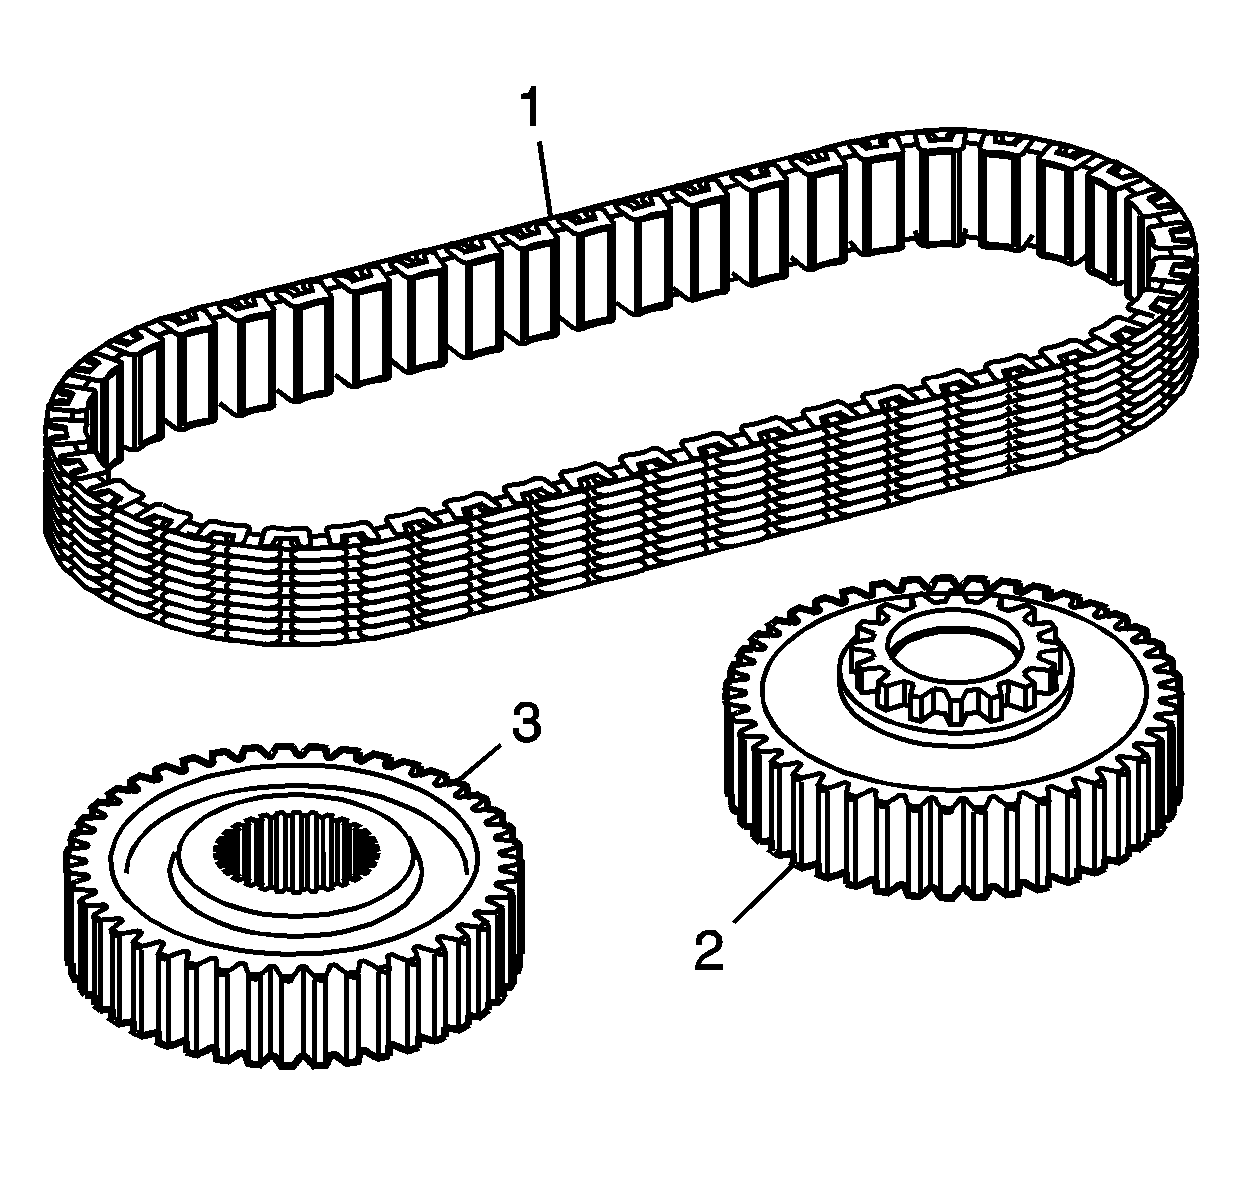
- Clean the drive chain (1), drive sprocket (2), and driven sprocket (3) in cleaning solvent and air dry.
- Inspect the drive chain (1) for the following conditions:
- Replace the chain if any of the above conditions are found.
- Inspect the driven sprocket (3) and the drive sprocket (2) for the following conditions:
- Inspect the drive sprocket bushing for the following conditions:
- Replace the sprockets if any of the above conditions are found. The chain and sprockets may be replaced separately.
| • | Loose link pins |
| • | Binding or stiff links |
| • | Debris embedded in the links |
| • | Worn teeth surfaces |
| • | Chipped teeth |
| • | Excessively worn gear surfaces |
| Slight wear marks are normal. |
| • | Debris embedded in the root of the teeth |
| • | Excessive wear |
| • | Scoring |
Input Shaft
- Clean the input shaft in cleaning solvent.
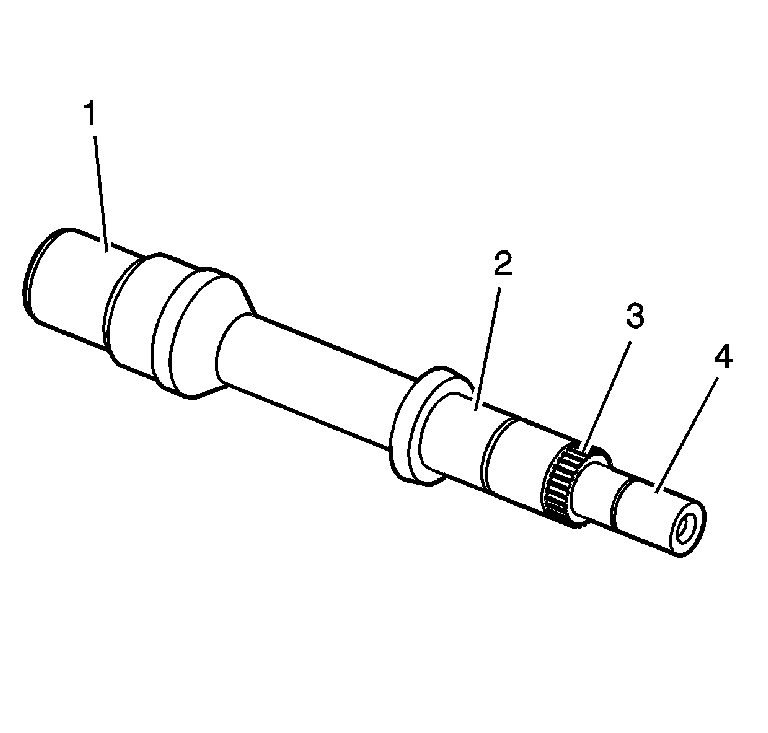
- Inspect the input seal surface (1) for excessive grooves or damage.
- Inspect the bearing journals on the input shaft for the following conditions:
- Inspect the input shaft planetary carrier assembly splines (3) for damage or excessive wear. Witness marks at the location of the gear is normal.
- Replace the input shaft if any of the above conditions are found.
Note: Do not attempt to smooth any roughness in the bearing journals.
| • | The drive gear bushing (2) |
| • | The rear support bushing (4) |
| - | Scoring |
| - | Pitting |
| - | Brinelling |
| - | Excessive wear |
Front Output Shaft
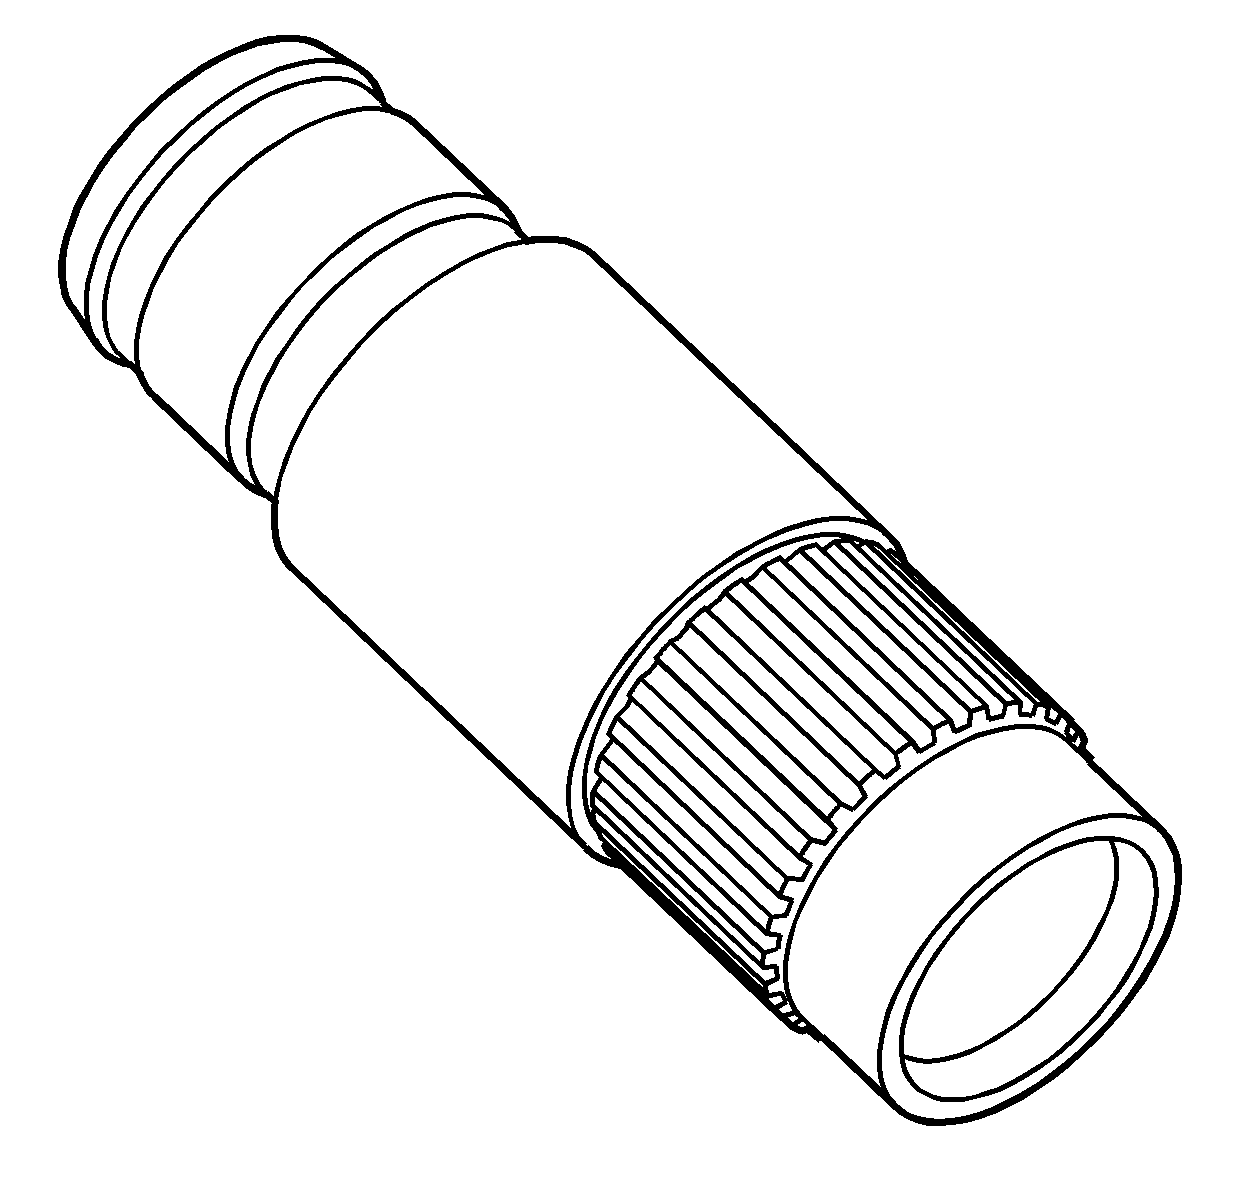
- Clean the front output shaft in cleaning solvent and air dry.
- Inspect for spun bearings at the front output shaft bearing areas.
- Inspect the front output internal splines and driven gear splines for damage or excessive wear.
- Replace the front output shaft if it is damaged.
- Inspect the cup plug in the front output shaft for leaking.
- Replace the cup plug if it is leaking. Refer to Transfer Case Disassemble and Transfer Case Assemble.
Rear Output Shaft
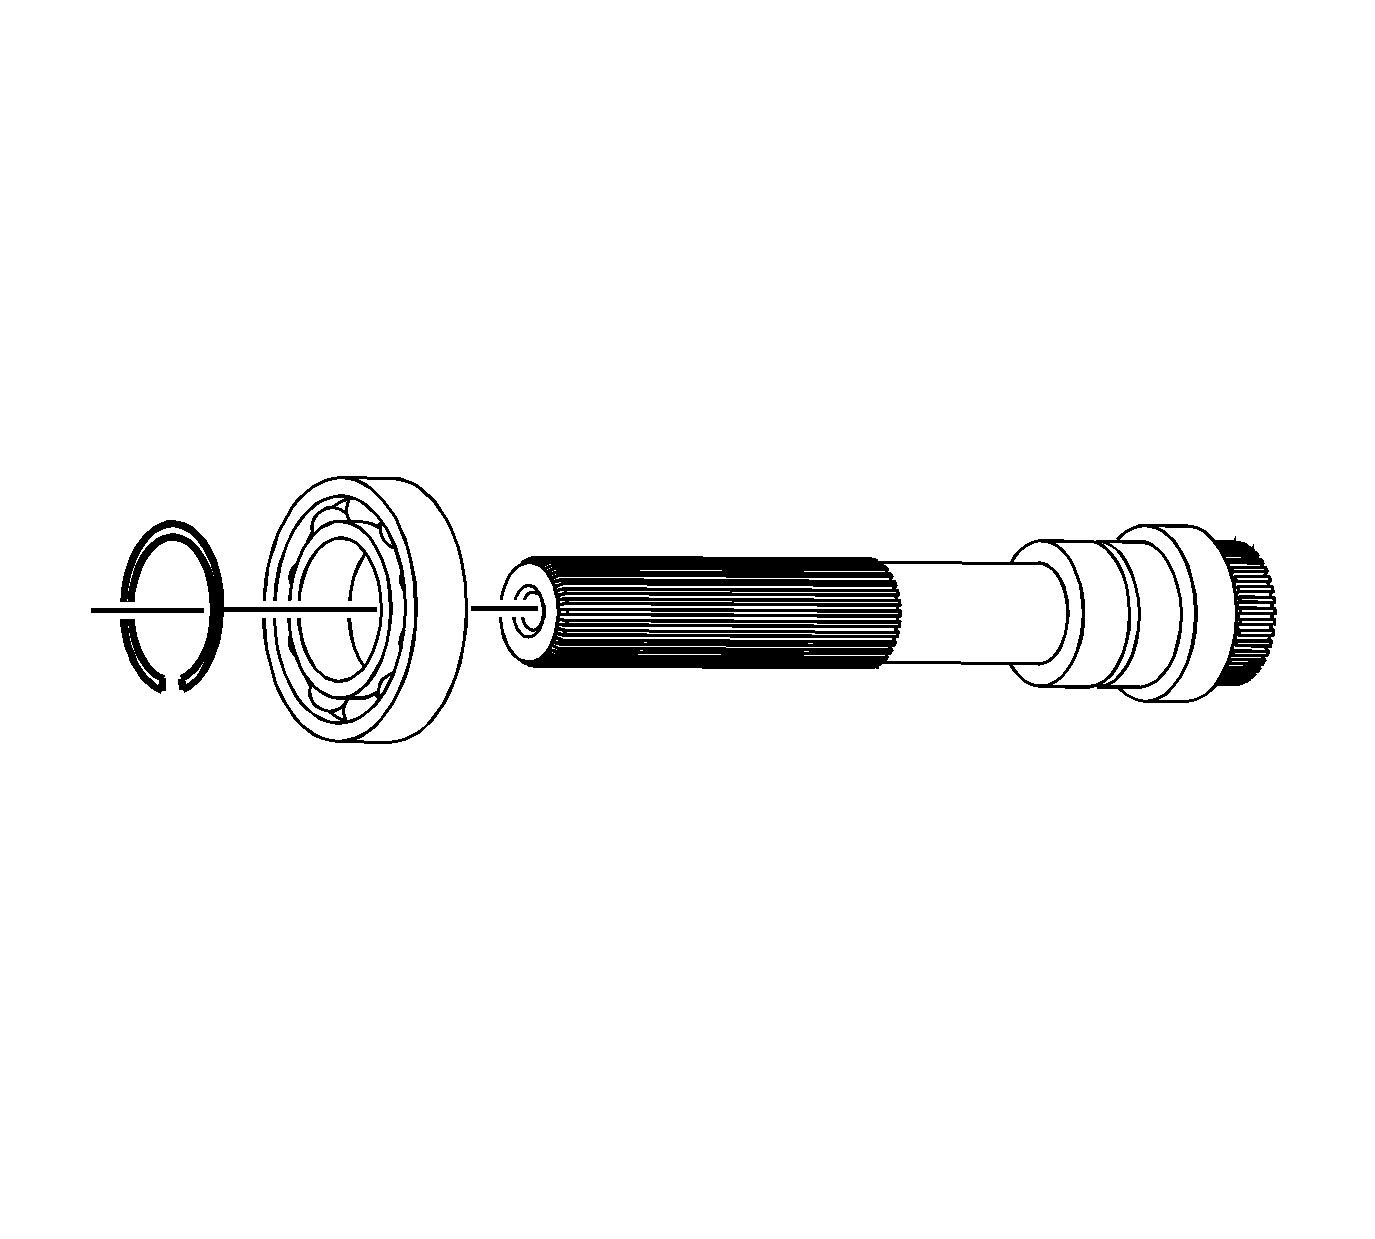
- Clean the rear output shaft with rear output shaft bearing in cleaning solvent.
- Air dry and ensure all solvent is removed from the bearing.
- Inspect the rear output shaft bearing for the following conditions:
- Replace the rear output shaft bearing if it is faulty. Refer to Transfer Case Disassemble and Transfer Case Assemble.
- Inspect the mainshaft rear support bushing for the following conditions:
- Replace the mainshaft rear support bushing if any of the above conditions are found. Refer to Transfer Case Disassemble and Transfer Case Assemble.
- Inspect the rear output shaft splines for wear or damage.
- Inspect the rear output shaft bearing area for a spun bearing.
- Replace the rear output shaft if any of the above conditions are found.
| • | Scoring |
| • | Pitting |
| • | Brinelling |
| • | Excessive wear |
| • | Pitted |
| • | Wear |
| • | Corrosion |
