Caution: Refer to Brake Dust Caution in the Preface section.
Removal Procedure
- Remove the brake caliper from the mounting bracket and support the brake caliper (2) with heavy mechanic's wire (1), or equivalent. Do NOT disconnect the hydraulic brake flexible hose from the caliper. Refer to Rear Brake Caliper Replacement .
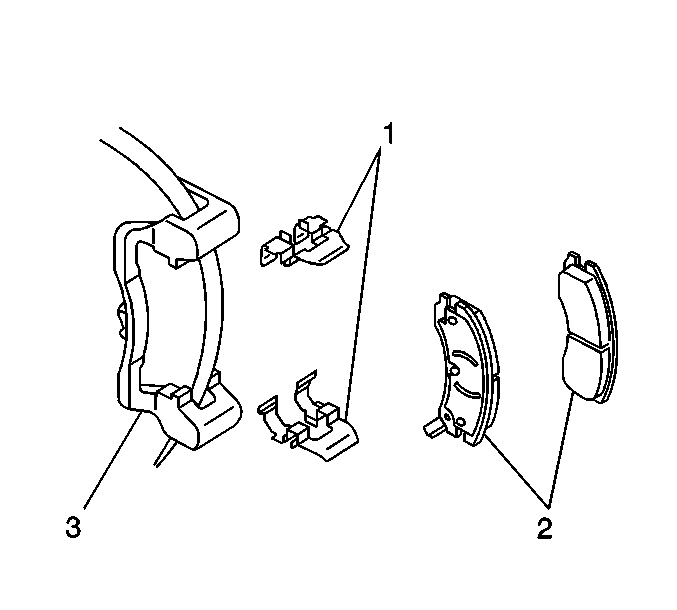
- Remove the brake pads (2) from the brake caliper bracket (3).
- Remove the brake pad retainers (1) from the brake caliper bracket (3).
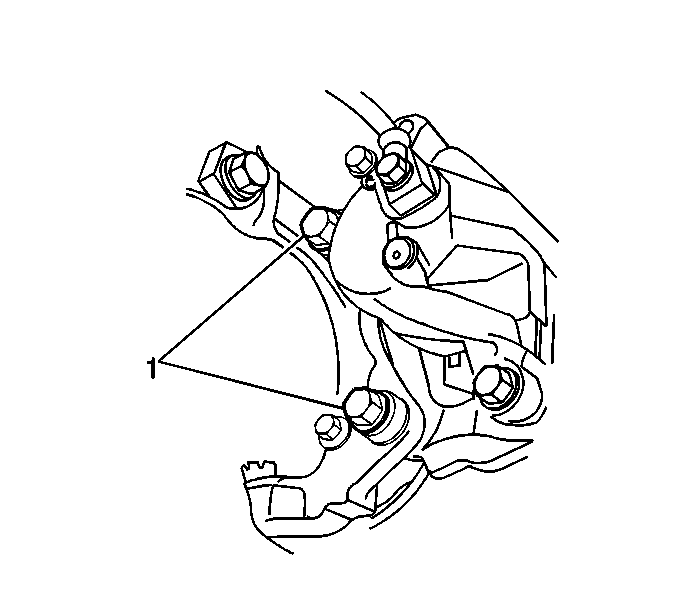
- Remove the brake caliper bracket bolts (1).
- Remove the rear brake caliper bracket.
- Use a wire brush to remove any rust and debris from the brake caliper bracket.
- Inspect the brake mounting and hardware. Refer to Rear Disc Brake Hardware Replacement .
- Inspect the brake caliper bracket.
- Replace the brake caliper bracket if cracked or damaged.

Notice: Support the brake caliper with heavy mechanic wire, or equivalent, whenever it is separated from its mount and the hydraulic flexible brake hose is still connected. Failure to support the caliper in this manner will cause the flexible brake hose to bear the weight of the caliper, which may cause damage to the brake hose and in turn may cause a brake fluid leak.
Installation Procedure
Important: The caliper bracket bolts threads and the threaded holes of the caliper bracket must be free of threadlocker residue and debris prior to re-application of threadlocker in order to ensure proper adhesion and fastener retention.
| • | Prepare the bolts and the threaded holes for assembly: |
| • | Thoroughly clean the residue from the fastener threads using denatured alcohol or equivalent and allow to dry. |
| • | Thoroughly clean the residue from the threaded holes using denatured alcohol or equivalent and allow to dry. |
| • | If reusing the old caliper bracket bolts, apply threadlocker GM P/N 12345493, (Canadian P/N 10953488), or equivalent to two-thirds of the threaded length of the fastener. Ensure that there are no gaps in the threadlocker along the length of the filled area of the fastener. |
| • | Allow the threadlocker to cure approximately ten minutes before installation. |
- Install the brake caliper bracket.
- Install the brake caliper bracket bolts (1).
- Lubricate the brake caliper pin bolts with a thin coat of high temperature silicone lube.
- Install the brake pad retainers (1) to the brake caliper bracket (3).
- Install the brake pads (2) to the brake caliper bracket (3).
- Install the brake caliper. Refer to Rear Brake Caliper Replacement .
Notice: Use the correct fastener in the correct location. Replacement fasteners must be the correct part number for that application. Fasteners requiring replacement or fasteners requiring the use of thread locking compound or sealant are identified in the service procedure. Do not use paints, lubricants, or corrosion inhibitors on fasteners or fastener joint surfaces unless specified. These coatings affect fastener torque and joint clamping force and may damage the fastener. Use the correct tightening sequence and specifications when installing fasteners in order to avoid damage to parts and systems.
Tighten
Tighten the rear brake caliper bracket bolts to 128 N·m (94 lb ft).
