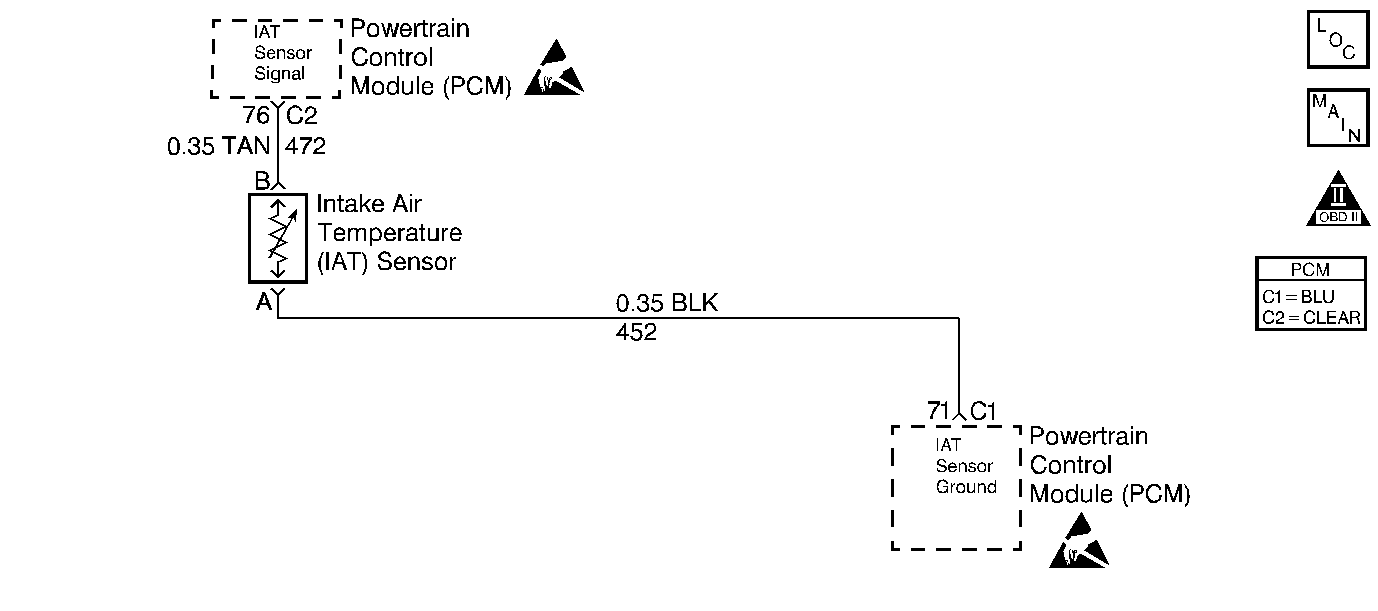
Circuit Description
The Intake Air Temperature sensor is a thermistor, or variable resistor, that varies resistance based on temperature. As the temperature of the sensor increases, resistance decreases. High temperature will result in low signal voltage. DTC P0112 sets when the PCM sees an IAT sensor reading of 139°C (282°F) when the coolant is less than 110°C (230°F).
Conditions for Running the DTC
| • | DTC P0117 and P0118 are not set. |
| • | Engine coolant temperature 110°C (230°F) or less. |
| • | Vehicle speed 15 MPH or greater. |
Conditions for Setting the DTC
The IAT sensor reading has been 139°C (282°F) or more.
Action Taken When the DTC Sets
| • | PCM substitutes ambient air temperature for IAT. |
| • | Transaxle shift adapts are maintained at current levels. |
| • | The PCM will illuminate the malfunction indicator lamp (MIL) when the diagnostic runs and fails. |
| • | The PCM will record operating conditions at the time the diagnostic fails. This information will be stored in the Freeze Frame and Failure Records. |
Conditions for Clearing the MIL/DTC
| • | The PCM will turn the MIL OFF after three consecutive drive trips that the diagnostic runs and does not fail. |
| • | A Last Test Failed (current) DTC will clear when the diagnostic runs and does not fail. |
| • | A History DTC will clear after forty consecutive warm-up cycles with no failures of any emission related diagnostic test. |
| • | Use a scan tool to clear DTCs. |
| • | Interrupting PCM battery voltage may or may not clear DTCs. This practice is not recommended. Refer to Clearing Diagnostic Trouble Codes in PCM Description and Operation. |
IAT sensors can be damaged by a backfire in the intake manifold. If the vehicle has had more than one IAT sensor replaced, check for signs of backfire.
Test Description
Number(s) below refer to the step number(s) on the Diagnostic Table.
-
If the IAT sensor circuit is shorted, IAT display should read 139°C (282°F) or greater.
-
Checking for the IAT Sensor Signal circuit shorted to ground. If IAT display reads 139°C (282°F) or greater with sensor disconnected, then the IAT Sensor Signal circuit may be shorted to ground.
-
If resistance to engine ground measured less than 10K ohms, then the IAT Sensor Signal circuit is shorted to ground.
Step | Action | Value(s) | Yes | No |
|---|---|---|---|---|
1 | Did you perform the Powertrain On-Board Diagnostic (OBD) System Check? | -- | Go to Step 2 | |
Is the temperature the same or more than the value specified? | 139°C (282°F) | Go to Step 3 | Fault not present. Refer to Diagnostic Aids | |
Disconnect IAT sensor connector. Is the temperature the same or more than the value specified? | 139°C (282°F) | Go to Step 4 | Go to Step 6 | |
Is the resistance of each measurement greater than the value specified? | 10K ohms | Go to Step 8 | Go to Step 5 | |
5 | Repair the short to ground in the IAT Sensor Signal circuit or the signal and ground circuits shorted together. Is the repair complete? | -- | Go to Powertrain Control Module Diagnosis for Verify Repair | -- |
6 |
Was terminal contact repaired? | -- | Go to Powertrain Control Module Diagnosis for Verify Repair | Go to Step 7 |
7 | Replace the IAT sensor. Refer to Intake Air Temperature Sensor Replacement . Is the replacement complete? | -- | Go to Powertrain Control Module Diagnosis for Verify Repair | -- |
8 |
Was terminal contact repaired? | -- | Go to Powertrain Control Module Diagnosis for Verify Repair | Go to Step 9 |
9 | Replace the PCM. Refer to Powertrain Control Module Replacement/Programming . Is the replacement complete? | -- | Go to Powertrain Control Module Diagnosis for Verify Repair | -- |
