Removal Procedure
- Remove the rear seat back. Refer to Rear Seat Back Replacement in Seats.
- Remove both rear outboard seat belt retractors. Rear Seat Belt Retractor Replacement .
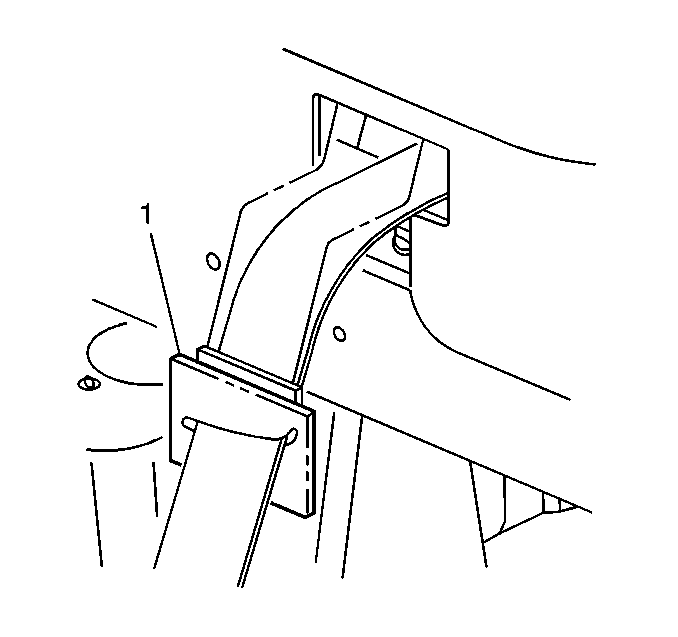
- Disengage the center belt escutcheon (1) from the rear shelf trim panel.
- Remove the rear shelf trim panel. Refer to Rear Window Shelf Trim Panel Replacement in Interior Trim.
- Remove the rear shelf carrier panel. Rear Shelf Carrier Replacement in Interior Trim.
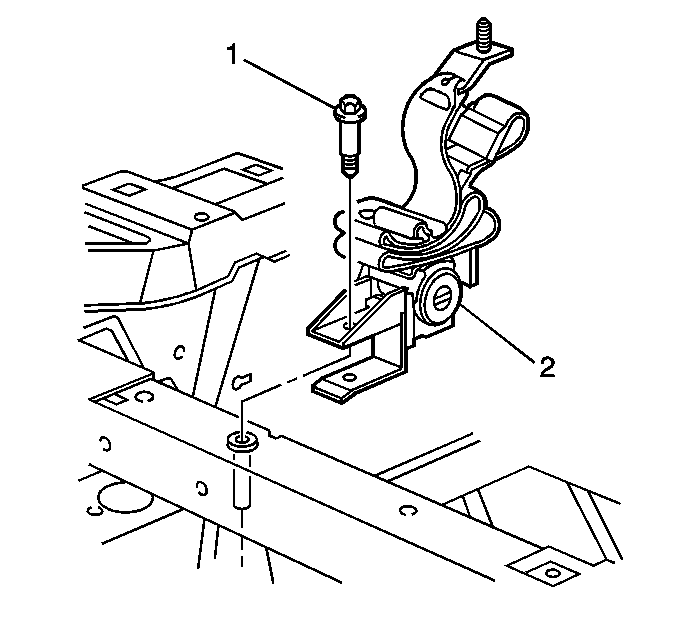
- Place the rear seat center belt up on the rear shelf area in order to expose the retractor anchor fastener (1).
- Remove the rear seat center belt retractor anchor fastener (1).
- Lower the rear compartment trim panel in order to access the rear seat center belt retractor (2). Refer to Rear Compartment Front Trim Panel Replacement in Body Rear End.
- Remove the rear seat center belt retractor (2) through the rear compartment.
Caution: Refer to SIR Caution in the Preface section.
Installation Procedure
- Install the center seat belt retractor (2) to the cross car beam. Ensure the retainer tab engages the notch in the cross car beam.
- From the inside of the vehicle install the center seat belt retractor fastener (1).
- Install the rear shelf carrier panel. Refer to Rear Shelf Carrier Replacement in Interior Trim.
- Install the rear shelf trim panel. Refer to Rear Window Shelf Trim Panel Replacement in Interior Trim.
- Install the rear seat center belt escutcheon (1) to the rear shelf.
- Install both of the outboard seat belt retractors. Refer to Rear Seat Belt Retractor Replacement .
- Install the rear seat back. Refer to Rear Seat Back Replacement in Seats.
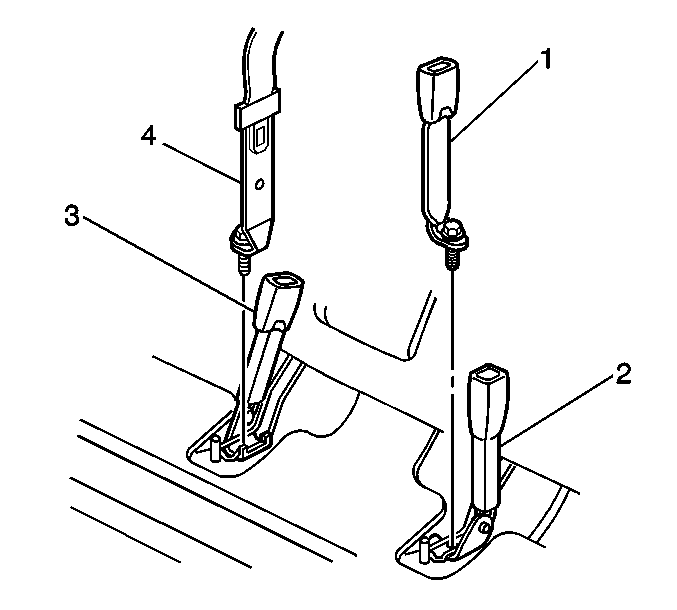
- Install the rear seat center belt shoulder strap (3) bolt.
Notice: Use the correct fastener in the correct location. Replacement fasteners must be the correct part number for that application. Fasteners requiring replacement or fasteners requiring the use of thread locking compound or sealant are identified in the service procedure. Do not use paints, lubricants, or corrosion inhibitors on fasteners or fastener joint surfaces unless specified. These coatings affect fastener torque and joint clamping force and may damage the fastener. Use the correct tightening sequence and specifications when installing fasteners in order to avoid damage to parts and systems.
Tighten
Tighten the rear seat center shoulder belt retractor fastener to 30 N·m
(22 lb ft).
Important: Ensure that the bolt threads and the bolt hole are free of any sealer patch material.
Ensure the fabric side of the lower anchor is facing the seat belt buckle (2) and the seat belt anchor is between the dimples on the body.
The shoulder belt will have a half twist once the belt is properly installed.
Tighten
Tighten the rear seat center belt bolt to 30 N·m (22 lb ft).
