For 1990-2009 cars only
Rear Support Replacement w/FE1, FE3
Removal Procedure
- Raise and support the vehicle. Refer to Lifting and Jacking the Vehicle .
- Remove the tires and the wheels. Refer to Tire and Wheel Removal and Installation .
- Remove the exhaust system. Refer to Exhaust System Replacement .
- Remove the coil springs. Refer to Coil Spring Replacement .
- Remove the brake calipers and support. Refer to Rear Brake Caliper Replacement .
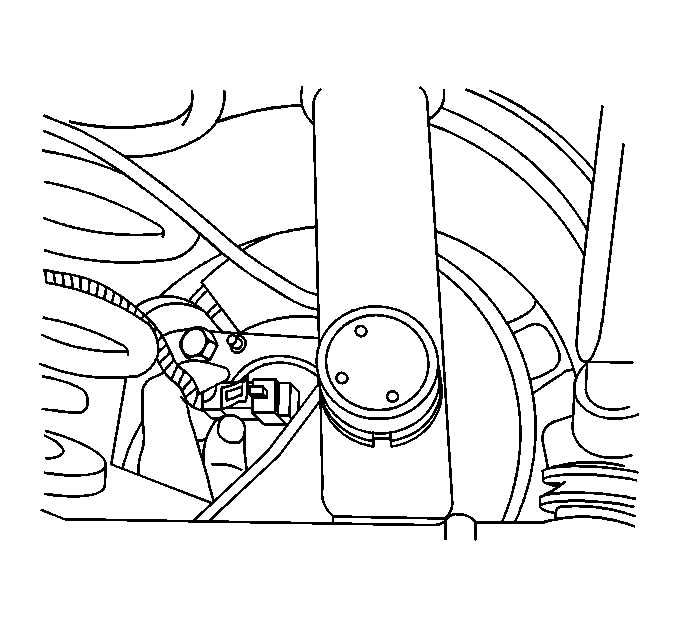
- Disconnect the wheel speed sensor electrical connector from each wheel.
- Disconnect the ABS electrical connectors from the support assembly.
- Remove the electronic level control link (FE1) or links (FE3).
- Support the rear suspension support assembly with a transmission jack and securely support.
- Remove the 3 bolts per side, securing the support brackets to the body of the vehicle.
- Remove the front 2 bolts and the rear 2 bolts securing the support assembly to the body.
- Lower the transmission jack and remove the support assembly.
- Transfer all necessary parts from the old support to the new support.


Installation Procedure
- Raise the support assembly with the transmission jack in position.
- Install the 2 rear bolts and the 2 front bolts at the mounts.
- Install the brackets at the forward support assembly mounts.
- Install the air tube to the electronic level control compressor.
- Connect the electronic level control electrical connector and install the vent tube.
- Connect the electrical connectors to the support assembly (FE3).
- Install the electronic level control link (FE1) or links (FE3) to the control arms.
- Install the brake calipers. Refer to Rear Brake Caliper Replacement .
- Install the springs. Refer to Coil Spring Replacement .
- Install the exhaust system. Refer to Exhaust System Replacement .
- Install the tires and the wheels. Refer to Tire and Wheel Removal and Installation .
Notice: Refer to Fastener Notice in the Preface section.
Tighten
Tighten the bolts to 191 N·m (141 lb ft).
Important: Loosen the assemble brackets to prevent spinning when securing the front support assembly bolts.
Tighten
Tighten the bolts to 86 N·m (63 lb ft).
Rear Support Replacement w/FE7
Removal Procedure
- Raise and support the vehicle. Refer to Lifting and Jacking the Vehicle .
- Remove the tires and the wheels. Refer to Tire and Wheel Removal and Installation .
- Lower the exhaust system. Refer to Exhaust System Replacement .
- Remove the coil springs. Refer to Coil Spring Replacement .
- Remove the brake calipers and support. Refer to Rear Brake Caliper Replacement .
- Disconnect the wheel speed sensor electrical connector from each wheel.
- Release the park brake cable from the brake calipers.
- Loosen the park brake cable (1) and then disconnect the cable at the rear suspension support assembly.
- Disconnect the electrical connectors from the support assembly.
- Disconnect the electrical connector from the electronic level control.
- Remove the vent hose.
- Remove the electronic level control link from the left and the right control arm, if equipped.
- Remove the vent tube from the electronic level control compressor.
- Support the rear suspension support assembly with a transmission jack and securely support.
- Remove the center support brackets (1).
- Remove 3 bolts per side, securing the support brackets to the body of the vehicle.
- Remove the front 2 bolts and the rear 2 bolts securing the support assembly to the body.
- Lower the transmission jack and remove the support assembly.


Installation Procedure
- Raise the support assembly with the transmission jack in position.
- Install the 2 rear bolts and the 2 front bolts at the mounts.
- Install the brackets at the forward support assembly mounts.
- Install the center support bracket bolts (1).
- Install the air tube to the electronic level control compressor.
- Connect the electronic level control electrical connector and install the vent tube.
- Connect the electrical connectors to the support assembly.
- Install the electronic level control links to both the control arms.
- Install the air tube to the electronic level control compressor.
- Connect the electrical connector to the electronic level control and install the vent tube.
- Connect the electrical connectors to the support assembly.
- Connect the electronic level control links to both the control arms.
- Attach the park brake cable at the support assembly.
- Install the park brake cable (1) to the brake calipers.
- Install the brake calipers. Refer to Rear Brake Caliper Replacement .
- Install the coil springs. Refer to Coil Spring Replacement .
- Install the exhaust system. Refer to Exhaust System Replacement .
- Install the tires and the wheels. Refer to Tire and Wheel Removal and Installation .
Notice: Refer to Fastener Notice in the Preface section.
Tighten
| • | Tighten the front support assembly bolts to 187 N·m (138 lb ft). |
| • | Tighten the rear support assembly bolts to 207 N·m (153 lb ft). |
Tighten
Tighten the bolts to 86 N·m (63 lb ft).
Tighten
Tighten the bolts to 128 N·m (94 lb ft).
