Cellular Telephone Docking Station Replacement DTS
Removal Procedure
- Remove the auxiliary HVAC control module. Refer to Auxiliary Heater and Air Conditioning Control Module Replacement in HVAC Automatic.
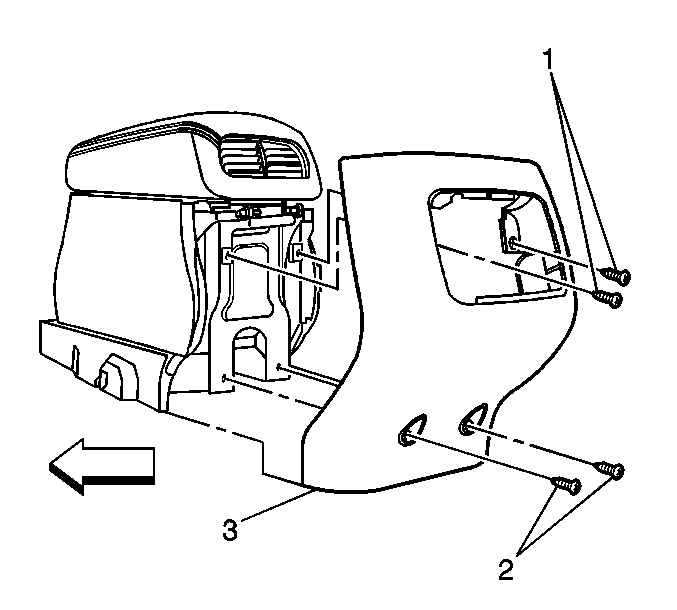
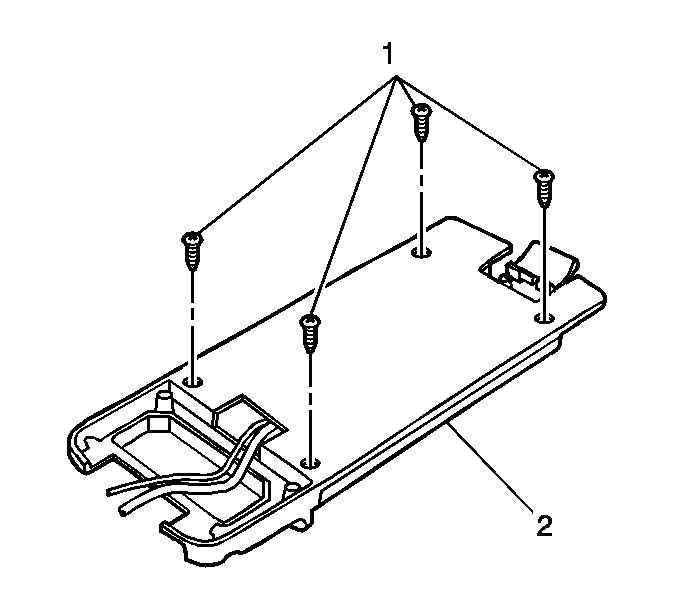
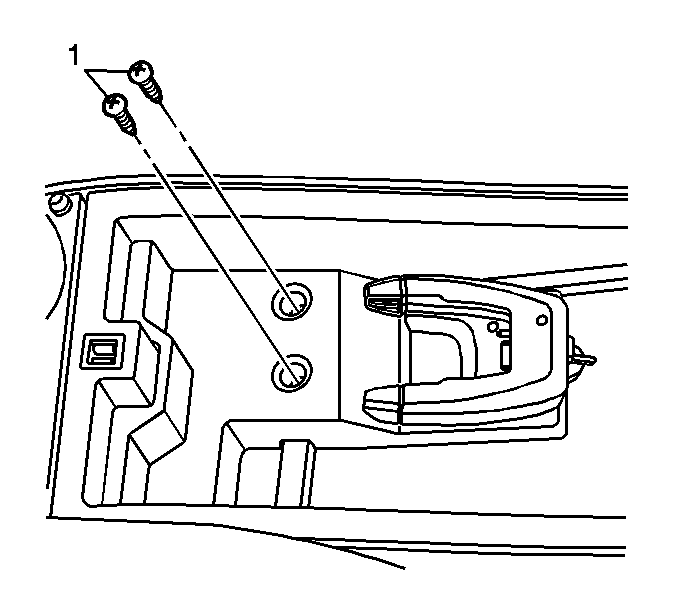
- Remove the floor console rear cover screws (1, 2).
- Remove the floor console rear cover (3).
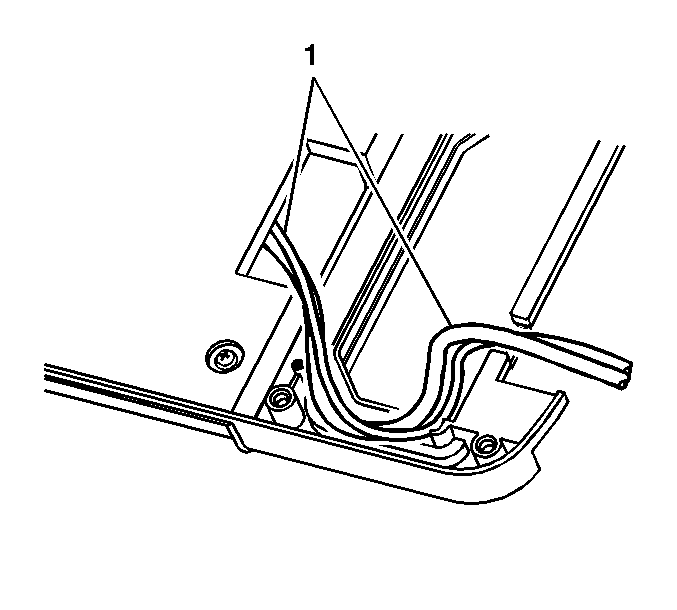
- Carefully pull the cellular phone wiring out from under the floor console.
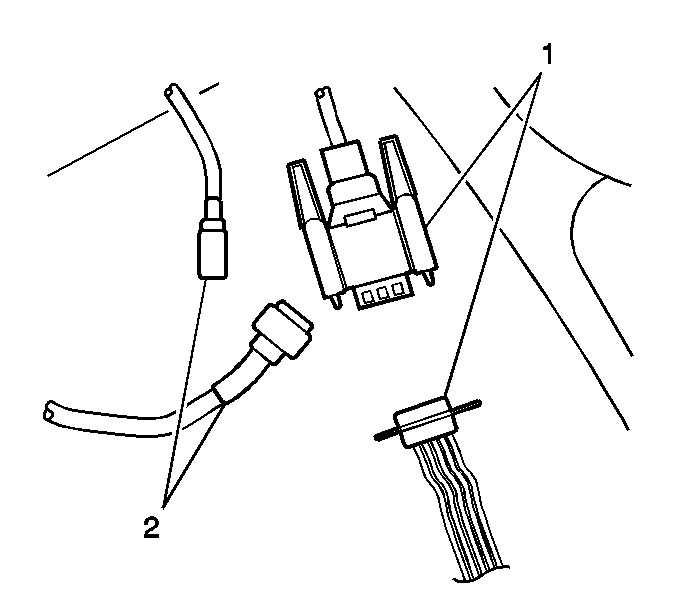
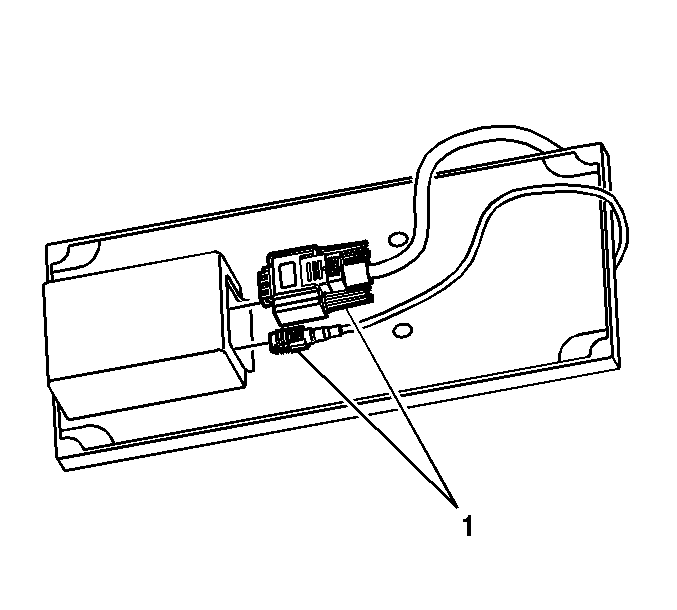
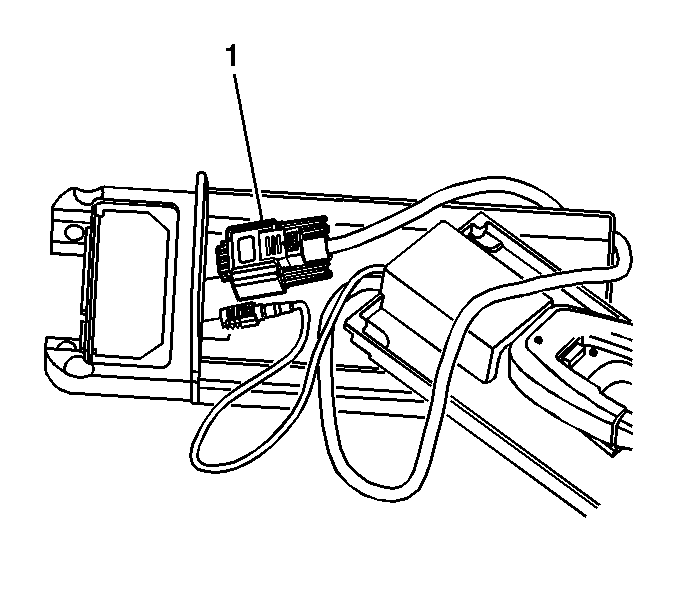
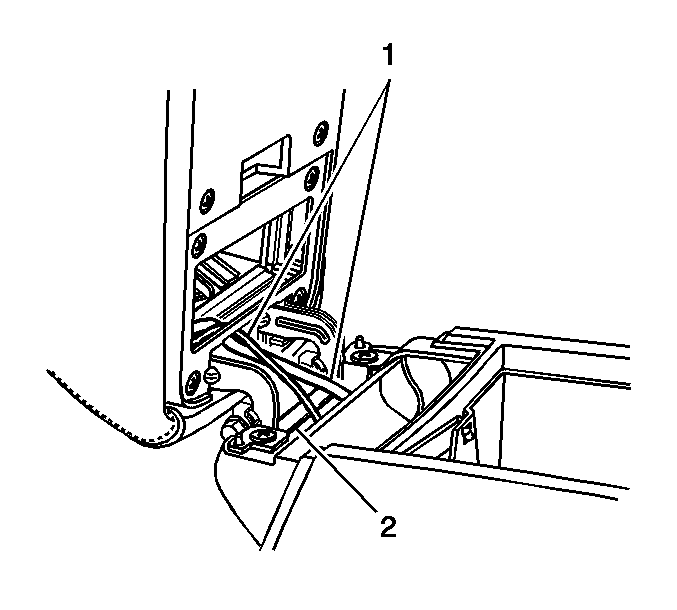
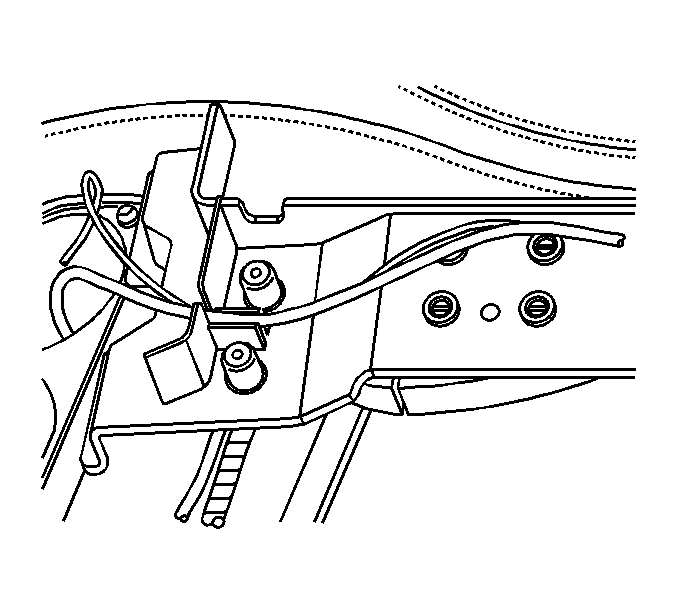
- Disconnect the docking station electrical connector (1).
- Disconnect the coaxial cable (2).
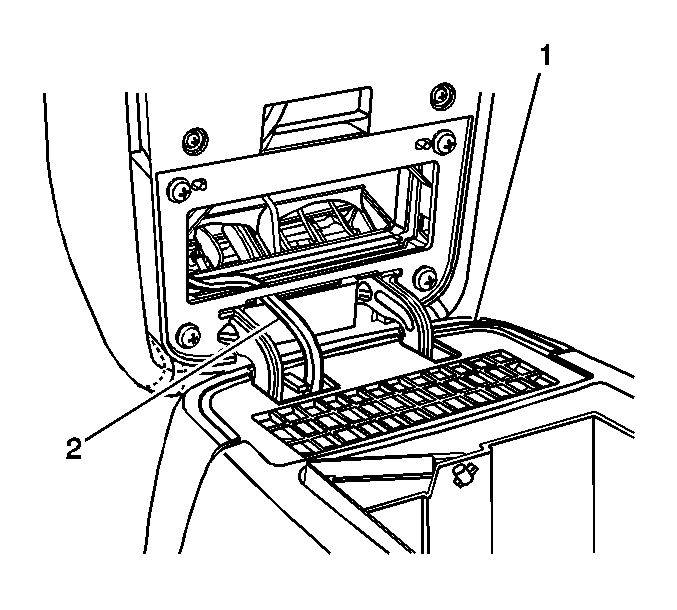
- Remove the inner auxiliary HVAC outlet (1).
- Remove the phone wiring (2) from the hinge area of the floor console.
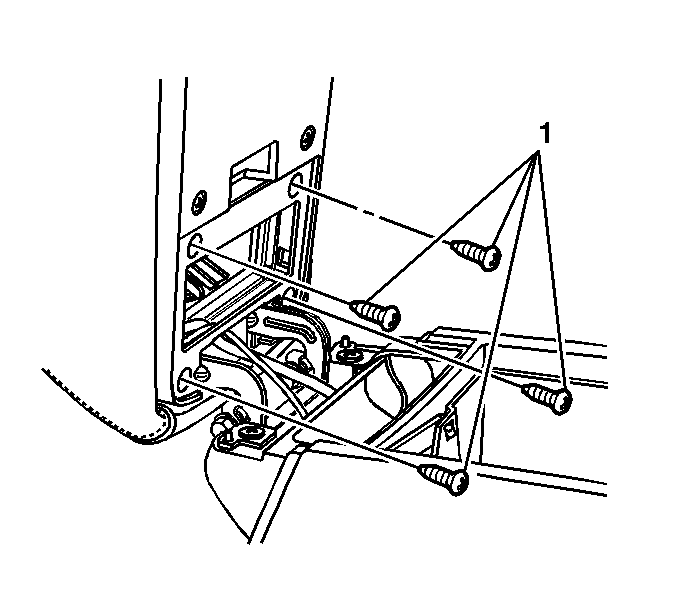
- Remove the floor console tray screws (1)
- Remove the console tray from the floor console
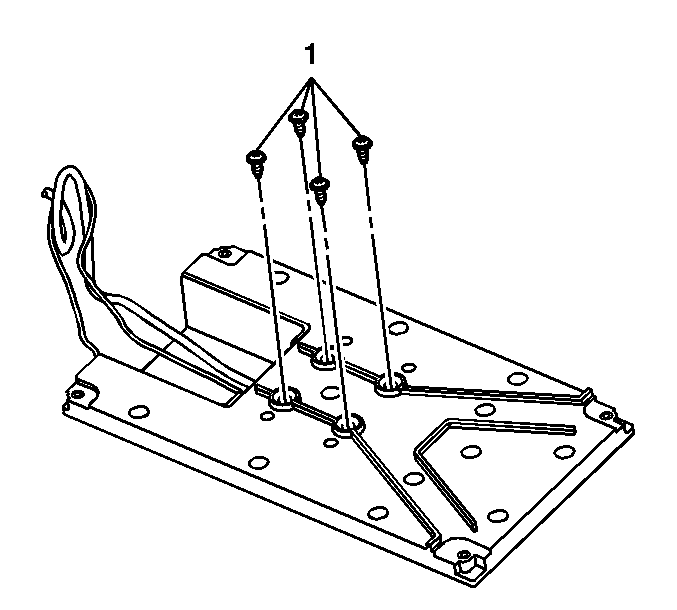
- Remove the console tray insert screws (1) from the console tray (2).
- Remove the tray insert from the console tray (1).
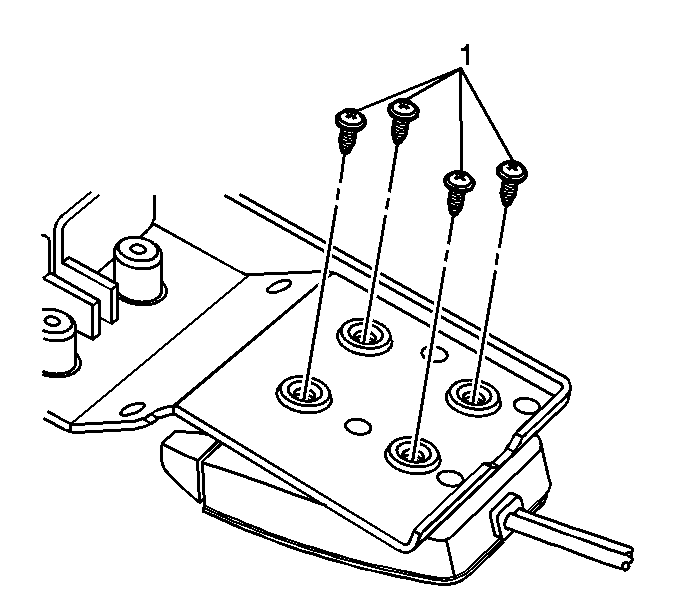
- Remove the docking station screws (1) from the console tray insert.
- Remove the docking station from the tray insert.
Installation Procedure
- Route the docking station wires (1) through the opening in the tray insert.
- Install the docking cup to the console tray insert.
- Install the phone docking station screws (1).
- Route the docking station wires (1) through the opening in the console tray.
- Install the console tray insert to the console tray (2).
- Install the console tray insert screws (1).
- Route the cellular phone wiring (1) in the hinge area of the console tray.
- Install the console tray to the floor console.
- Install the console tray screws (1).
- Route the cellular phone wiring (1) behind the console hinge cross brace (2).
- Connect the docking station electrical connector (1).
- Connect the coaxial cable (2).
- Route the cellular phone wiring under the floor console.
- Install the floor console rear cover (3).
- Install the floor console rear cover screws (1, 2).
- Install the auxiliary HVAC control module. Refer to Auxiliary Heater and Air Conditioning Control Module Replacement in HVAC Automatic.
- Install the inner auxiliary HVAC outlet (1).
- Ensure the phone wiring (2) is captured in the cutout on the inner auxiliary HVAC outlet (1).
Notice: Use the correct fastener in the correct location. Replacement fasteners must be the correct part number for that application. Fasteners requiring replacement or fasteners requiring the use of thread locking compound or sealant are identified in the service procedure. Do not use paints, lubricants, or corrosion inhibitors on fasteners or fastener joint surfaces unless specified. These coatings affect fastener torque and joint clamping force and may damage the fastener. Use the correct tightening sequence and specifications when installing fasteners in order to avoid damage to parts and systems.
Tighten
Tighten the screws to 1.6 N·m (14 lb in).
Tighten
Tighten the screws to 1.6 N·m (14 lb in).
Tighten
Tighten the screws to 1.6 N·m (14 lb in).
Tighten
Tighten the screws to 1.6 N·m (14 lb in).
Cellular Telephone Docking Station Replacement DeVille and DHS
Removal Procedure
- Open the center seat lower storage compartment door.
- Remove the screws (1) securing the phone docking station adapter to the center seat.
- Partially remove the docking station adapter from the center seat .
- Disconnect the docking station electrical connector (1).
- Disconnect the coaxial cable (2).
- Remove the docking station and adapter from the center seat.
- Remove the screws (1) securing the phone docking station to the center seat adapter.
- Remove the docking station.
Installation Procedure
- Install the docking station to the center seat docking station adapter.
- Install the screws (1).
- Partially install the docking station.
- Connect the docking station wiring electrical connector (1).
- Connect the coaxial cable (2).
- Route the docking station wiring through the docking station adapter and the center seat.
- Completely install the docking station adapter to the center seat.
- Install the screws (1).
Notice: Use the correct fastener in the correct location. Replacement fasteners must be the correct part number for that application. Fasteners requiring replacement or fasteners requiring the use of thread locking compound or sealant are identified in the service procedure. Do not use paints, lubricants, or corrosion inhibitors on fasteners or fastener joint surfaces unless specified. These coatings affect fastener torque and joint clamping force and may damage the fastener. Use the correct tightening sequence and specifications when installing fasteners in order to avoid damage to parts and systems.
Tighten
Tighten the screws to 1.6 N·m (14 lb in).
Tighten
Tighten the screws to 1.6 N·m (14 lb in).
