For 1990-2009 cars only
Removal Procedure
- Open the hood.
- Remove the upper filler panel. Refer to Filler Panel Replacement - Upper in Body Front End.
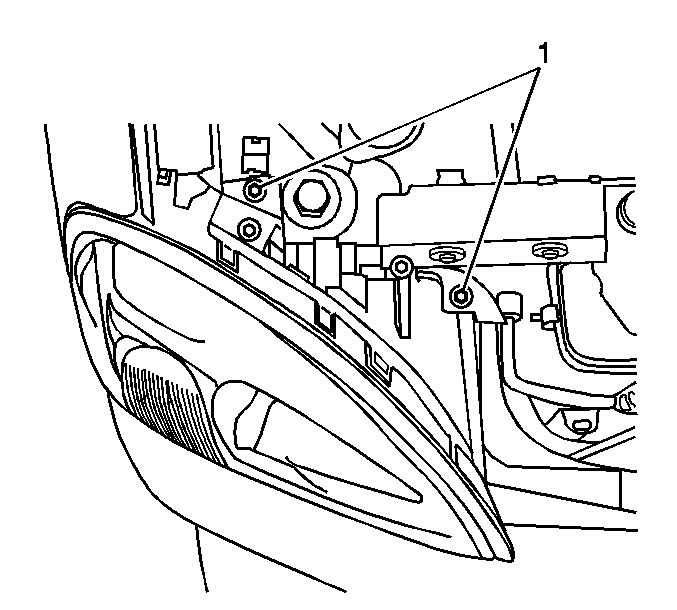
- Remove the bolts (1) retaining the headlamp to the headlamp mounting bracket.
- Remove the bolt retaining the headlamp to the lower rail.
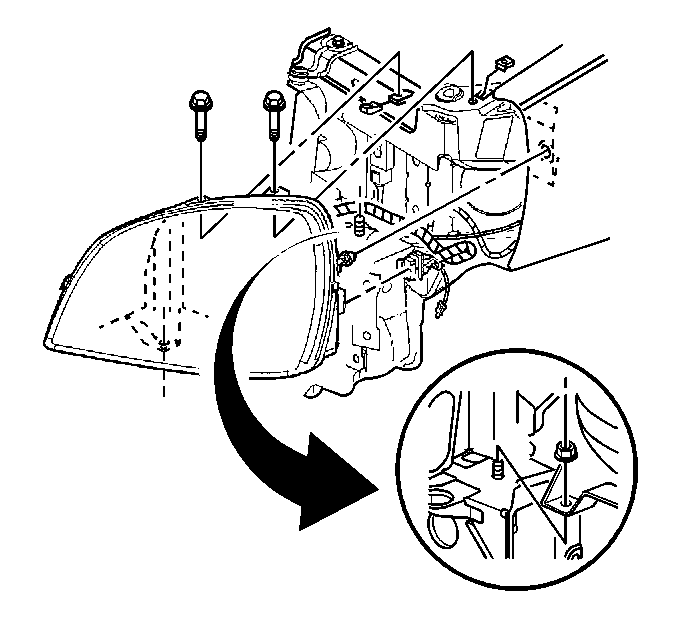
- Pull the headlamp forward and rotate upward order to disengage the nylon grommet at the outboard edge of the headlamp. A firm pull may be required.
- Disconnect the headlamp connector.
- Remove the headlamp from the vehicle.
Installation Procedure
- Connect the headlamp electrical connector.
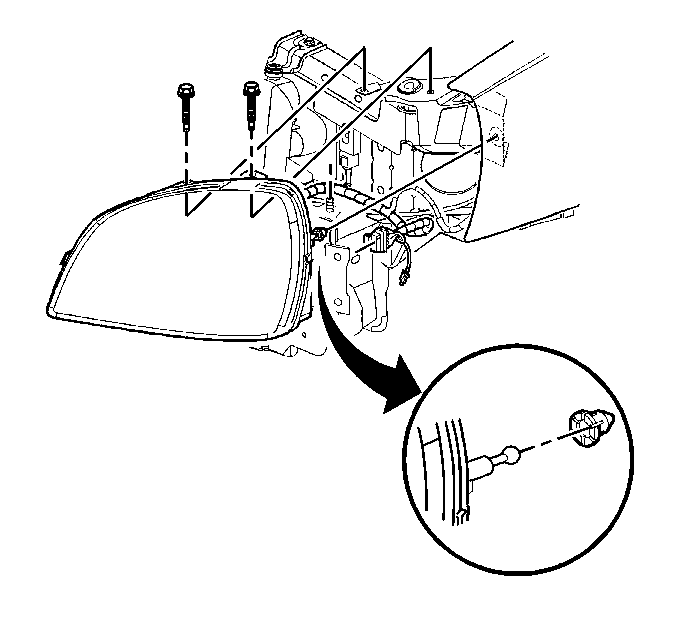
- Place the headlamp over the lower rail stud.
- Position the outboard portion of the headlamp in order to align the nylon grommet with the headlamp mounting bracket.
- Press the headlamp rearward in order to engage the nylon grommet with the headlamp mounting bracket.
- Install the bolt that retains the headlamp to the headlamp mounting bracket.
- Install the bolts (1) that retain the headlamp to the headlamp mounting bracket.
- Install the upper filler panel. Refer to Filler Panel Replacement - Upper in Body Front End.
- Close the hood.
Important: Do not push too hard while connecting the electrical connector or you could push the connector through the headlamp housing.
Notice: Refer to Fastener Notice in the Preface section.
Tighten
Tighten the mounting bolt to 6 N·m
(53 lb in).
Tighten
Tighten the headlamp mounting bolts to 6 N·m
(53 lb in).
