Tools Required
J 38185 Hose Clamp Pliers
Removal Procedure
- Drain the cooling system. Refer to Cooling System Draining and Filling .
- Remove the air cleaner. Refer to Air Cleaner Assembly Replacement .
- Remove the fuel injector sight shield. Refer to Fuel Injector Sight Shield Replacement .
- Remove the water pump drive belt. Refer to Water Pump Belt Replacement .
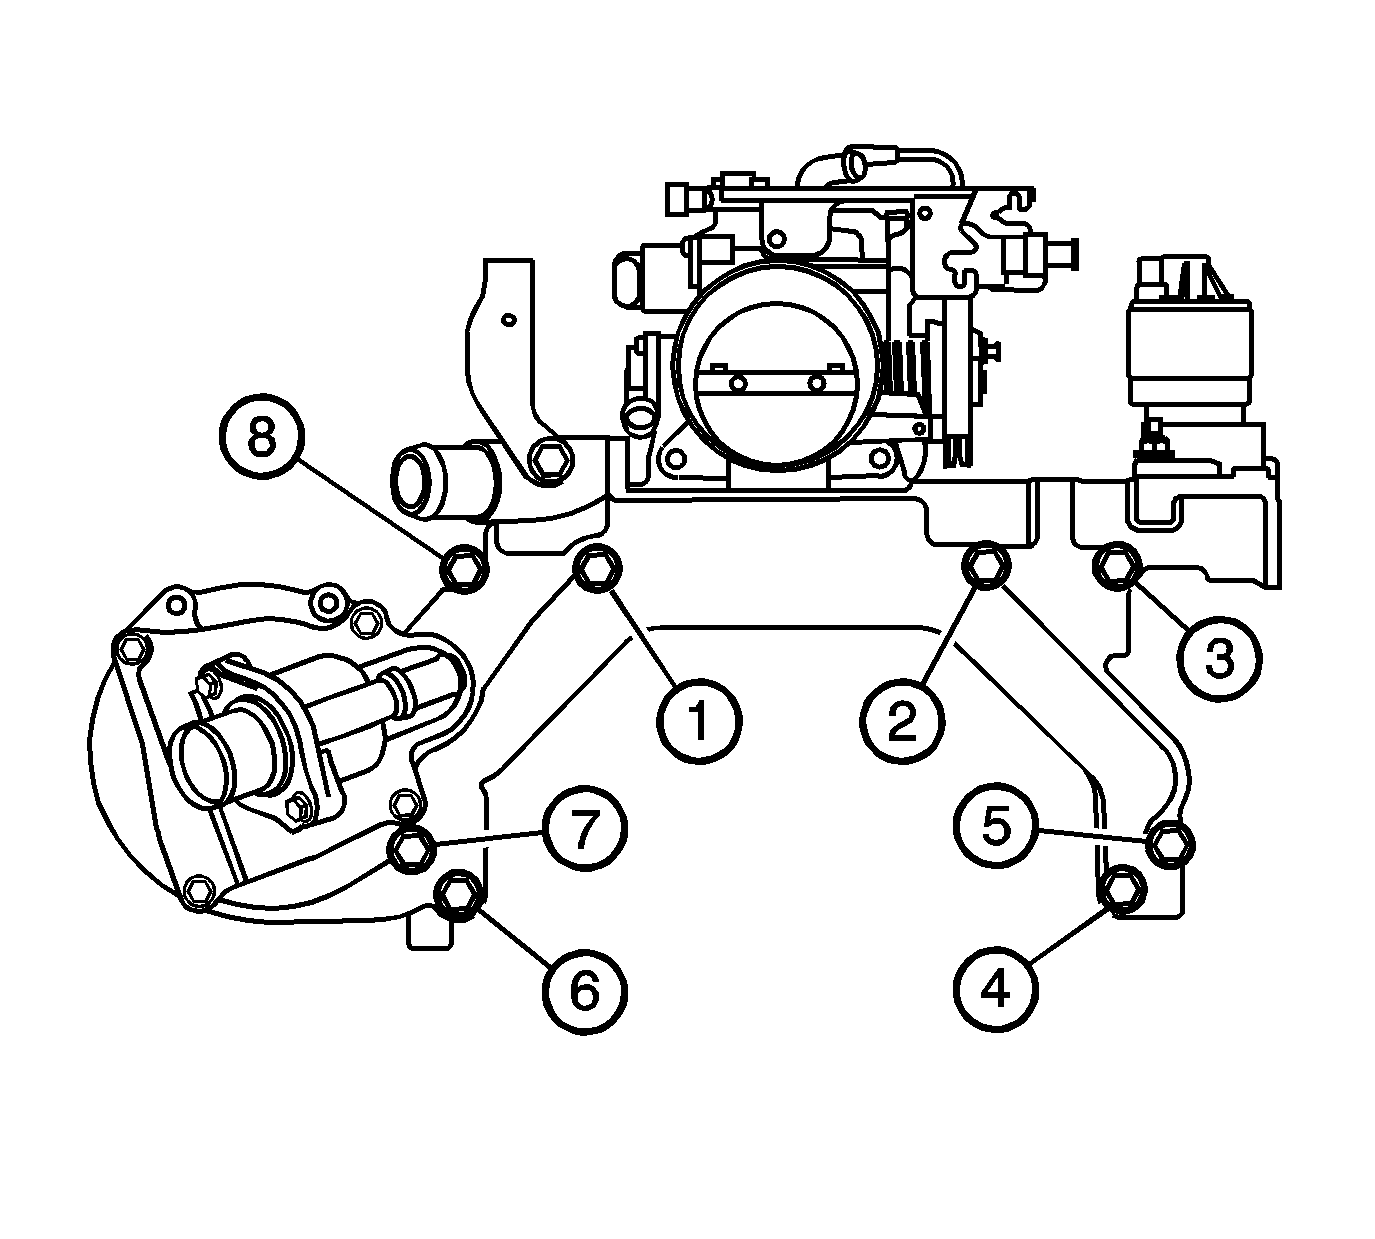
- Reposition the brake booster vacuum hose clamp at the water pump housing.
- Remove the brake booster vacuum hose from the water pump housing.
- Remove the oil level indicator tube nut.
- Reposition the oil level indicator tube.
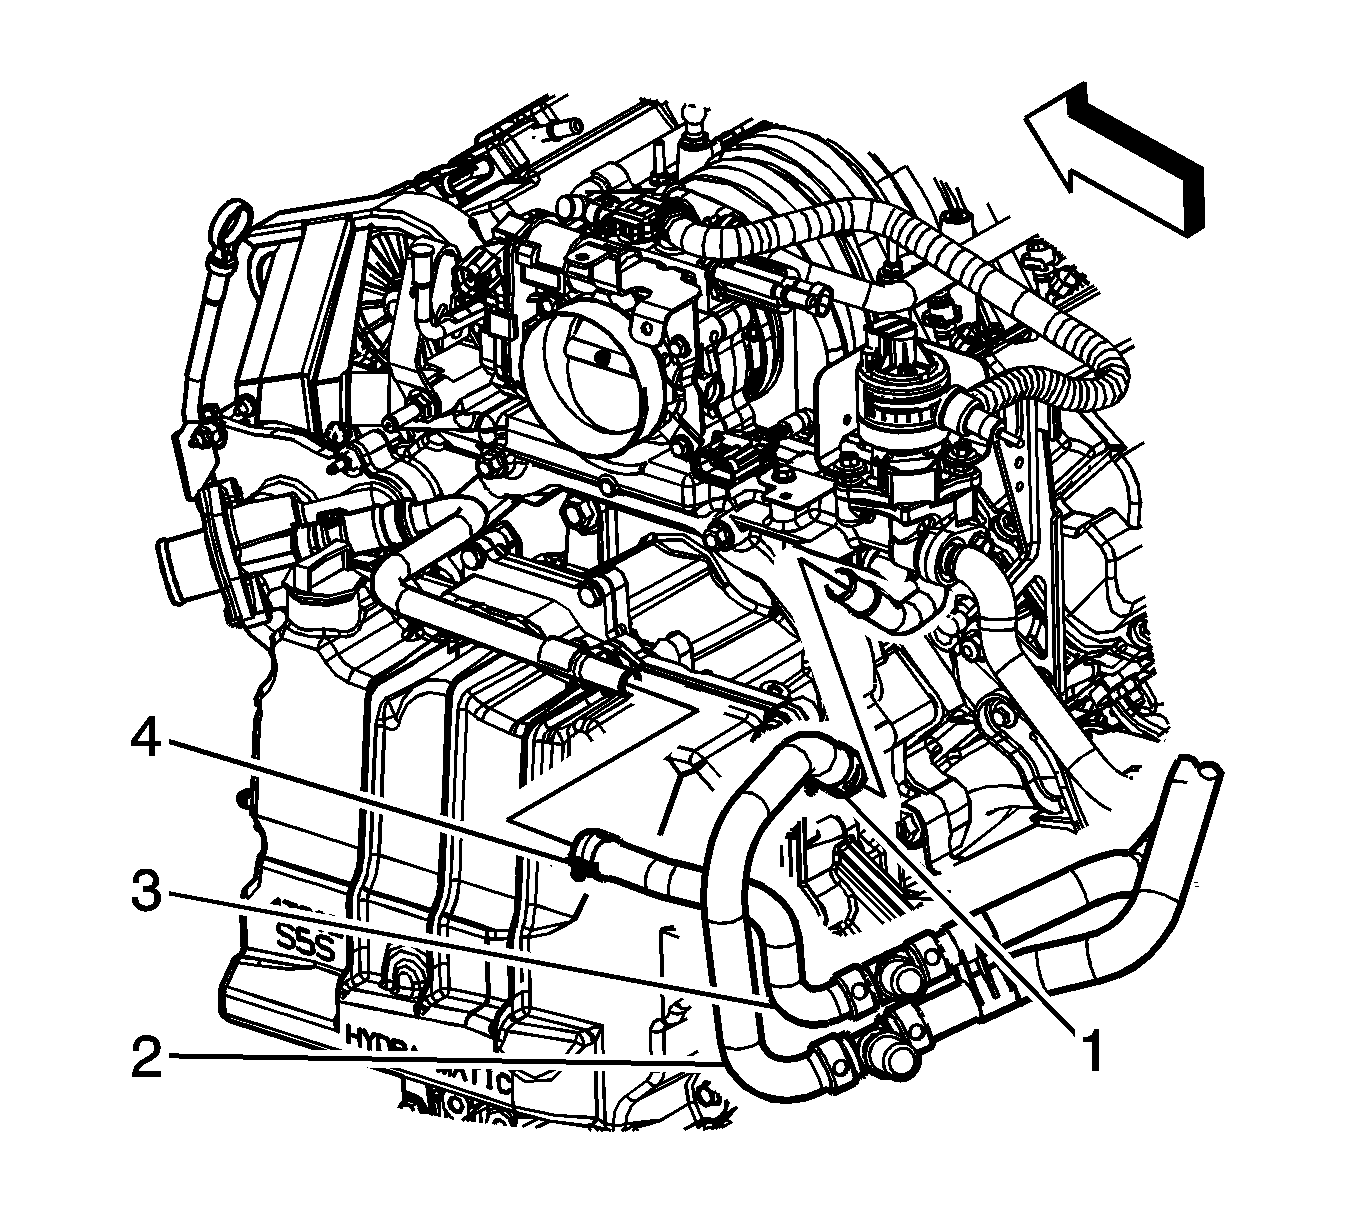
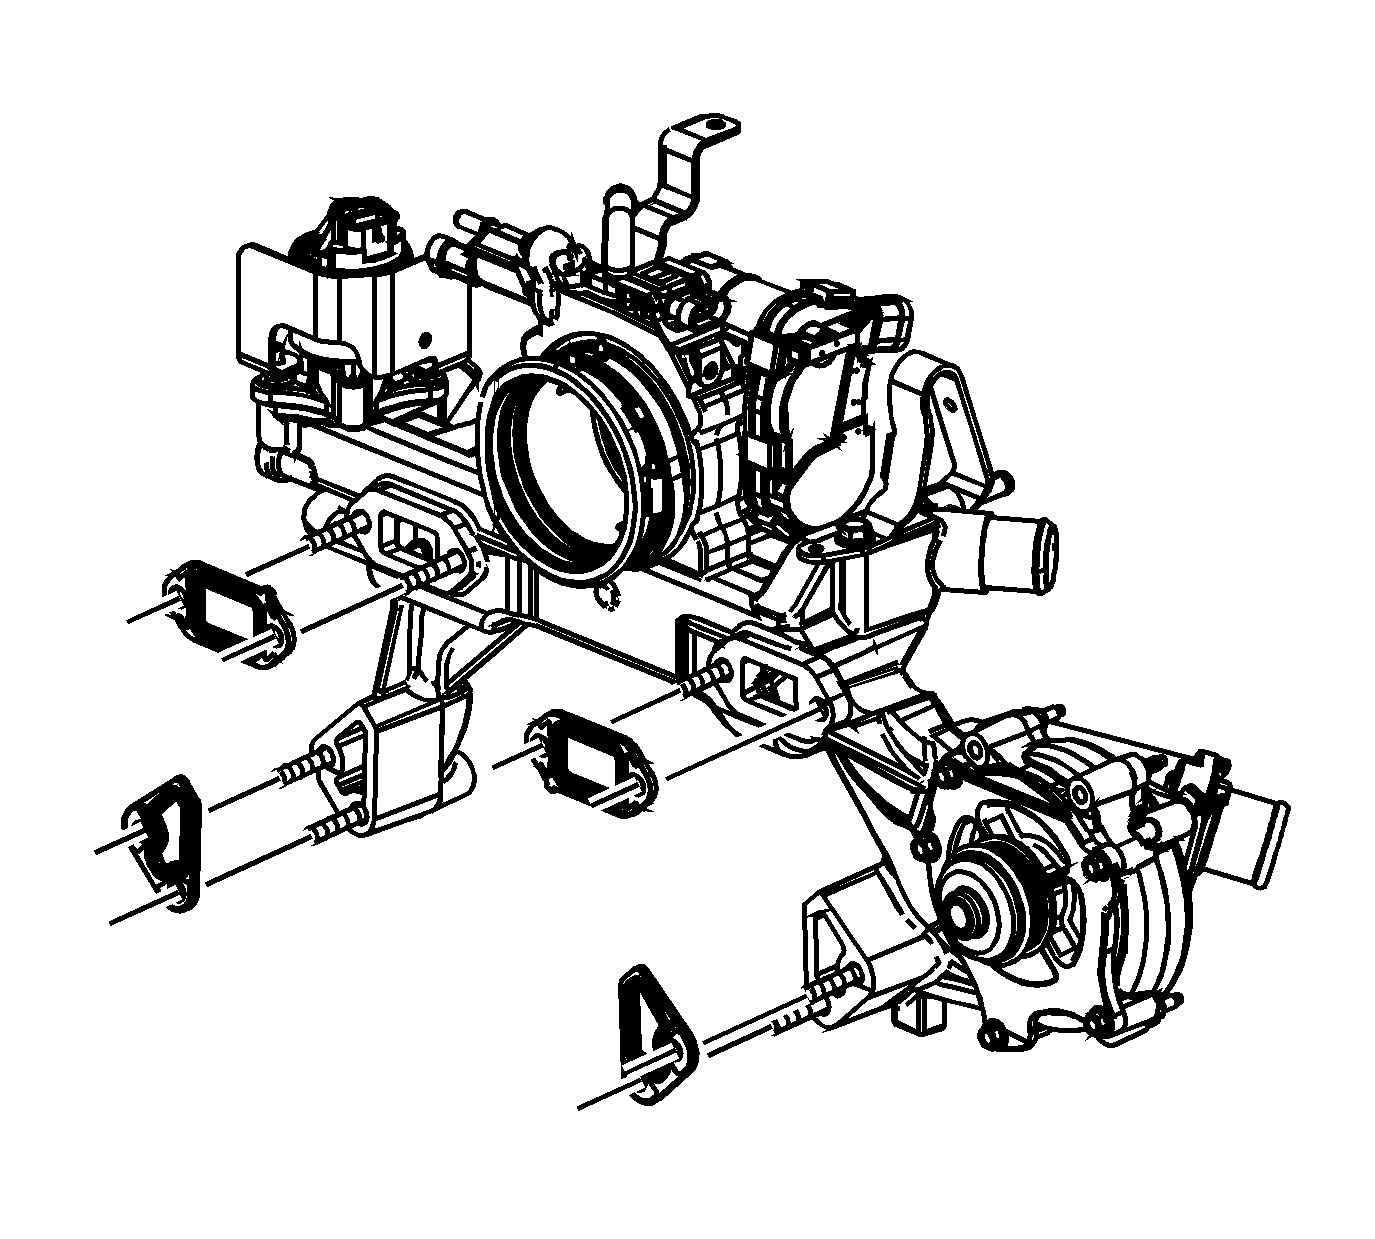
- Remove the transaxle vent hose clip (1) from the bracket.
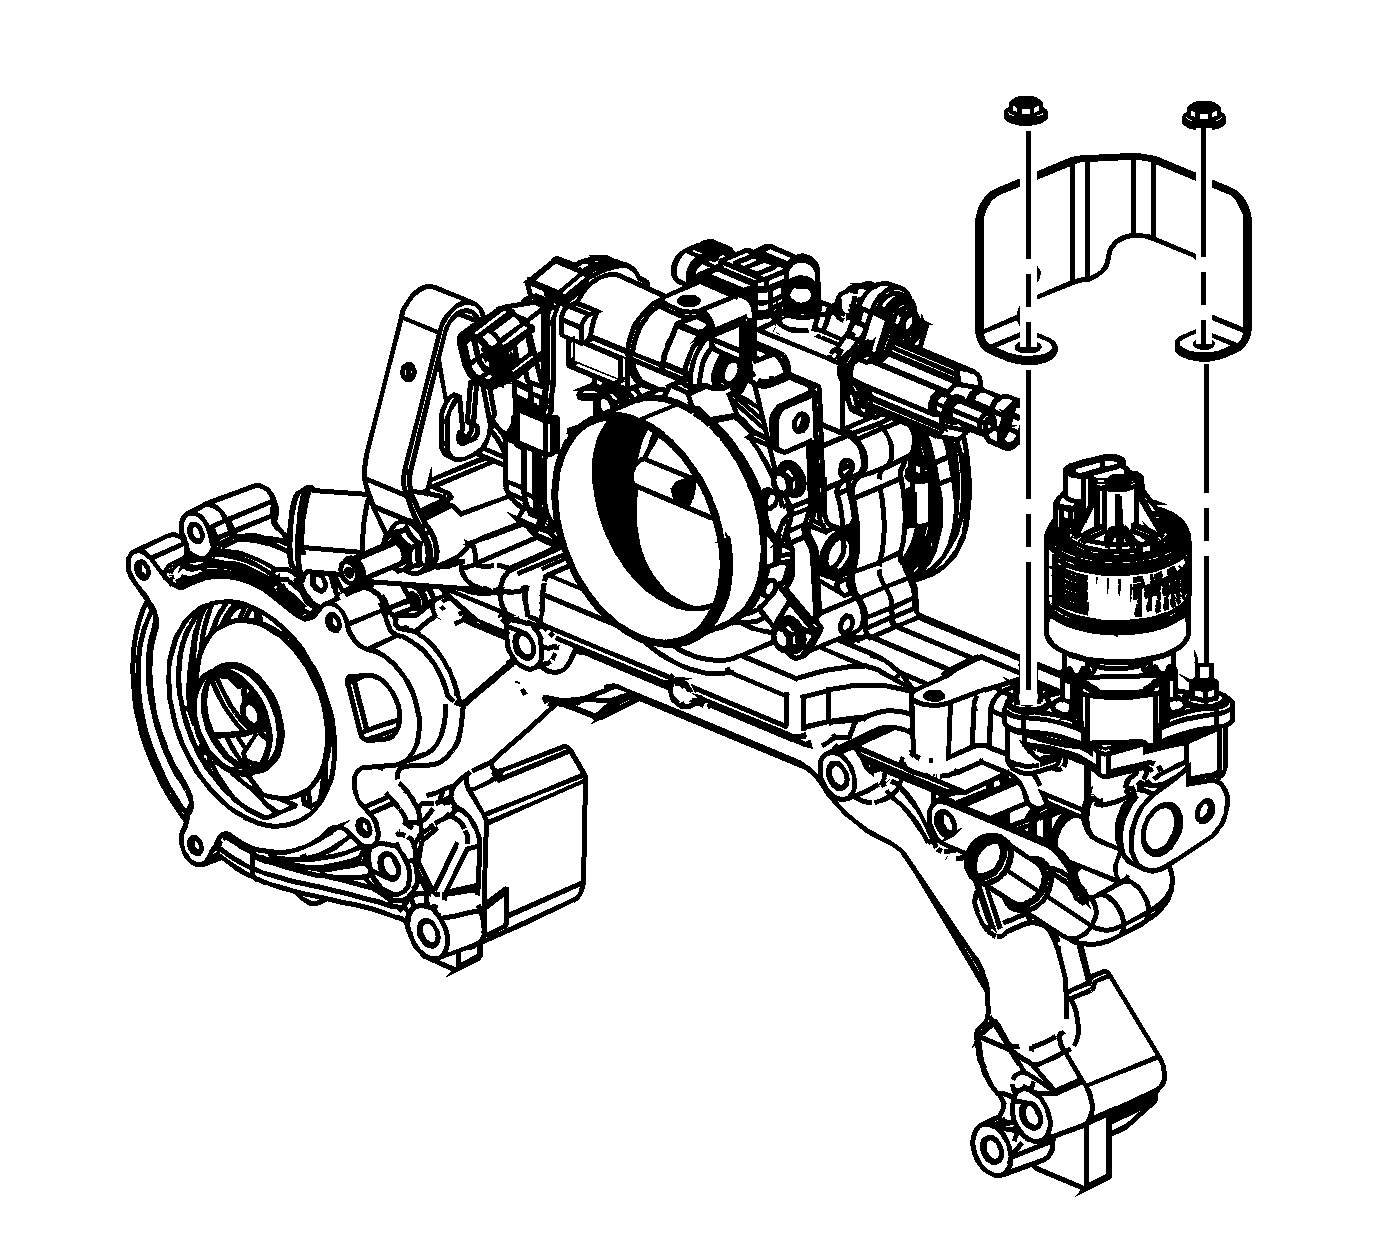
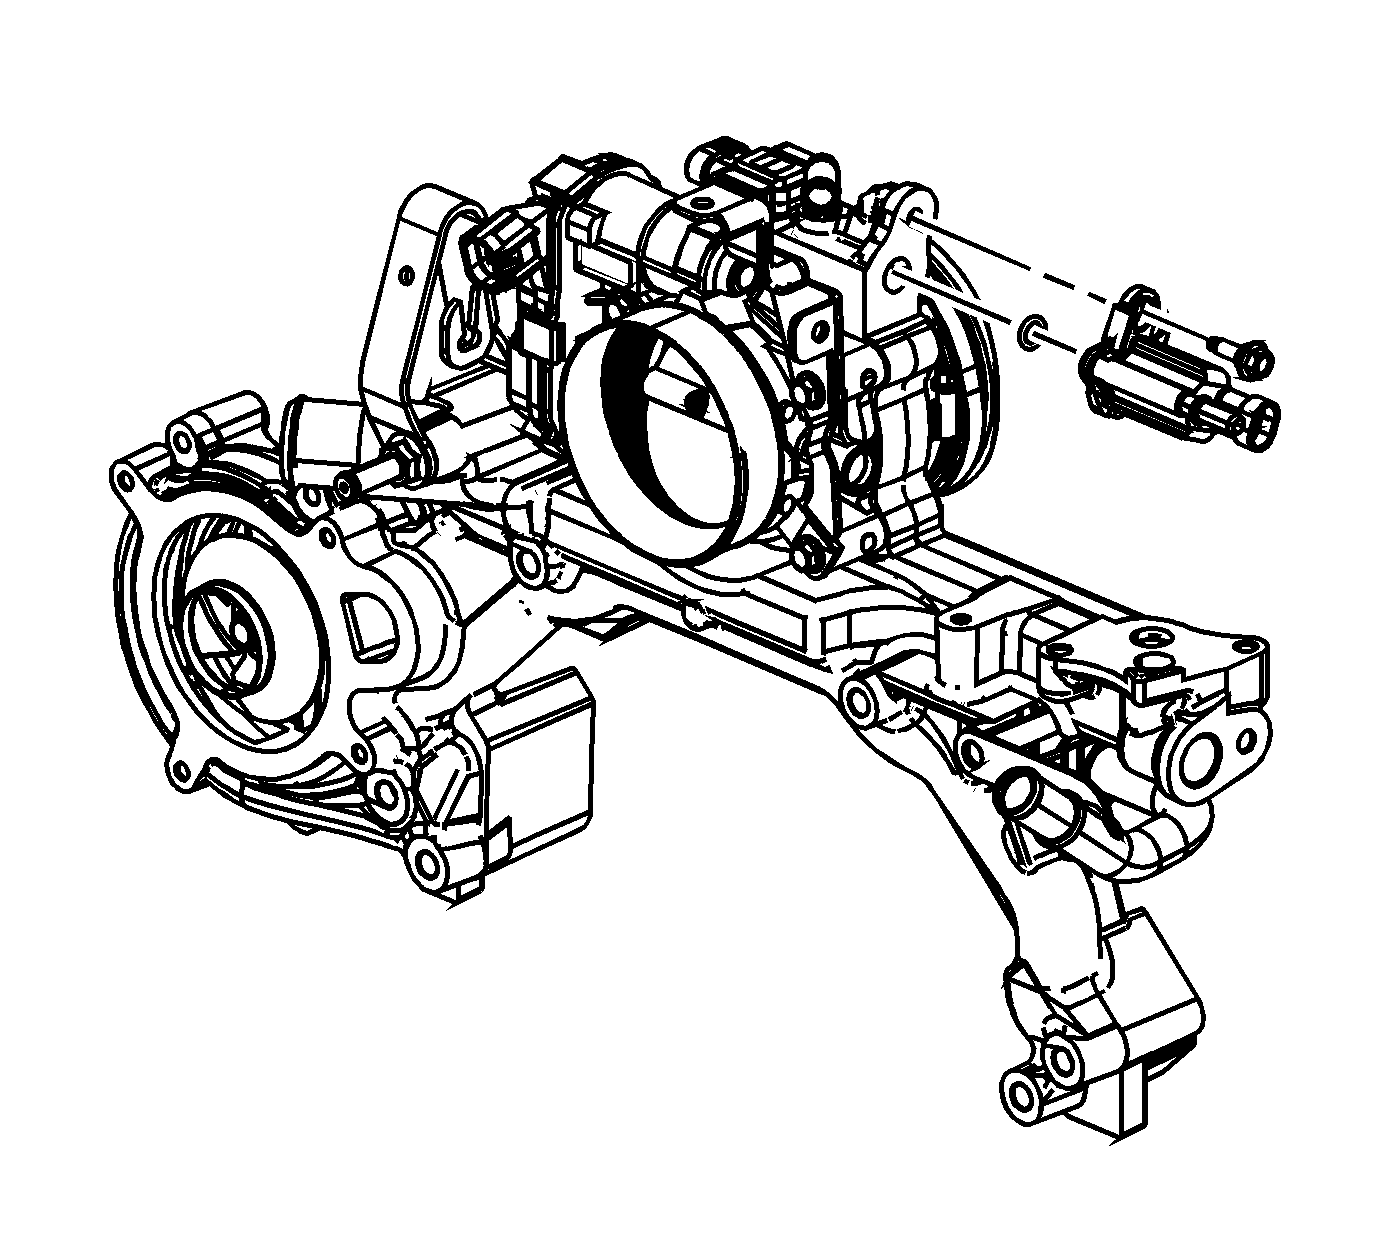
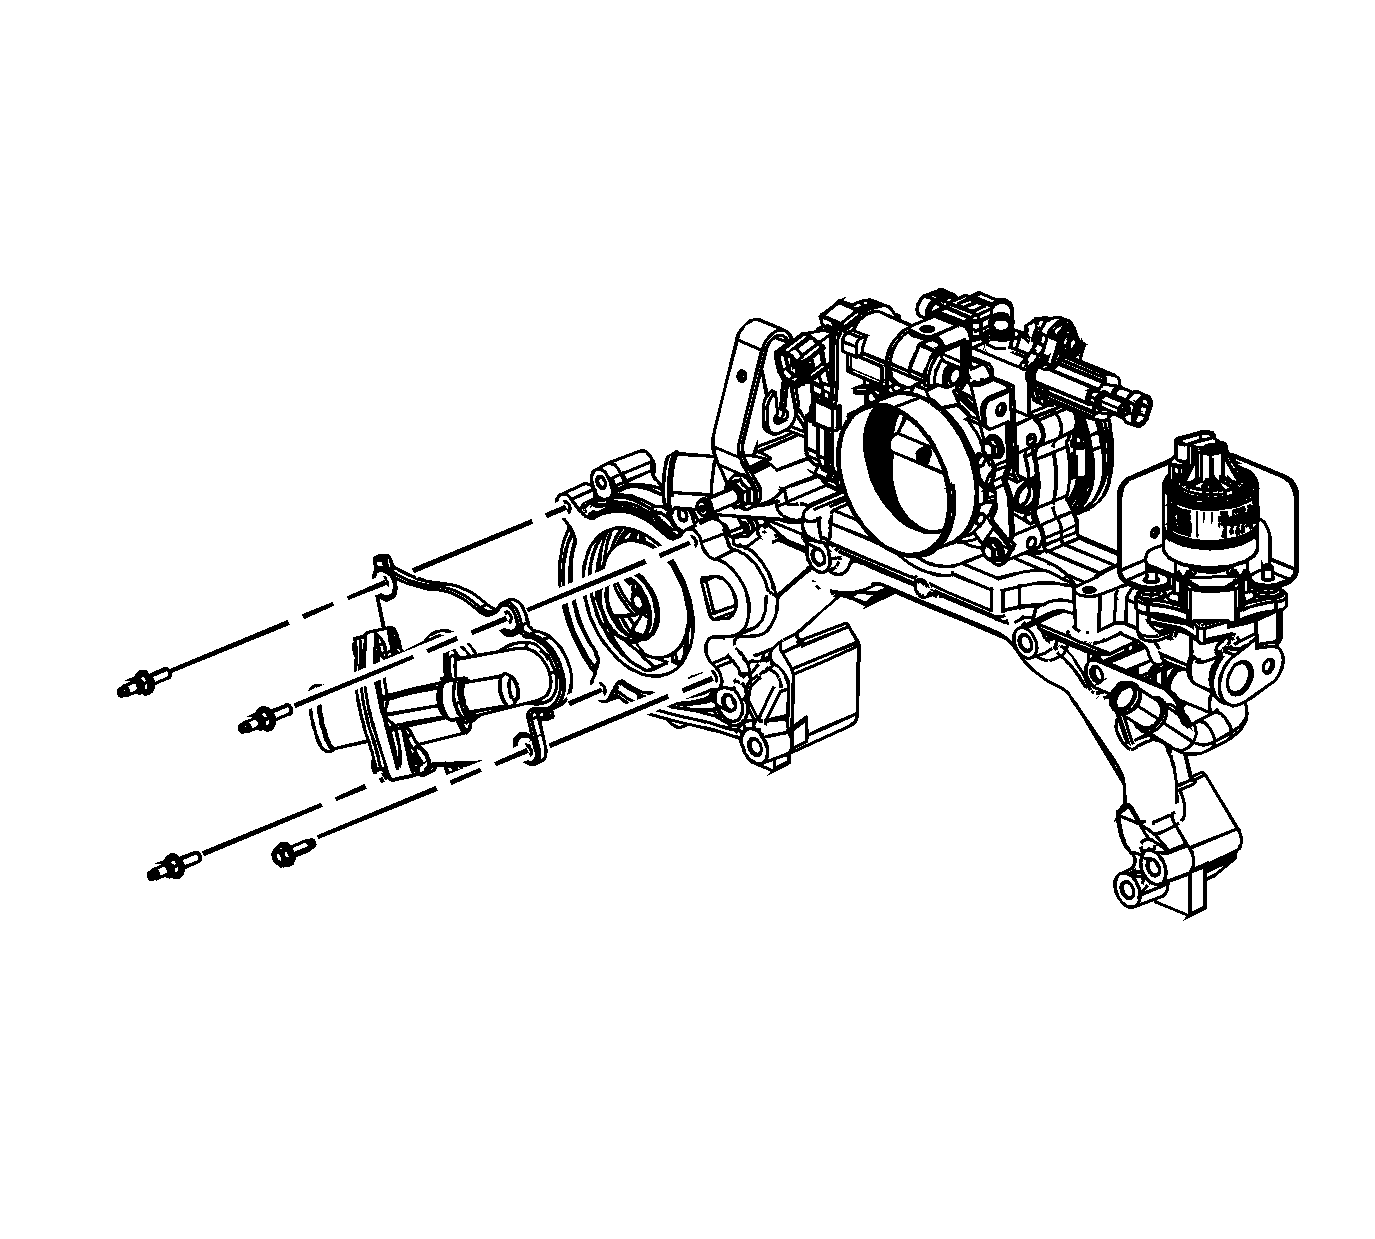
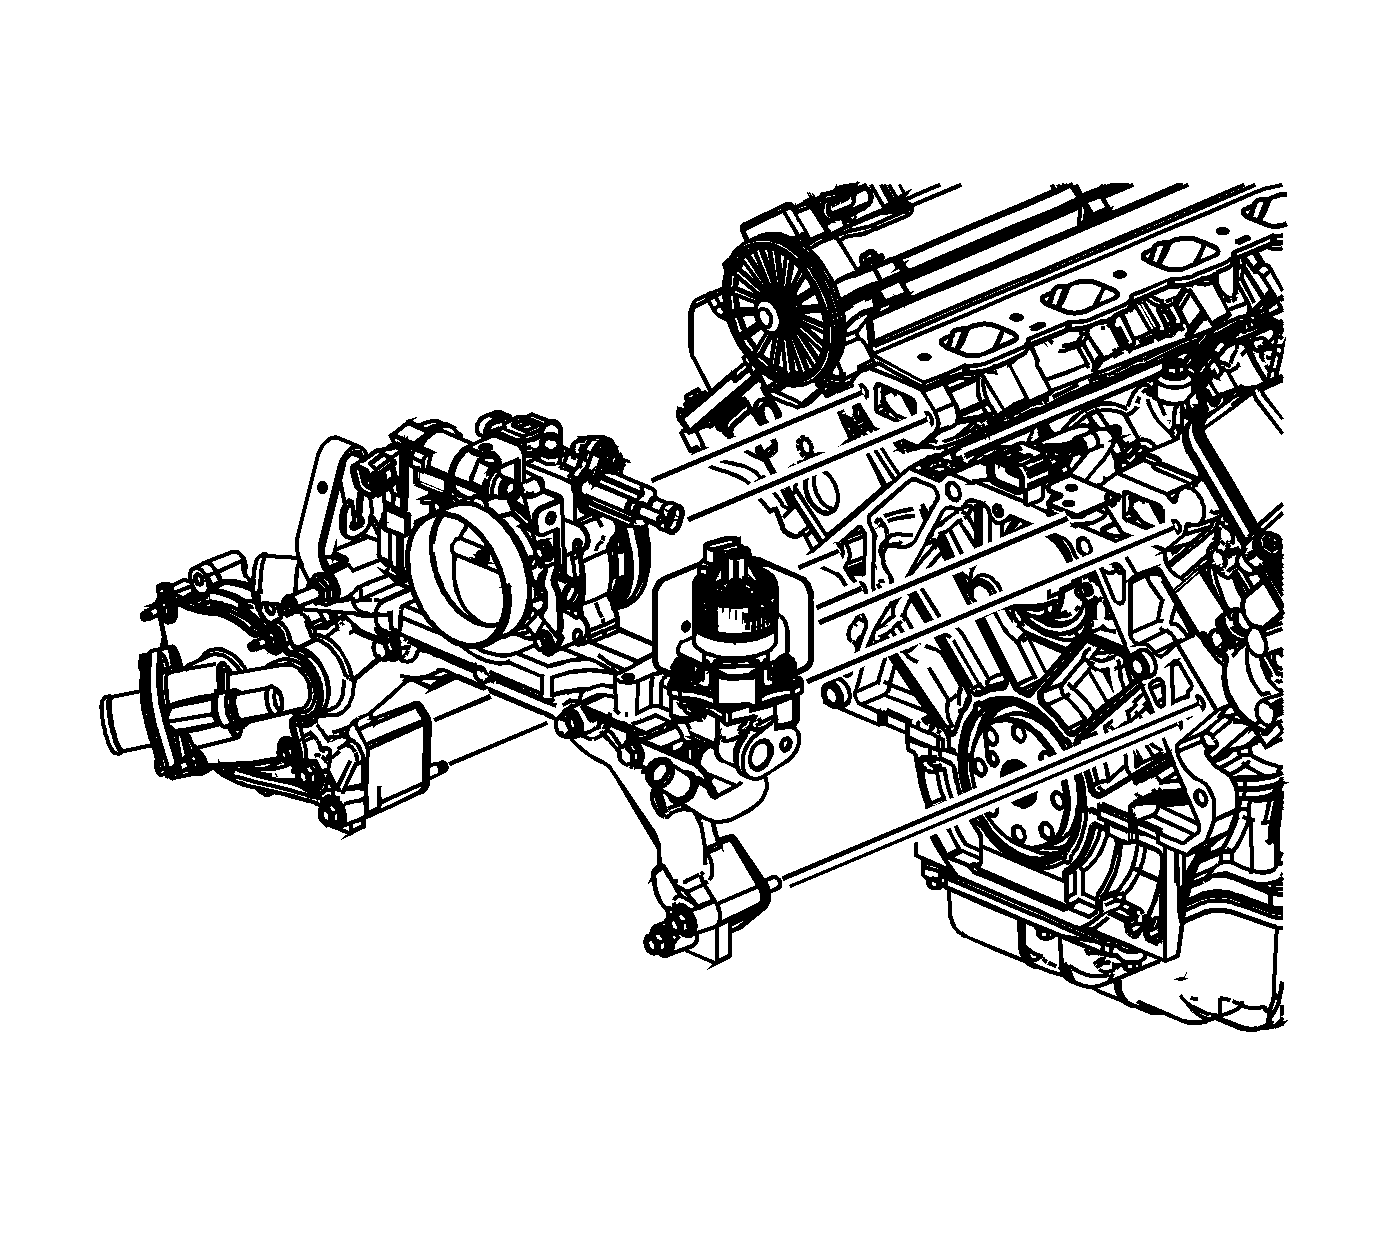
- Remove the throttle body bolts.
- Remove the bracket.
- Remove the throttle body.
- Remove and discard the throttle body seal.
- Loosen the throttle body plenum duct clamp.
- Remove and discard the throttle body plenum duct.
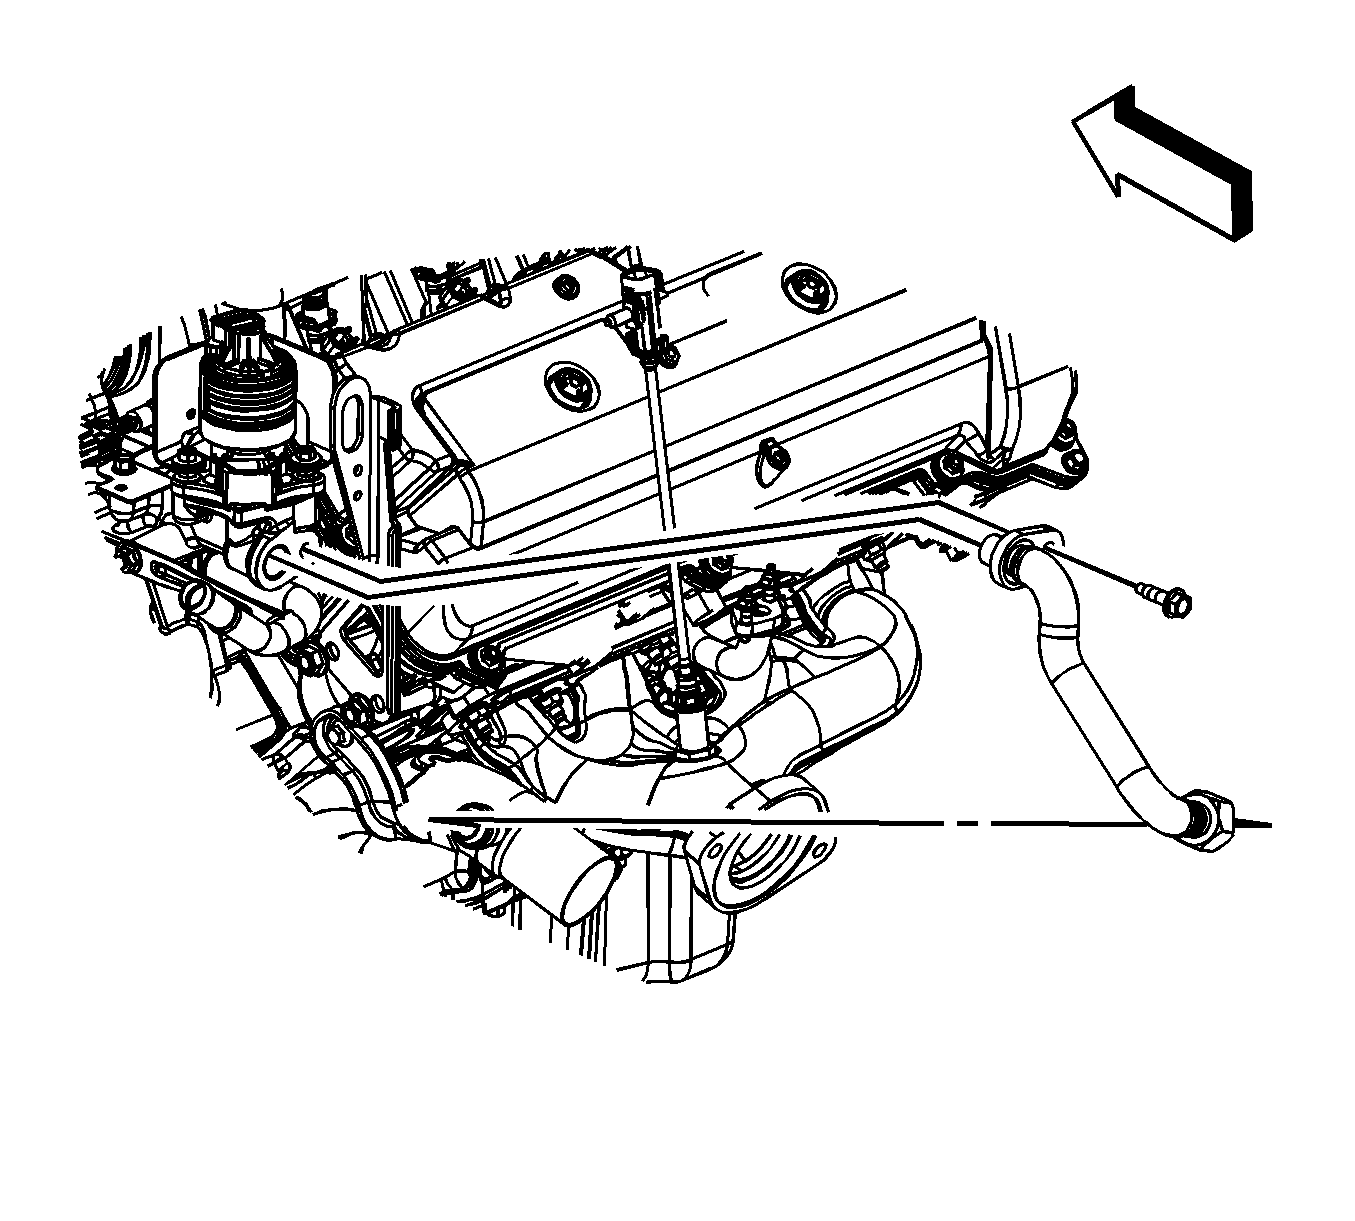
- Remove the fuel rail bracket nut at the rear left lift bracket.
- Reposition the surge tank inlet hose clamp at the fitting.
- Remove the surge tank inlet hose from the fitting.
- Remove the engine coolant outlet fitting.
- Remove the rear left lift bracket bolt.
- Remove the rear left lift bracket.
- Remove the exhaust gas recirculation (EGR) valve shield nuts.
- Remove the EGR valve shield.
- Remove the EGR valve bolts.
- Remove the EGR valve.
- Remove and discard the EGR valve gasket.
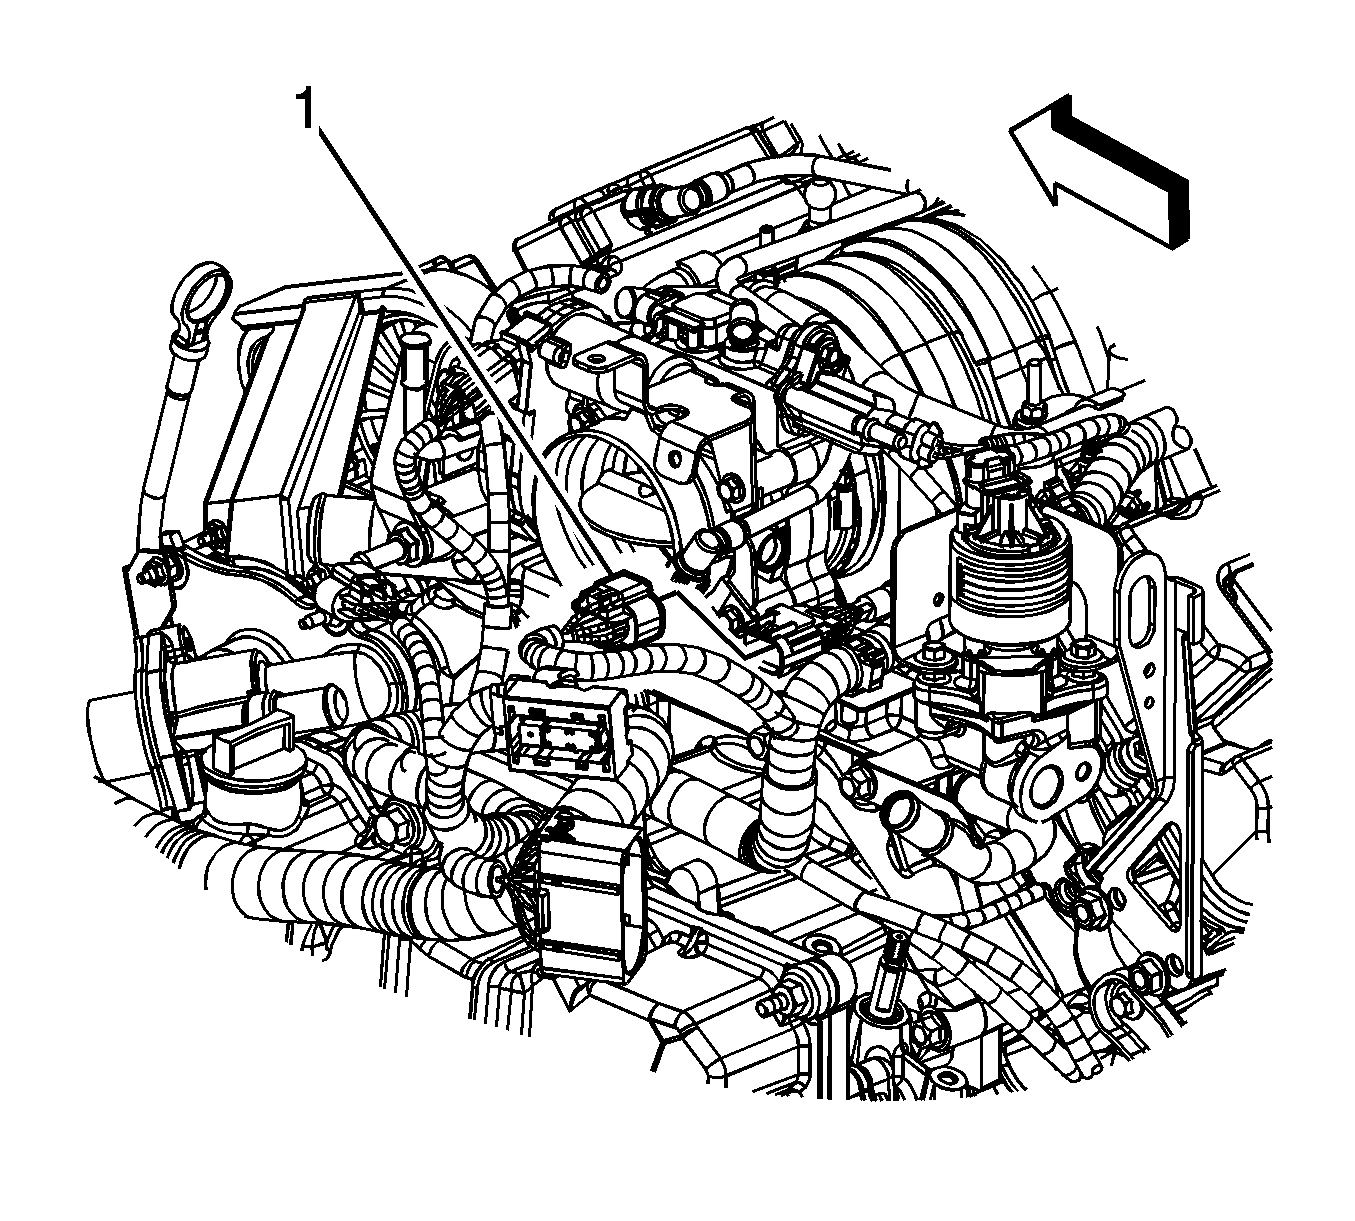
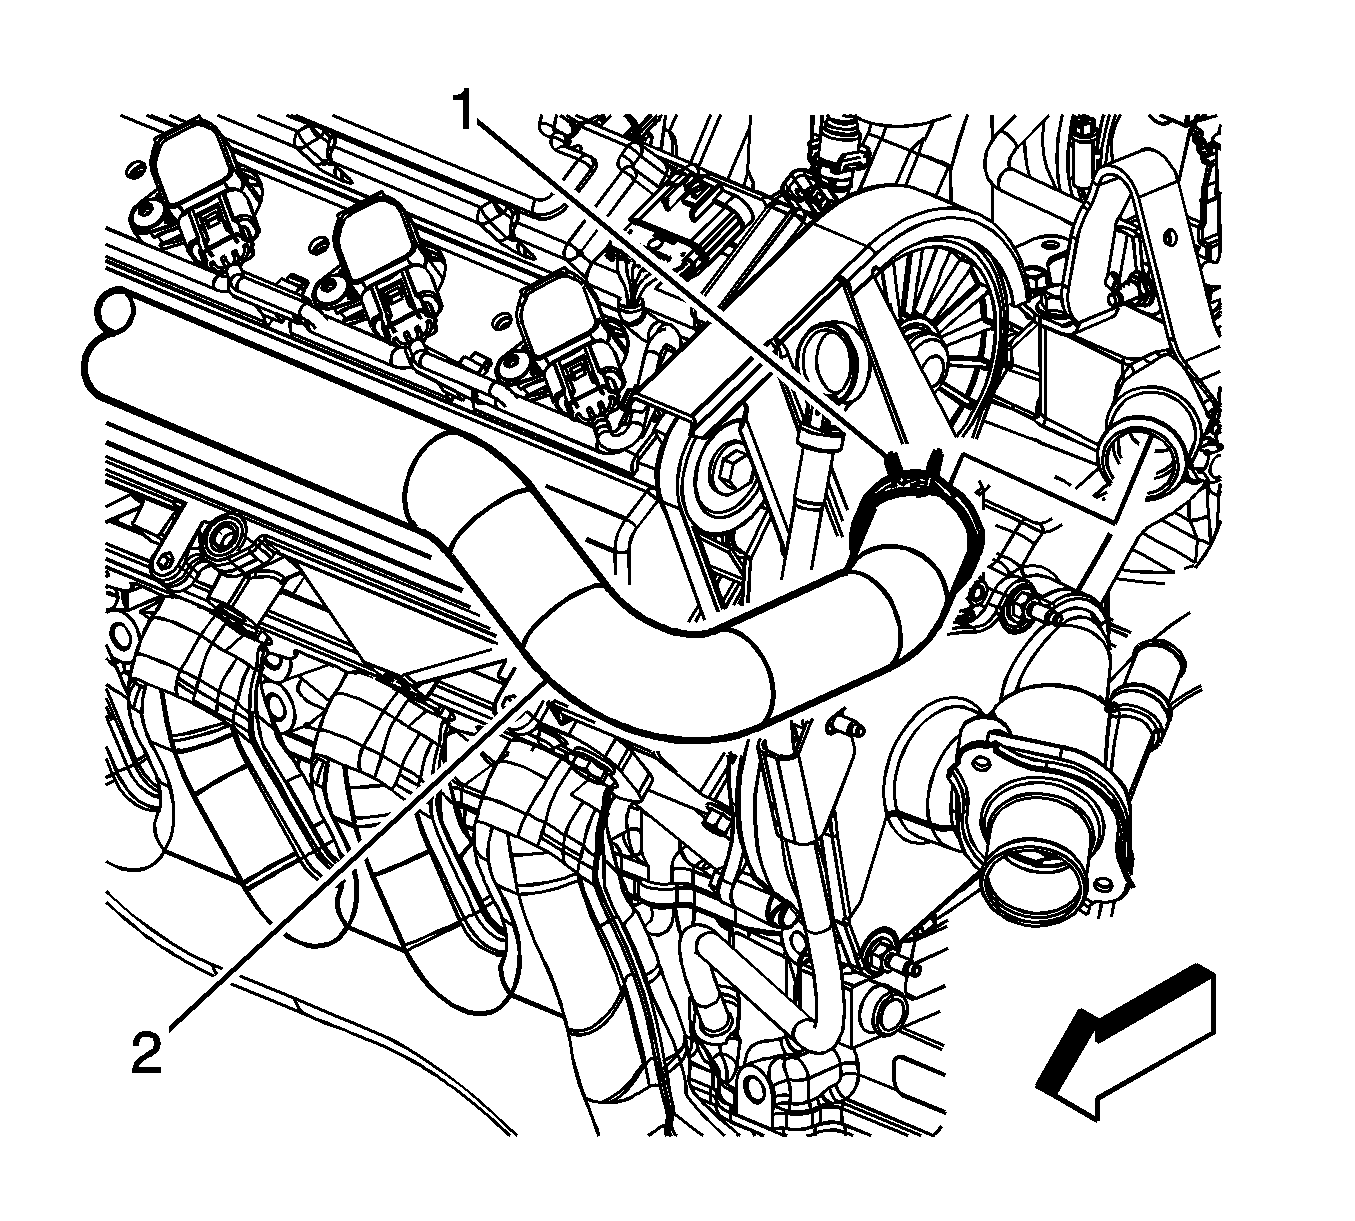
- Disconnect the engine harness electrical connector (1) from the engine valley electrical connector.
- Raise and support the vehicle. Refer to Lifting and Jacking the Vehicle .
- Disconnect the EGR inlet pipe nut from the exhaust manifold front pipe.
- Lower the vehicle.
- Remove the EGR inlet pipe bolt from the water pump housing.
- Remove and discard the EGR inlet pipe.
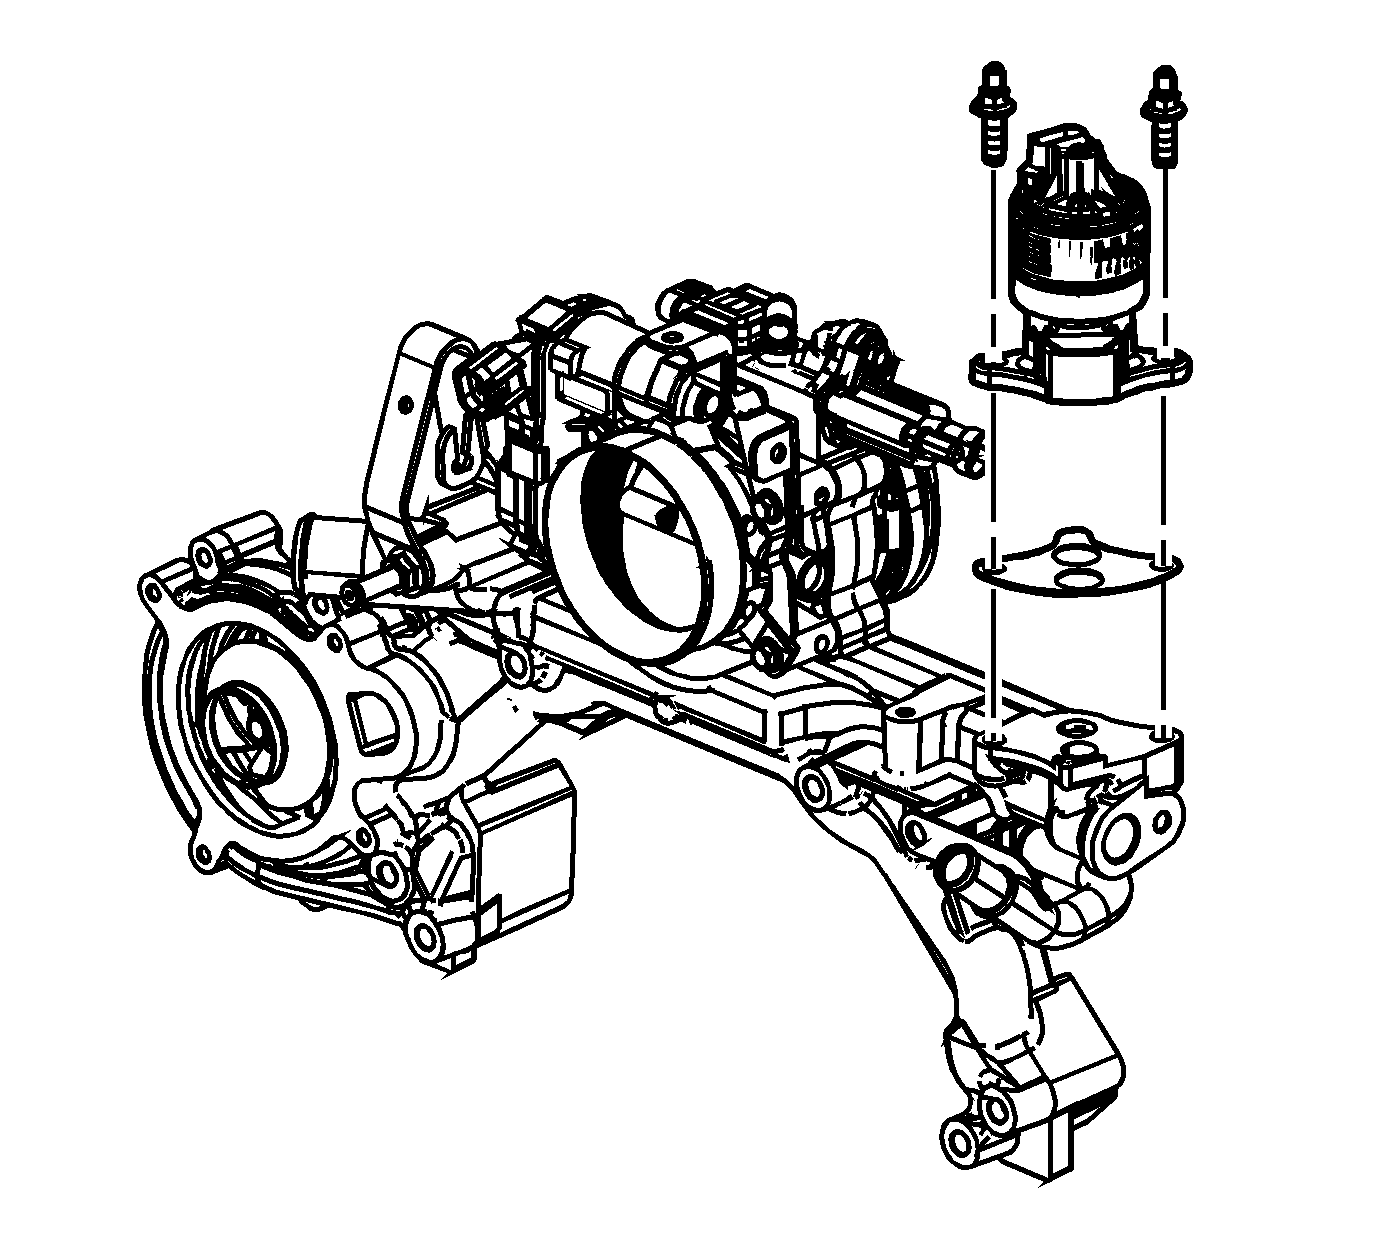
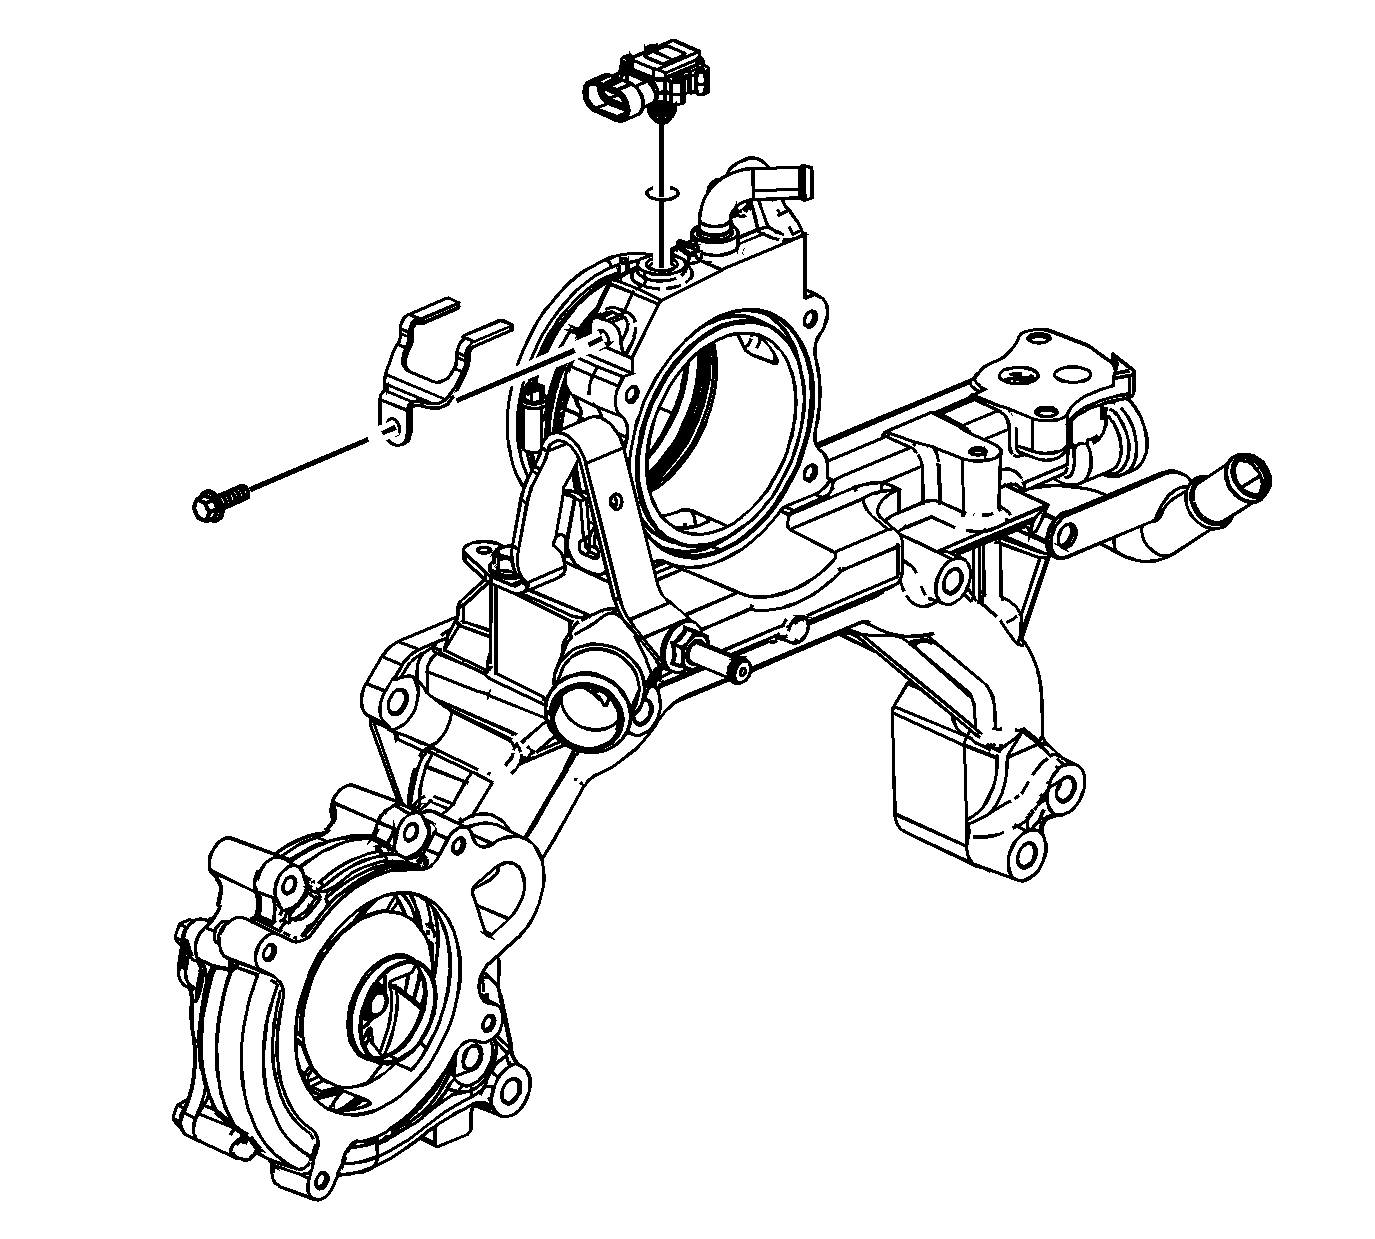
- Remove the evaporative emission (EVAP) canister purge solenoid valve bolt.
- Remove the EVAP canister purge solenoid valve.
- Remove the manifold absolute pressure (MAP) sensor bracket bolt.
- Remove the MAP sensor bracket.
- Remove the MAP sensor.
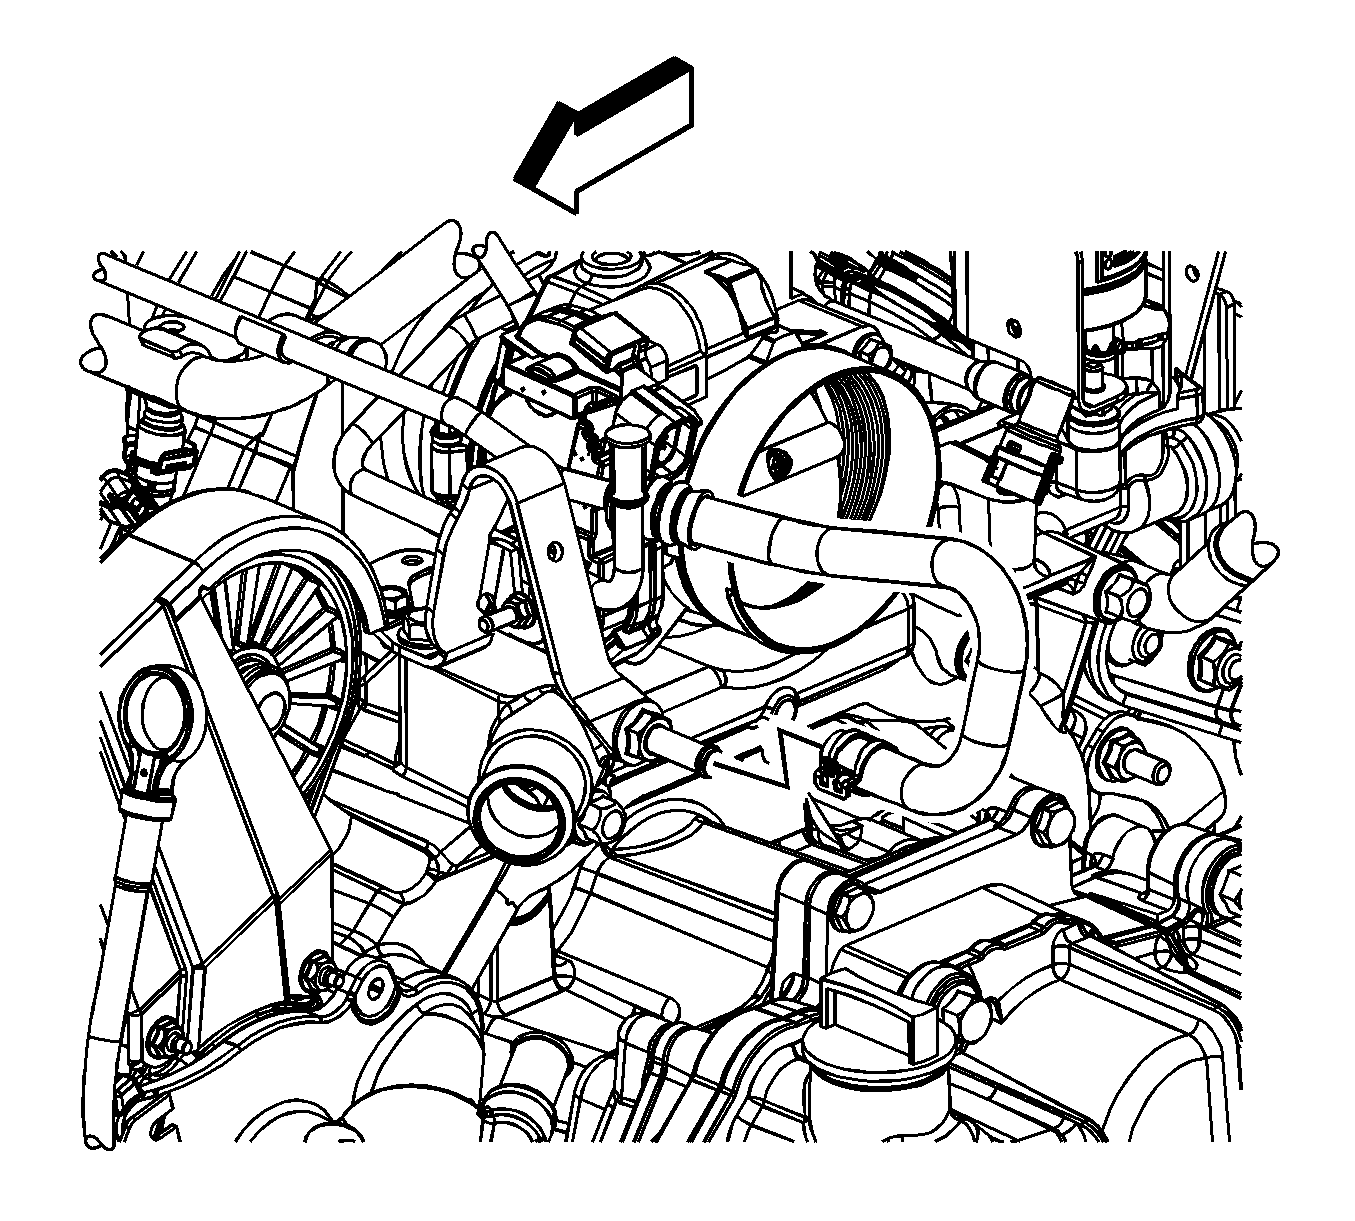
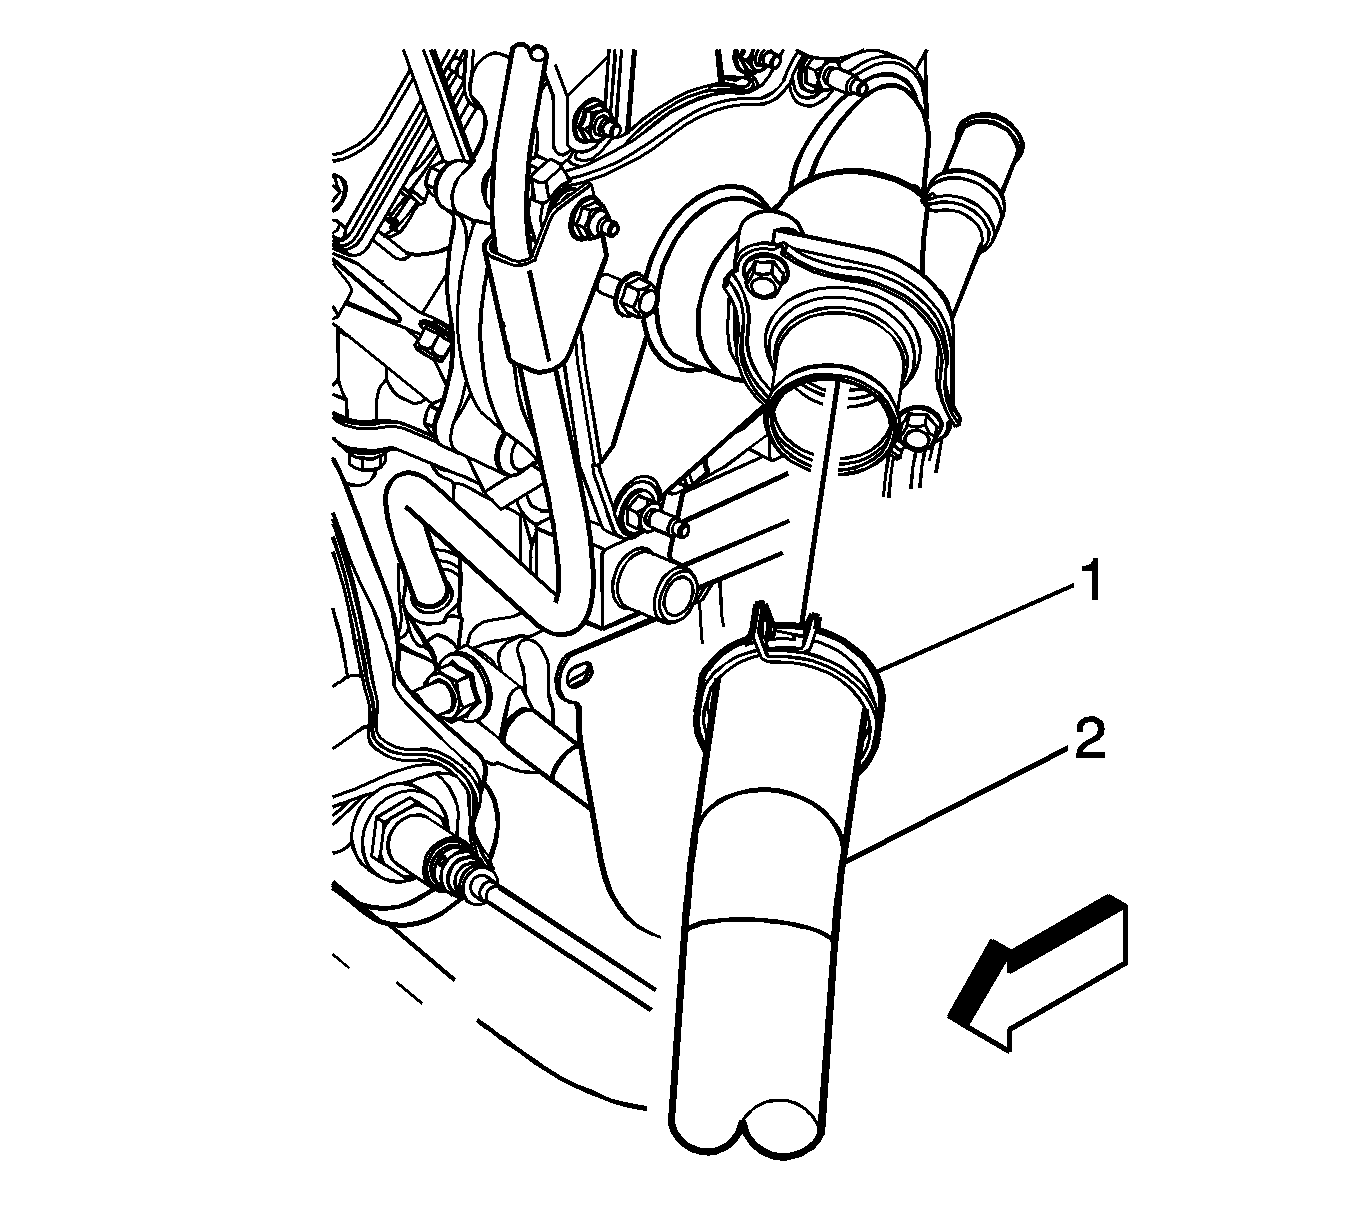
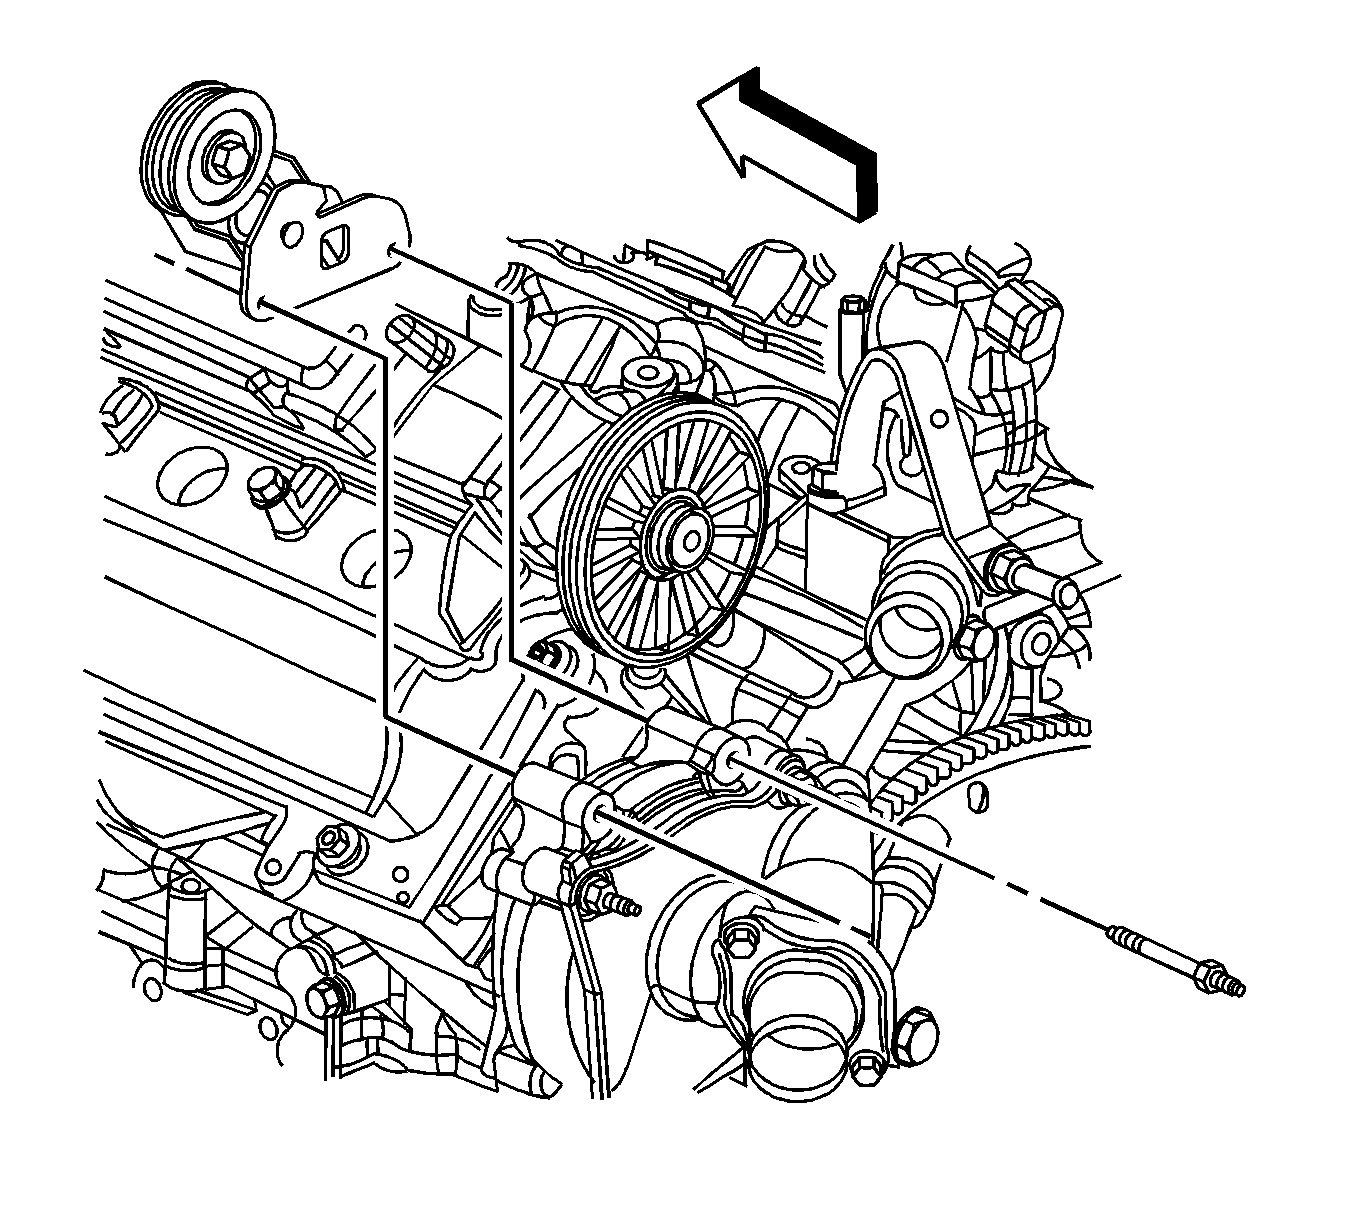
- Using the J 38185 , reposition the radiator inlet hose clamp (1) at the water pump housing.
- Remove the radiator inlet hose (2) from the water pump housing.
- Using the J 38185 , reposition the radiator outlet hose clamp (1) at the thermostat housing.
- Remove the radiator outlet hose (2) from the thermostat housing.
- Remove the water pump belt tensioner studs.
- Remove the water pump belt tensioner.
- Reposition the heater outlet hose clamp (4) at the heater pipe.
- Remove the heater outlet hose (3) from the heater pipe.
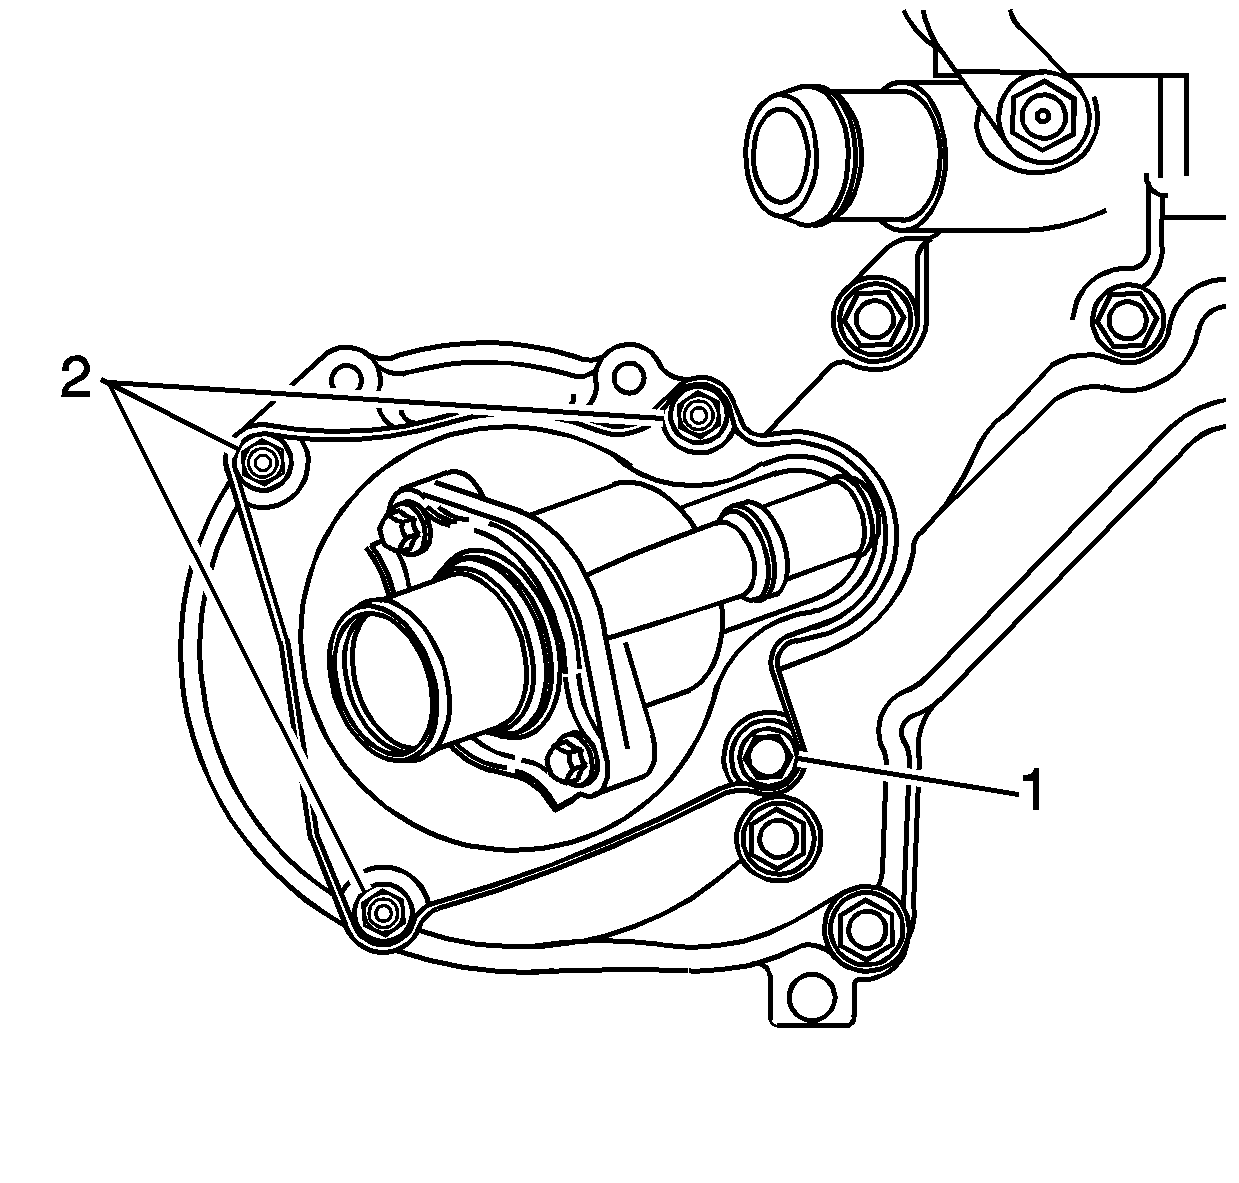
- Remove the water pump cover bolt and studs.
- Remove the water pump cover
- Loosen the water pump housing bolts.
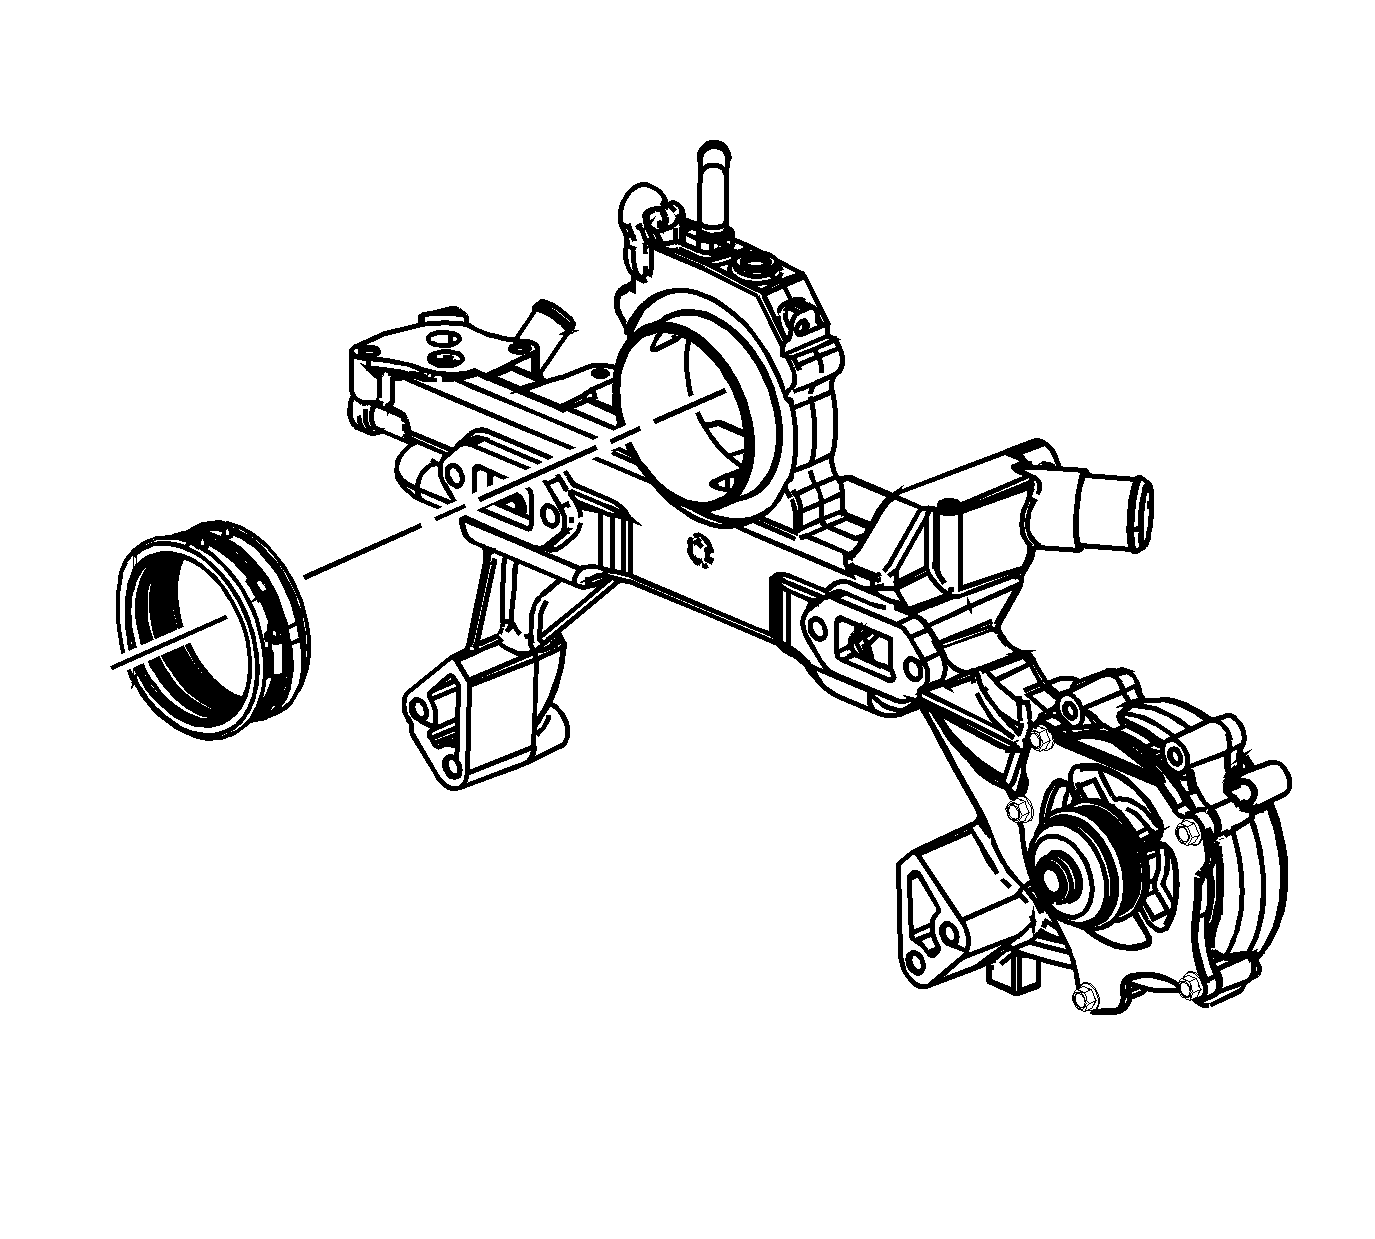
- Remove the water pump housing.
- Remove the water pump housing gaskets and bolts.
- With the water pump housing on the bench, remove the water pump bolts.
- Remove the water pump from the water pump housing.
- Remove and discard the water pump O-ring.

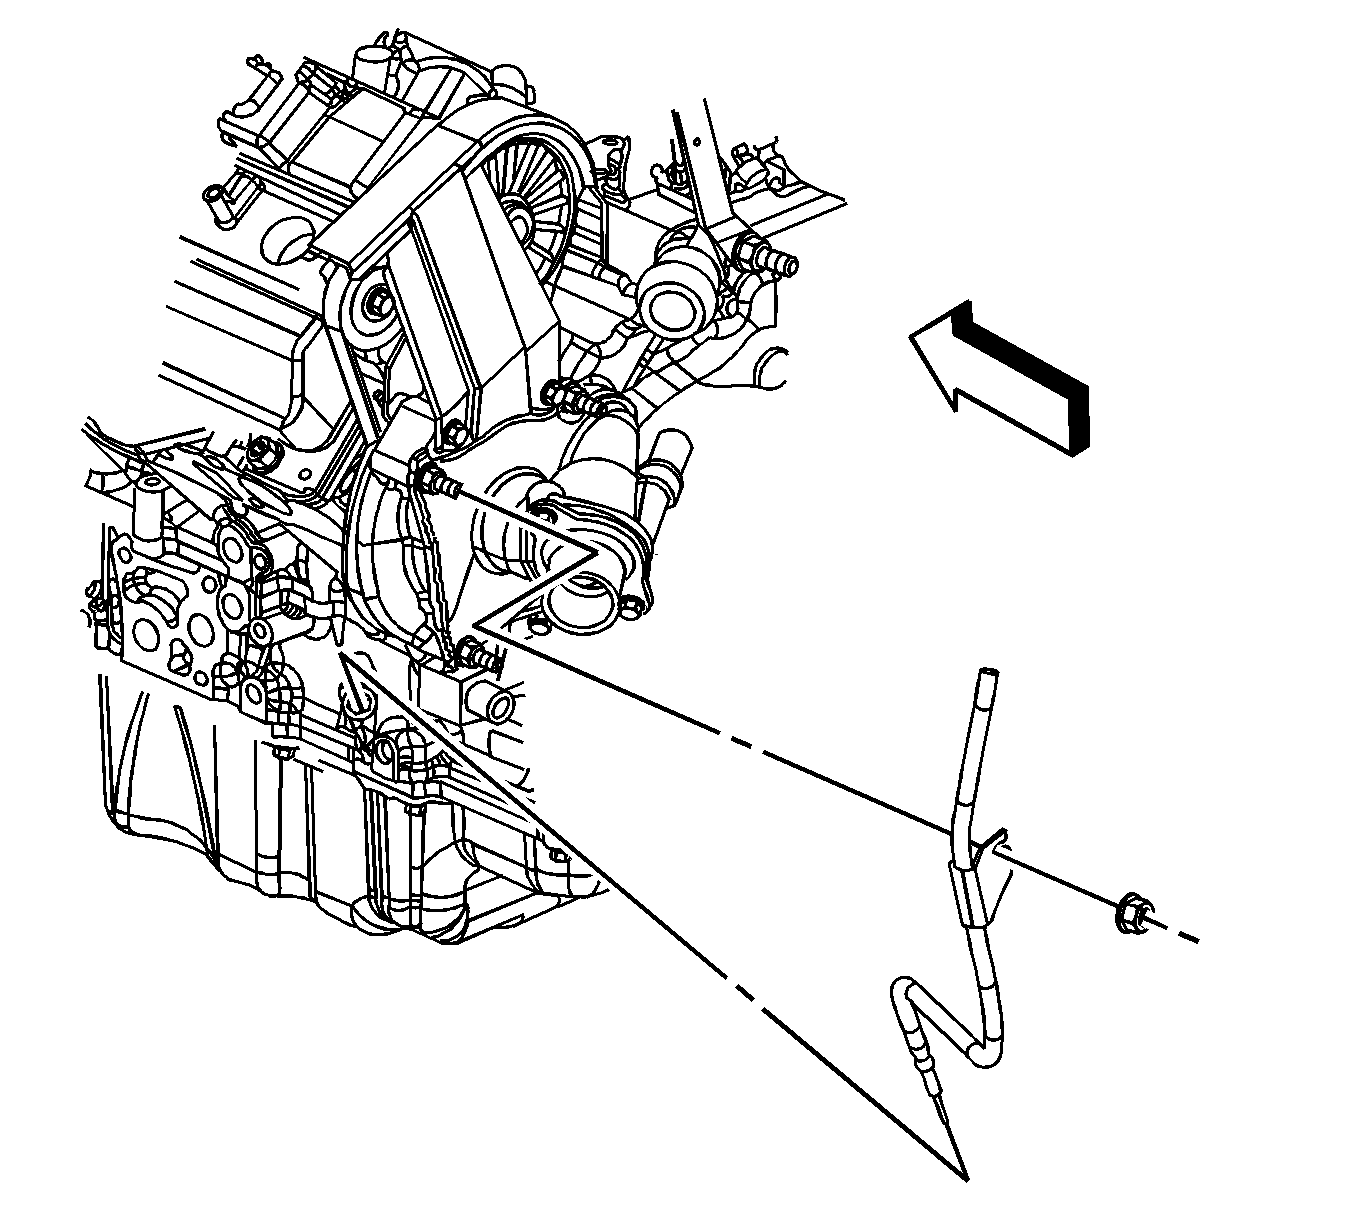


Important: The EGR valve inlet pipe incorporates a crush seal connection at the water pump housing. The EGR valve inlet pipe must be replaced if disconnected from the water pump housing.
Installation Procedure
- Install a NEW water pump O-ring to the water pump.
- Install the water pump.
- Install the water pump bolts.
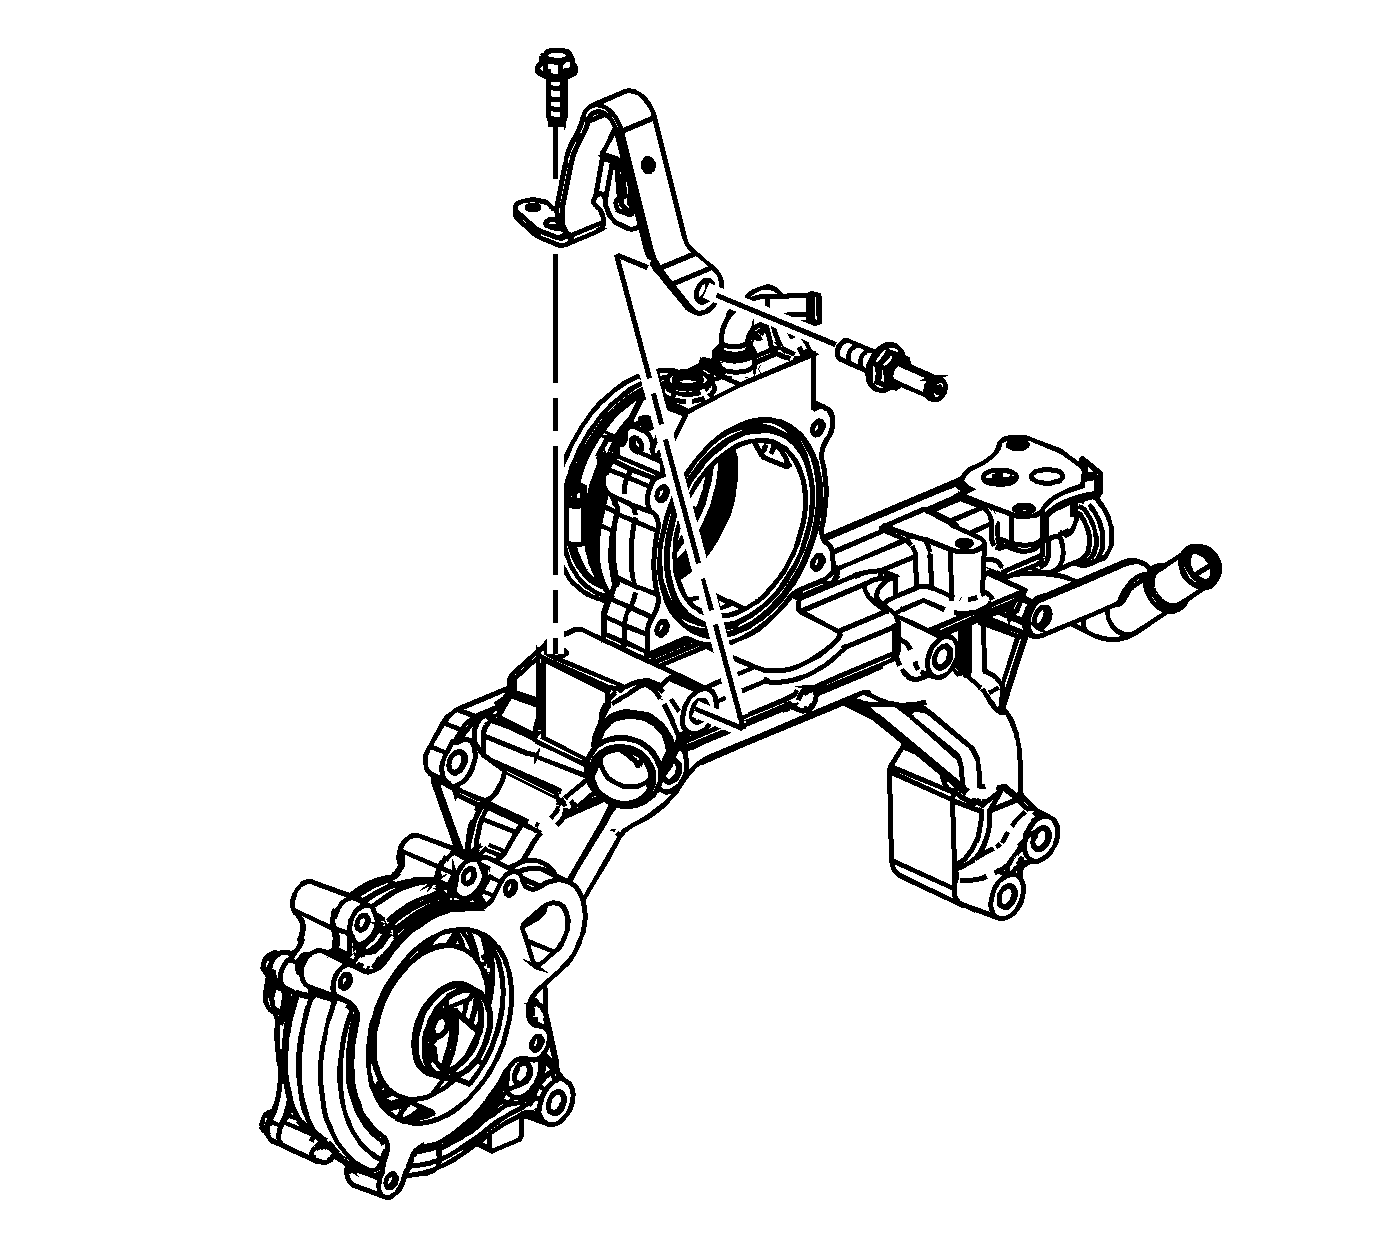
- With the water pump housing on the bench, install the bolts in the locations shown.
- With the housing still on the bench, install the NEW water pump housing gasket onto the bolts.
- Position the water pump housing to the engine and hand start the bolts.
- Tighten the water pump housing bolts.
- Install the water pump cover.
- Install the water pump cover bolt and studs.
- Install the heater outlet hose (3) to the heater pipe.
- Position the heater outlet hose clamp (4) at the heater pipe.
- Position the water pump belt tensioner.
- Install the water pump belt tensioner studs.
- Install the radiator outlet hose (2) to the thermostat housing.
- Using the J 38185 , position the radiator outlet hose clamp (1) at the thermostat housing.
- Install the radiator inlet hose (2) to the water pump housing.
- Using the J 38185 , position the radiator inlet hose clamp (1) at the water pump housing.
- Install the MAP sensor.
- Install the MAP sensor bracket.
- Install the MAP sensor bracket bolt.
- Install the EVAP canister purge solenoid valve.
- Install the EVAP canister purge solenoid valve bolt.
- Hand start the NEW EGR inlet pipe nut at the exhaust manifold front pipe.
- Install the EGR inlet pipe and bolt to the water pump housing.
- Raise and support the vehicle. Refer to Lifting and Jacking the Vehicle .
- Tighten the EGR inlet pipe nut.
- Lower the vehicle.
- Connect the engine harness electrical connector (1) to the engine valley electrical connector.
- Install the NEW EGR valve gasket.
- Install the EGR valve.
- Install the EGR valve bolts.
- Install the EGR valve shield.
- Instal the EGR valve shield nuts.
- Position the rear left lift bracket to the water pump housing.
- Install the rear left lift bracket bolt.
- Install the engine coolant outlet fitting.
- Install the surge tank inlet hose to the fitting.
- Position the surge tank inlet hose clamp at the fitting.
- Instal the fuel rail bracket nut (2) at the rear left lift bracket.
- Install a NEW throttle body plenum duct.
- Tighten the throttle body plenum duct clamp.
- Install a NEW throttle body seal.
- Install the throttle body.
- Install the throttle body bracket.
- Install the throttle body bolts.
- Install the transaxle vent hose clip (1) to the bracket.
- Position the oil level indicator tube.
- Install the oil level indicator tube nut.
- Install the brake booster vacuum hose to the water pump housing.
- Position the brake booster vacuum hose clamp at the water pump housing.
- Install the water pump drive belt. Refer to Water Pump Belt Replacement .
- Install the air cleaner. Refer to Air Cleaner Assembly Replacement .
- Fill the cooling system. Refer to Cooling System Draining and Filling .
- Install the fuel injector sight shield. Refer to Fuel Injector Sight Shield Replacement .
Notice: Refer to Fastener Notice in the Preface section.
Tighten
Tighten the bolts to 10 N·m (89 lb in).
| • | Bolt (1) length 40.7 mm (1.6024 in). |
| • | Bolts (2) length 92.0 mm (3.6220 in). |
| • | Bolts (3) length 109.0 mm (4.2913 in). |
| • | Bolts (4) length 115.0 mm (4.5276 in). |
Tighten
Tighten the bolts in the sequence shown to 25 N·m (18 lb ft).
Important: Ensure the bolt is installed in the lower inboard position (1) and the studs are installed in the remaining position (2).
Tighten
Tighten the bolt/studs to 10 N·m (89 lb in).
Tighten
Tighten the studs to 10 N·m (89 lb in).
Tighten
Tighten the bolt to 10 N·m (89 lb in).
Tighten
Tighten the bolt to 10 N·m (89 lb in).
Important: The EGR valve inlet pipe incorporates a crush seal connection at the water pump housing. The EGR valve inlet pipe must be replaced if disconnected from the water pump housing.
Tighten
| • | Tighten the nut to 60 N·m (44 lb ft). |
| • | Tighten the bolt to 25 N·m (18 lb ft). |
Tighten
Tighten the nut to 60 N·m (44 lb ft).
Tighten
Tighten the bolts to 25 N·m (18 lb ft).
Tighten
Tighten the nuts to 10 N·m (89 lb in).
Tighten
Tighten the bolt to 25 N·m (18 lb ft).
Tighten
Tighten the fitting to 47 N·m (35 lb ft).
Tighten
Tighten the nut to 10 N·m (89 lb in).
Important: DO NOT use any type of sealant between the plenum and the water pump housing.
Tighten
Tighten the clamp to 2.25 N·m (20 lb in).
Tighten
Tighten the bolts to 10 N·m (89 lb in).
Tighten
Tighten the nut to 10 N·m (89 lb in).
