Callout
| Component Name
|
Preliminary Procedures
- Raise and support the vehicle. Refer to
Lifting and Jacking the Vehicle.
- Remove the front tire and wheel assembly. Refer to
Tire and Wheel Removal and Installation.
- Remove the front stabilizer shaft link. Refer to
Stabilizer Shaft Link Replacement.
|
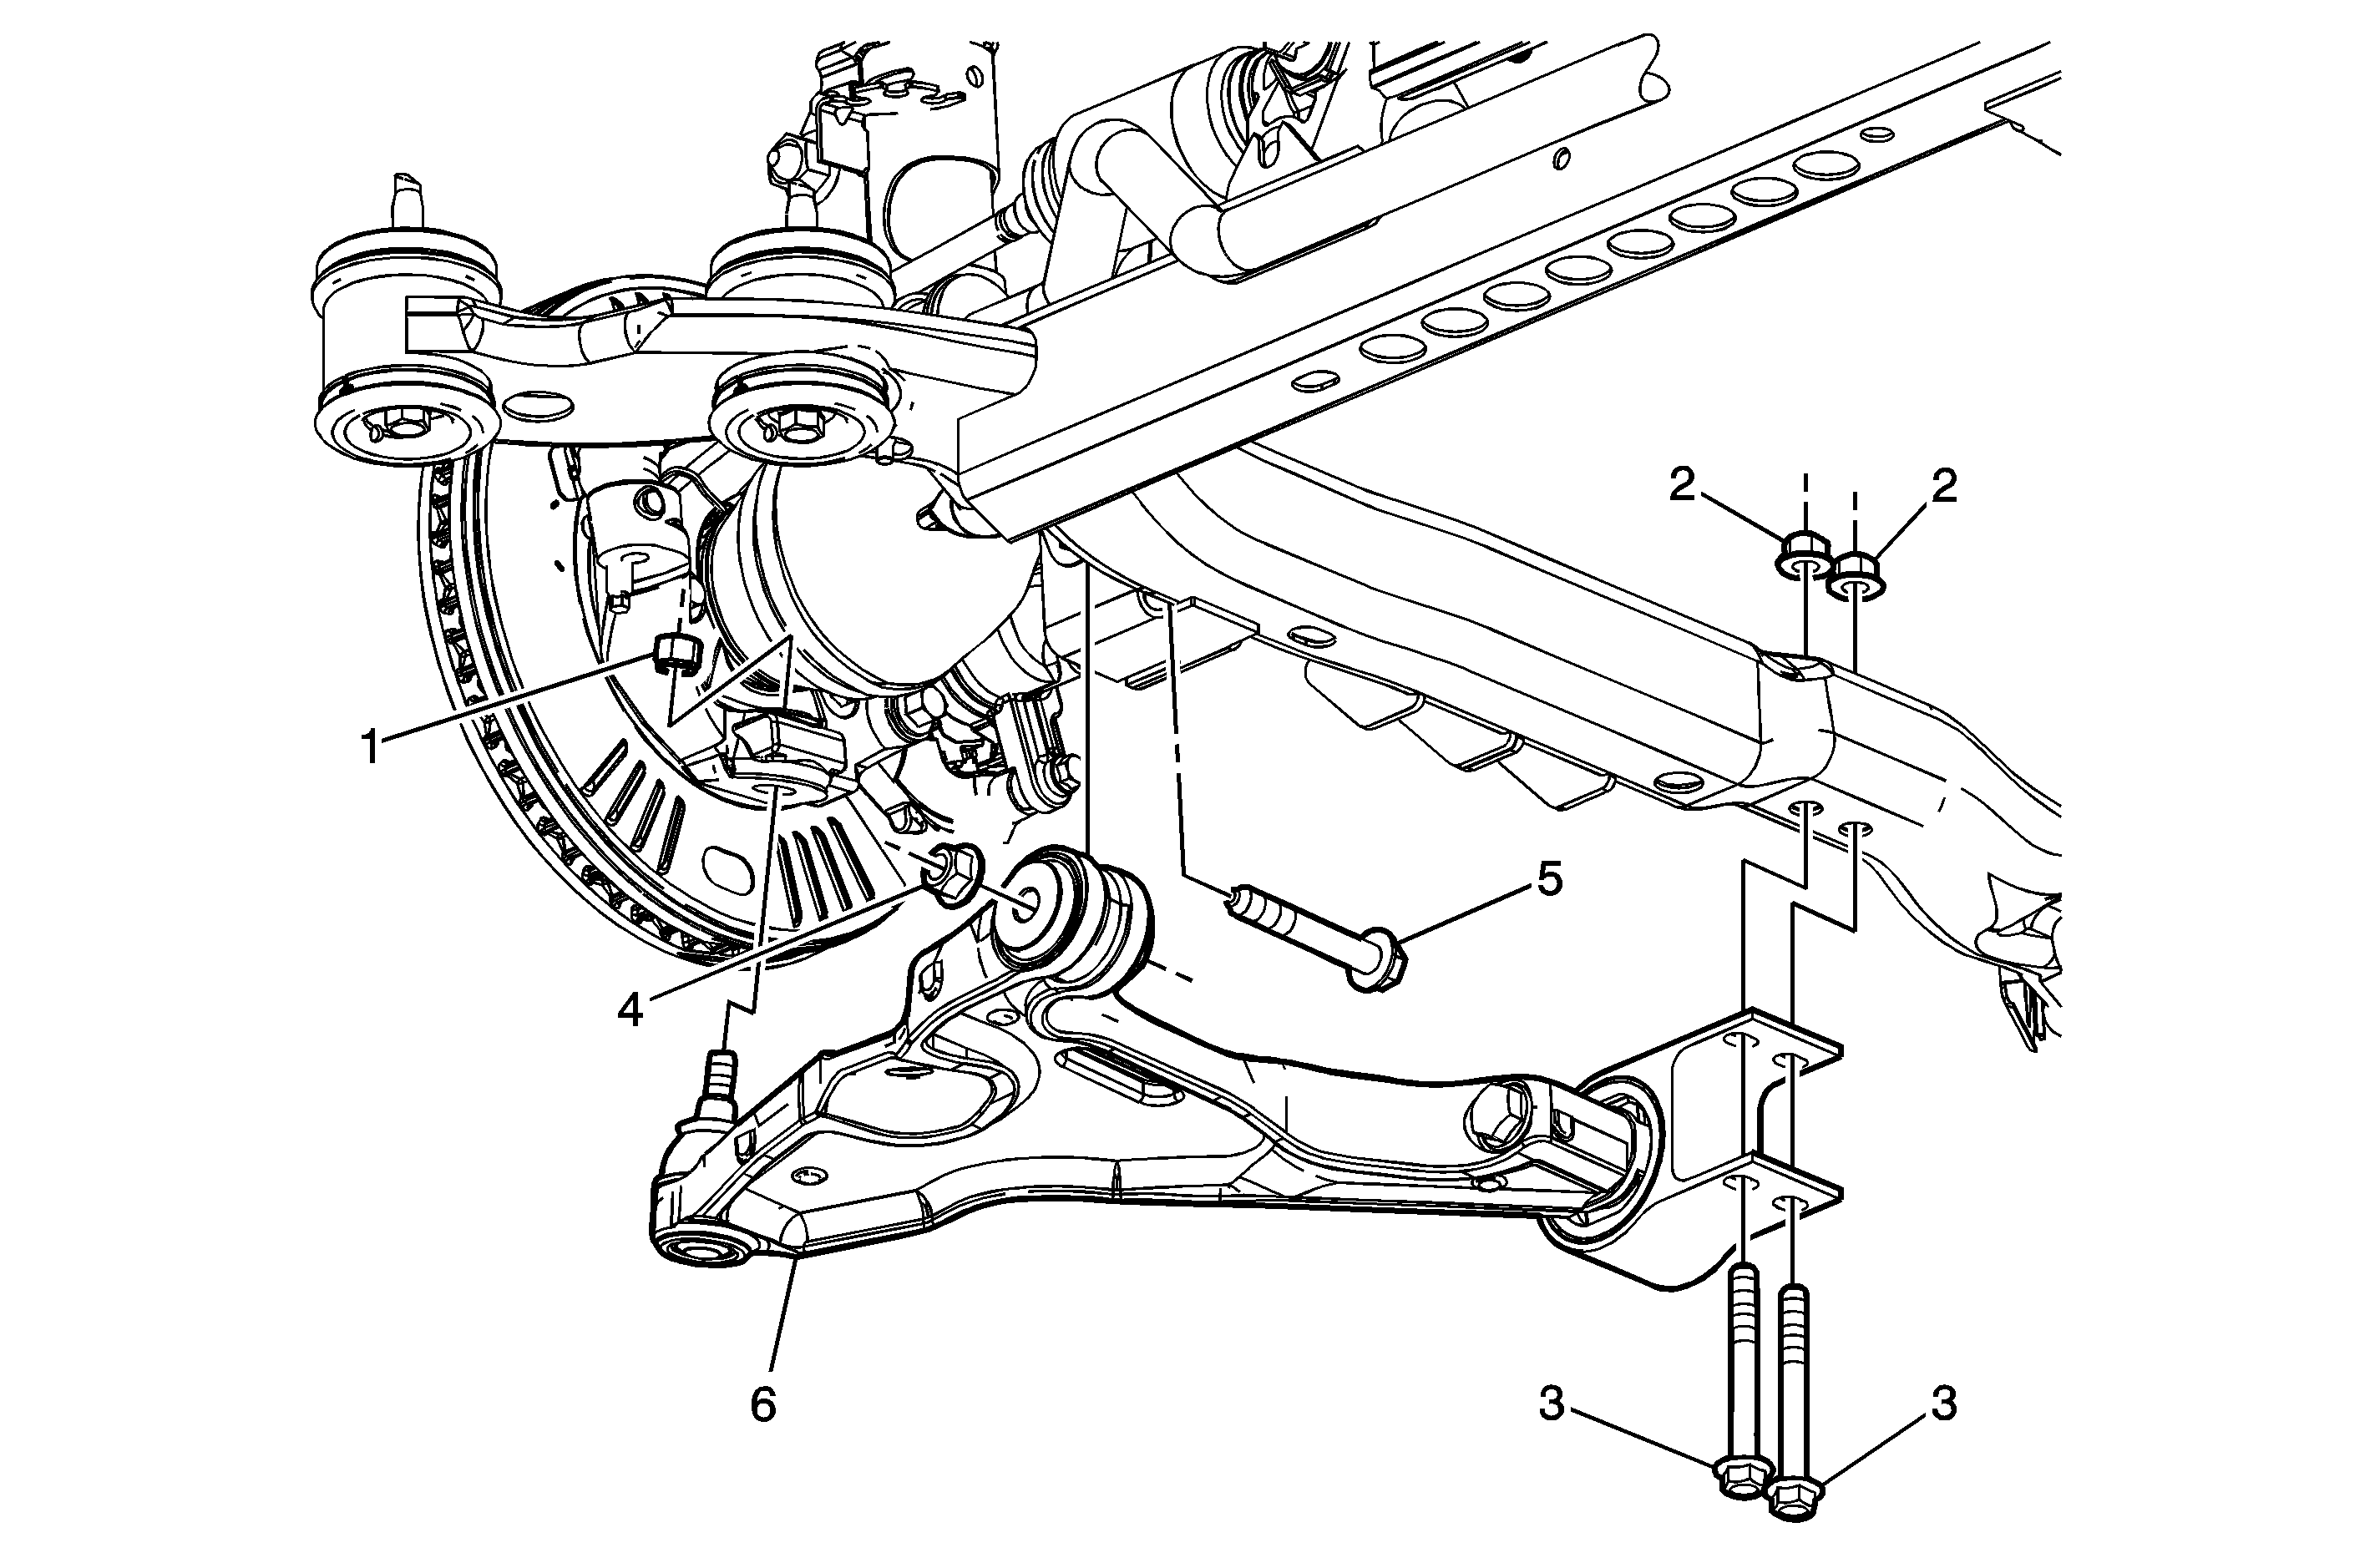
1
| Front Lower Ball Joint Nut
Notice: Refer to Fastener Notice in the Preface section.
Tip
| • | Use the
J 39549
Ball Joint and Tie Rod End Separator to separate the ball joint from the control arm. |
| • | Always replace the ball joint nut after it has been used. |
Tighten
30 N·m (22 lb ft) plus an additional 210 degrees |
2
| Front Control Arm Rear Nut
Tip
Do not tighten the control arm nuts until the weight of the vehicle is supported by the control arm. The vehicle needs to be sitting at normal trim height.
Tighten
146 N·m (108 lb ft) |
3
| Front Control Arm Rear Bolt
Tip
Remove the bolt from the control arm. |
4
| Front Control Arm Front Nut (Qty: 2)
Tighten
150 N·m (111 lb ft) |
5
| Front Control Arm Front Bolt (Qty: 2)
Tip
Remove the bolts from the control arm bracket. |
6
| Front Control Arm
Tip
Remove the control arm from the vehicle. |
Callout
| Component Name
|
Preliminary Procedures
- Raise and support the vehicle. Refer to
Lifting and Jacking the Vehicle
.
- Remove the front tire and wheel assembly. Refer to
Tire and Wheel Removal and Installation
.
- Remove the front stabilizer shaft link. Refer to
Stabilizer Shaft Link Replacement
.
|
1
| Front Lower Ball Joint Nut
Notice: Refer to Fastener Notice in the Preface section.
Tip
| • | Use the
J 36226
Ball Joint Separator to separate the ball joint from the control arm. |
| • | Always replace the ball joint nut after it has been used. |
Tighten
30 N·m (22 lb ft) plus an additional 210 degrees |
2
| Front Control Arm Front Nut (Qty: 2)
Tip
Torque is applied to the nut, not to the bolt.
Tighten
150 N·m (111 lb ft) |
3
| Front Control Arm Front Bolt (Qty: 2)
|
4
| Front Control Arm Rear Nut
|
5
| Front Control Arm Rear Bolt
Tip
Do not tighten the control arm bolt until the weight of the vehicle is supported by the control arm. The vehicle needs to be sitting at normal trim height.
Tighten
157 N·m (116 lb ft) |
6
| Front Control Arm
ProcedureRemove the control arm from the vehicle.
|

