For 1990-2009 cars only
Catalytic Converter Replacement - Right Side LA3, LY9
Removal Procedure
Caution: Refer to Exhaust Service Caution in the Preface section.
Caution: Refer to Protective Goggles and Glove Caution in the Preface section.
- Raise and support the vehicle. Refer to Lifting and Jacking the Vehicle in General Information.
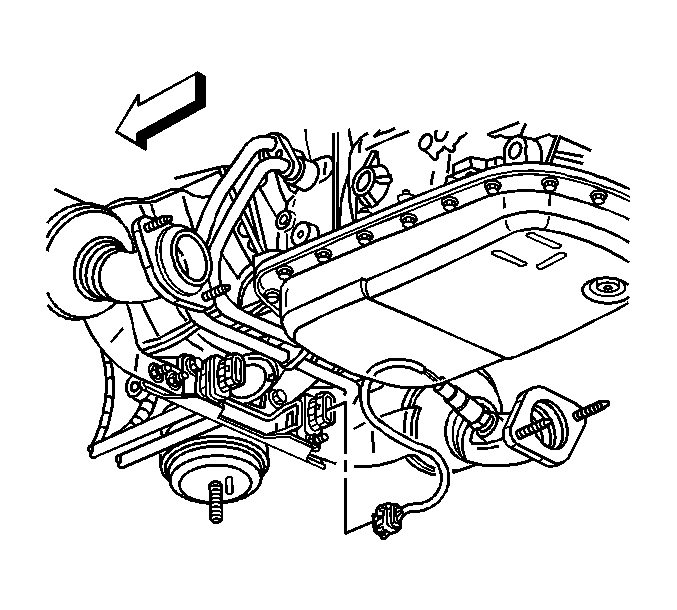
- Disconnect the Heated oxygen sensor at the sensor pigtail.
- Remove the heated oxygen sensor if replacement is necessary. Refer to Heated Oxygen Sensor Replacement - Bank 1 Sensor 2 in Engine Controls-2.6L and 3.2L.
- Remove the nuts securing the exhaust pipe to the left catalytic converter.
- Remove the nuts securing the exhaust pipe to the right catalytic converter.
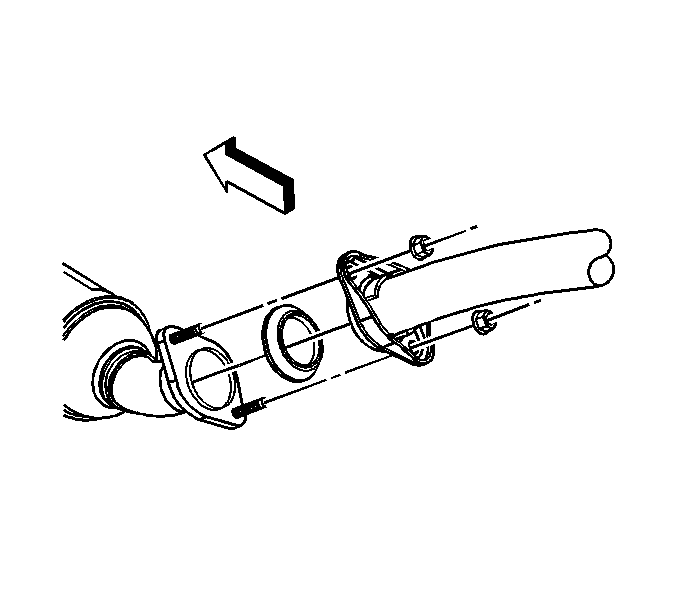
- Position the exhaust system rearward, enough to allow the studs located in the rear of the catalytic converters to clear the exhaust pipe flange.
- Remove the left side catalytic converter seal. Do not reuse the seal.
- Remove the right side catalytic converter gasket. Do not reuse the gasket.
- Remove the 2 nuts attaching the catalytic converter to the catalytic converter hanger bracket.
- Remove the 3 nuts attaching the catalytic converter to the exhaust manifold.
- Remove the catalytic converter and the seal. Do not reuse the seal.
Notice: Refer to Flex Decoupler Notice in the Preface section.
Allow the exhaust system to rest on the floor panel tunnel brace.
Installation Procedure
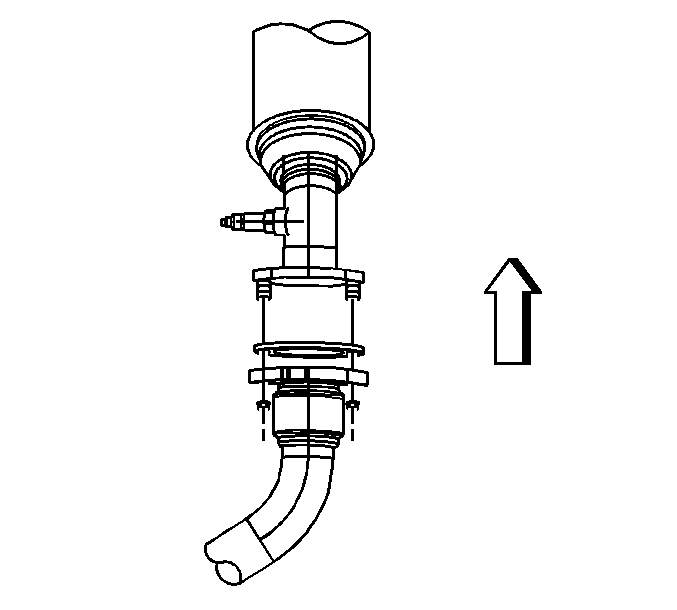
- Insert a NEW seal into the seal grove of the catalytic converter.
- Position the catalytic converter to the exhaust manifold and catalytic converter hanger bracket.
- Install the 3 nuts attaching the catalytic converter to the exhaust manifold.
- Install the 2 nuts attaching the catalytic converter to the catalytic converter hanger bracket.
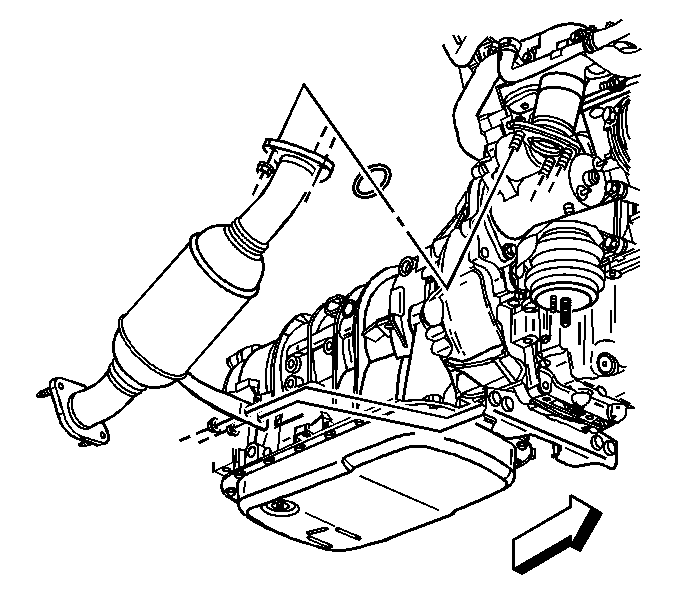
- Place a NEW seal on the left side catalytic converter flange.
- Place a NEW gasket over the right side catalytic converter studs.
- Align the exhaust pipe flanges with the studs located in the rear of the catalytic converters.
- Install the 2 nuts securing the exhaust pipe to the left catalytic converter.
- Install the 2 nuts securing the exhaust pipe to the right catalytic converter.
- Install the heated oxygen sensor if previously removed. Refer to Heated Oxygen Sensor Replacement - Bank 1 Sensor 2 in Engine Controls-2.6L and 3.2L.
- Connect the Heated oxygen sensor at the sensor pigtail.
- Lower the vehicle.
Notice: Refer to Exhaust System Inspection Notice in the Preface section.
Notice: Refer to Fastener Notice in the Preface section.
Tighten
Tighten the exhaust manifold pipe nuts to 25 N·m (18 lb ft).
Tighten
Tighten the catalytic converter hanger bracket nuts to 25 N·m (18 lb ft).
Tighten
Tighten the catalytic converter nuts to 15 N·m (11 lb ft).
Notice: Refer to Flex Decoupler Notice in the Preface section.
Tighten
Tighten the catalytic converter nuts to 15 N·m (11 lb ft).
