For 1990-2009 cars only
Exhaust System Replacement LA3, LY9
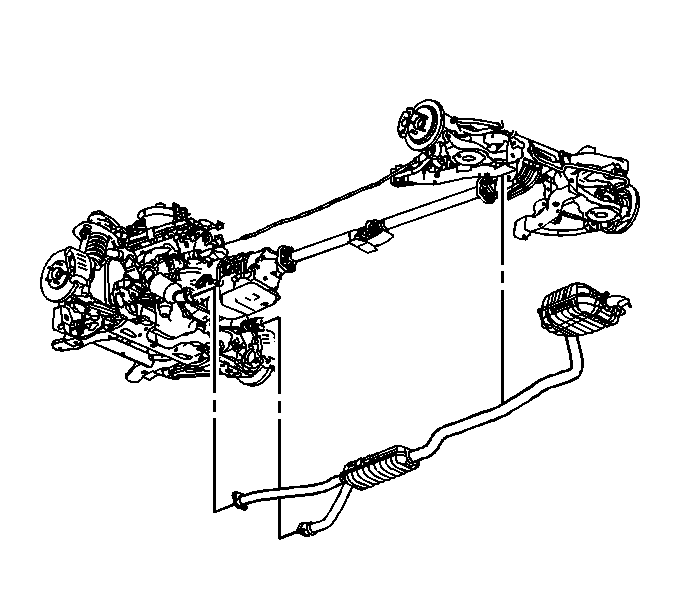
Servicing of the muffler, resonator or pipe requires the replacement of the exhaust system as a complete one-piece unit.
Removal Procedure
Caution: Refer to Exhaust Service Caution in the Preface section.
Caution: Refer to Protective Goggles and Glove Caution in the Preface section.
- Raise and support the vehicle. Refer to Lifting and Jacking the Vehicle in General Information.
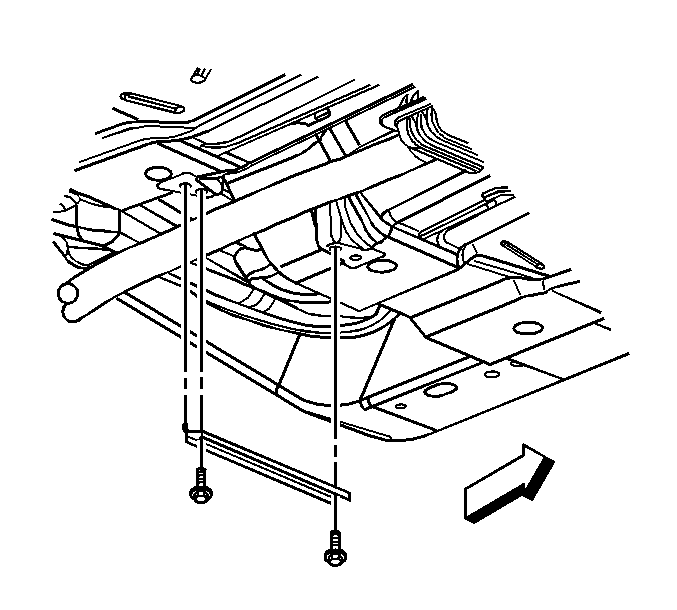
- Remove the 2 bolts securing the floor panel tunnel brace to the floor panel.
- Remove the floor panel tunnel brace from the floor panel.
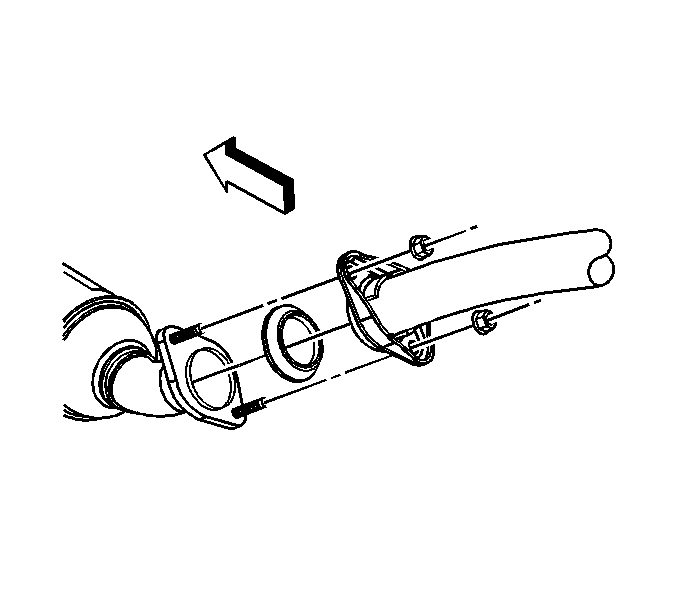
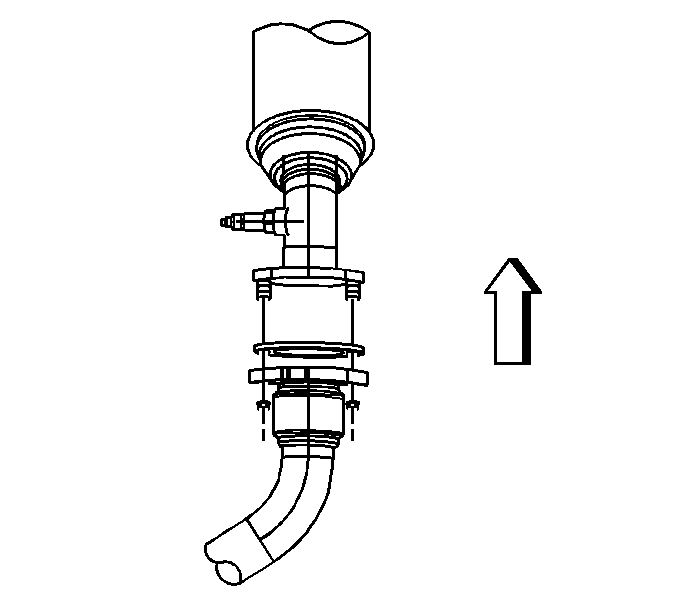
- Remove the nuts securing the exhaust pipe to the left catalytic converter.
- Remove the nuts securing the exhaust pipe to the right catalytic converter.
- Suitably support the exhaust system.
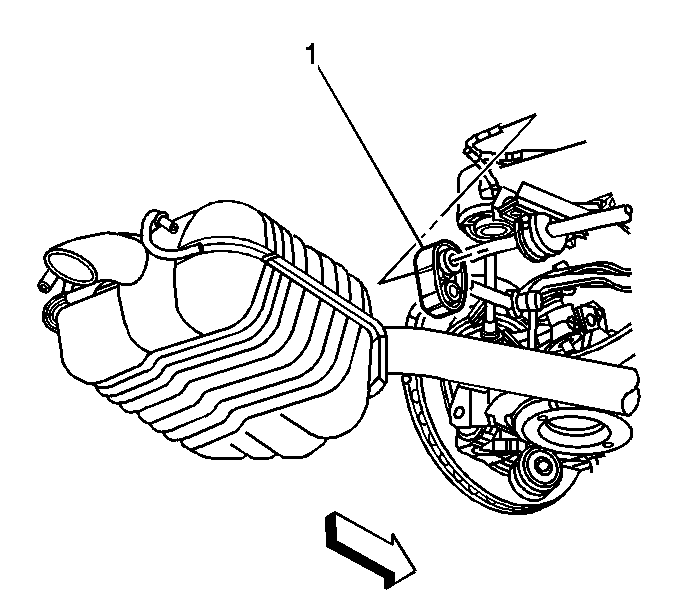
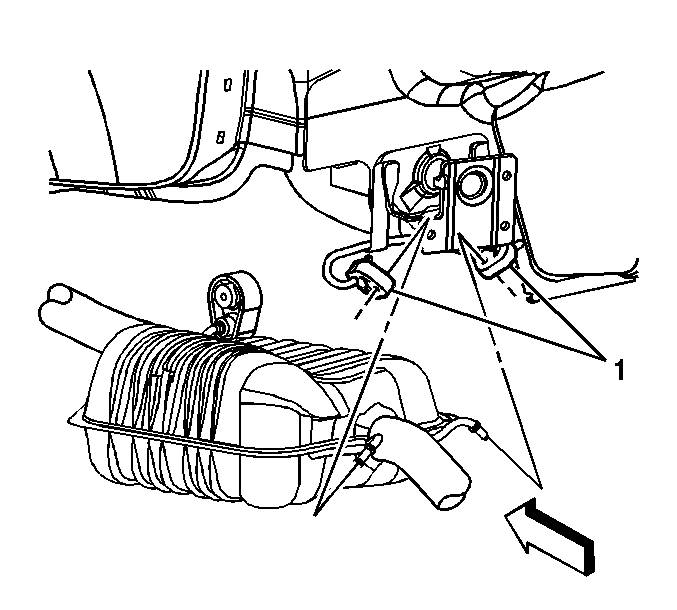
- Pry the front exhaust hanger (1) free from the rear suspension hanger rod.
- Apply a suitable lubricant to the tail pipe hanger rods in order to ease the removal of the tail pipe hangers (1).
- Pry the tail pipe hangers (1) free from the tail pipe hanger rods.
- With the aid of an assistant, lower the exhaust system.
- Remove the left side catalytic converter seal. Do not reuse the seal.
- Remove the right side catalytic converter gasket. Do not reuse the gasket.
- While the exhaust system is on the floor complete the following:
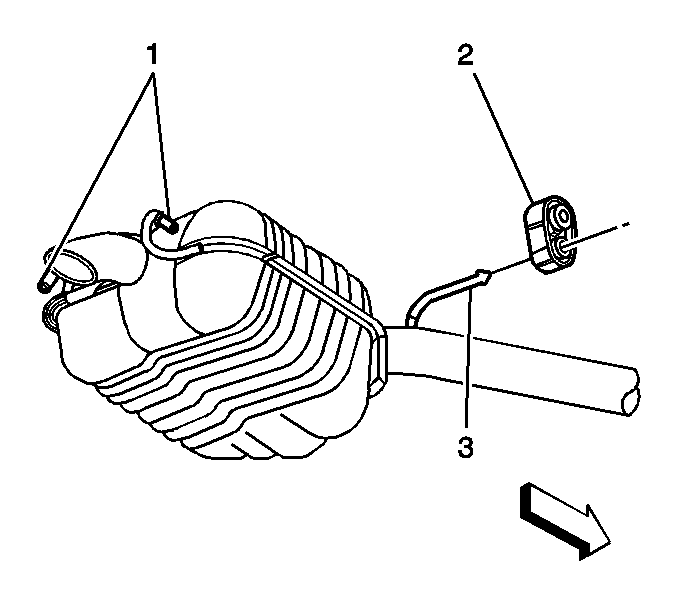
- Apply a suitable lubricant to the exhaust pipe hanger rod (3) in order to ease the removal of the front exhaust hanger (2).
- Pull the front exhaust hanger (2) from the exhaust pipe hanger rod.
Installation Procedure
- While the exhaust system is on the floor complete the following:
- Place a NEW seal on the left catalytic converter flange.
- Place a NEW gasket over the right catalytic converter studs.
- With the aid of an assistant, raise the exhaust system into position, aligning the exhaust pipe flanges with the studs located in the rear of the catalytic converters.
- Finger tighten the 4 nuts to the catalytic converter studs.
- Press the tail pipe hangers (1) over the tail pipe hanger rods.
- Press the front exhaust hanger (1) over the rear suspension hanger rod.
- Tighten the 2 left catalytic converter nuts previously installed in step 5.
- Tighten the 2 right catalytic converter nuts previously installed in step 5.
- Position the floor panel tunnel brace to the floor panel.
- Install the 2 bolts securing the floor panel tunnel brace to the floor panel.
- Lower the vehicle.

| 1.1. | Apply a soapy solution to the following in order to ease the installation of the hangers: |
| • | The inner diameter of the front exhaust hanger (2) |
| • | The exhaust pipe hanger rod (3) |
| • | The inner diameter of the tail pipe hangers |
| • | The tail pipe hanger rods (1) |
| 1.2. | Press the front exhaust hanger (2) over the exhaust pipe hanger rod (3). |
Notice: Refer to Exhaust System Inspection Notice in the Preface section.
Notice: Refer to Flex Decoupler Notice in the Preface section.


Notice: Refer to Fastener Notice in the Preface section.

Tighten
Tighten the catalytic converter nuts to 15 N·m (11 lb ft).

Tighten
Tighten the catalytic converter nuts to 15 N·m (11 lb ft).

Tighten
Tighten the floor panel tunnel brace bolts to 25 N·m (18 lb ft).
