Removal Procedure
- Turn OFF the ignition.
- Thoroughly clean all of the contaminants from and around the EBCM assembly.
- Disconnect the coolant bypass valve from the radiator and position out of the way. Refer to Coolant Bypass Valve Replacement in Engine Cooling.
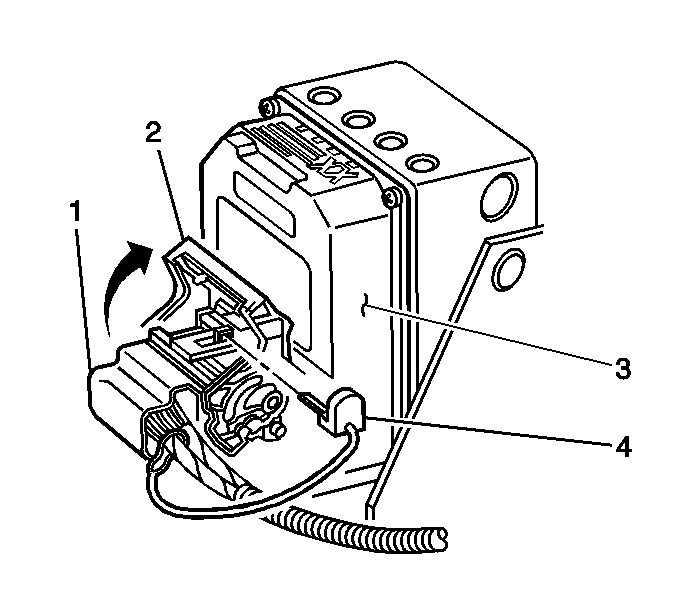
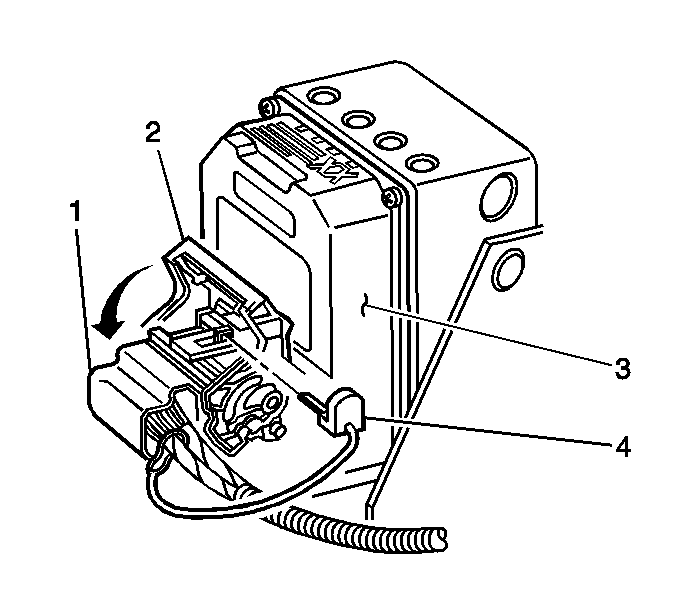
- Remove the EBCM connector position assurance retainer (4) from the EBCM electrical connector (1).
- Rotate the EBCM connector tab (2) up to the unlocked position.
- Disconnect the EBCM electrical connector (1) from the EBCM (3).
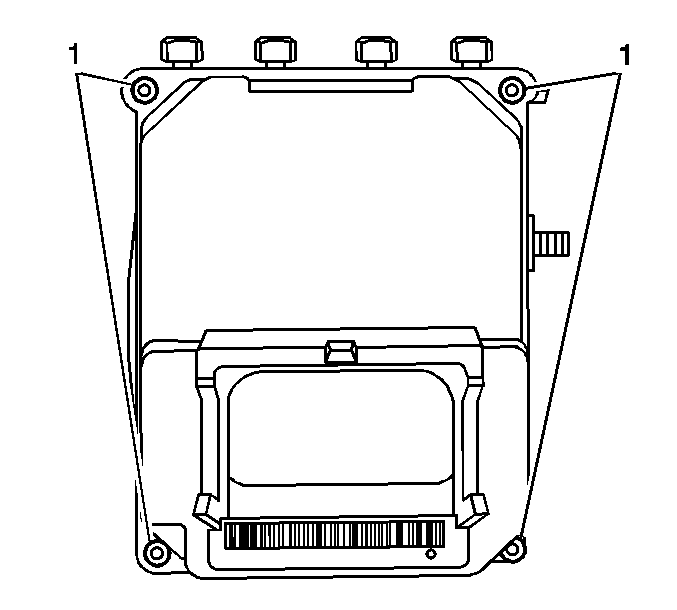
- Remove and discard the 2 upper EBCM to brake pressure modulator valve (BPMV) screws (1).
- Raise and suitably support the vehicle. Refer to Lifting and Jacking the Vehicle in General Information.
- Remove the front air deflector. Refer to Front Air Deflector Replacement in Body Front End.
- Remove and discard the 2 lower EBCM to brake pressure modulator valve (BPMV) screws (1).
- Lower the vehicle.
- Clean the surface of the EBCM/BPMV assembly.
- Separate the EBCM (1) from the BPMV (2).
Notice: To prevent equipment damage, never connect or disconnect the wiring harness connection from the EBCM with the ignition switch in the ON position.
Important: The area around the electronic brake control module (EBCM) must be free from loose dirt to prevent contamination of dissembled ABS components.
Important: It is not necessary to drain the coolant or disconnect the coolant lines when moving the coolant bypass valve.

Important: The EBCM cannot be repaired. If faulty, the unit must be replaced.
Installation Procedure
- Clean the seal surface of the BPMV.
- Install the EBCM (1) to the BPMV (2).
- Make sure that the internal pump motor connector (3) is installed into the new EBCM (1) prior to EBCM replacement.
- Install the 2 upper NEW EBCM to BPMV screws.
- Raise and suitably support the vehicle. Refer to Lifting and Jacking the Vehicle in General Information.
- Install the 2 lower NEW EBCM to BPMV screws.
- Install the front air deflector. Refer to Front Air Deflector Replacement in Body Front End.
- Lower the vehicle.
- Connect the EBCM electrical connector (1) to the EBCM (3).
- Rotate the EBCM connector tab (2) down to the locked position.
- Install the EBCM connector position assurance retainer (4) to the EBCM electrical connector (1).
- Connect the coolant bypass valve to the radiator. Refer to Coolant Bypass Valve Replacement in Engine Cooling.
- Use the scan tool in order to clear the DTCs.
- Perform the auto bleed procedure. Refer to Antilock Brake System Automated Bleed Procedure .
- Perform the ABS Diagnostic System Check. Refer to Diagnostic System Check - ABS .
Important: Use New EBCM/BPMV screws after separating the EBCM from the BPMV.
Notice: Refer to Fastener Notice in the Preface section.
Tighten
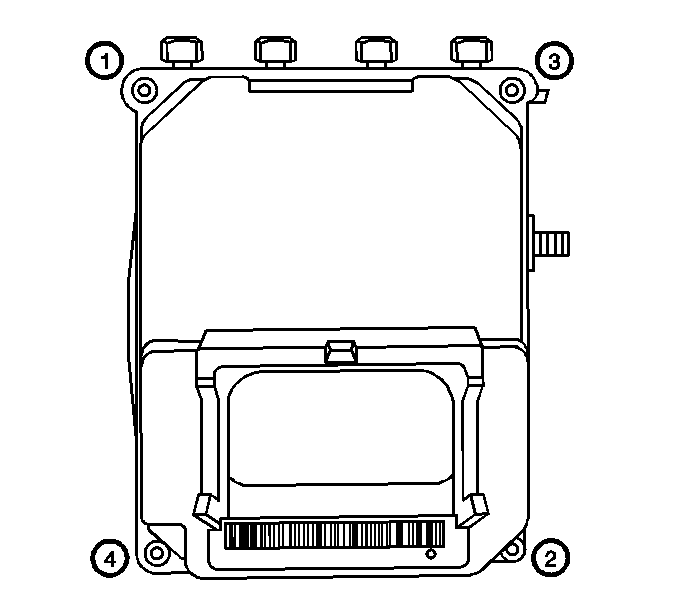
Tighten the (4) NEW EBCM to BPMV screws in sequence (1-4)
to 5 N·m (44 lb in).
Notice: To prevent equipment damage, never connect or disconnect the wiring harness connection from the EBCM with the ignition switch in the ON position.
