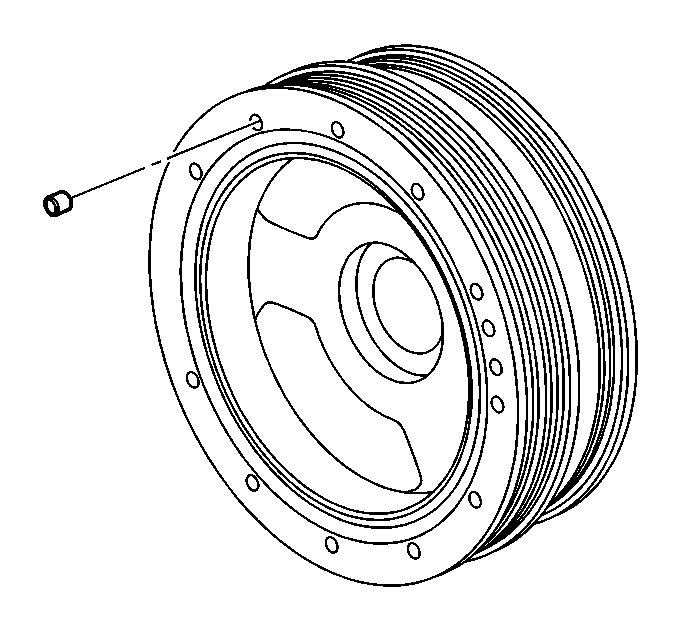
Important: The position of the crankshaft balancer must be marked before removal, relative to the crankshaft. The balancer does not use a key or keyway for positioning. Mark or scribe the end of the crankshaft and the balancer before
removal. The crankshaft balancer must be installed to the original position. If replacing the crankshaft balancer, note the location of any existing balance weights, if applicable. Crankshaft balancer weights must be installed into the new balancer in the same
location as the old balancer. A properly installed balance weight is flush or below flush with the face of the balancer.
- Inspect the crankshaft balancer weight holes for any existing balance weights.
Caution: Refer to Safety Glasses Caution in the Preface section.
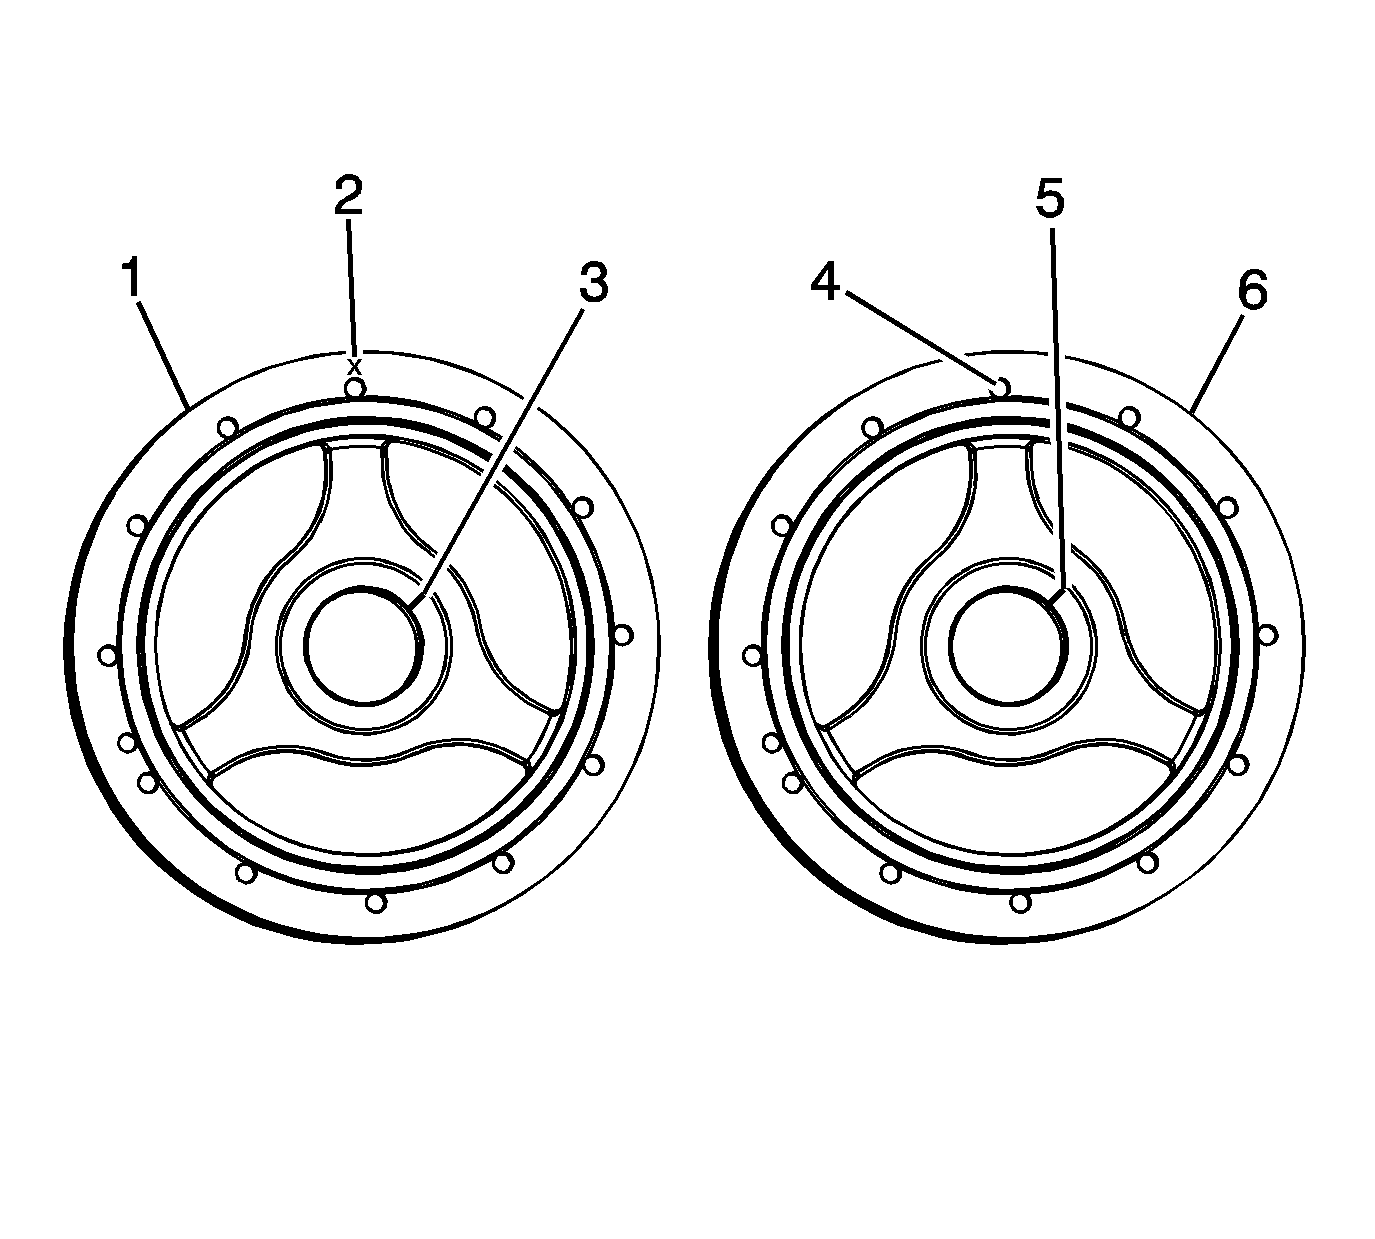
- Using a punch, position the balance weights in the old balancer (1) to the bottom of the weight holes.
- With a marking crayon, note the weight holes (2) containing balance weights, if applicable.
- Lay the old crankshaft balancer (1) on a bench or flat table.
Rotate the old balancer until 1 of the marked balance weight holes (2) is in the 12 o'clock position.
- Lay the new crankshaft balancer (6) on the bench next to the old balancer.
Rotate the new balancer until 1 of the balance weight holes (4) is in the 12 o'clock position.
- With a marking crayon, mark the new balancer weight hole (4) located in the 12 o'clock position.
- Viewing the old balancer, note the position of the crankshaft-to-balancer alignment mark (3).
- Mark the new balancer in the same location (5).
- Measure the distance from the top of the balance weights to the face of the old crankshaft balancer.
- Record the readings.
- Determine the proper balance weight size for the new balancer. Balance weights are available in 3 different sizes.
| • | A balance weight hole depth that measures 13.0 mm (0.512 in), has a short balance weight in the hole. A short balance weight measures 12.7 mm (0.5 in) in length. |
| • | A balance weight hole depth that measures 6.69 mm (0.263 in), has a medium balance weight in the hole. A medium balance weight measures 19.0 mm (0.75 in) in length. |
| • | A balance weight hole depth that measures 0.29 mm (0.011 in), has a long balance weight in the hole. A long balance weight measures 25.4 mm (1.0 in) in length. |
- Insert new crankshaft balance weights of the proper size into the new balancer in the same location as the old balancer.
A properly installed balance weight is flush or below flush with the face of the balancer.
