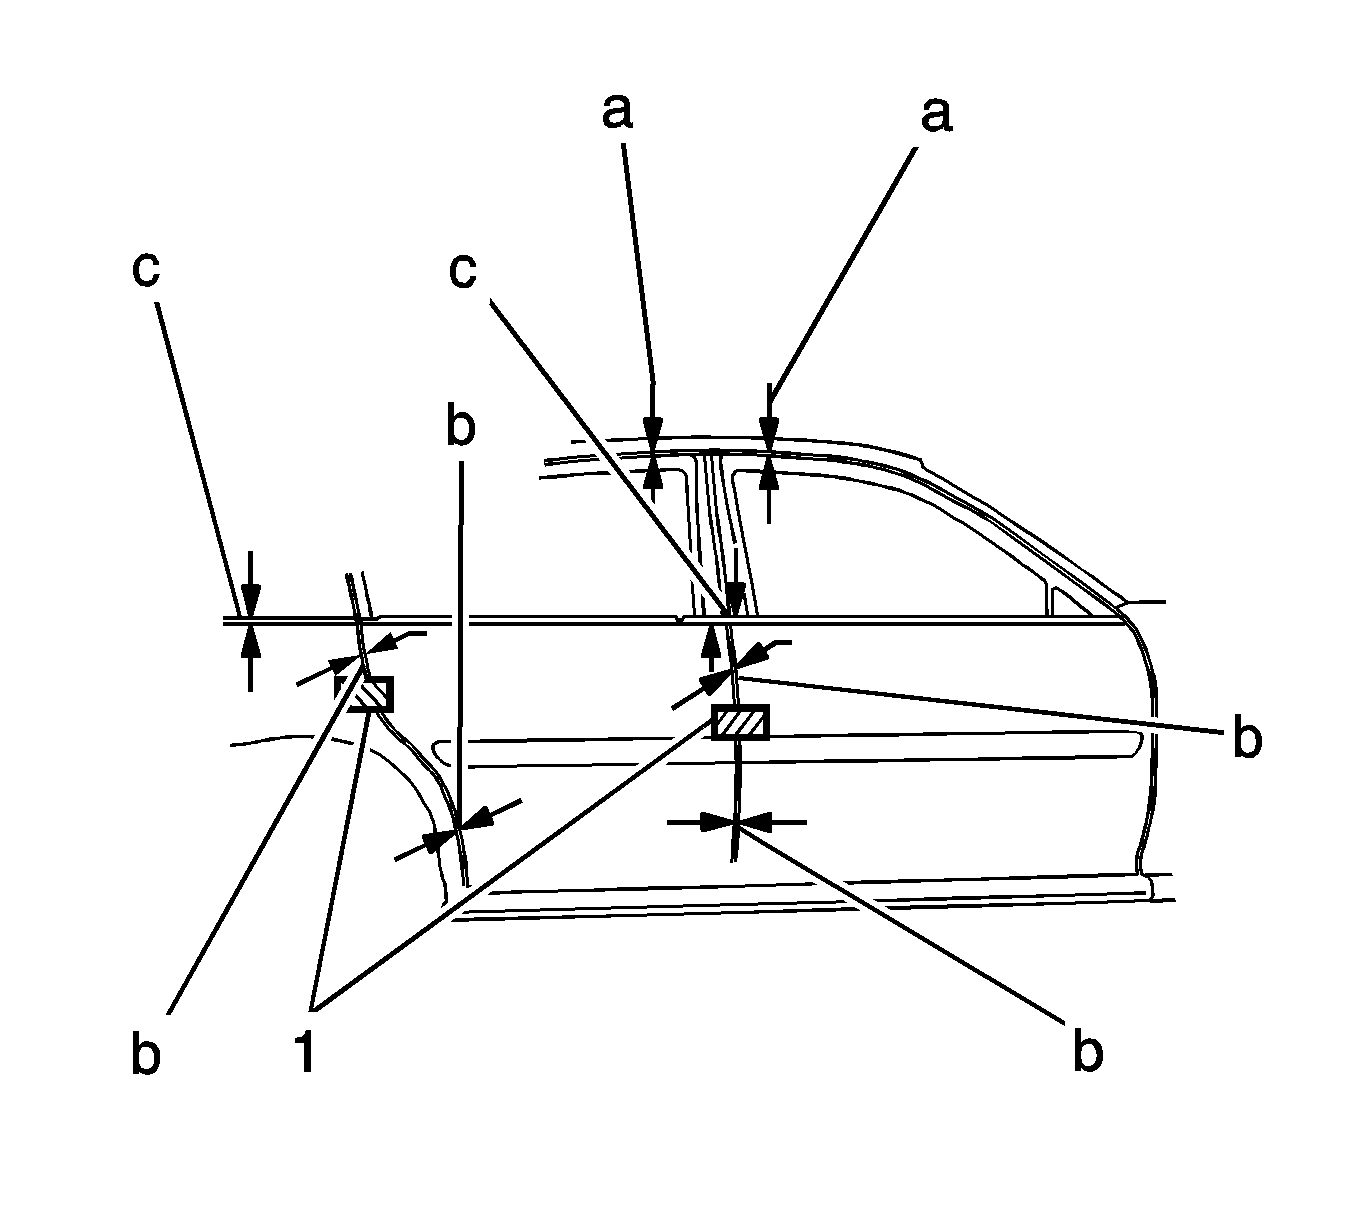
- Loosen the door hinge to pillar bolts. This will allow adjustment of the door at the hinge pillar in the following directions:
| • | Up or down (c), 0.0-2.0 mm (0.0-0.08 in) upwards, 1 mm (0.04 in) upwards preferred. |
| • | Fore or aft (b), 3-5 mm (0.12-0.20 in) equal gap, 4 mm (0.16 in) preferred. |
- Reposition the door as needed.
Notice: Refer to Fastener Notice in the Preface section.
- Position the door fore or aft at the hinge pillar attachment. Perform the following steps as needed:
| 3.2. | Reposition the door. |
Tighten
Tighten the bolts to 25 N·m (18 lb ft).
- Verify the doors are flush (1) to within 1 mm (0.04 in).
- If in or out adjustment is needed, remove the door hinge. Refer to
Front Side Door Hinge Replacement
or
Rear Side Door Hinge Replacement
.
- Drill the door side of the hinge holes with a 13 mm (0.5 in) drill bit in order to allow for 2.5 mm (0.10 in) in or out adjustment.
- Use replacement bolts on the door side of the hinge.
- Leave the bolts on the door side of the hinge loose.
- Align the front door to the front fender first, if needed.
- Position the door in or out. Perform the following steps as needed:
| 10.2. | Reposition the door. |
Tighten
Tighten the bolts to 25 N·m (18 lb ft).
- Align the rear door to the front door and rear quarter, if needed.
- Position the door in or out. Perform the following steps as needed:
| 12.2. | Reposition the door. |
Tighten
Tighten the bolts to 25 N·m (18 lb ft).
- Adjust the seal gap (a) at the door header to 13-17 mm (0.52-0.68 in), 15 mm (0.60 in) preferred.
- Verify door header to door header at the center pillar is flush to within 1 mm (0.04 in). Adjust the door headers if necessary.
- Verify all door gaps are within specifications.
- Adjust the lock striker. Refer to
Door Lock Striker Adjustment
.

