For 1990-2009 cars only
Door Lock Cylinder Replacement without UA2
Removal Procedure
- Place the window in the full up position.
- Remove the door trim panel. Refer to Front Side Door Trim Panel Replacement .
- Pull the rear of the water deflector far enough away from the door in order to access the outside door handle. Refer to Front Side Door Water Deflector Replacement .
- Remove the outside door handle. Refer to Front Side Door Outside Handle Replacement .
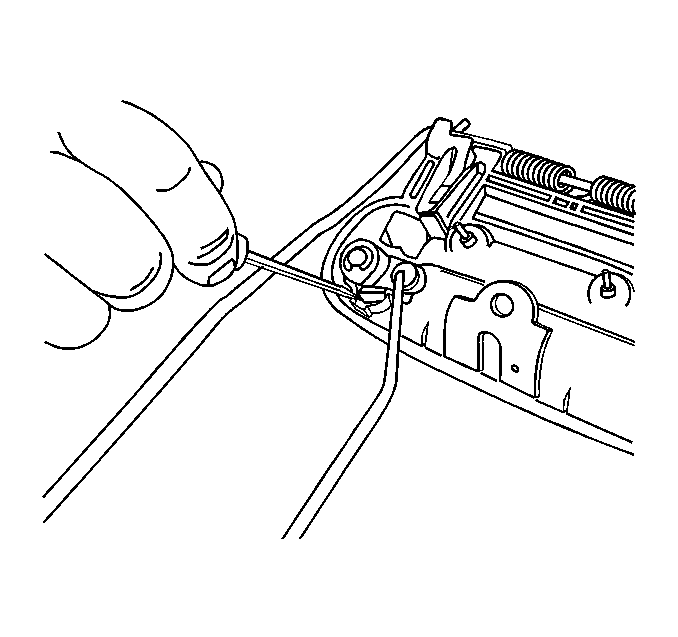
- Remove the E-clip on the lock cylinder.
- Remove the lock rod and arm.
- Release the lock cylinder by inserting a small flat bladed tool between the retaining clip and the housing and twisting.
- Remove the lock cylinder from the backside of the door handle.
Installation Procedure
- If a new lock cylinder is to be installed, refer to Key and Lock Cylinder Coding in General Information, for proper coding procedure.
- Ensure the lock cylinder retaining clip is fully inserted into the door handle.
- Snap the lock cylinder into the outside door handle from the backside.
- Secure the lock cylinder arm and rod to the lock cylinder with the E-clip.
- Install the outside door handle. Refer to Front Side Door Outside Handle Replacement .
- Install the water deflector. Refer to Front Side Door Water Deflector Replacement .
- Install the door trim panel. Refer to Front Side Door Trim Panel Replacement .
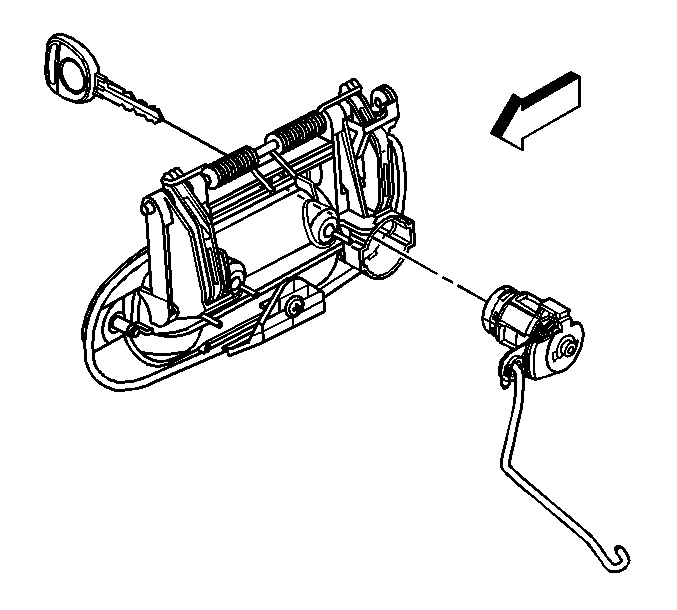
Door Lock Cylinder Replacement with UA2
Removal Procedure
- Place the window in the full up position.
- Remove the door trim panel. Refer to Front Side Door Trim Panel Replacement .
- Pull the rear of the water deflector far enough away from the door in order to access the outside door handle. Refer to Front Side Door Water Deflector Replacement .
- Remove the outside door handle. Refer to Front Side Door Outside Handle Replacement .
- Remove the E-clip (2) on the lock cylinder.
- Remove the lock rod and arm.
- Remove the roll pins (1).
- Remove the lock cylinder from the backside of the door handle.
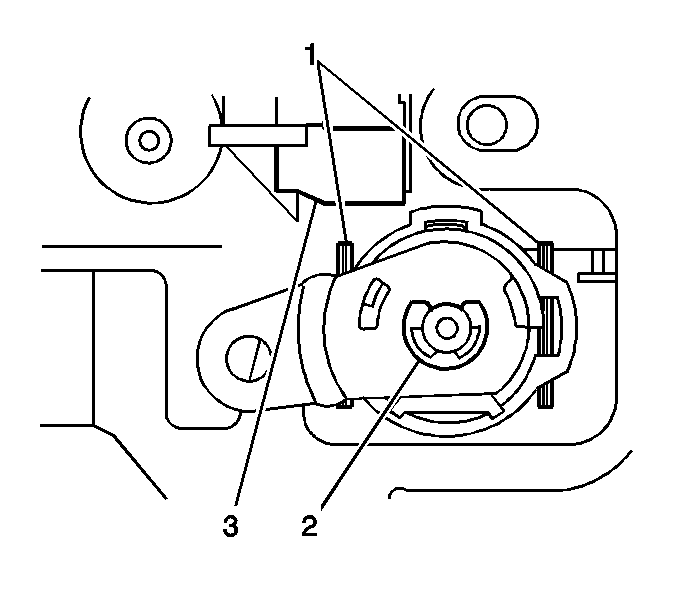
| 7.1. | Insert a suitable prying tool between the reinforcement (3) and the roll pin (1). |
| 7.2. | Pry the roll pin downward far enough to grasp the opposite end with pliers. |
| 7.3. | Remove the roll pin with the pliers. |
| 7.4. | Remove the remaining roll pin with a drift punch. |
Installation Procedure
- If a new lock cylinder is to be installed, refer to Key and Lock Cylinder Coding in General Information, for the proper coding procedure.
- Insert the lock cylinder into the cavity in the door handle.
- Install the roll pins (1).
- Secure the lock cylinder arm and rod to the lock cylinder with the E-clip (2).
- Install the outside door handle. Refer to Front Side Door Outside Handle Replacement .
- Install the water deflector. Refer to Front Side Door Water Deflector Replacement .
- Install the door trim panel. Refer to Front Side Door Trim Panel Replacement .
