Air Conditioning Condenser Replacement MAE
Tools Required
J 39400-A Halogen Leak Detector
Removal Procedure
- Recover the refrigerant. Refer to Refrigerant Recovery and Recharging .
- Remove the radiator support brackets. Refer to Radiator Support Bracket Replacement in Engine Cooling.
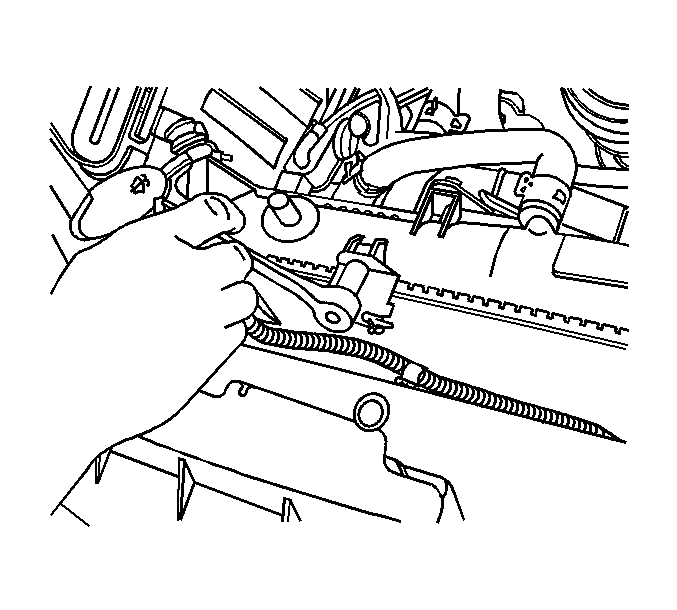
- Remove the upper condenser bolts.
- Remove the air deflector. Refer to Front Air Deflector Replacement in Body Front End.
- Disconnect the hose from the power steering cooler.
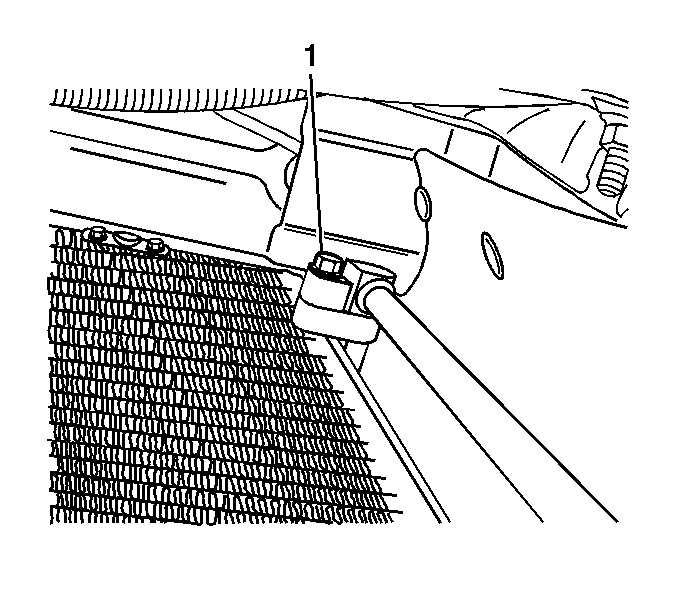
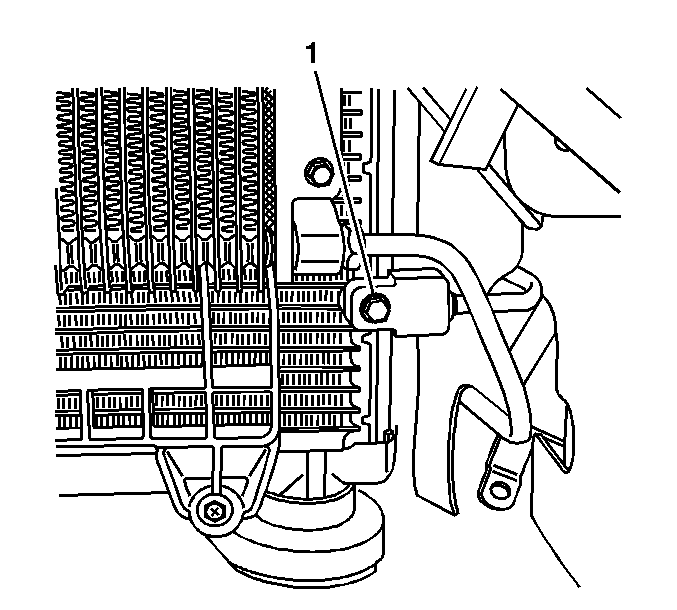
- Remove the discharge hose bolt (1).
- Remove the discharge hose.
- Remove and discard the O-ring seal.
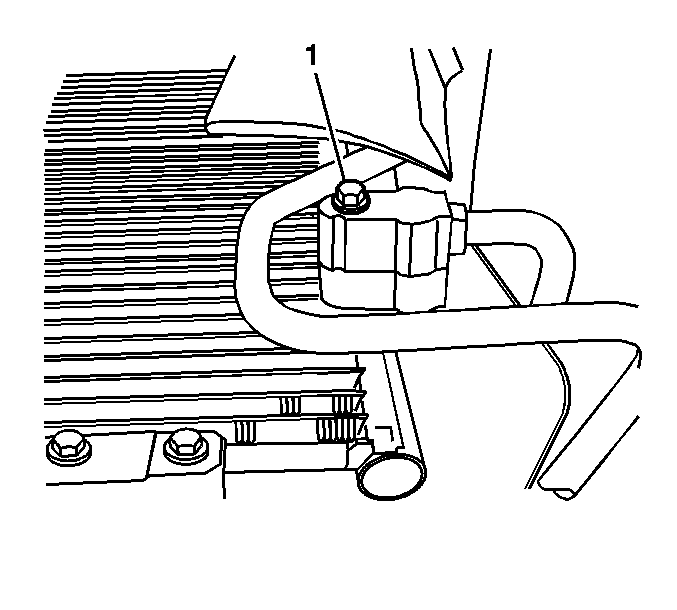
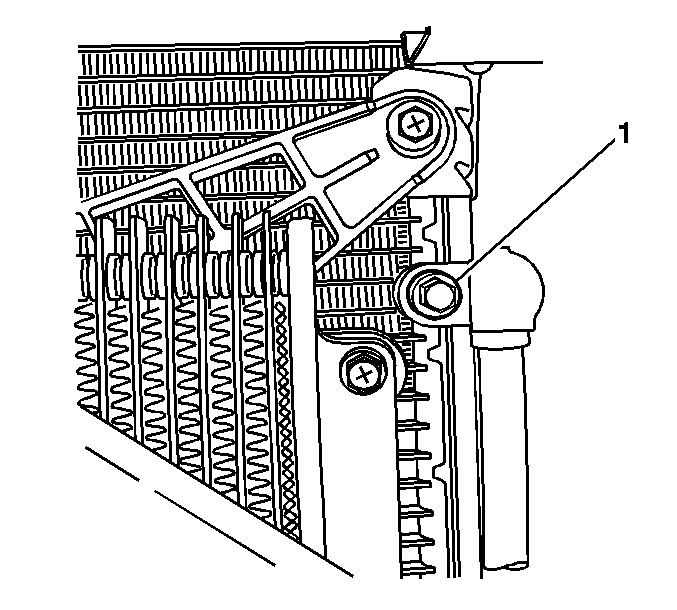
- Remove the condenser tube bolt (1).
- Remove the condenser tube.
- Remove and discard the O-ring seal.
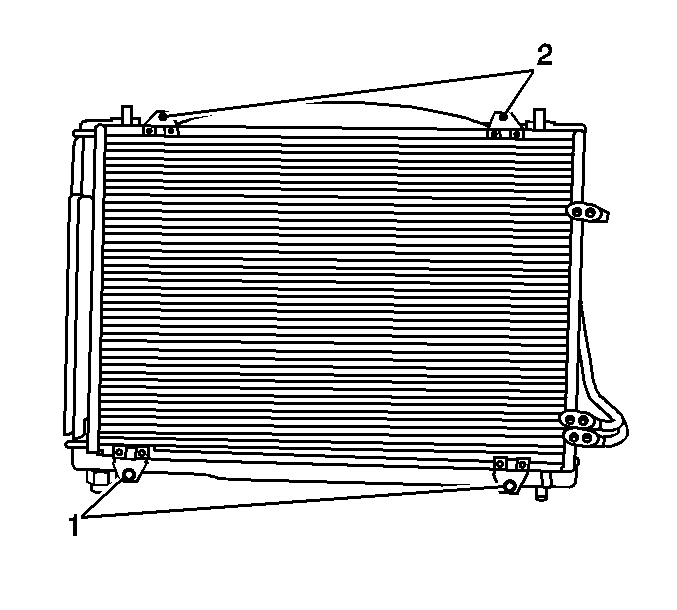
- Remove the lower condenser mounting bolts (1).
- Remove the condenser.
Installation Procedure
- Add refrigerant oil. Refer to Refrigerant System Capacities .
- Install the condenser.
- Install the lower condenser mounting bolts (1).
- Lubricate the O-ring with refrigerant oil before installing the hose. Refer to O-Ring Replacement .
- Connect the condenser tube to the condenser.
- Install the condenser tube bolt (1).
- Connect the power steering lines to hoses.
- Lube the O-ring with refrigerant oil before installing hose. Refer to O-Ring Replacement .
- Connect the discharge hose to the condenser.
- Connect the discharge hose bolt (1) to the condenser.
- Ensure that side seals are not damaged and in position around pipes.
- Install the air deflector. Refer to Front Air Deflector Replacement in Body Front End.
- Install the upper condenser mounting bolts.
- Install the upper radiator supports. Refer to Radiator Support Bracket Replacement in Engine Cooling.
- Evacuate and recharge the A/C system. Refer to Refrigerant Recovery and Recharging .
- Leak test all fittings of the repaired or reinstalled components using the J 39400-A .
Notice: Refer to Fastener Notice in the Preface section.
Tighten
Tighten the bolts to 3.9 N·m (35 lb in).
Tighten
Tighten the bolt to 5.4 N·m (48 lb in).
Tighten
Tighten the bolt to 5.4 N·m (48 lb in).
Tighten
Tighten the bolts to 3.9 N·m (35 lb in).
Air Conditioning Condenser Replacement CZ3
Tools Required
J 39400-A Halogen Leak Detector
Removal Procedure
- Recover the refrigerant. Refer to Refrigerant Recovery and Recharging .
- Remove the radiator support brackets. Refer to Radiator Support Bracket Replacement in Engine Cooling.
- Remove the upper condenser mounting bolts.
- Remove the auxiliary cooling fan. Refer to Auxiliary Engine Coolant Fan and Fan Motor Replacement in Engine Cooling.
- Remove the liquid line bolt (1) at the condenser
- Pull the line straight out to protect the O-ring.
- Disconnect the discharge hose (1) at the condenser.
- Pull the line straight out to protect the O-ring.
- Remove the condenser.
Installation Procedure
- Add refrigerant oil. Refer to Refrigerant System Capacities .
- Install the condenser.
- Install the auxiliary cooling fan. Refer to Auxiliary Engine Coolant Fan and Fan Motor Replacement in Engine Cooling.
- Lube O-ring with refrigerant oil before installing. Refer to O-Ring Replacement .
- Connect the discharge hose to the condenser.
- Install the discharge hose bolt (1).
- Lube O-ring with refrigerant oil before installing. Refer to O-Ring Replacement .
- Connect the liquid line to the condenser.
- Connect the liquid line bolt (1) to the condenser.
- Install the air deflector. Refer to Front Air Deflector Replacement in Body Front End.
- Install the upper condenser bolts.
- Install the radiator support brackets. Refer to Radiator Support Bracket Replacement in Engine Cooling.
- Evacuate and recharge the refrigerant system. Refer to Refrigerant Recovery and Recharging .
- Leak test all fittings of the repaired or reinstalled components using the J 39400-A .
Notice: Refer to Fastener Notice in the Preface section.
Tighten
Tighten the bolt to 5.4 N·m (48 lb in).
Tighten
Tighten the bolt to 5.4 N·m (48 lb in).
Tighten
Tighten the bolts to 3.9 N·m (35 lb in).
Air Conditioning Condenser Replacement LS6
Tools Required
J 39400-A Halogen Leak Detector
Removal Procedure
- Recover the refrigerant. Refer to Refrigerant Recovery and Recharging .
- Remove the radiator support brackets. Refer to Radiator Support Bracket Replacement in Engine Cooling.
- Remove the air deflector. Refer to Front Air Deflector Replacement in Body Front End.
- Remove the lower condenser bolts.
- Remove the discharge hose bolt (1).
- Remove the discharge hose.
- Remove and discard the O-ring seal.
- Remove the condenser tube bolt (1).
- Remove the condenser tube.
- Remove and discard the O-ring seal.
- Remove the upper condenser mounting bolts (1).
- Remove the condenser.
Installation Procedure
- Add refrigerant oil to the condenser. Refer to Refrigerant System Capacities .
- Install the condenser.
- Install the upper condenser mounting bolts (1).
- Lubricate the O-ring with refrigerant oil before installing the hose. Refer to O-Ring Replacement .
- Connect the condenser tube to the condenser.
- Install the condenser tube bolt (1).
- Lube the O-ring with refrigerant oil before installing hose. Refer to O-Ring Replacement .
- Connect the discharge hose to the condenser.
- Connect the discharge hose bolt (1) to the condenser.
- Ensure that side seals are not damaged and in position around pipes.
- Install the lower condenser mounting bolts.
- Install the air deflector. Refer to Front Air Deflector Replacement in Body Front End.
- Install the upper radiator supports. Refer to Radiator Support Bracket Replacement in Engine Cooling.
- Evacuate and recharge the A/C system. Refer to Refrigerant Recovery and Recharging .
- Leak test all fittings of the repaired or reinstalled components using the J 39400-A .
Notice: Refer to Fastener Notice in the Preface section.
Tighten
Tighten the bolts to 3.9 N·m (35 lb in).
Tighten
Tighten the bolt to 5.4 N·m (48 lb in).
Tighten
Tighten the bolt to 5.4 N·m (48 lb in).
Tighten
Tighten the bolts to 3.9 N·m (35 lb in).
