For 1990-2009 cars only
Clutch Assembly Replacement CTS-V
Removal Procedure
- Remove the transmission. Refer to Transmission Replacement .
- Remove the concentric slave cylinder. Refer to Clutch Concentric Actuator Cylinder Replacement .
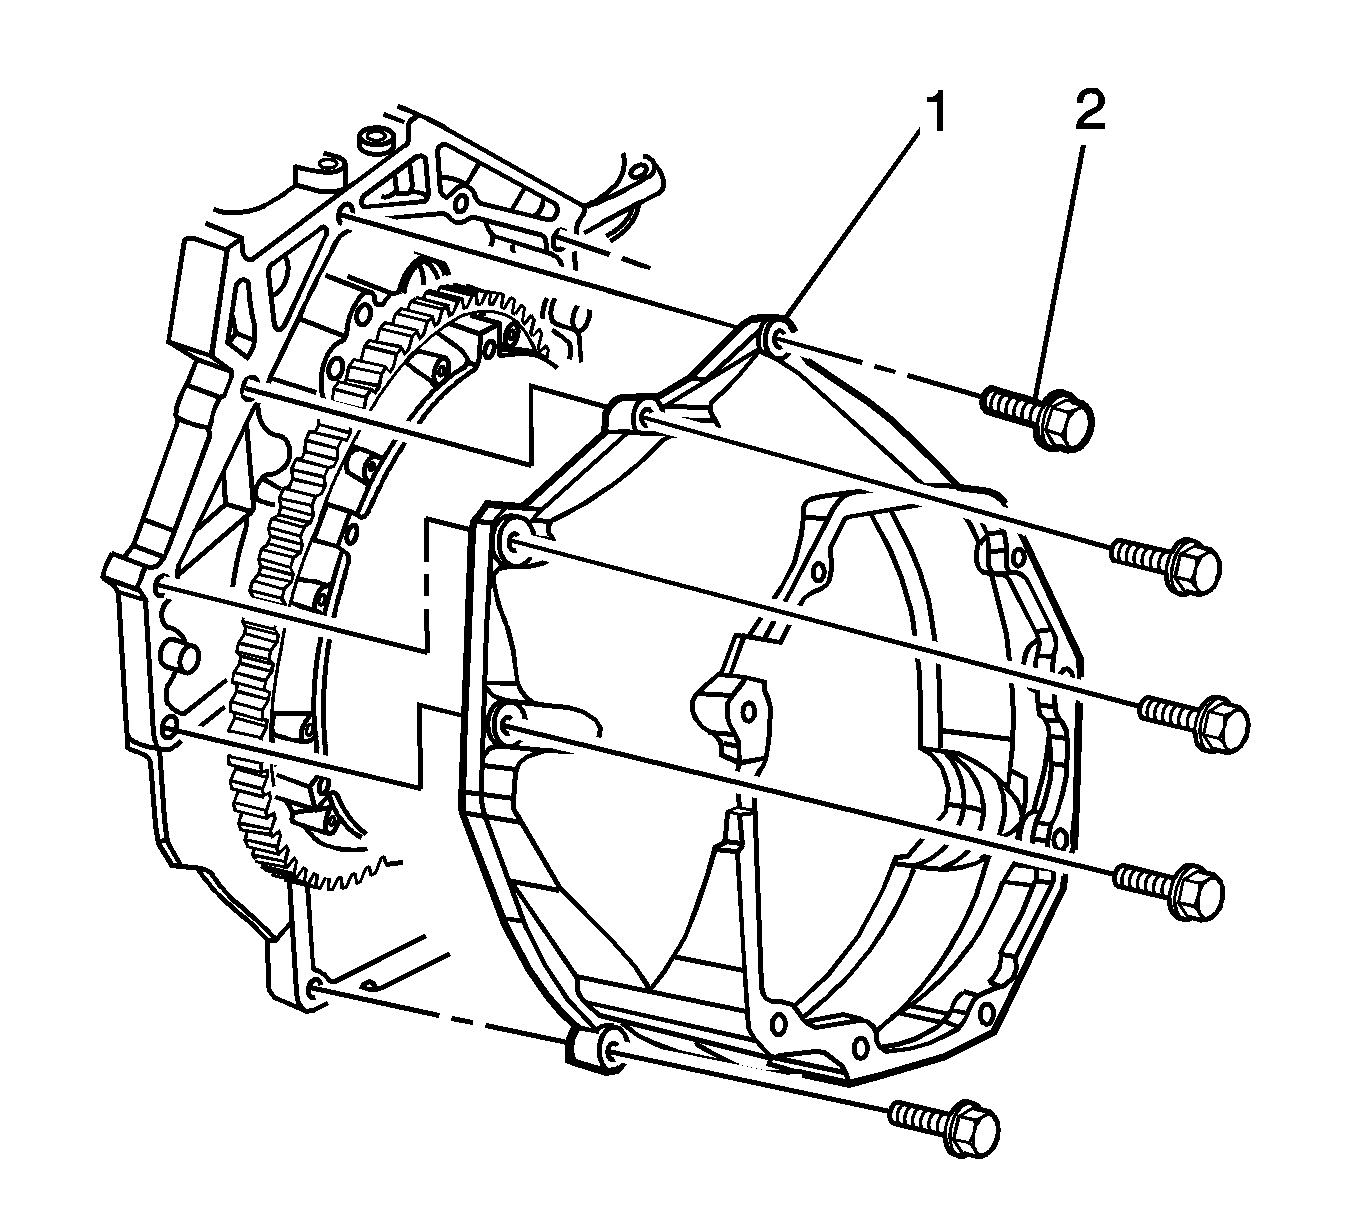
- Remove the clutch housing bolts/studs (2).
- Remove the clutch housing (1) .
- Remove the clutch pressure plate bolts.
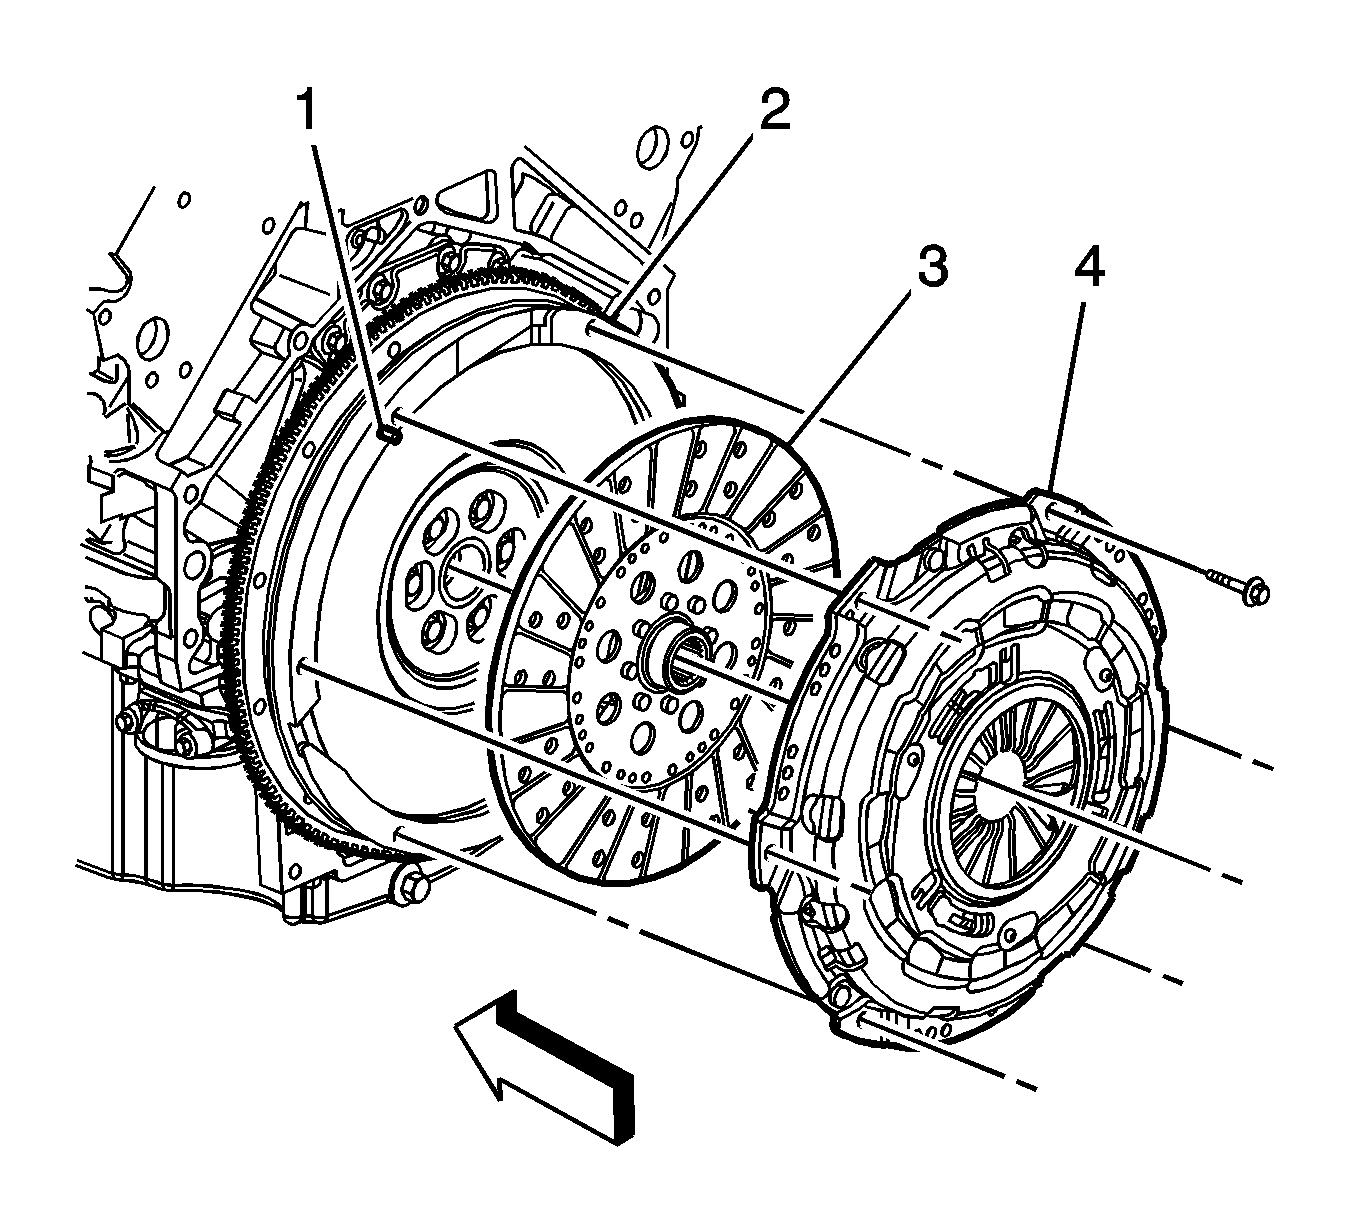
- Remove the clutch pressure plate (4) and the driven disc (3) from the dowel pins (1) on the flywheel (2).
Installation Procedure
- The splined portion of the driven plate (3) protrudes out of the plate more on one side than the other. The side that protrudes out more is the transmission side.
- Install the clutch pressure plate (4) and driven plate (3) to the dowel pins (1) on the flywheel (2).
- Install the clutch pressure plate bolts finger tight.
- Use a commercially available universal clutch alignment tool in order to align the clutch driven plate to the clutch pilot bearing.
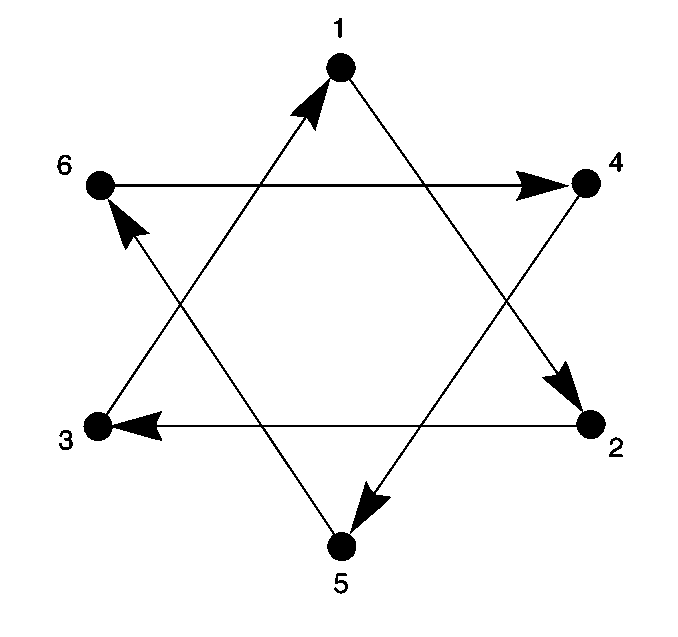
- Tighten the clutch pressure plate bolts in the sequence shown, starting with the number one and following in numerical order.
- Remove the clutch alignment tool.
- Install the clutch housing (1).
- Install the clutch housing bolts/studs (2).
- Install the concentric slave cylinder. Refer to Clutch Concentric Actuator Cylinder Replacement .
- Install the manual transmission. Refer to Transmission Replacement .
Notice: Refer to Fastener Notice in the Preface section.
Tighten
Tighten the clutch pressure plate bolts in sequence and evenly over 3 increments with the fourth increment to 70 N·m (52 lb ft).
Tighten
Tighten the clutch housing bolts/studs to 50 N·m (37 lb ft).
Clutch Assembly Replacement CTS
Removal Procedure
- Remove the manual transmission. Refer to Transmission Replacement .
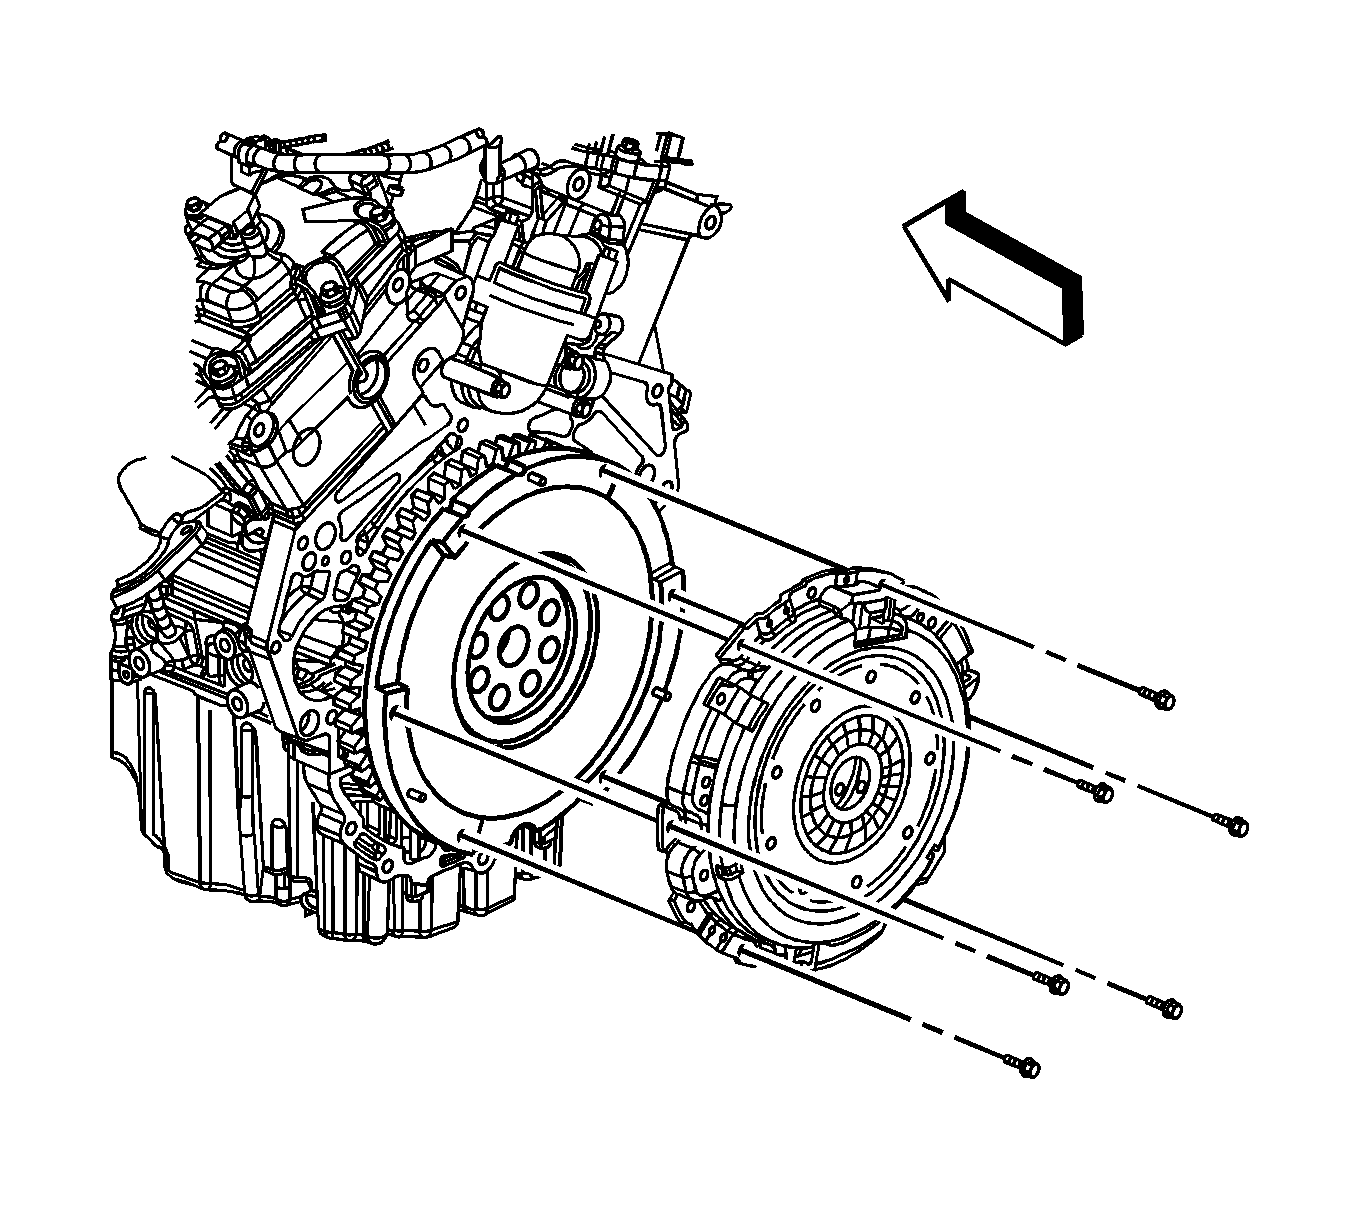
- Remove the clutch pressure plate bolts.
- Remove the clutch pressure plate and driven disc from the dowel pins on the flywheel.
Installation Procedure
Important: When the clutch driven plate requires replacement, the engine flywheel must also be replaced along with the clutch pressure plate as an assembly.
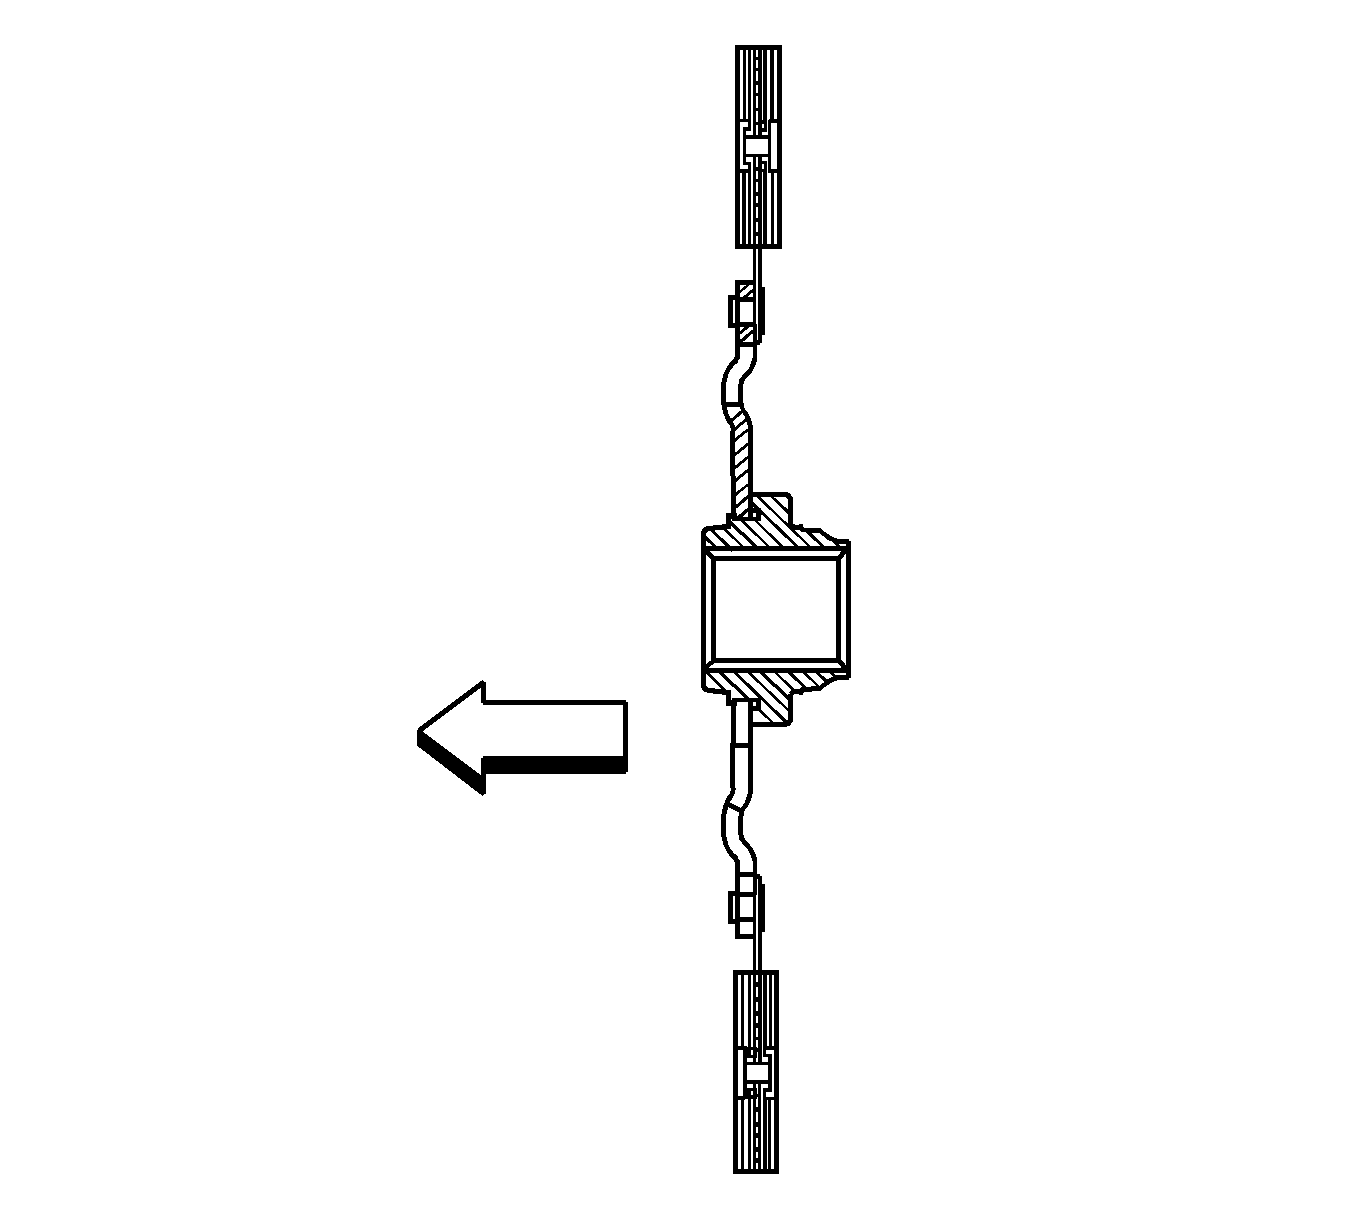
- The splined portion of the driven plate protrudes out of the plate more on one side than the other. The side that protrudes out more is the transmission side. The arrow in the graphic indicates the front of the vehicle, or flywheel side of the driven plate.
- Install the clutch pressure plate and driven plate to the dowel pins on the flywheel.
- Install the clutch pressure plate bolts finger tight.
- Using a commercially available universal clutch alignment tool, align the clutch driven plate to the clutch pilot bearing.
- Tighten the clutch pressure plate bolts in the sequence shown, starting with the number one and following in numerical order.
- Install the manual transmission. Refer to Transmission Replacement .
Notice: Refer to Fastener Notice in the Preface section.
Tighten
Tighten the clutch pressure plate bolts in sequence and evenly over 3 increments with the fourth increment to 28 N·m (21 lb ft).
