Exhaust Manifold Replacement - Right Side LA3, LY9
Removal Procedure
Caution: Refer to Exhaust Service Caution in the Preface section.
Caution: Refer to Protective Goggles and Glove Caution in the Preface section.
- Remove the drive belt tensioner. Refer to Drive Belt Tensioner Replacement in Engine Mechanical-2.6L and 3.2L.
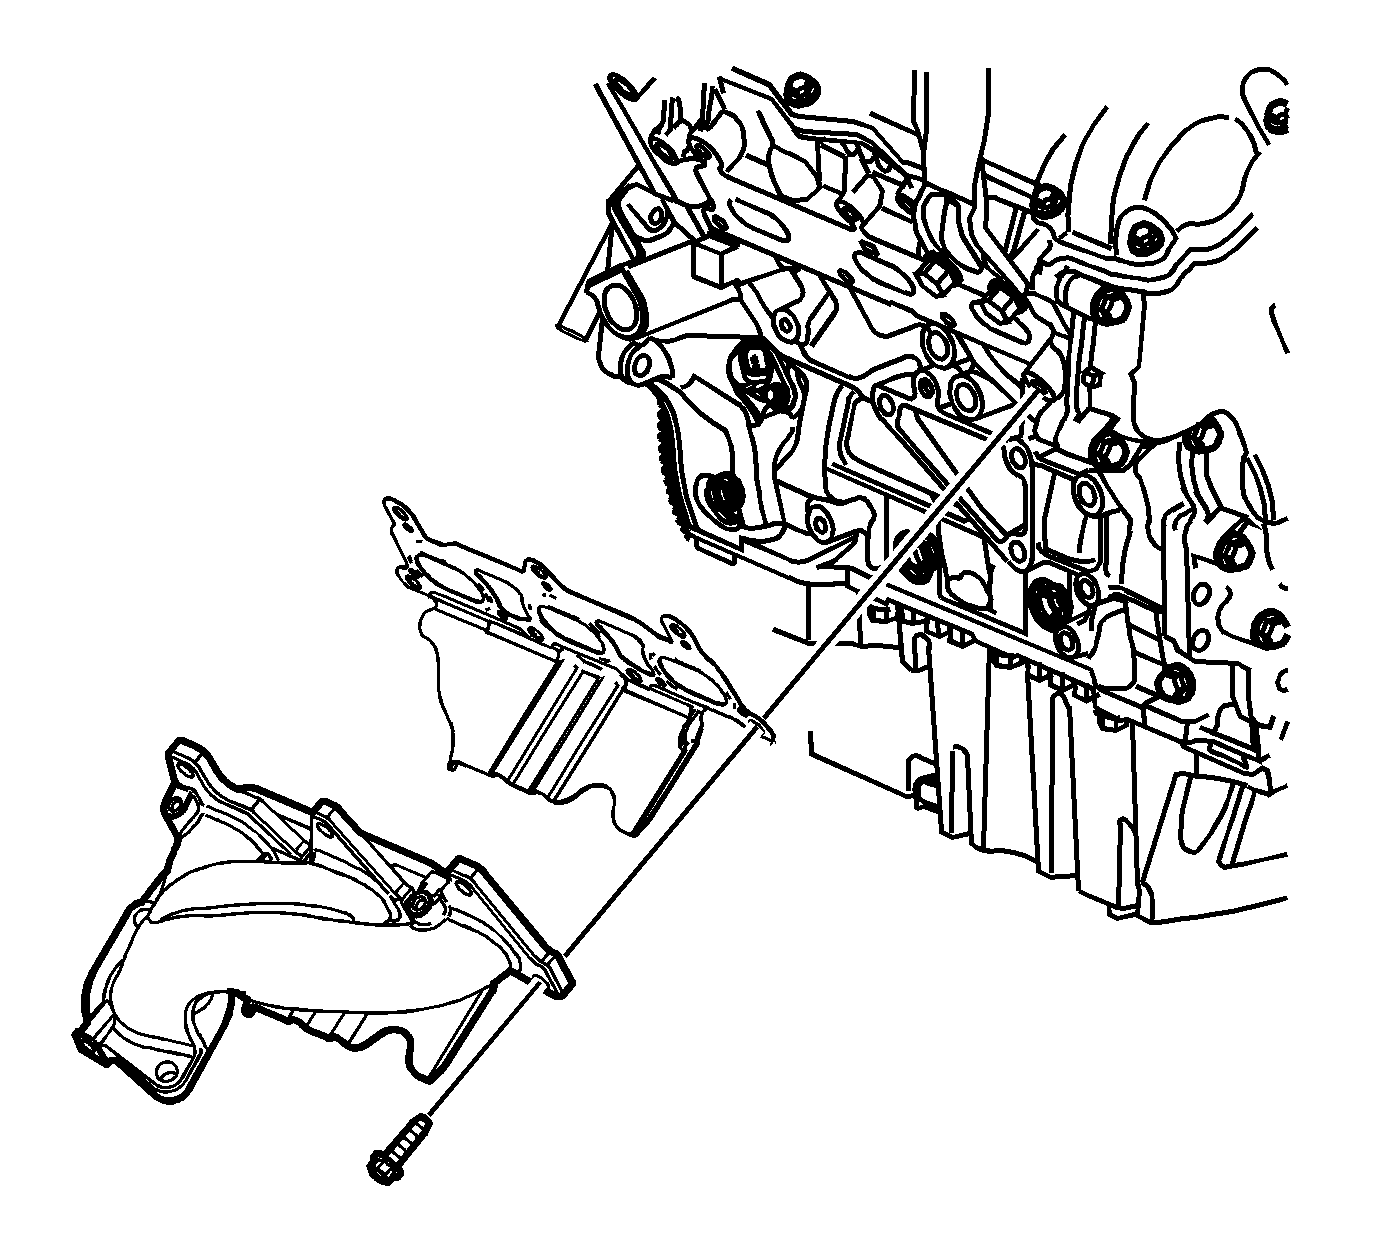
- Disconnect the 2 cable harness clips (1) securing the engine wiring harness (4) to the ECM bracket (2) and position aside.
- Remove the 2 bolts (3) securing the after boil coolant pump to the ECM bracket, and position aside.
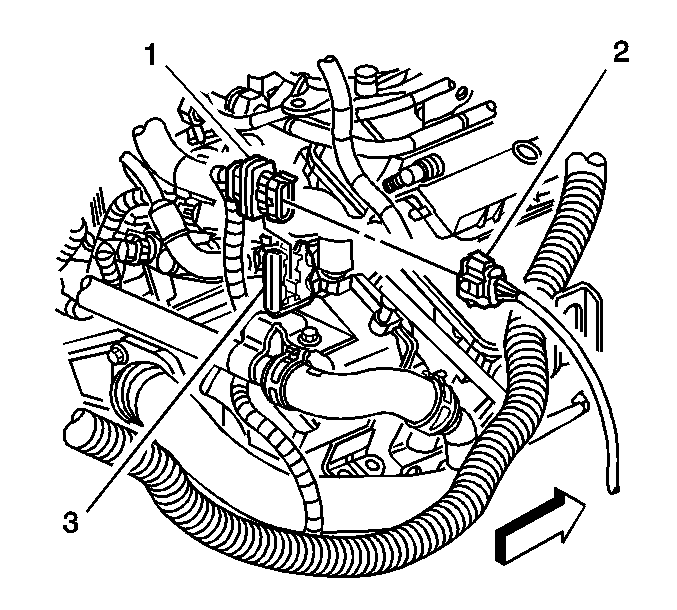
- Disconnect the heated oxygen sensor pigtail (2) from the wiring harness connector (1).
- Remove the following right exhaust manifold retaining nuts:
- Remove the starter. Refer to Starter Motor Replacement in Engine Electrical.
- Remove the heated oxygen sensor if replacement is necessary. Refer to Heated Oxygen Sensor Replacement - Bank 1 Sensor 1 in Engine Controls-2.6L and 3.2L.
- Remove the remaining right exhaust manifold retaining nuts.
- Remove the right exhaust manifold and the gasket from the engine. Do not reuse the gasket.
- Clean and inspect the right exhaust manifold. Refer to Exhaust Manifold Cleaning and Inspection in Engine Mechanical-2.6L and 3.2L.
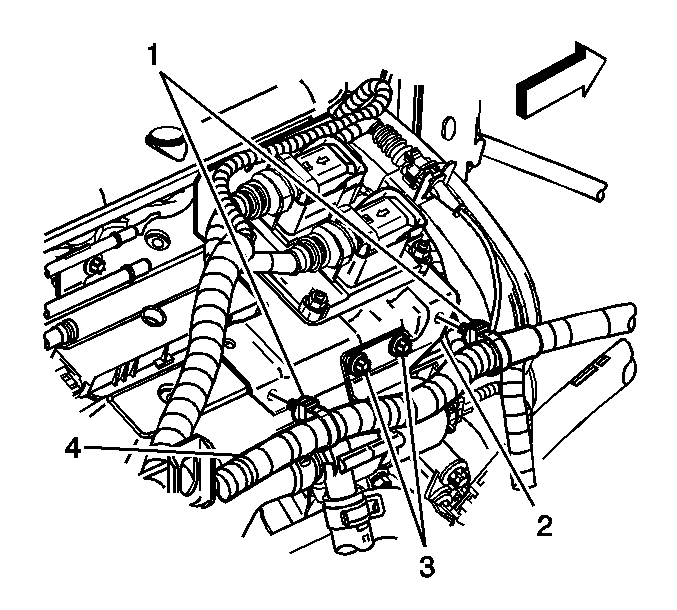
| • | The 3 upper |
| • | The front lower |
Installation Procedure
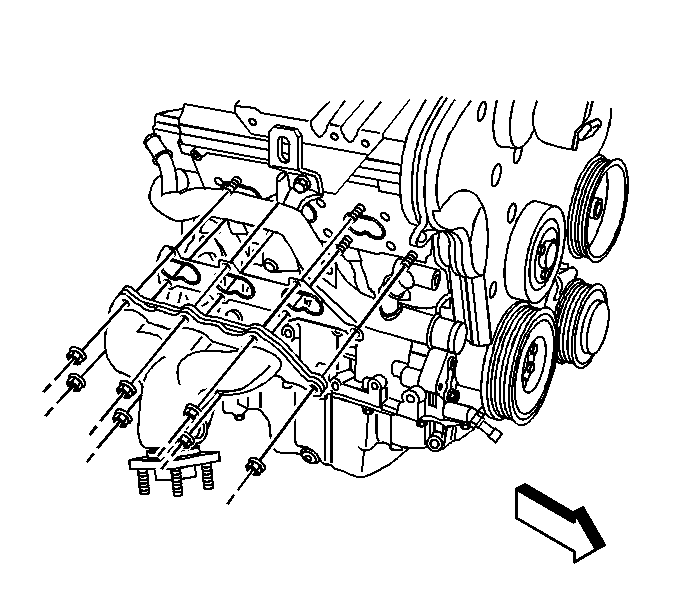
- Place a NEW exhaust manifold gasket over the cylinder head studs.
- Position the right exhaust manifold to the right cylinder head.
- Install the right exhaust manifold 3 lower nuts.
- Install the heated oxygen sensor if previously removed. Refer to Heated Oxygen Sensor Replacement - Bank 1 Sensor 1 in Engine Controls-2.6L and 3.2L.
- Install the starter. Refer to Starter Motor Replacement in Engine Electrical.
- Install the remaining right exhaust manifold nuts.
- Connect the heated oxygen sensor pigtail (2) to the wiring harness connector (1).
- Install the 2 bolts (3) securing the after boil coolant pump to the ECM bracket.
- Connect the 2 cable harness clips (1) securing the engine wiring harness (4) to the ECM bracket (2).
- Install the drive belt tensioner. Refer to Drive Belt Tensioner Replacement in Engine Mechanical-2.6L and 3.2L.
Notice: Refer to Fastener Notice in the Preface section.
Tighten
Tighten the exhaust manifold nuts to 20 N·m (15 lb ft).
Tighten
Tighten the exhaust manifold nuts to 20 N·m (15 lb ft).
Tighten
Tighten the afterboil coolant pump bolts to 10 N·m (89 lb in).
Exhaust Manifold Replacement - Right Side LP1, LY7, LLT
Removal Procedure
Caution: Refer to Exhaust Service Caution in the Preface section.
Caution: Refer to Protective Goggles and Glove Caution in the Preface section.
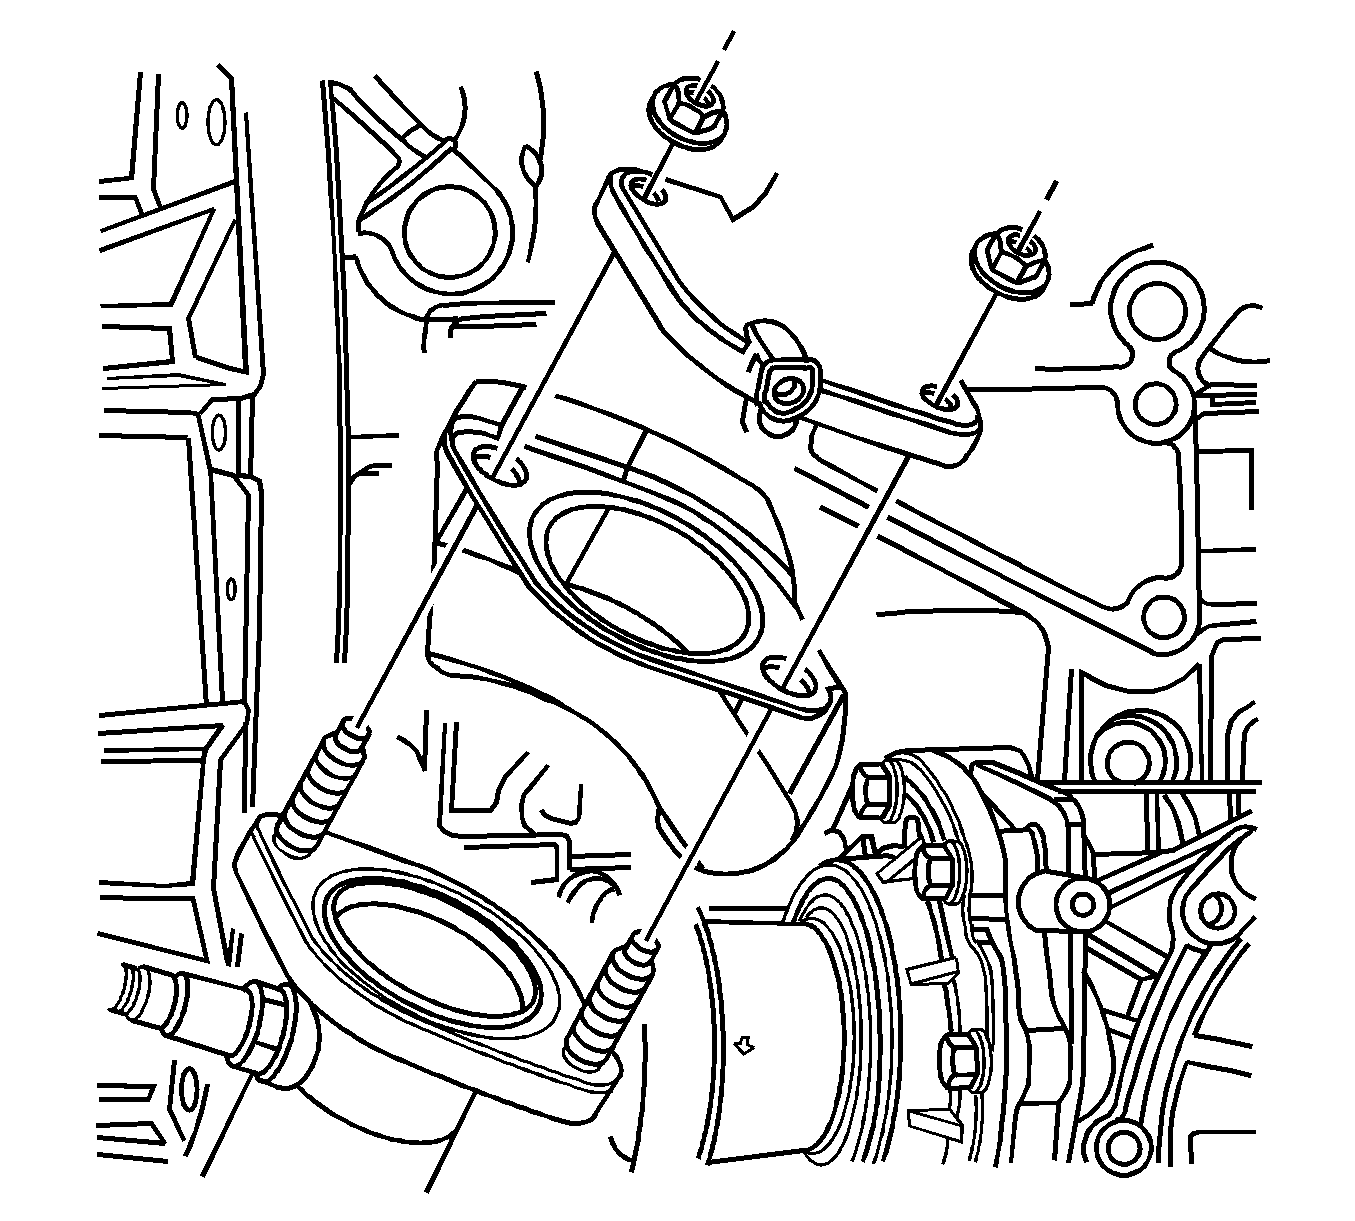
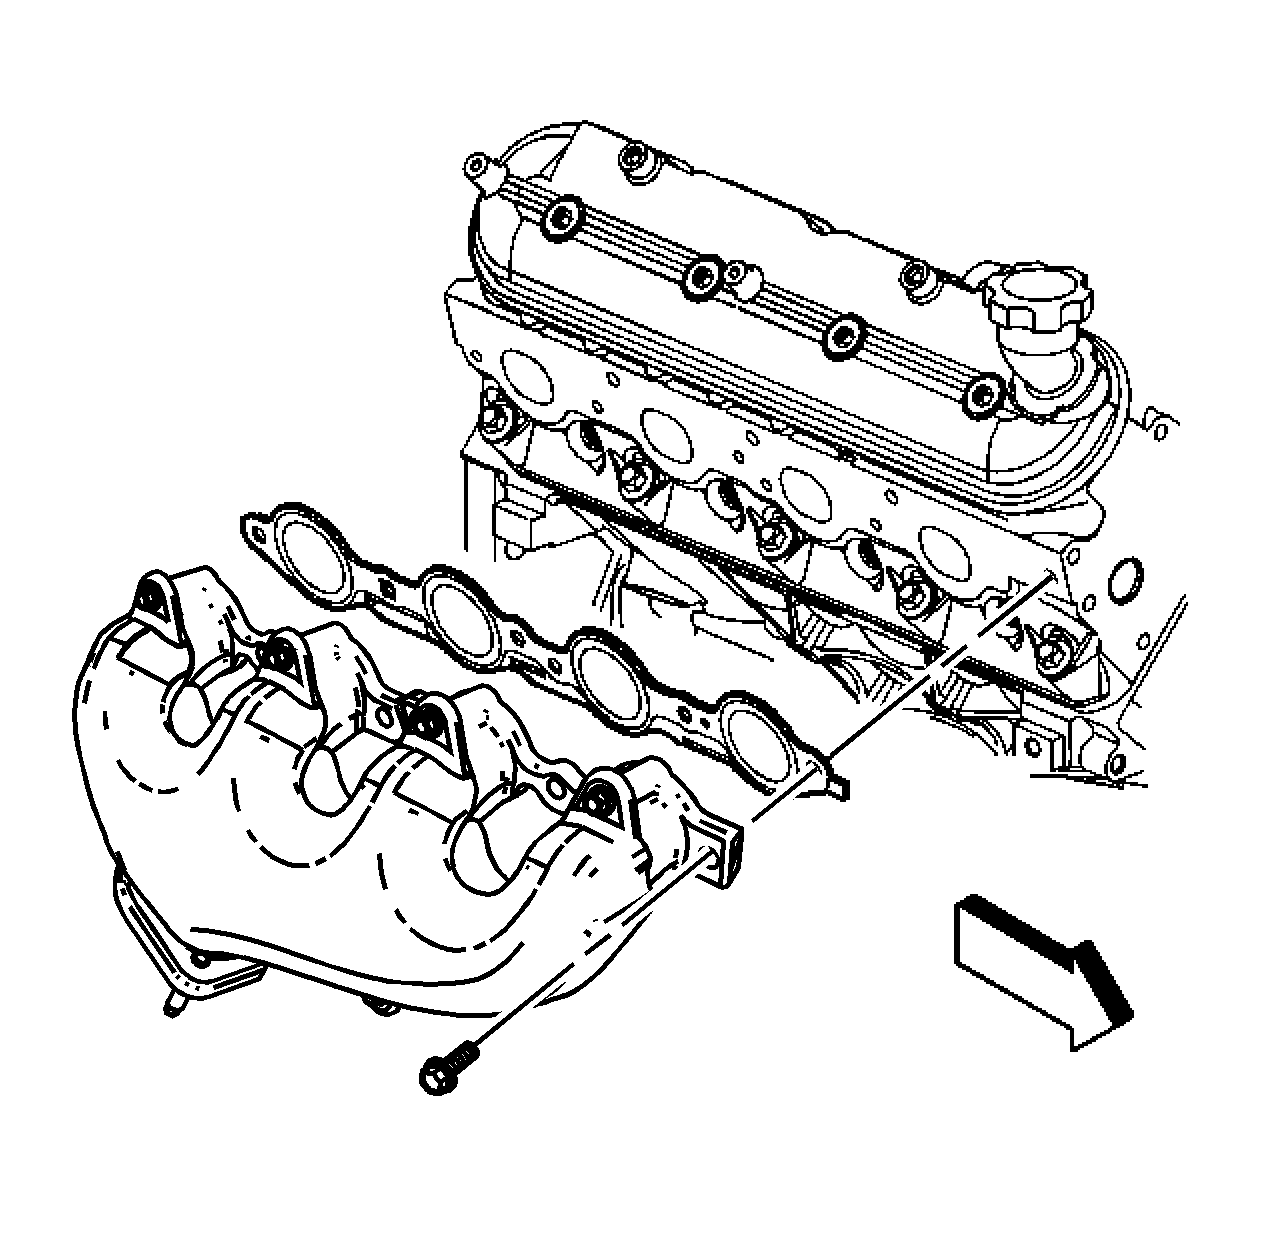
- Remove the exhaust manifold heat shield. Refer to Exhaust Manifold Heat Shield Replacement - Right Side .
- Remove the catalytic converter nuts.
- Remove the exhaust manifold bolts.
- Remove the exhaust manifold and discard the exhaust manifold gasket.
- Clean and inspect the exhaust manifold. Refer to Exhaust Manifold Cleaning and Inspection - Left Side .
Important: Do not reuse the gasket.
Installation Procedure
- Install the catalytic converter seal/heat shield to the catalytic converter.
- Install a NEW exhaust manifold gasket to the exhaust manifold.
- Install the exhaust manifold with the gasket to the catalytic converter and the cylinder head.
- Install the exhaust manifold bolts.
- Install the catalytic converter nuts.
- Install the exhaust manifold heat shield. Refer to Exhaust Manifold Heat Shield Replacement - Right Side .
Important: Inspect the catalytic converter seal/heat shield sealing surface. Replace the seal/heat shield if the sealing surface is worn or damaged.
Notice: Refer to Fastener Notice in the Preface section.
Tighten
Tighten the exhaust manifold bolts to 20 N·m (15 lb ft).
Tighten
Tighten the catalytic converter nuts to 50 N·m (37 lb ft).
Exhaust Manifold Replacement - Right Side LS6
Removal Procedure
- Remove the fuel injector sight shield. Refer to Fuel Injector Sight Shield Replacement in Engine Mechanical - 5.7L.
- Remove the right bank coil assembly. Refer to Ignition Coil Replacement in Engine Controls - 5.7L.
- Remove the right bank spark plugs. Refer to Spark Plug Replacement in Engine Controls - 5.7L.
- Remove the oil level dipstick tube. Refer to Oil Level Indicator and Tube Replacement in Engine Mechanical - 5.7L.
- Raise and suitably support the vehicle. Refer to Lifting and Jacking the Vehicle in General Information.
- Remove the right catalytic converter. Refer to Catalytic Converter Replacement - Right Side .
- Remove the starter motor. Refer to Starter Motor Replacement in Engine Electrical.
- Lower the vehicle.
- Remove the exhaust manifold bolts.
- Raise and suitably support the vehicle. Refer to Lifting and Jacking the Vehicle in General Information.
- Remove the exhaust manifold, bolts, and gasket. Discard the gasket.
- Remove the heat shield from the manifold, if required.
- Clean and inspect the exhaust manifold. Refer to Exhaust Manifold Cleaning and Inspection in Engine Mechanical - 5.7L.
Installation Procedure
Important: Tighten the exhaust manifold bolts as specified in the service procedure. Improperly installed and/or leaking exhaust manifold gaskets may effect vehicle emissions and/or On-Board Diagnostics (OBD) II system performance.
The cylinder head exhaust manifold bolt hole threads must be cleaned and free of debris or threadlocking material.- If necessary, install the exhaust manifold heat shield and bolts.
- Position the exhaust manifold and a NEW gasket into place.
- Lower the vehicle.
- Install the exhaust manifold bolts. Refer to Exhaust Manifold Installation - Right Side in Engine Mechanical - 5.7L.
- Raise and suitably support the vehicle. Refer to Lifting and Jacking the Vehicle in General Information.
- Install the starter motor. Refer to Starter Motor Replacement in Engine Electrical.
- Install the right catalytic converter. Refer to Catalytic Converter Replacement - Right Side .
- Lower the vehicle.
- Install the right bank spark plugs. Refer to Spark Plug Replacement in Engine Controls - 5.7L.
- Install the right bank coil assembly. Refer to Ignition Coil Replacement in Engine Controls - 5.7L.
- Install the oil level dipstick tube. Refer to Oil Level Indicator and Tube Replacement in Engine Mechanical - 5.7L.
- Install the fuel injector sight shield. Refer to Fuel Injector Sight Shield Replacement in Engine Mechanical - 5.7L.
Notice: Refer to Fastener Notice in the Preface section.
Tighten
Tighten the exhaust manifold heat shield bolts to 9 N·m (80 lb in).
