WIND NOISE AND WATER LEAKS ADDITIONAL INFO TO VIDEO TAPE

WIND NOISE AND WATER LEAKS
VEHICLES AFFECTED: 1987-1988 ALLANTE
The following specific subjects are covered in this bulletin:
I. DOOR ALIGNMENT (use Labor Operation B4000-RH, B4001-LH at .3 hour each)
II. DOOR GLASS ADJUSTMENT (use Labor Operation C0100-RH, C0101-LH at .6 hour each)
III. A-PILLAR WIND NOISE AND WATER LEAKS (use the most applicable labor operation from the Canadian Labour Time Guide and claim .8 hour each)
IV. SOFT TOP WIND NOISE AND WATER LEAKS (use the most applicable labor operation from the Canadian Labour Time Guide and claim 1.4 hours each)
V. HARD TOP WIND NOISE AND WATER LEAKS (use the most applicable labor operation from the Canadian Labour Time Guide and claim 2.0 hours each)
The Labor Operations are listed for maximum times, when all steps are not required reduce the time claimed.
The repair procedures in this bulletin should be performed in the order outlined in this bulletin. Since many of the adjustment procedures affect alignment of other components, performing the procedures out of the sequence outlined may not properly repair the condition.
For this same reason, owners should be instructed to bring in their hard top when they come in for service of a wind noise or water leak condition, even if the condition only occurs with the soft top.
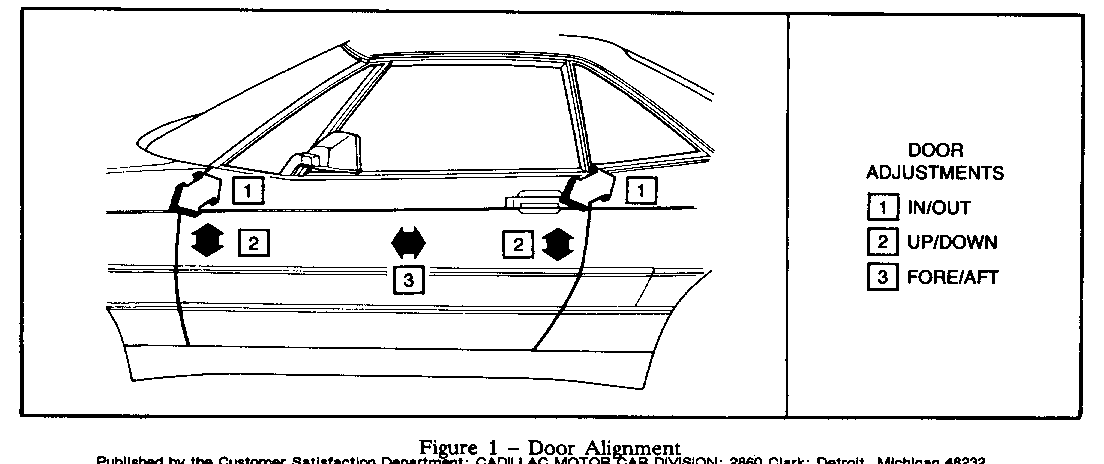
I. DOOR ALIGNMENT -------------- The doors are adjustable in the fore/aft, up/down, and in/out directions (refer to Figure 1). The door should be adjusted if: 1) door drops when released from the striker; 2) the body lines do not maintain proper horizontal positioning at the door; 3) the fit (gap) between the door and adjacent body panels is too tight or too wide; or 4) the door closing effort is excessively hard.
Door Alignment Procedure:
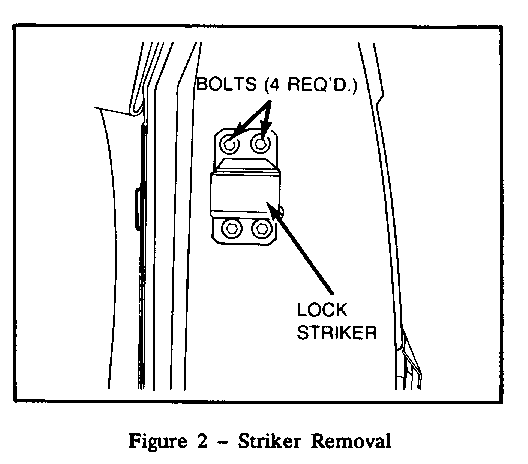
1. Remove striker (refer to Figure 2).
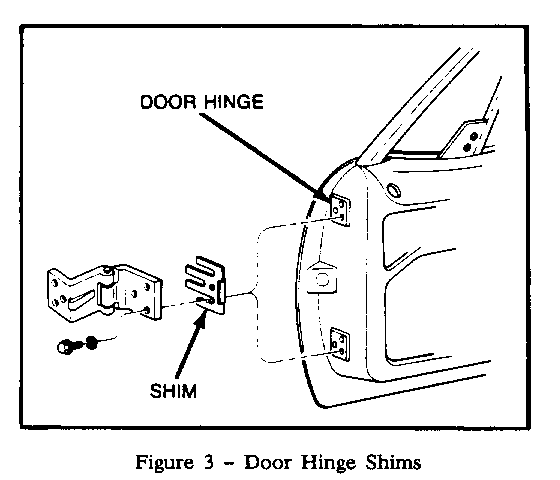
2. Remove/add door hinge shims, P/N 1637576, at hinges to make all adjustments except in/out adjustment at the rear of the door (refer to Figure 3).
3. Install door striker.
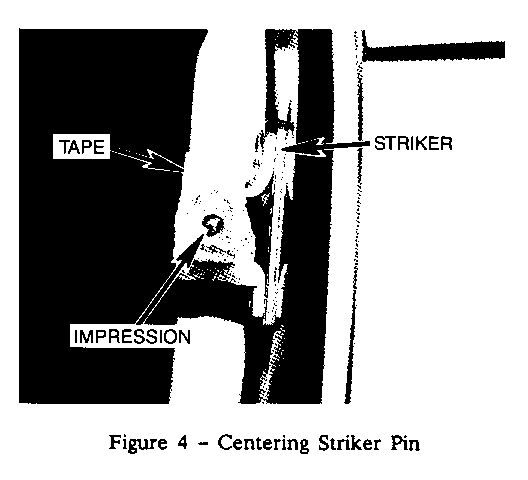
4. Install a piece of masking tape over the striker (refer to Figure 4).
5. Close door enough to make an impression in the tape (refer to Figure 4).
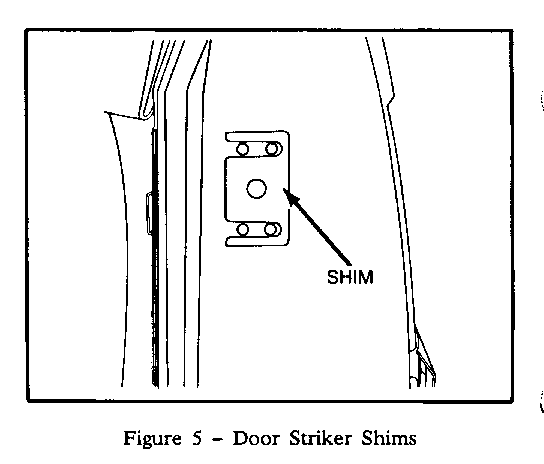
6. Align striker fore/aft so striker pin is centered in striker by adding or removing shims, P/N 1640649 (refer to Figure 5).
7. Tighten striker bolts tight enough to maintain up/down, in/out position but loose enough so striker can still be moved for those adjustments.
8. Align striker up/down so striker pin is centered in the striker by moving striker in its slotted holes.
9. Close door and check for proper door rear in/out positioning. Align door rear in/out position by moving door striker in or out.
10. Open door and tighten striker bolts.
II. DOOR GLASS ADJUSTMENTS ---------------------- The door glass should not be adjusted to the weather strips of the soft top and hard top. The weather strips of the soft top and hard top are adjustable and will be covered later in this bulletin.
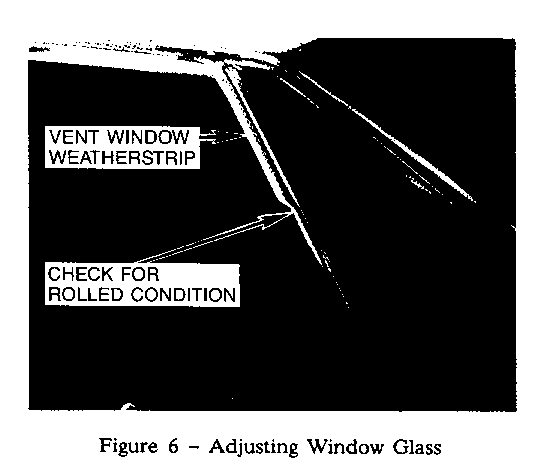
The door glass should only be adjusted if the window has rolled over the vent window weather strip (refer to Figure 6).
Door glass adjustment procedure:
1. Remove the lower door trim panel to access the door glass to regulator mounting nuts. Refer to "Door Glass Remove or Disconnect" in Section 10-5-4 of the 1987 Allante Service information Manual.
2. Scribe the location on the lower sash channel for an indication to maintain the correct height and parallelism.
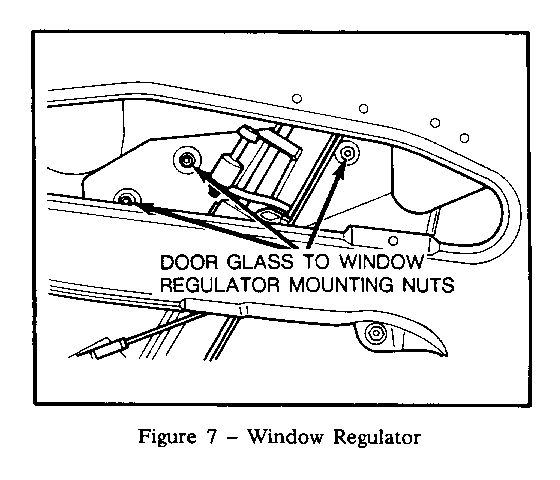
3. Loosen the door glass to regulator mounting nuts (refer to Figure 7).
4. Move the door glass forward.
5. Tighten door glass to regulator mounting nuts.
6. Reinstall lower door trim panel.
III. A-PILLAR WIND NOISE AND WATER LEAKS -----------------------------------
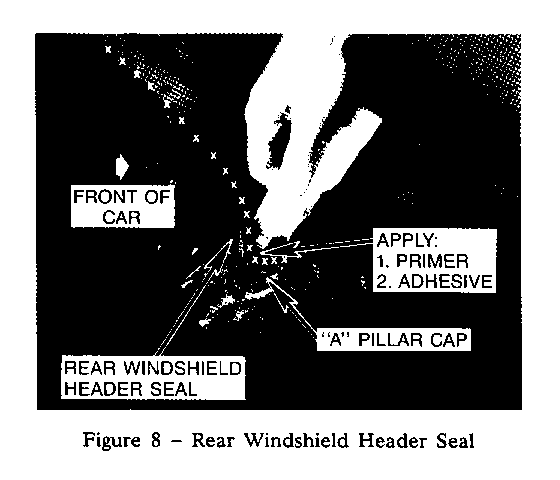
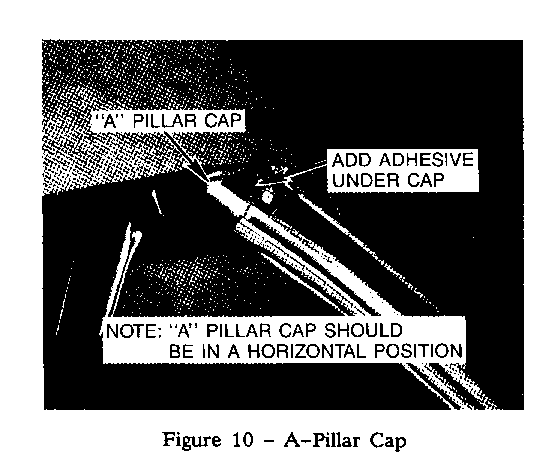
1. Apply windshield primer, kit P/N 993110 or equivalent, under the rear windshield header seal along its entire length and to all exposed edges of the "A" Pillar Cap (refer to Figure 8).
2. Seal under the rear windshield header seal along its entire length and to all exposed edges of the A-Pillar Cap with weather strip adhesive, kit P/N 993110 or equivalent, (refer to Figure 8).
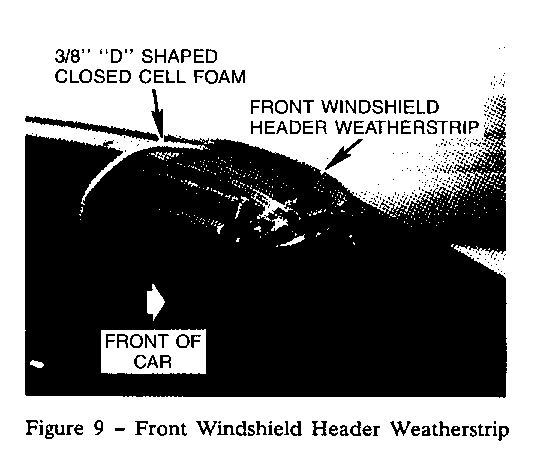
3. Install a strip of 3/8" "D" shaped closed cell foam under the entire length of the front windshield header weather strip (refer to Figure 9).
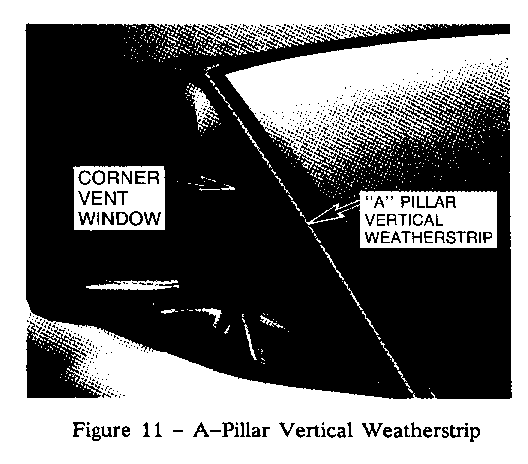
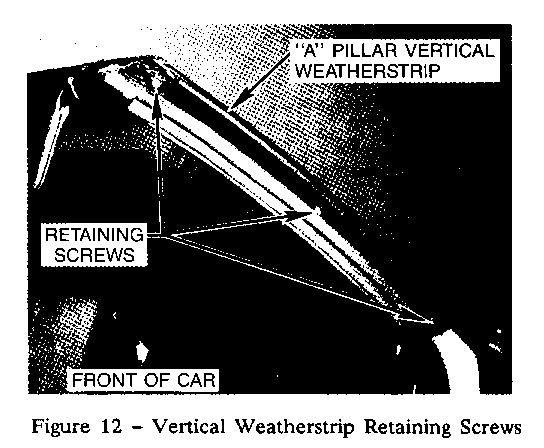
4. The A-Pillar vertical weather strip should form an even seal with the vent frame from top to bottom (refer to Figure 11). Adjust the A-Pillar vertical weather strip with the retaining screws (refer to Figure 12) and by slotting the holes in the weather strip if necessary.
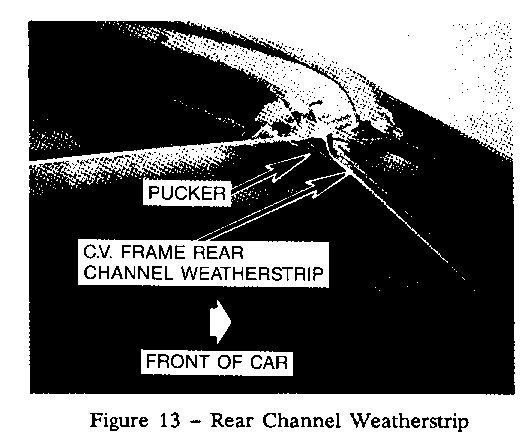
If there is a pucker at the top of the rear channel weather strip (refer to Figure 13), continue with steps 5-11.
5. Remove the C.V. Frame Cap and slide the run channel weather strip out of its retainer a short distance (refer to Figure 14).
6. Inspect to see if there is a foam plug glued to the C.V. Frame Cap (refer to Figure 14).
7. If there is no foam plug, add C.V. Frame Cap Plug, P/N 1648007 RH and 1648008 LH (refer to Figure 102424) . Apply windshield primer, kit P/N 993110 or equivalent, to the C.V. Frame Cap.
8. Apply Loctite 401 or equivalent to the C.V. Frame and plug and install C.V. Frame plug (refer to Figure 14).
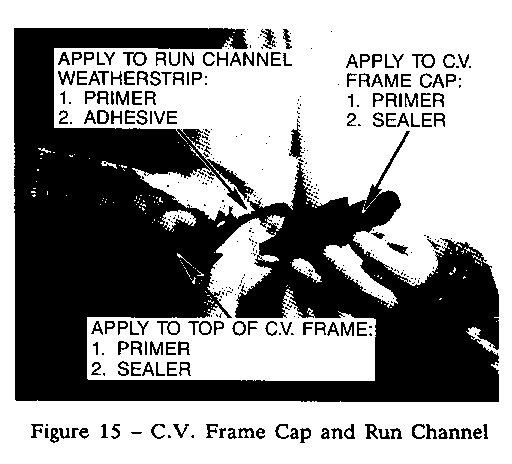
9. Apply windshield primer, kit P/N 993110 or equivalent, to the C.V. Frame Cap, top of C.V. Frame, and run channel weather strip (refer to Figure 15).
10. Apply adhesive, kit P/N 993110 or equivalent, to the C.V. Frame Cap, top of C.V. Frame, and run channel weather strip, and reinstall run channel weather strip and C.V. Frame Cap.
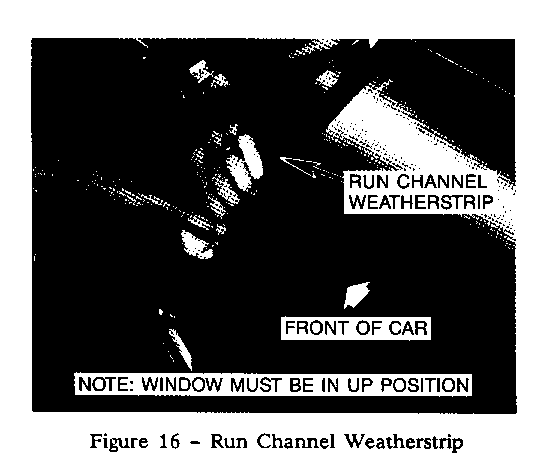
11. Raise window and hold down on the run channel to relieve the pucker until the adhesive sets (refer to Figure 16).
Up to this point we have addressed areas that are common to both the soft and hard top. If the wind noise or water leak occurs with only the soft top or only the hard top installed, go directly to the procedures for that specific top.
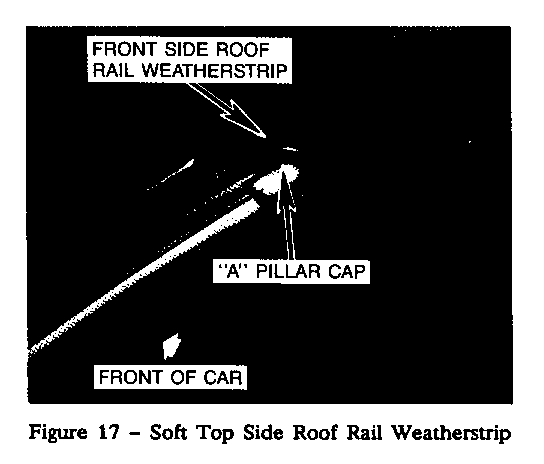
IV. SOFT TOP WIND NOISE AND WATER LEAKS ----------------------------------- A. Soft top wind noise and water leak at the A-Pillar repair procedure. The soft top side roof rail weather strip must sit approximately 1/16" outboard of the A-Pillar Caps (refer to Figure 17).
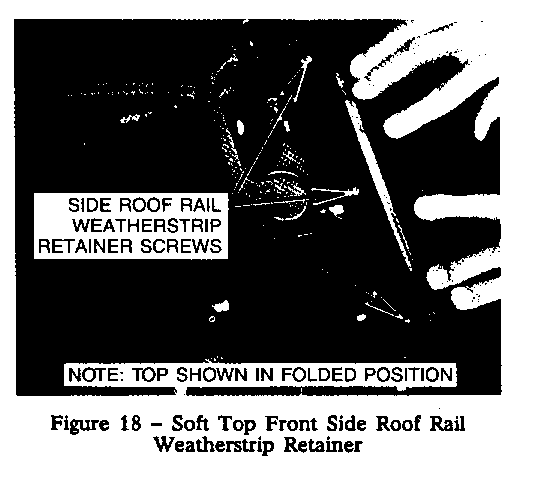
1. If there is insufficient door glass to weather strip contact, adjust the soft top front side roof rail weather strip by loosening the three weather strip retainer mounting screws (refer to Figure 18). Adjust outboard as needed.
B. Soft top wind noise and water leak at the top of the door glass to the side roof rail weather strips repair procedure.
1. Remove side roof rail weather strip retainers attachment screws.
2. Install 1/8" flat washers between the side roof rail weather strip retainers and the side roof rail retainer at the retaining screw locations.
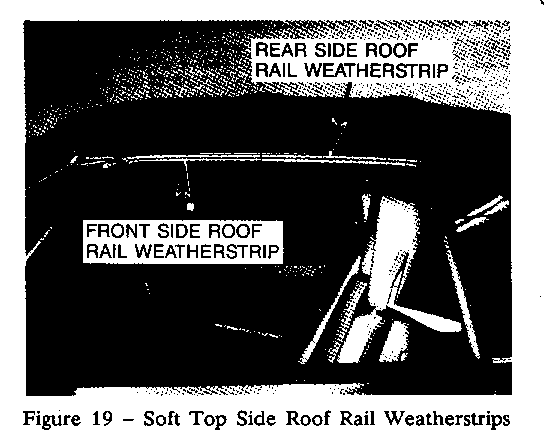
C. Soft top wind noise and water leak between the front and rear side roof rail weather strips repair procedure (refer to Figure 19).
This condition may be caused by one of the weather strips sitting outboard of the other, or if the weather strip butt joints meet with excessive force forcing both inboard or outboard.
The weather strips should meet with just enough pressure to maintain a good seal without distorting.
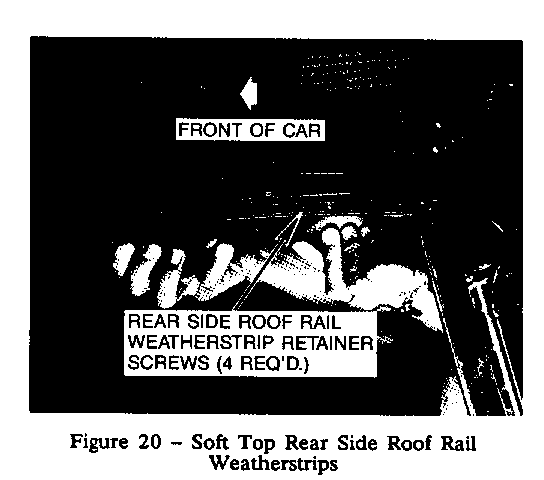
1. Loosen the rear weather strip retainer attachment screws (refer to Figure 20).
2. Move the rear weather strip in or out to be flush with the front weather strip. (The front weather strip was already adjusted in or out to align with the door glass).
3. Tighten rear weather strip retainer attachment screws.
4. Move the rear weather strip fore or aft in its retainer until the weather strips meet with proper force. (The front weather strip can also be moved fore and aft if there isn't sufficient adjustment to the rear weather strip.)
NOTE: Weather strip may be crimped to weather strip retainer.
D. Soft top wind noise and water leaks at the top rear corner of the door glass or along the quarter glass weather strip to door glass seal repair procedure.
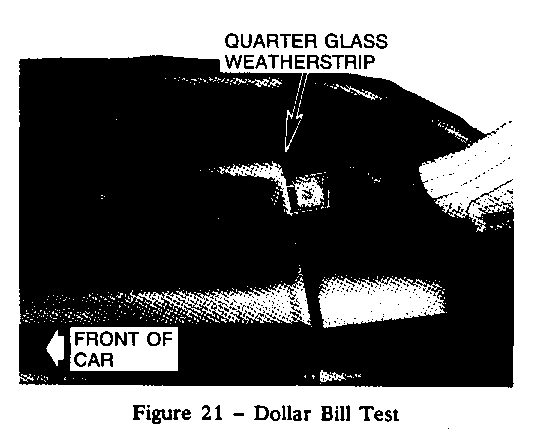
1. Insert a dollar bill or similar weight paper between the door glass and quarter glass weather strip (refer to Figure 21).
2. Pull the dollar bill from between the door glass and quarter glass weather strip. Medium to firm tension on the bill should be present.
3. If adjustment at the top of the quarter glass weather strip is necessary, the quarter glass should be adjusted inboard or outboard by installing or removing shims, P/N 1638640, from behind the quarter glass hinge (refer to Figure 22).
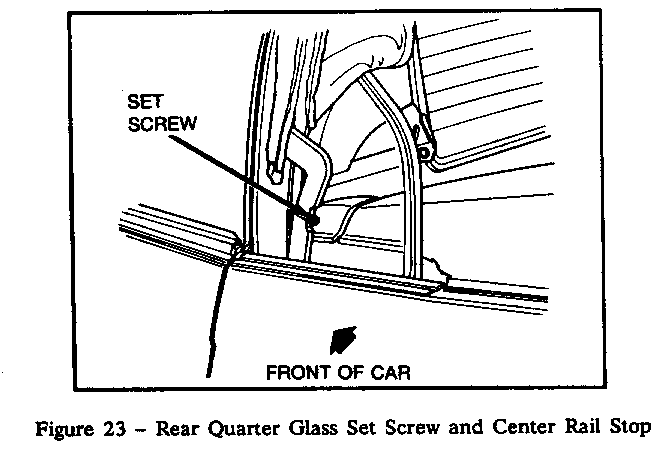
4. If adjustment at the bottom of the quarter glass weather strip is necessary, adjust the set screw located on the bottom of the rear soft top bow (refer to Figure 23). Adjusting the screw out (counterclockwise) will bring the bottom of the quarter glass out and adjusting the screw in (clockwise) will bring the bottom of the quarter glass in.
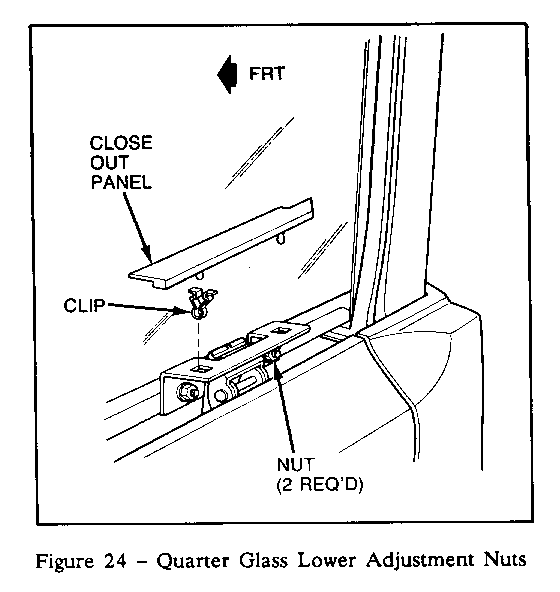
5. If adjustment of the entire quarter glass weather strip fore and aft is necessary, loosen the quarter glass adjustment nuts (refer to Figures 23 and 24) and move quarter glass fore and aft. Tighten nuts.
V. HARD TOP WIND NOISE AND WATER LEAKS ----------------------------------- A. Hard top wind noise and water leak at the A-Pillar repair procedure.
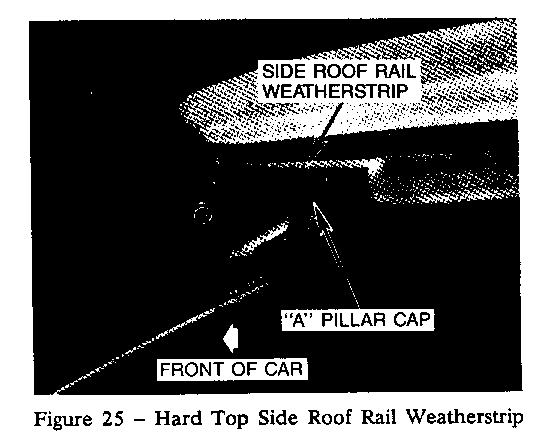
With the hard top properly installed, the hard top side roof rail weather strip should sit approximately 1/16" outboard of the A-Pillar Cap (refer to Figure 25).
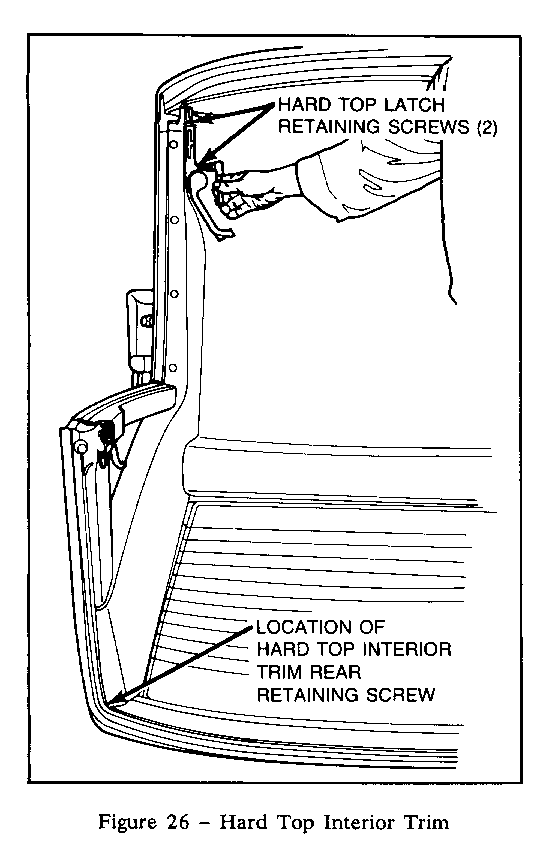
1. Remove hard top and interior trim to expose the side roof rail weather strip retainer (refer to Figure 26).
2. Loosen the four side roof rail weather strip retainer bolts.
3. Adjust side roof rail weather strip until it sits 1/16" outboard of the A-Pillar Cap.
4. Tighten screws.
5. Reinstall adjustment screw covers.
B. Hard top water leak at the side roof rail weather strip adjustment screw covers repair procedure.
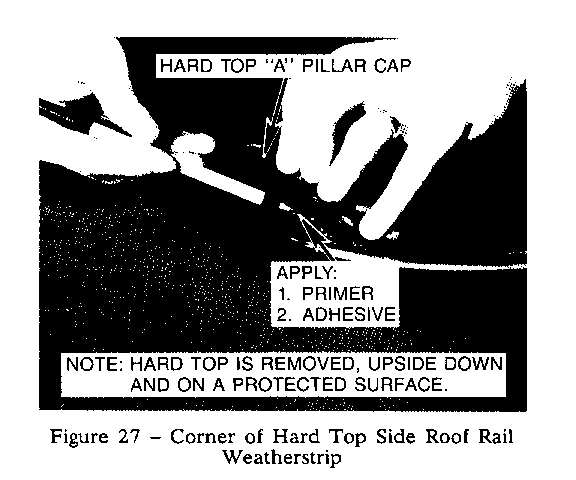
1. Apply windshield primer, kit P/N 993110 or equivalent, to the corner of hard top side roof rail weather strip (refer to Figure 27).
2. Apply windshield adhesive, kit P/N 993110 or equivalent, to the corner of hard top side roof rail weather strip (refer to Figure 27).
C. Hard top wind noise and water leak between the top of the door glass and the side roof rail weather strip repair procedure.
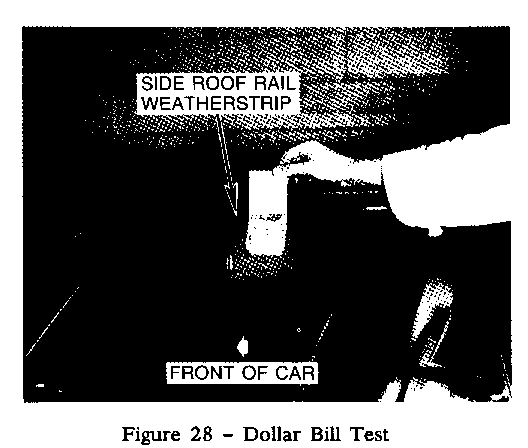
1. Insert a dollar bill or similar weight paper between the top of the door glass and the side roof rail weather strip (refer to Figure 28).
2. Pull the dollar bill from between the door glass and the side roof rail weather strip. Medium to firm tension on the bill should be present.
3. If adjustment is required, remove the hard top and interior trim to expose the side roof rail weather strip retainer (refer to Figure 26).
4. Loosen the four side roof rail weather strip retainer bolts.
5. Move the side roof rail weather strip outboard.
6. Tighten four side roof rail weather strip retainer bolts.
7. Reinstall hard top and check for proper adjustment using a dollar bill.
8. Remove hard top.
9. Reinstall interior trim and hard top.
D. Hard top wind noise and water leak at the side roof rail weather strip repair procedure.
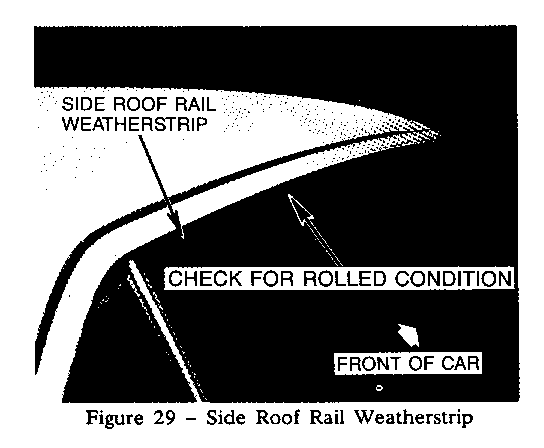
Check side roof rail weather strip for an inward roll (refer to Figure 29).
1. Remove hard top and interior trim to expose the weather strip retainer.
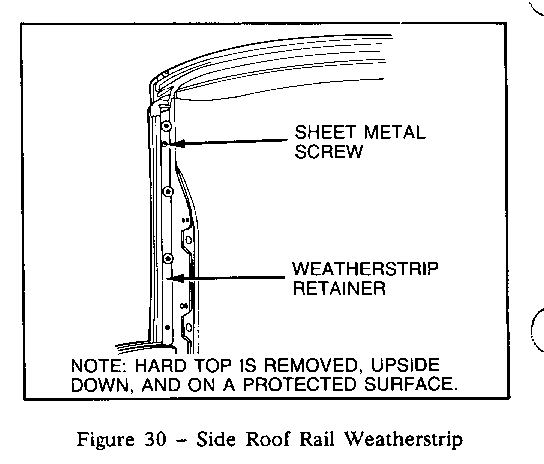
2. Using a 7/64" bit, drill a hole through the outboard edge of the side roof rail weather strip retainer and the side roof rail (refer to Figure 30).
3. Using a 9/64" bit, enlarge the hole in the weather strip retainer.
4. Install a 4.2 x 1.41 x 13mm sheet metal screw, P/N 11501133.
5. Reinstall interior trim and hard top.
E. Hard top wind noise and water leak at the top rear corner of the door glass repair procedure.
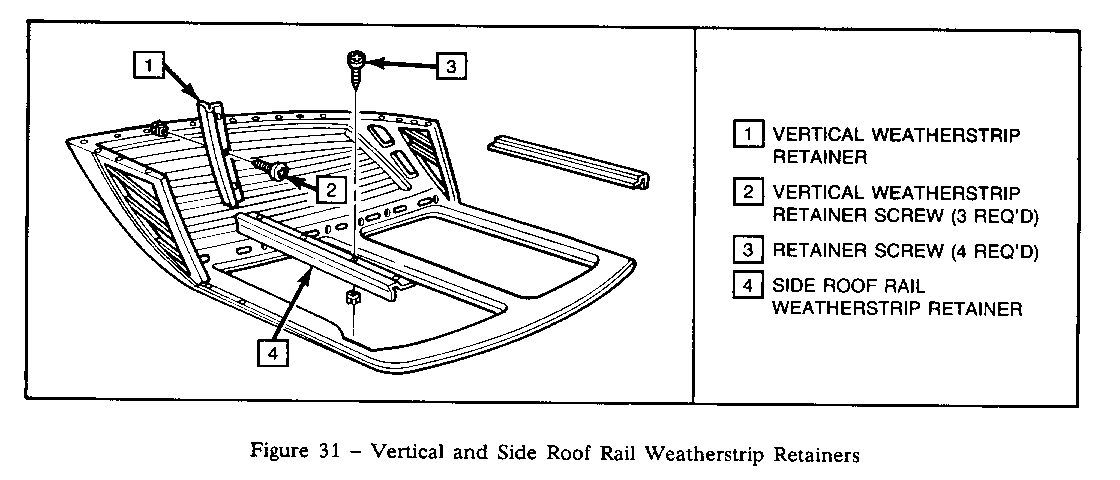
1. Remove the side and vertical weather strip retainers (refer to Figure 31).
2. Apply windshield primer, kit P/N 993110 or equivalent, to the corner of the hard top.
3. Apply weather strip adhesive, kit P/N 993110 or equivalent, to the corner of the hard top.
4. Apply a light bead of adhesive, kit P/N 993110 or equivalent, along the retainers and reinstall.
F. Hard top wind noise and water leak between the door glass and vertical weather strip repair procedure.
1. Insert a dollar bill or similar weight paper between the door glass and the vertical weather strip.
2. Pull the dollar bill from between the door glass and vertical weather strip. Medium to firm tension on the bill should be present.
3. If adjustment is required, remove hard top.
4. Remove hard top B-Pillar trim.
5. Loosen three vertical weather strip retaining screws (refer to Figure 31).
6. Move the weather strip outboard.
7. Tighten vertical weather strip retaining screws.
8. Reinstall hard top.
9. Check for proper adjustment using a dollar bill.
10. Remove hard top.
11. Reinstall hard top trim and hard top.
General Motors bulletins are intended for use by professional technicians, not a "do-it-yourselfer". They are written to inform those technicians of conditions that may occur on some vehicles, or to provide information that could assist in the proper service of a vehicle. Properly trained technicians have the equipment, tools, safety instructions and know-how to do a job properly and safely. If a condition is described, do not assume that the bulletin applies to your vehicle, or that your vehicle will have that condition. See a General Motors dealer servicing your brand of General Motors vehicle for information on whether your vehicle may benefit from the information.
