For 1990-2009 cars only
Removal Procedure
- Raise and support the vehicle. Refer to Lifting and Jacking the Vehicle.
- Remove the right front tire and wheel. Refer to Tire and Wheel Removal and Installation.
- Remove the right engine splash shield. Refer to Engine Splash Shield Replacement.
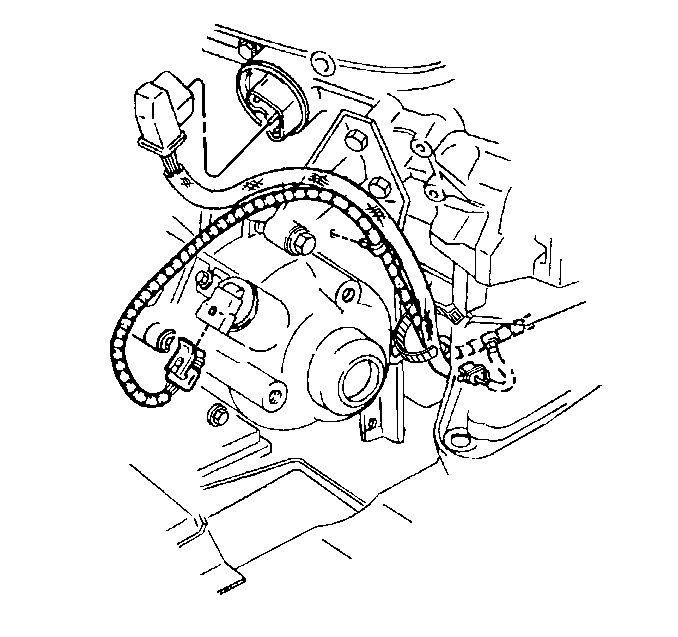
- Disconnect the vehicle speed sensor wiring harness connector.
- Remove the vehicle speed sensor bolt (9).
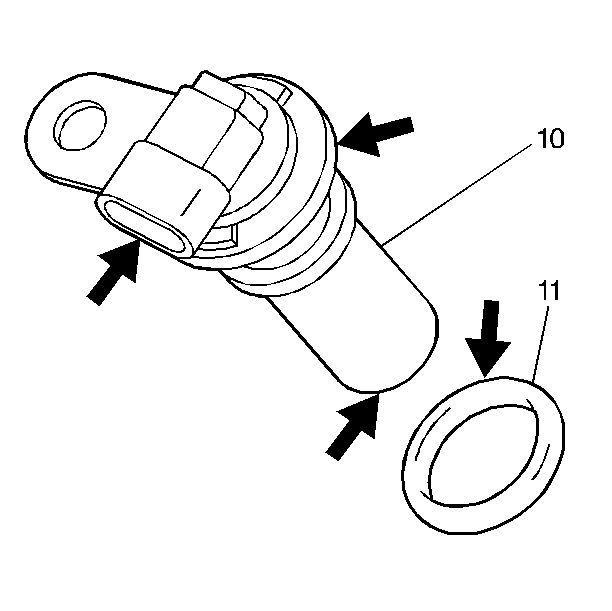
- Remove the vehicle speed sensor (10) from the extension case.
- Remove the O-ring seal (11) from the vehicle speed sensor (10).
- Inspect the vehicle speed sensor and O-ring seal for the following:

Important: Handle the vehicle speed sensor (10) carefully.
| • | Damaged connector |
| • | Cracked housing |
| • | Signs of rotor damage |
| • | Cuts or nicks on the O-ring seal (11) |
Installation Procedure
- Install the O-ring seal (11) to the vehicle speed sensor (10).
- Install the vehicle speed sensor to the extension case.
- Install the vehicle speed sensor bolt (9).
- Connect the vehicle speed sensor wiring harness connector.
- Install the right engine splash shield. Refer to Engine Splash Shield Replacement.
- Install the right front tire and wheel. Tire and Wheel Removal and Installation.
- Lower the vehicle.
Notice: Refer to Fastener Notice in the Preface section.
Tighten
Tighten the bolt to 12 N·m (106 lb in).
