Generator Replacement RPO LX9
The generator does not require periodic lubrication. The rotor shaft is mounted on bearings. Each bearing contains a permanent grease supply. Periodically check the mounting bolts for tightness, and the drive belt tension. The drive belt is self-adjusting, within the operating limits of the tensioner. Refer to Drive Belt Tensioner Diagnosis in Engine Mechanical - 3.5L for tensioner information.
Removal Procedure
Important: Service the generator as a complete unit.
- Disconnect the negative battery cable. Refer to Battery Negative Cable Disconnection and Connection .
- Remove the wiper motor module. Refer to Windshield Wiper System Module Replacement in Wipers/ Washer Systems.
- Rotate the engine forward. Refer to Rotating the Engine for Service Access in Engine Mechanical - 3.5L.
- Remove the drive belt. Refer to Drive Belt Replacement in Engine Mechanical - 3.5L.
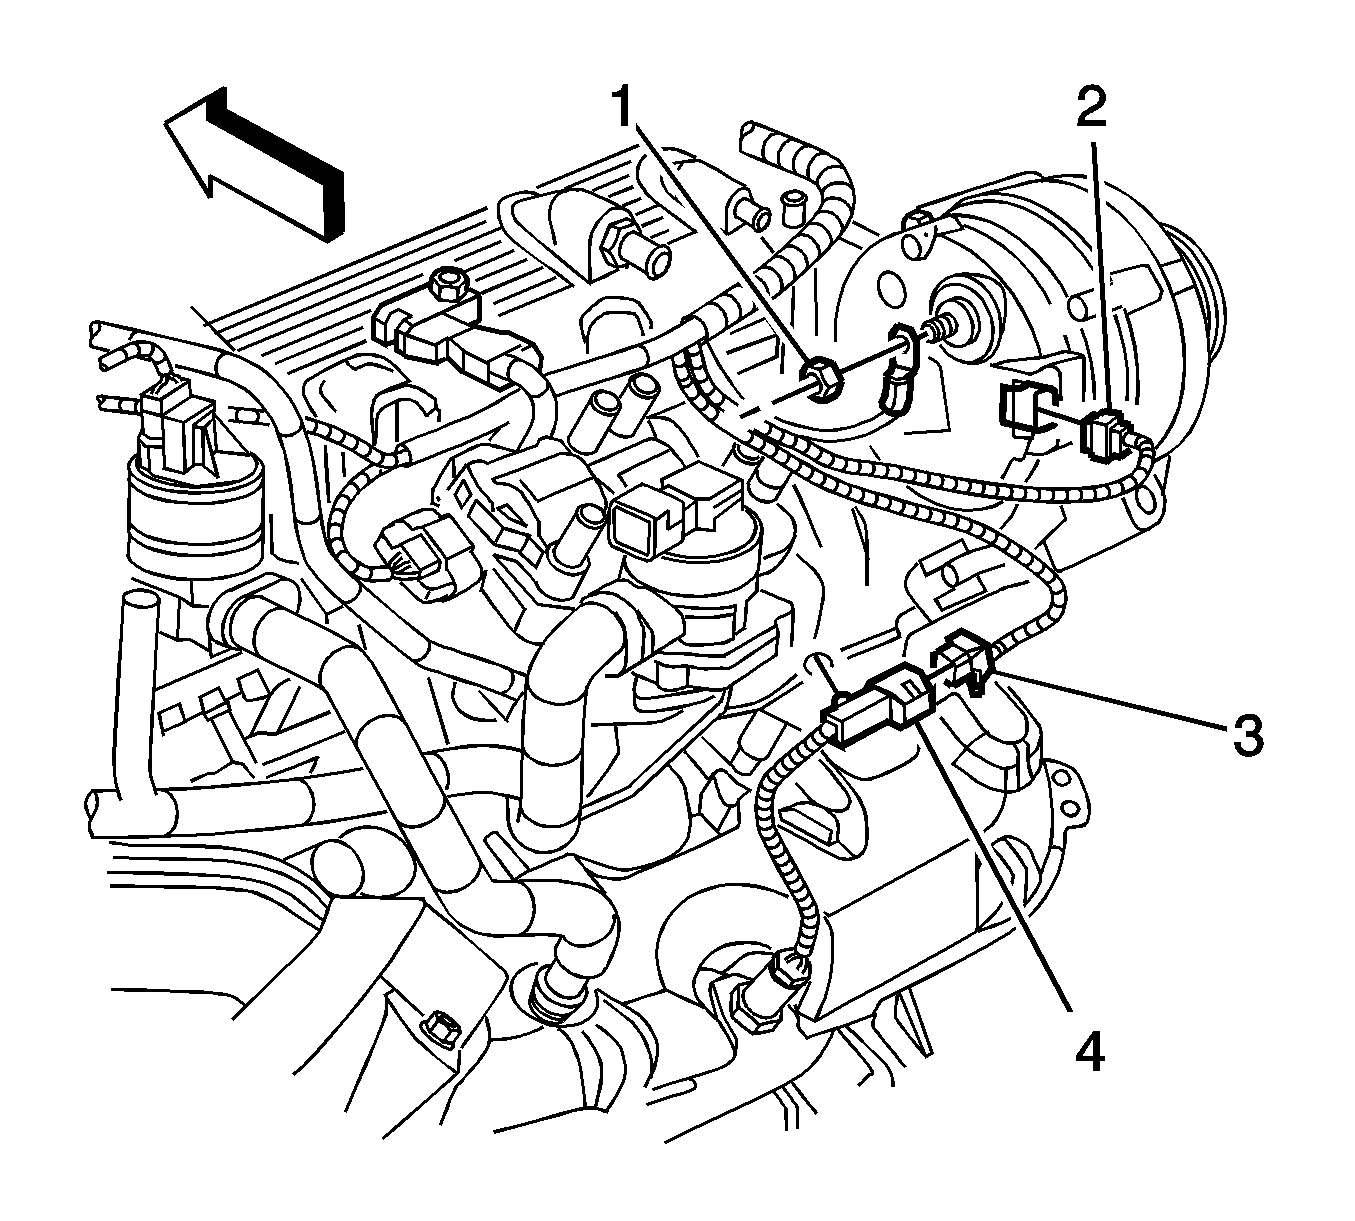
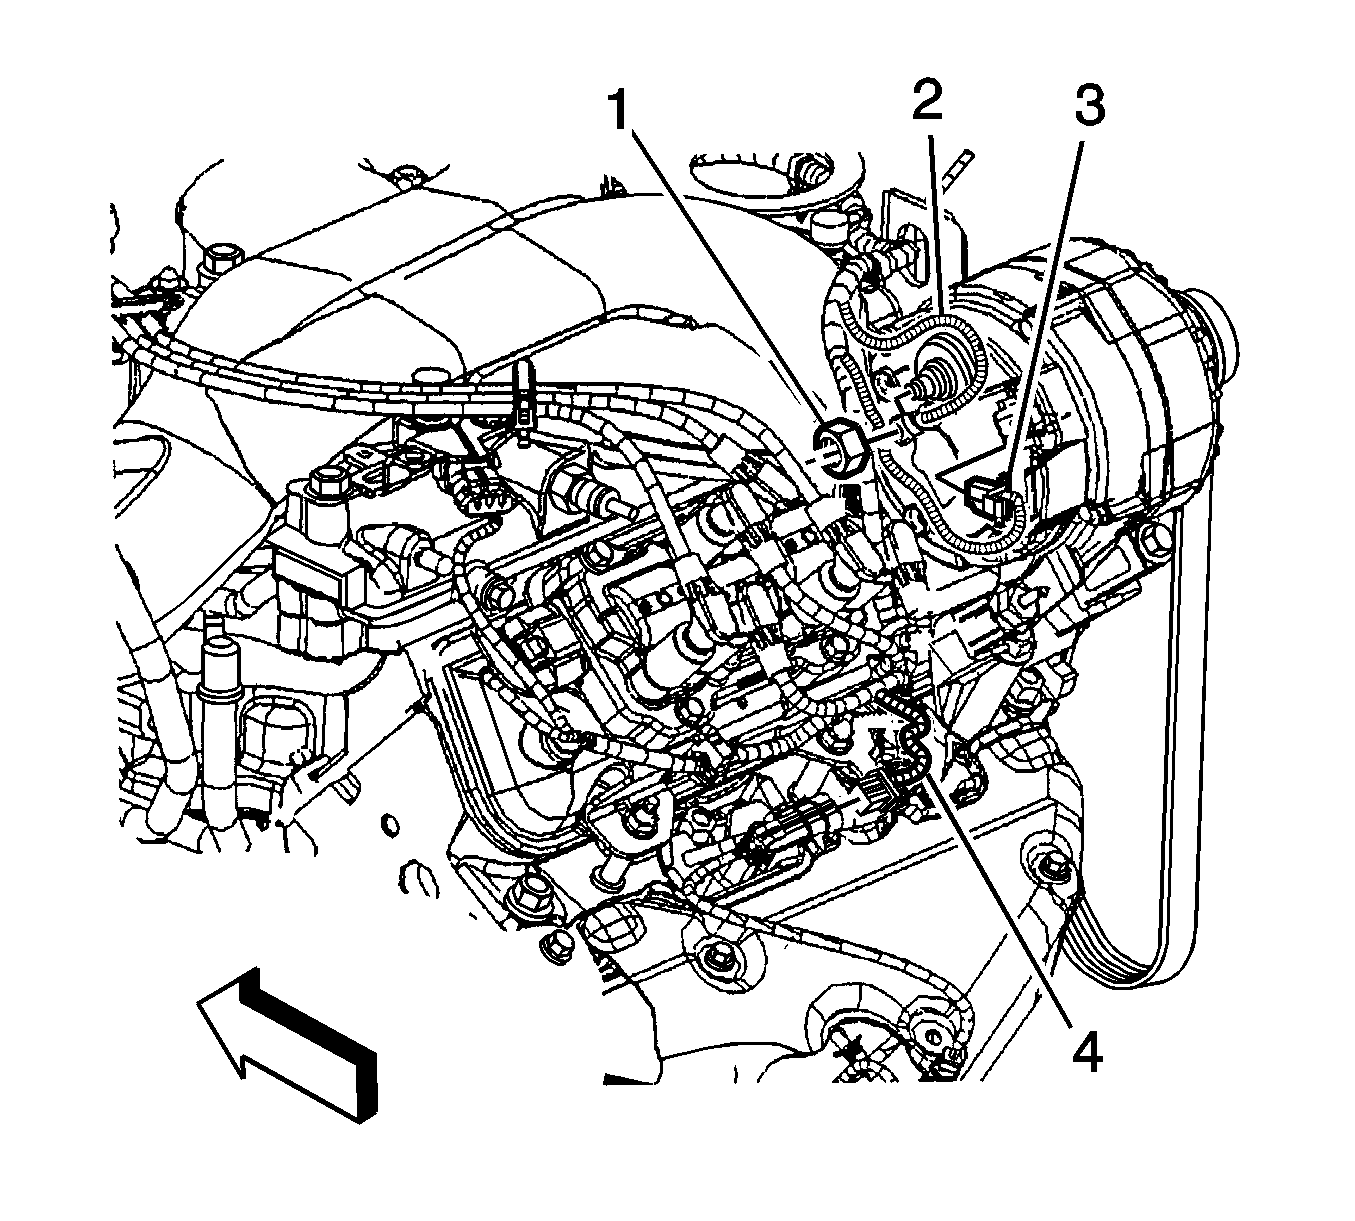
- Remove the generator battery positive nut (1) and remove the terminal.
- Disconnect the regulator electrical connector (2).
- Remove the generator mounting bolts.
- Remove the generator.
Installation Procedure
- Install the generator .
- Install the generator mounting bolts.
- Install the terminal and generator battery positive nut (1).
- Connect the regulator electrical connector (2).
- Install the drive belt. Refer to Drive Belt Replacement in Engine Mechanical - 3.5L.
- Position the engine into the normal location and install the engine mount strut bolts. Refer to Engine Mount Strut Replacement - Left Side and Engine Mount Strut Replacement - Right Side in Engine Mechanical - 3.5L.
- Install the wiper motor module. Refer to Windshield Wiper System Module Replacement in Wipers/Washer Systems.
- Connect the negative battery cable. Refer to Battery Negative Cable Disconnection and Connection .
Notice: Refer to Fastener Notice in the Preface section.
Tighten
Tighten the bolts to 50 N·m (37 lb ft).
Tighten
Tighten the nut to 30 N·m (22 lb ft).
Generator Replacement RPO LZ9
The generator does not require periodic lubrication. The rotor shaft is mounted on bearings. Each bearing contains a permanent grease supply. Periodically check the mounting bolts for tightness, and the drive belt tension. The drive belt is self-adjusting, within the operating limits of the tensioner. Refer to Drive Belt Tensioner Diagnosis .
Removal Procedure
Important: Service the generator as a complete unit.
- Disconnect the negative battery cable. Refer to Battery Negative Cable Disconnection and Connection .
- Remove the washer solvent container. Refer to Windshield Washer Solvent Container Replacement .
- Disconnect the windshield wiper transmission link in front of the wiper motor and position out of the way. Refer to Windshield Wiper System Module Replacement .
- Rotate the engine forward. Refer to Rotating the Engine for Service Access .
- Remove the drive belt. Refer to Drive Belt Replacement .
- Remove the engine harness to generator output wire nut.
- Remove the engine harness output wire from the generator.
- Disconnect the engine harness electrical connector (3) from the generator.
- Remove the nut holding the power steering lines to the stud on back of generator.
- Position the power steering lines aside.
- Disconnect the wire harness from the retainers on the upper and lower right front shock tower.
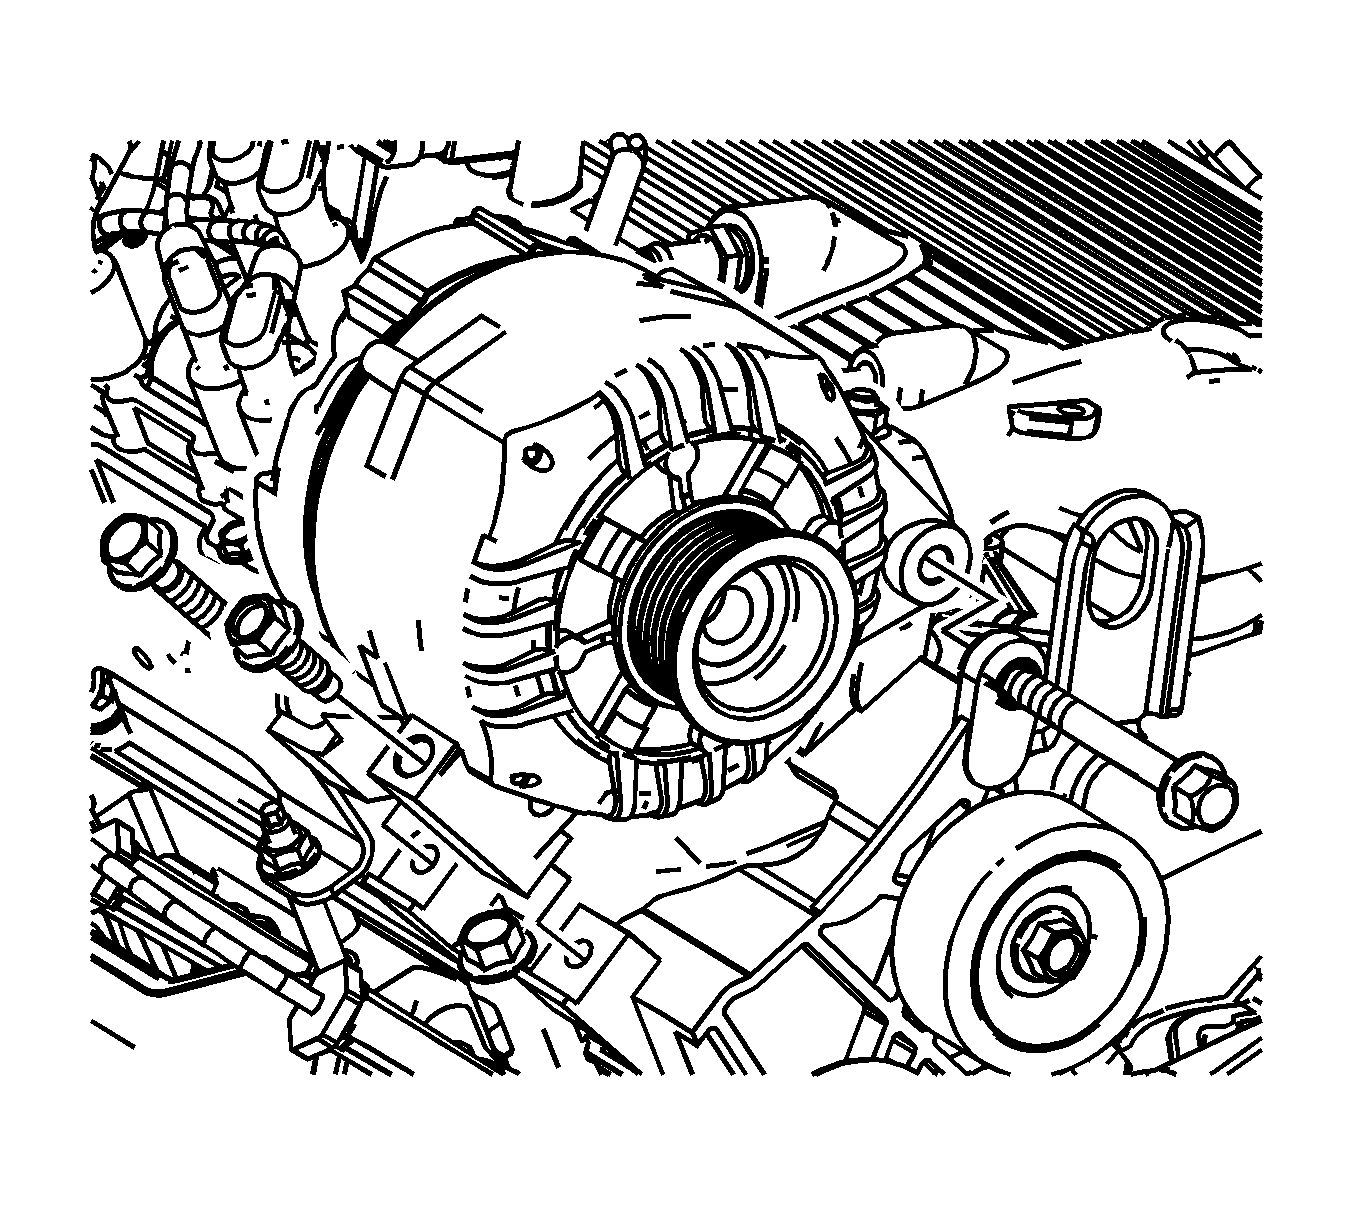
- Remove the idler pulley bolt and pulley on the right front side of the engine.
- Remove the generator lower bolt and stud.
- Remove the generator upper bolt (3).
- Remove the generator.

Installation Procedure
- Install the generator.
- Install the generator lower bolt and stud until snug.
- Install the generator upper bolt (3).
- Install the idler pulley and bolt on the right front side of the engine.
- Connect the wire harness to the retainers on the upper and lower right front shock tower.
- Position the power steering lines and retainer to the stud on the generator bracket.
- Install the nut holding the power steering lines on the back of the generator.
- Connect the engine harness electrical connector (3) to the generator.
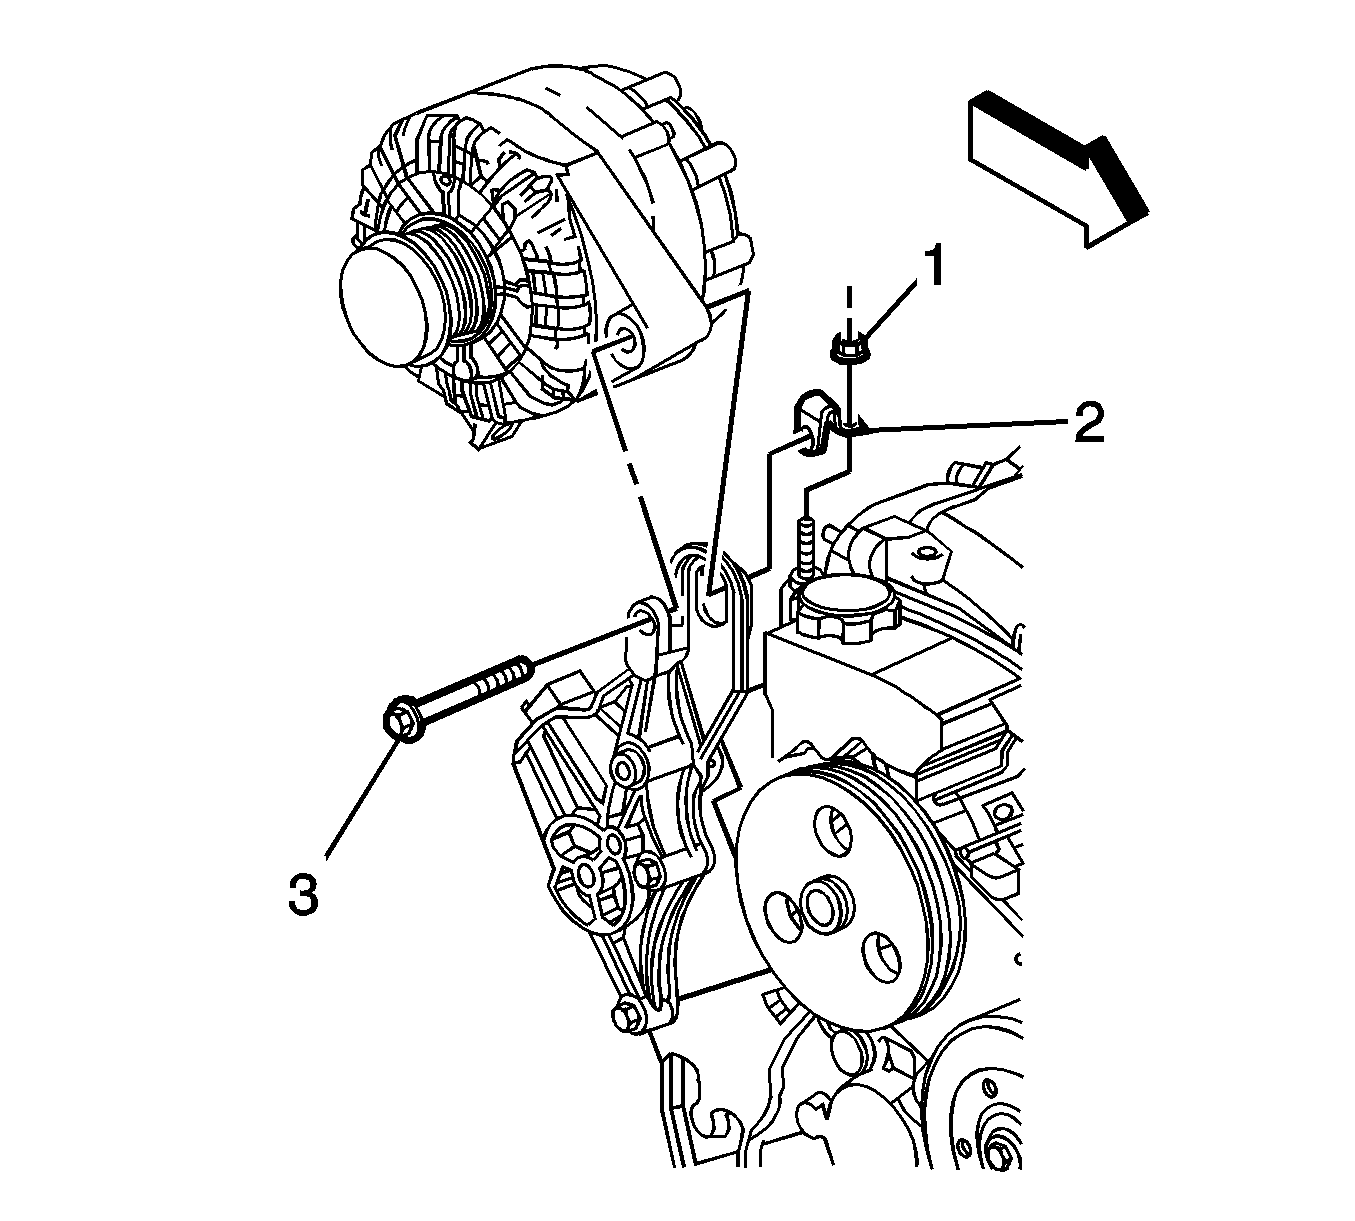
- Install the engine harness ground (2) to the generator.
- Install the engine harness ground nut (1).
- Install the drive belt. Refer to Drive Belt Replacement .
- Position the engine into the normal location and install the engine mount strut bolts. Refer to Engine Mount Strut Replacement - Left Side and Engine Mount Strut Replacement - Right Side .
- Connect the windshield wiper transmission. Refer to Windshield Wiper System Module Replacement .
- Install the washer solvent container. Refer to Windshield Washer Solvent Container Replacement .
- Connect the negative battery cable. Refer to Battery Negative Cable Disconnection and Connection .
Notice: Refer to Fastener Notice in the Preface section.
Tighten
Tighten the bolts/stud to 50 N·m (37 lb ft).
Tighten
Tighten the nut to 30 N·m (22 lb ft).
