For 1990-2009 cars only
Removal Procedure
- Set the HVAC controls in the vent setting to close the defroster door.
- Remove the instrument panel (I/P) carrier. Refer to Instrument Panel Carrier Replacement in Instrument Panel, Gages, and Console.
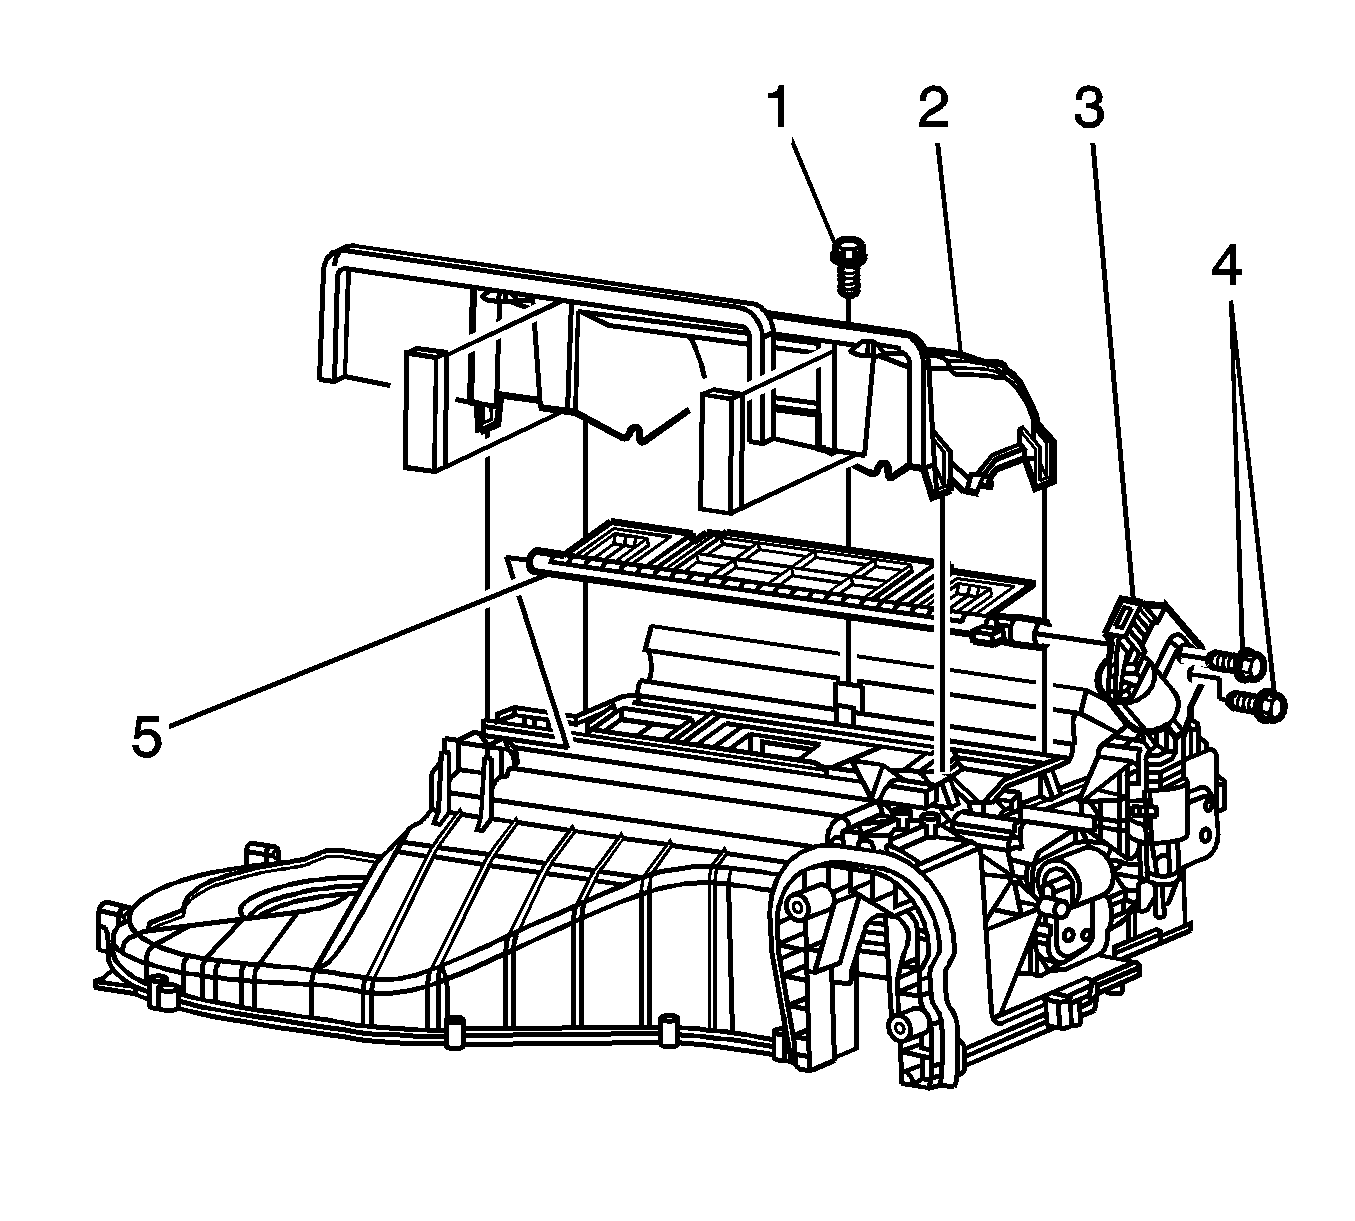
- Remove the defroster cover bolts/screws (1).
- Remove the defroster cover (2).
- Remove the defrost actuator bolts/screws (4).
- Remove the defrost actuator (3).
- Remove the defrost actuator door (5).
Important: The defroster door must be closed to allow clearance during defroster duct removal.
Installation Procedure
- Install the defrost actuator door (5).
- Install the defrost actuator (3).
- Install the defrost actuator bolts/screws (4).
- Install the defroster cover (2).
- Install the defroster cover bolts/screws (1).
- Install the I/P carrier. Refer to Instrument Panel Carrier Replacement in Instrument Panel, Gages, and Console.
- Re-calibrate the actuators. Refer to Actuator Recalibration .
Notice: Refer to Fastener Notice in the Preface section.
Tighten
Tighten the bolts/screws to 1.2 N·m
(11 lb in).
Tighten
Tighten the bolts/screws to 1.2 N·m
(11 lb in).
