For 1990-2009 cars only
Engine Mount Replacement - Right Side FWD
Removal Procedure
- Remove the throttle body air inlet duct. Refer to Air Cleaner Inlet Duct Replacement .
- Remove the engine mount struts. Refer to Engine Mount Strut Replacement - Left Side and Engine Mount Strut Replacement - Right Side .
- Raise and support the vehicle. Refer to Lifting and Jacking the Vehicle .
- Remove the catalytic converter from the engine exhaust manifold. Refer to Catalytic Converter Replacement .
- Remove the right front wheel and tire. Refer to Tire and Wheel Removal and Installation .
- Remove the right engine splash shield. Refer to Engine Splash Shield Replacement .
- Remove the engine mount lower nuts.
- Use a utility stand and a block of wood in order to raise the engine.
- Remove the engine mount bracket-to-oil pan bolts.
- Remove the engine mount and the engine mount bracket.
- Remove the engine mount from the engine mount bracket.
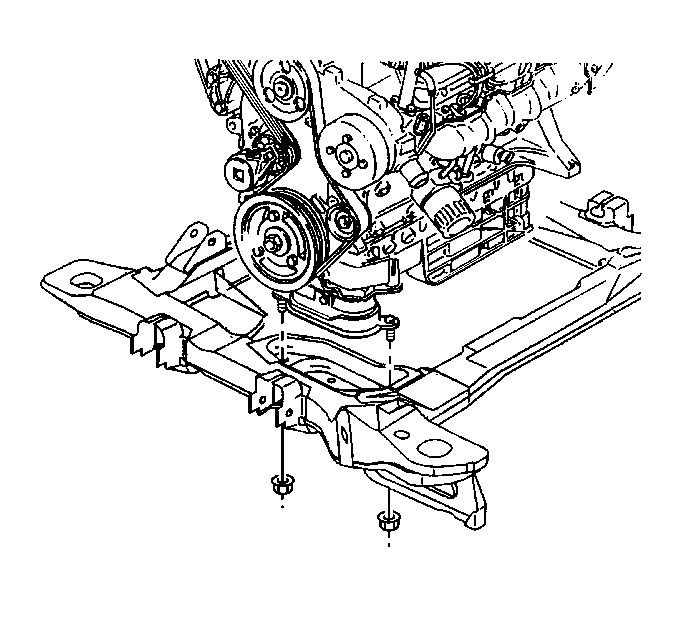
Notice: In order to avoid oil pan damage and possible engine failure, insert a block of wood that spans the width of the oil pan bottom between the oil pan and the jack support.
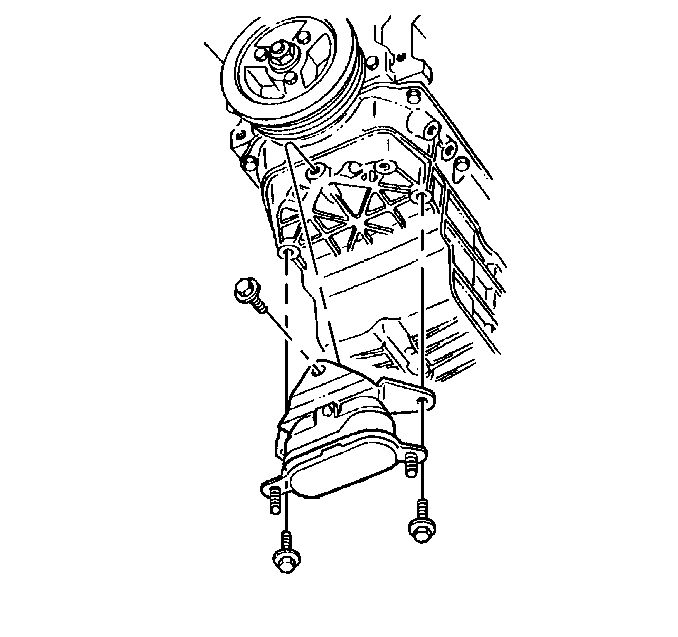
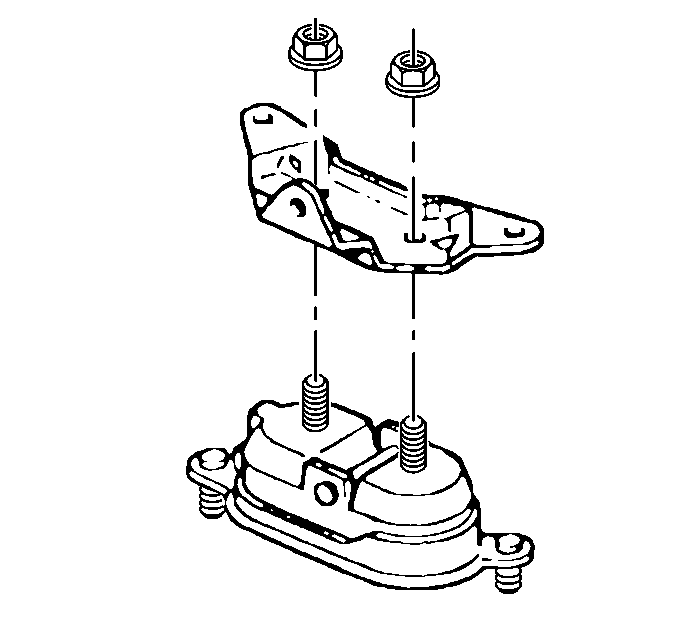
Installation Procedure
- Install the engine mount to the engine mount bracket.
- Install the engine mount bracket with the engine mount to the oil pan.
- Install the engine mount bracket-to-oil pan bolts.
- Use the utility stand in order to lower the engine.
- Install the engine mount lower nuts.
- Install the right engine splash shield. Refer to Engine Splash Shield Replacement .
- Install the right front wheel and tire. Refer to Tire and Wheel Removal and Installation .
- Connect the catalytic converter pipe to the engine exhaust manifold. Refer to Catalytic Converter Replacement .
- Lower the vehicle.
- Install the engine mount struts. Refer to Engine Mount Strut Replacement - Left Side and Engine Mount Strut Replacement - Right Side .
- Install the throttle body air inlet duct. Refer to Air Cleaner Inlet Duct Replacement .


Notice: Refer to Fastener Notice in the Preface section.
Tighten
Tighten the bolts to 58 N·m (43 lb ft).

Tighten
Tighten the nuts to 47 N·m (35 lb ft).
Engine Mount Replacement - Right Side AWD
Removal Procedure
- Remove the air cleaner outlet duct. Refer to Air Cleaner Outlet Duct Replacement .
- Remove the engine mount struts. Refer to Engine Mount Strut Replacement - Left Side and Engine Mount Strut Replacement - Right Side .
- Raise and support the vehicle. Refer to Lifting and Jacking the Vehicle .
- Remove the catalytic converter. Refer to Catalytic Converter Replacement .
- Remove the right front wheel and tire. Refer to Tire and Wheel Removal and Installation .
- Remove the right engine splash shield. Refer to Engine Splash Shield Replacement .
- Remove the engine mount to frame nuts.
- Place a utility stand and a block of wood under the oil pan in order to raise the engine.
- Remove the engine mount bracket to oil pan bolt.
- Remove the engine mount bracket to engine block bolt.
- Remove the engine mount and bracket.
- Remove the engine mount bracket to engine mount nuts.
- Remove the engine mount from the bracket.
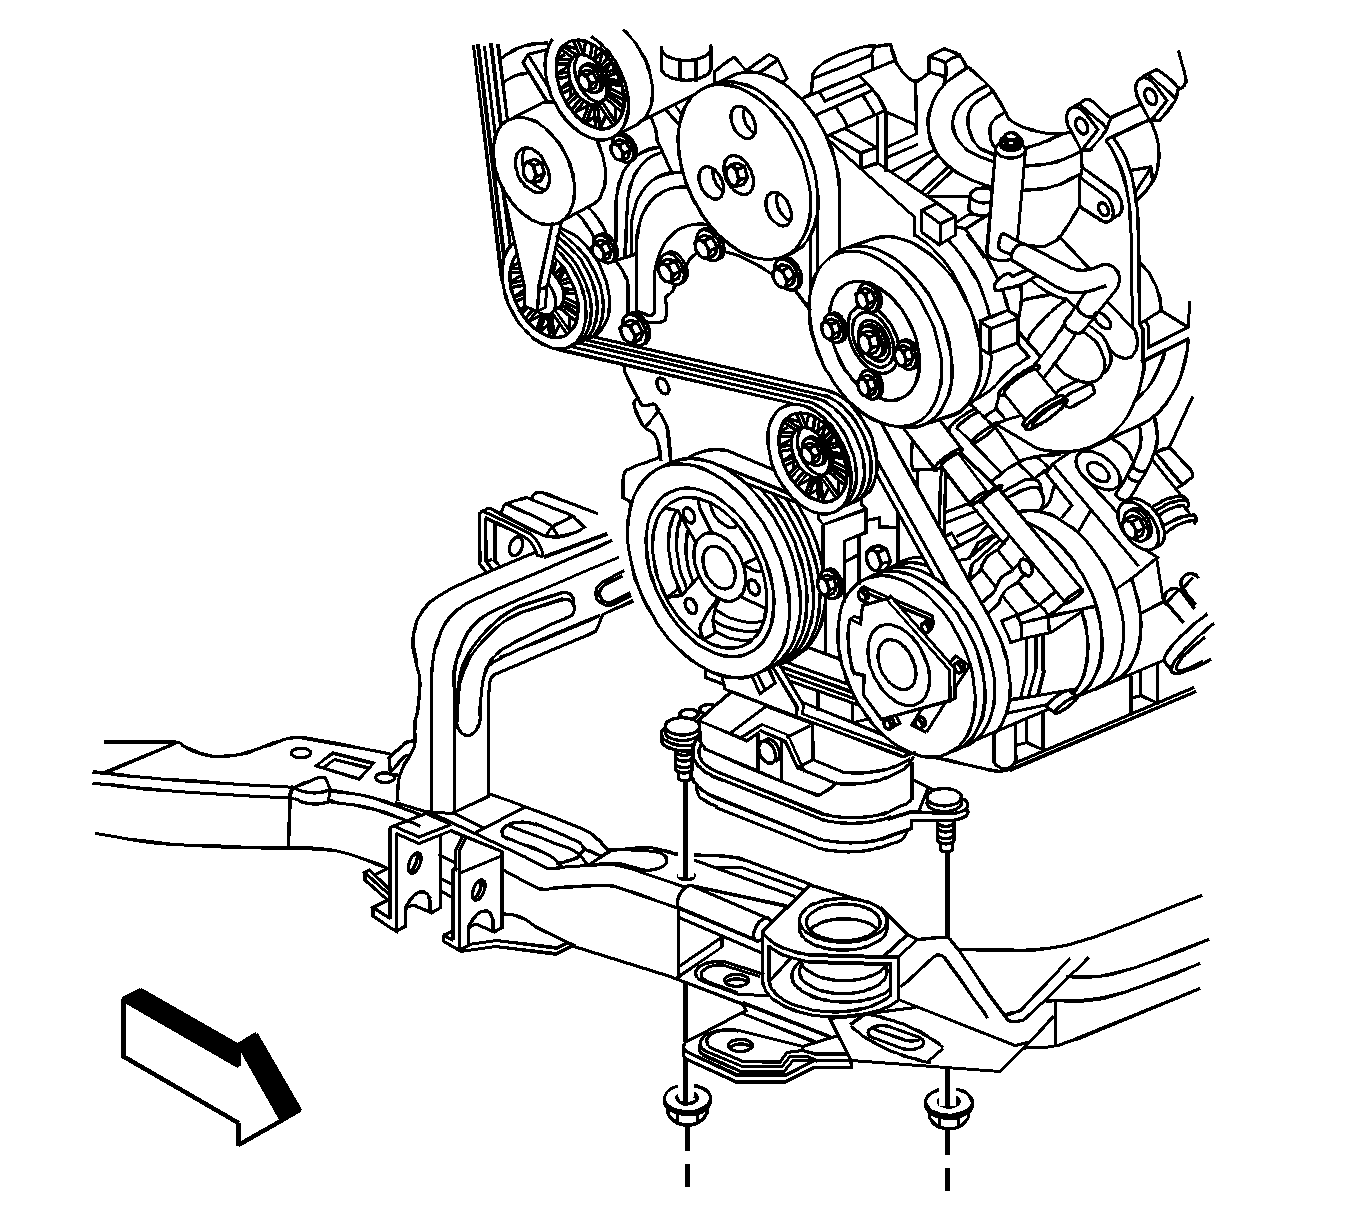
Notice: In order to avoid oil pan damage and possible engine failure, insert a block of wood that spans the width of the oil pan bottom between the oil pan and the jack support.
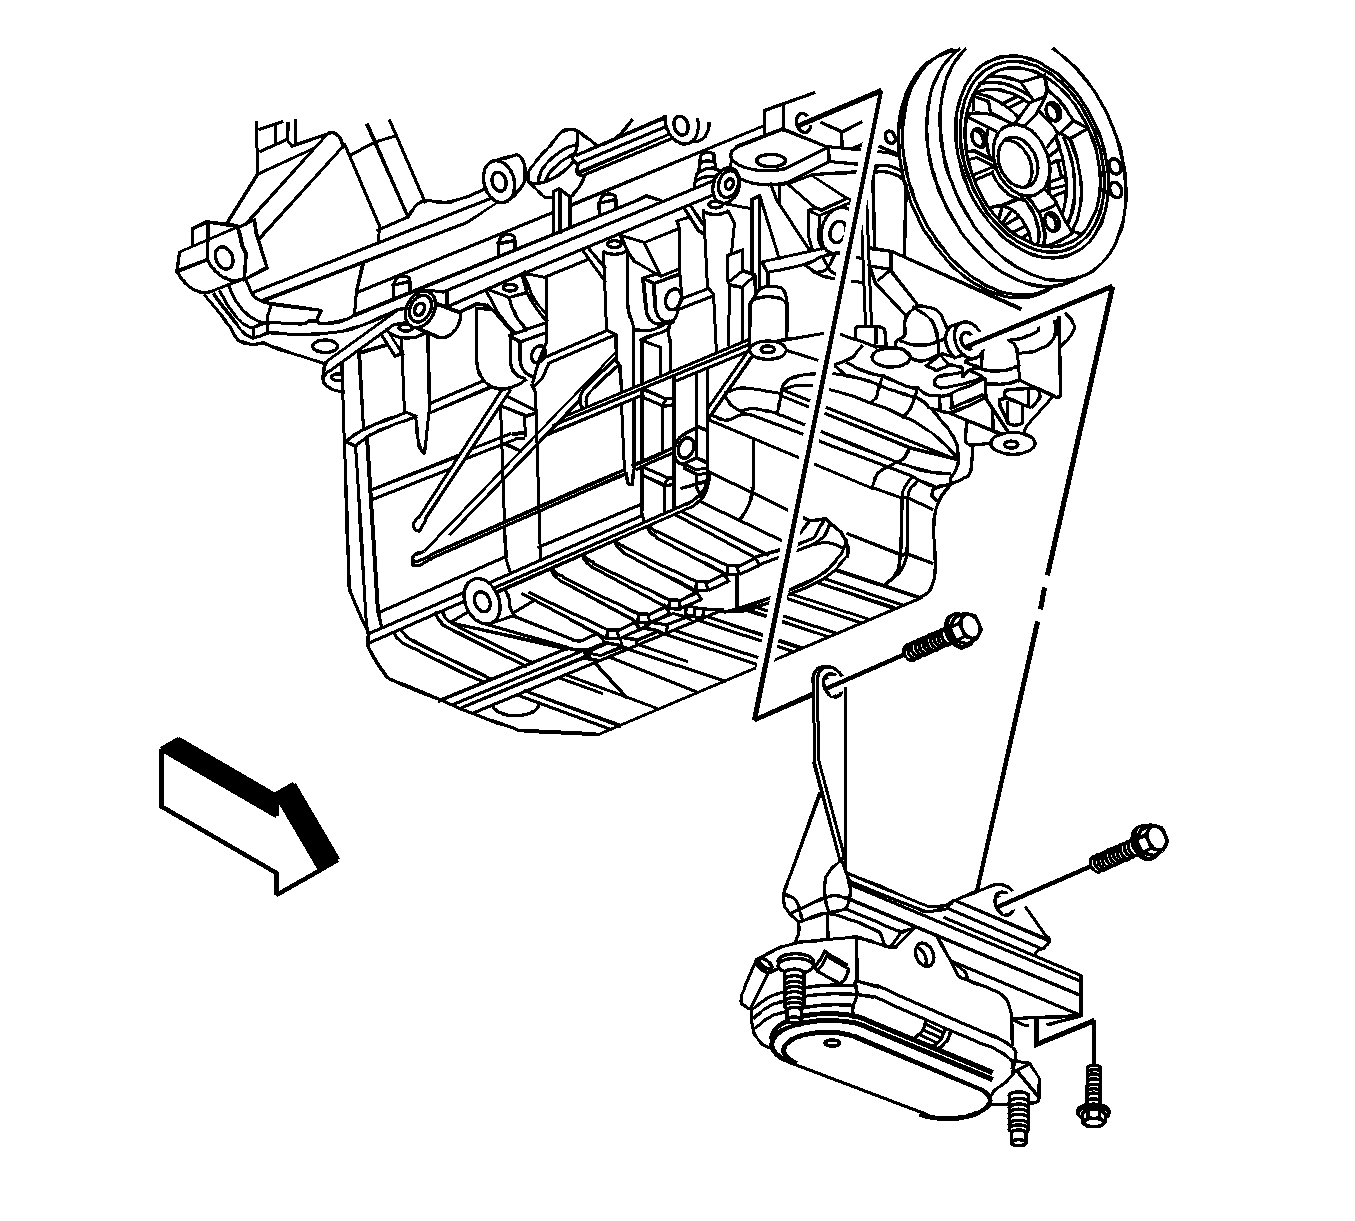

Installation Procedure
- Install the engine mount to the bracket.
- Install the engine mount bracket to engine mount nuts.
- Install the engine mount and bracket.
- Install the engine mount bracket to the engine block bolt.
- Install the engine mount bracket to oil pan bolt.
- Using the utility stand, lower the engine.
- Install the engine mount to frame nuts.
- Install the right engine splash shield. Refer to Engine Splash Shield Replacement .
- Install the right front wheel and tire. Refer to Tire and Wheel Removal and Installation .
- Install the catalytic converter. Refer to Catalytic Converter Replacement .
- Lower the vehicle.
- Install the engine mount struts. Refer to Engine Mount Strut Replacement - Left Side and Engine Mount Strut Replacement - Right Side .
- Install the air cleaner outlet duct. Refer to Air Cleaner Outlet Duct Replacement .

Notice: Refer to Fastener Notice in the Preface section.
Tighten
Tighten the nuts to 50 N·m (37 lb ft).

Tighten
Tighten the bolts to 58 N·m (43 lb ft).

Tighten
Tighten the nuts to 47 N·m (35 lb ft).
