For 1990-2009 cars only
Exhaust Crossover Pipe Replacement RPO LX9
Removal Procedure
- Disconnect the negative battery cable. Refer to Battery Negative Cable Disconnection and Connection .
- Remove the throttle body air inlet duct. Refer to Air Cleaner Inlet Duct Replacement .
- Drain the cooling system. Refer to Cooling System Draining and Filling .
- Remove the radiator inlet hose from the engine. Refer to Radiator Inlet Hose Replacement .
- Remove the thermostat bypass pipe. Refer to Thermostat Bypass Pipes Replacement .
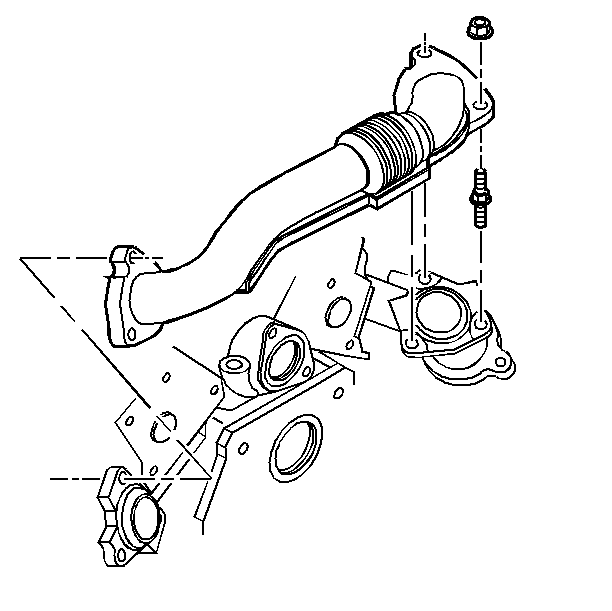
- Remove the exhaust crossover heat shield bolts.
- Remove the exhaust crossover heat shield.
- Remove the exhaust crossover pipe studs/nuts.
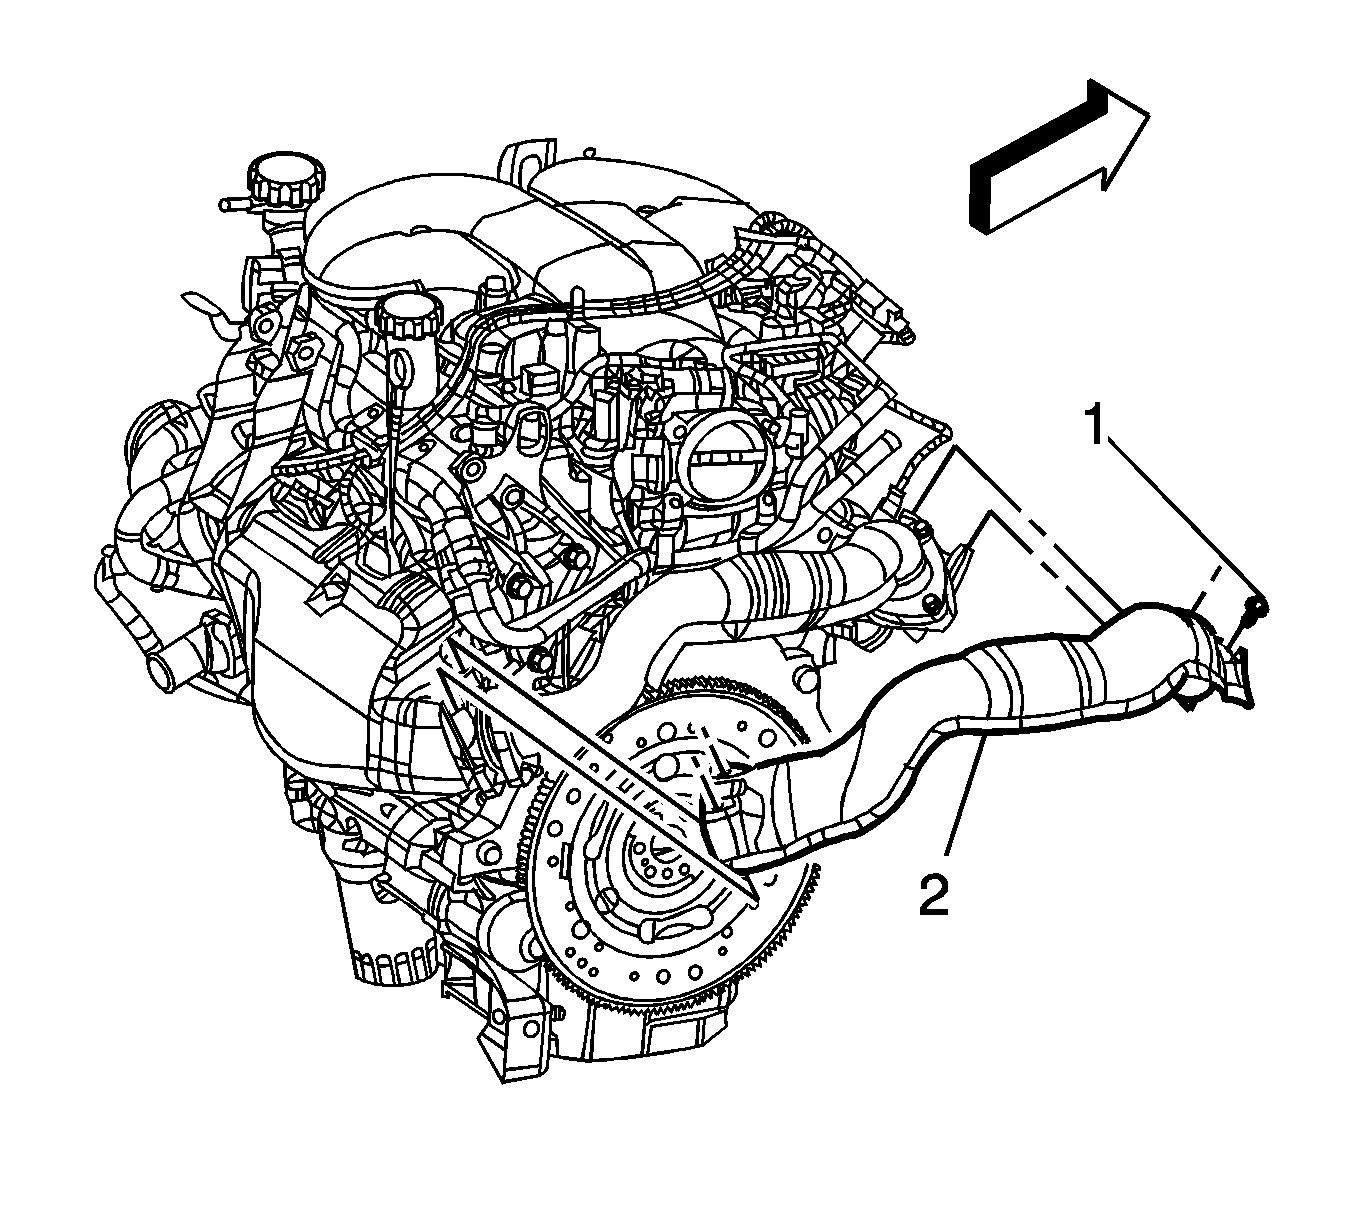
- Remove the exhaust crossover pipe.

Installation Procedure
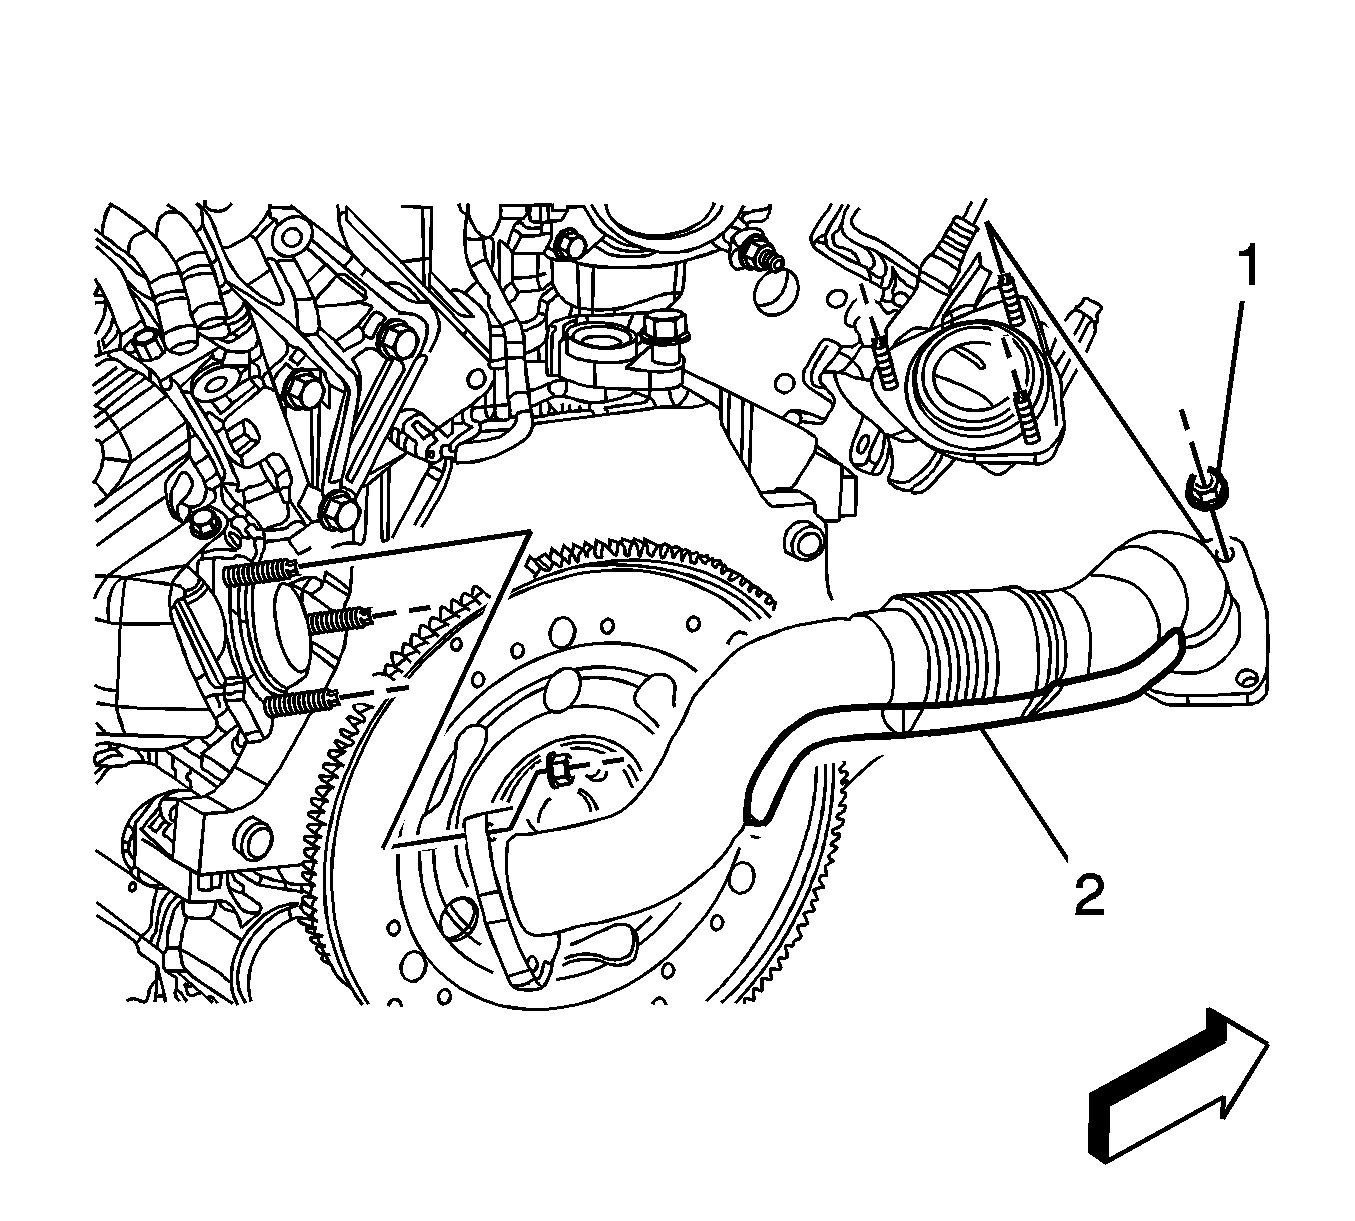
- Install the exhaust crossover pipe.
- Install the exhaust crossover pipe studs/nuts.
- Install the exhaust crossover heat shield.
- Install the exhaust crossover heat shield bolts.
- Install the thermostat bypass pipe. Refer to Thermostat Bypass Pipes Replacement .
- Install the radiator inlet hose to the engine. Refer to Radiator Inlet Hose Replacement .
- Fill the cooling system. Refer to Cooling System Draining and Filling .
- Install the throttle body air inlet duct. Refer to Air Cleaner Inlet Duct Replacement .
- Connect the negative battery cable. Refer to Battery Negative Cable Disconnection and Connection .
Notice: Refer to Fastener Notice in the Preface section.
Tighten
Tighten the studs/nuts to 25 N·m (18 lb ft).
Tighten
Tighten the bolts to 10 N·m (89 lb in).
Exhaust Crossover Pipe Replacement RPO LZ9
Removal Procedure
- Remove the air cleaner outlet duct. Refer to Air Cleaner Outlet Duct Replacement .
- Disconnect the heater hoses from the heater pipes.
- Remove the nuts holding the heater pipes onto the throttle body.
- Position the heater pipes out of the way.
- Remove the exhaust crossover heat shield bolts (1).
- Remove the exhaust crossover heat shield (2).
- Remove the exhaust crossover pipe nuts (1).
- Remove the exhaust crossover pipe (2).
- Remove the exhaust crossover pipe seals.
Installation Procedure
- Install the exhaust crossover pipe seals to the exhaust manifolds.
- Install the exhaust crossover pipe (2).
- Install the exhaust crossover pipe nuts (1).
- Install the exhaust crossover heat shield (2).
- Install the exhaust crossover heat shield bolts (1).
- Position the heater pipes back to the original position.
- Install the nuts holding the heater pipes on the throttle body.
- Connect the heater hoses onto the heater pipes.
- Install the air cleaner outlet duct. Refer to Air Cleaner Outlet Duct Replacement .
Notice: Refer to Fastener Notice in the Preface section.
Tighten
Tighten the nuts to 20 N·m (15 lb ft).
Tighten
Tighten the bolts to 10 N·m (89 lb in).
