For 1990-2009 cars only
The generator does not require periodic lubrication. The rotor shaft is mounted on bearings. Each bearing contains a permanent grease supply. Periodically check the mounting bolts for tightness, and the drive belt tension. The drive belt is self-adjusting, within the operating limits of the tensioner. Refer to Drive Belt Tensioner Diagnosis .
Removal Procedure
Important: Service the generator as a complete unit.
- Disconnect the negative battery cable. Refer to Battery Negative Cable Disconnection and Connection .
- Remove the washer solvent container. Refer to Windshield Washer Solvent Container Replacement .
- Disconnect the windshield wiper transmission link in front of the wiper motor and position out of the way. Refer to Windshield Wiper System Module Replacement .
- Rotate the engine forward. Refer to Rotating the Engine for Service Access .
- Remove the drive belt. Refer to Drive Belt Replacement .
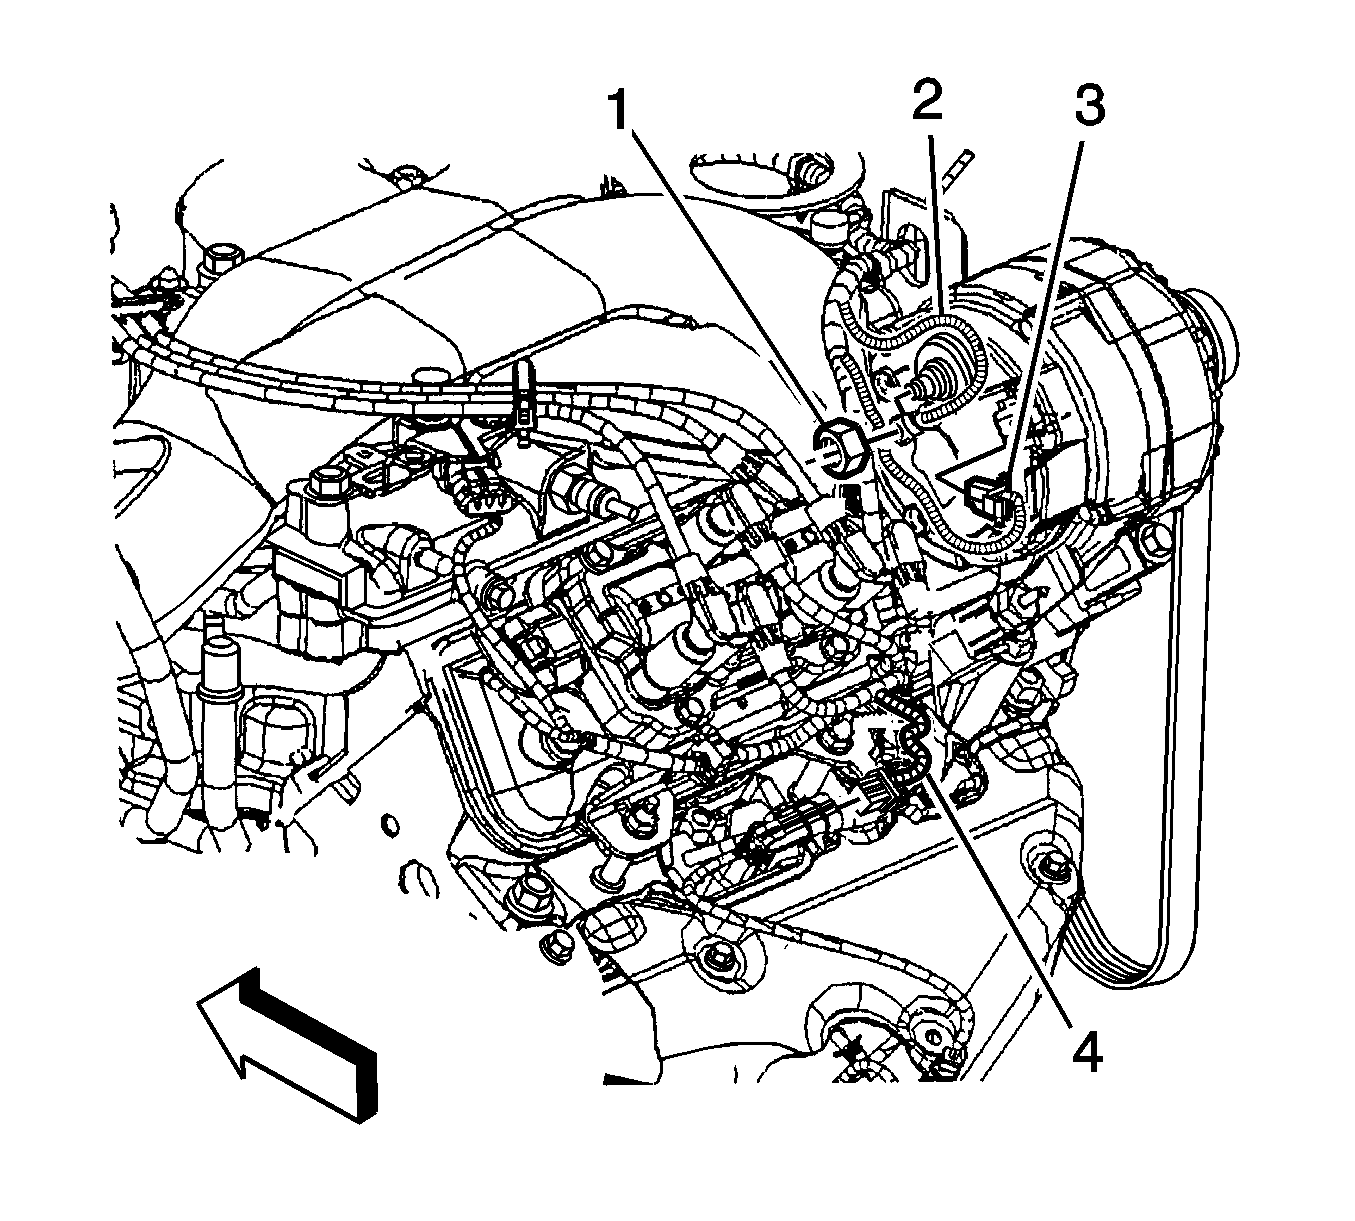
- Remove the engine harness to generator output wire nut.
- Remove the engine harness output wire from the generator.
- Disconnect the engine harness electrical connector (3) from the generator.
- Remove the nut holding the power steering lines to the stud on back of generator.
- Position the power steering lines aside.
- Disconnect the wire harness from the retainers on the upper and lower right front shock tower.
- Remove the idler pulley bolt and pulley on the right front side of the engine.
- Remove the generator lower bolt and stud.
- Remove the generator upper bolt (3).
- Remove the generator.

Installation Procedure
- Install the generator.
- Install the generator lower bolt and stud until snug.
- Install the generator upper bolt (3).
- Install the idler pulley and bolt on the right front side of the engine.
- Connect the wire harness to the retainers on the upper and lower right front shock tower.
- Position the power steering lines and retainer to the stud on the generator bracket.
- Install the nut holding the power steering lines on the back of the generator.
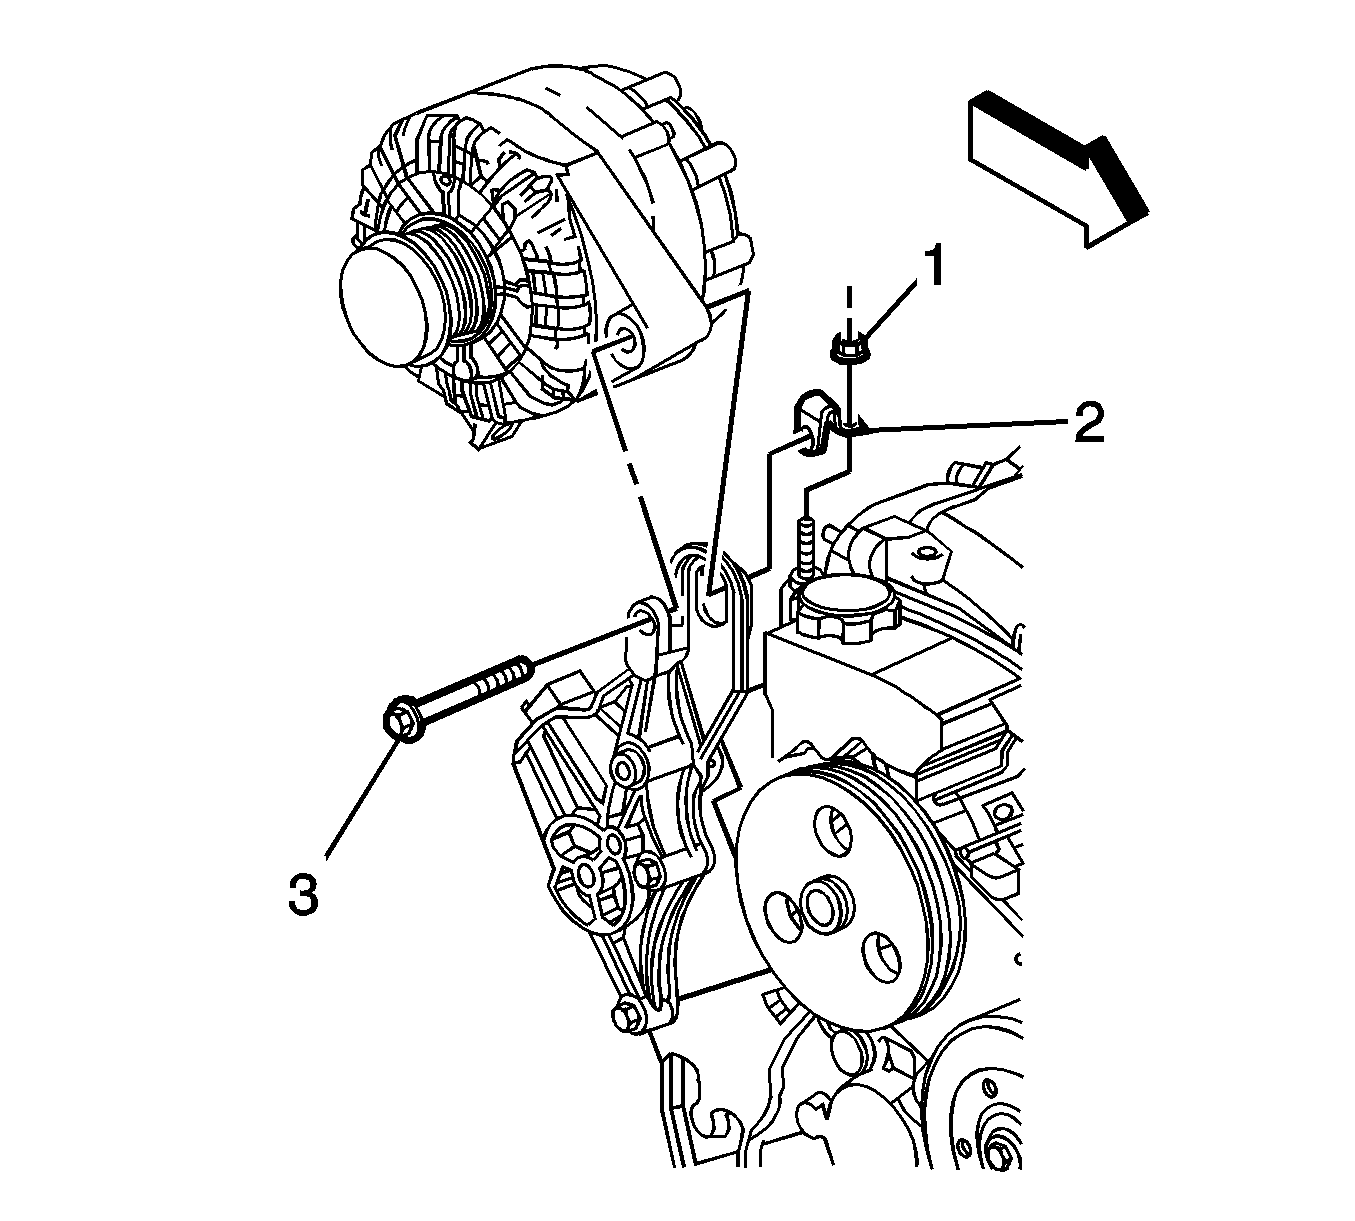
- Connect the engine harness electrical connector (3) to the generator.
- Install the engine harness ground (2) to the generator.
- Install the engine harness ground nut (1).
- Install the drive belt. Refer to Drive Belt Replacement .
- Position the engine into the normal location and install the engine mount strut bolts. Refer to Engine Mount Strut Replacement - Left Side and Engine Mount Strut Replacement - Right Side .
- Connect the windshield wiper transmission. Refer to Windshield Wiper System Module Replacement .
- Install the washer solvent container. Refer to Windshield Washer Solvent Container Replacement .
- Connect the negative battery cable. Refer to Battery Negative Cable Disconnection and Connection .
Notice: Refer to Fastener Notice in the Preface section.
Tighten
Tighten the bolts/stud to 50 N·m (37 lb ft).
Tighten
Tighten the nut to 30 N·m (22 lb ft).
