Sliding Rear Side Door Adjustment Manual or Power
In and Out Adjustments
- If equipped with a power sliding door, disable the PSD system by removing the PSD 15A fuse from the instrument panel (I/P) fuse block.
- Remove the garnish molding. Refer to Rear Side Door Garnish Molding Replacement .
- Remove the sliding door trim panel. Refer to Rear Side Door Trim Panel Replacement .
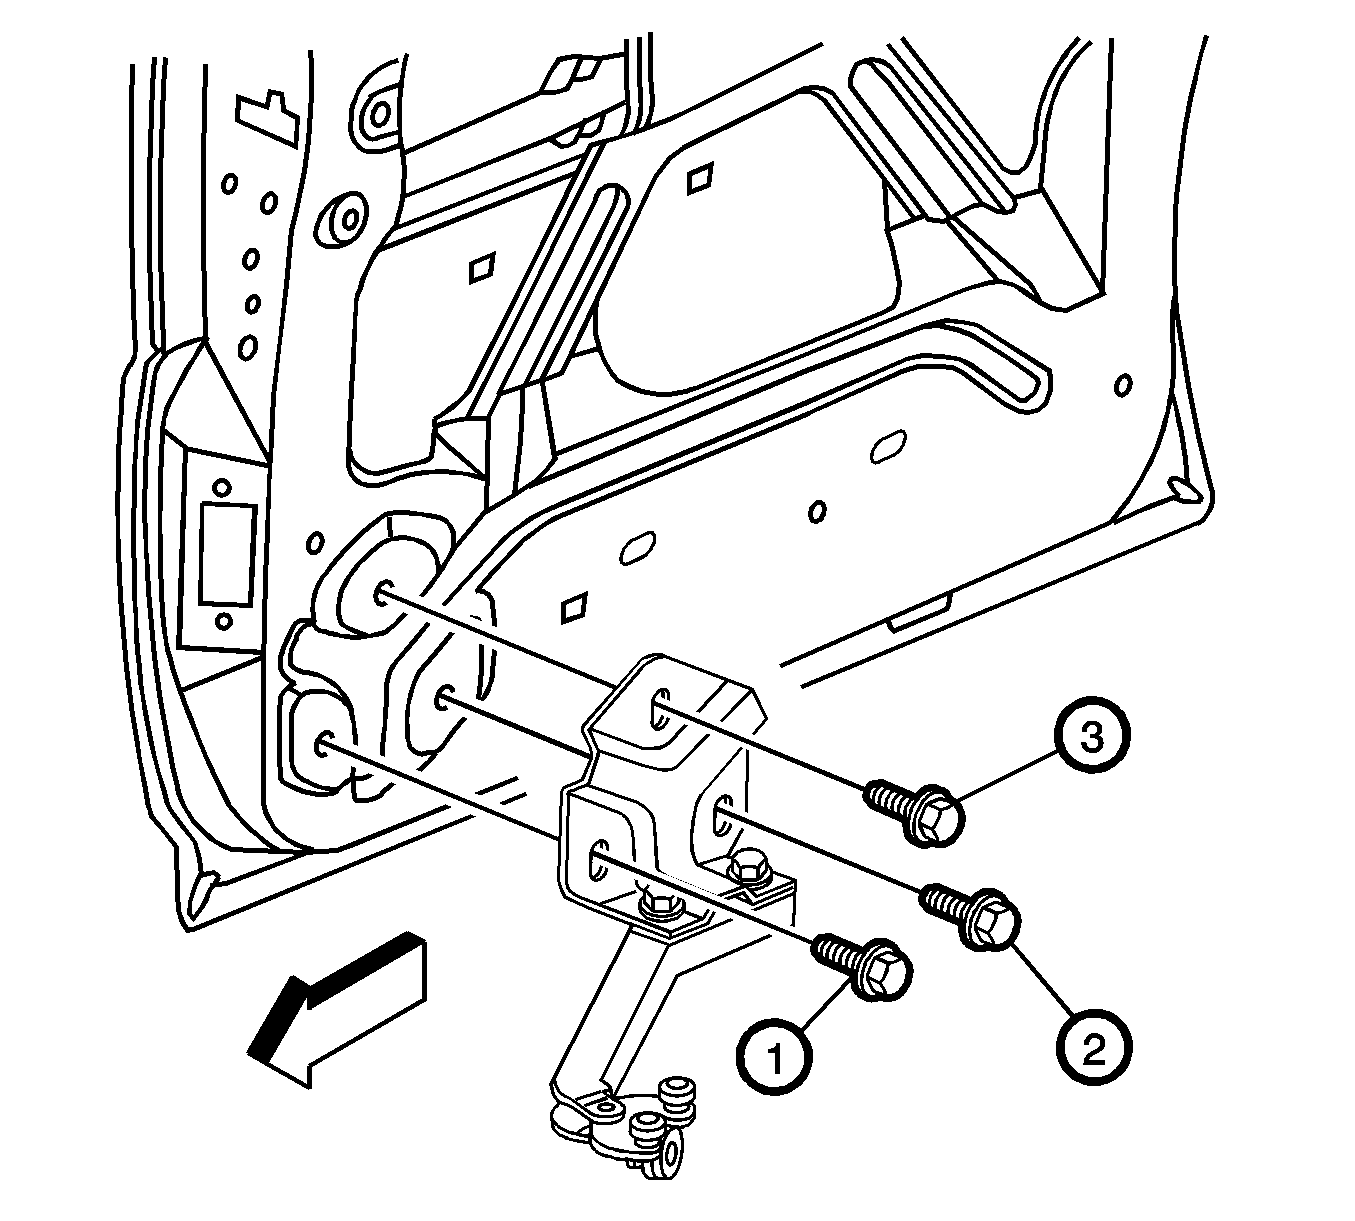
- Loosen the 2 horizontal sliding door lower roller bracket bolts.
- Loosen the sliding door lower bracket bolts.
- Adjust the front edge of the sliding door in or out as needed.
- Tighten the loosened sliding door lower bracket bolts.
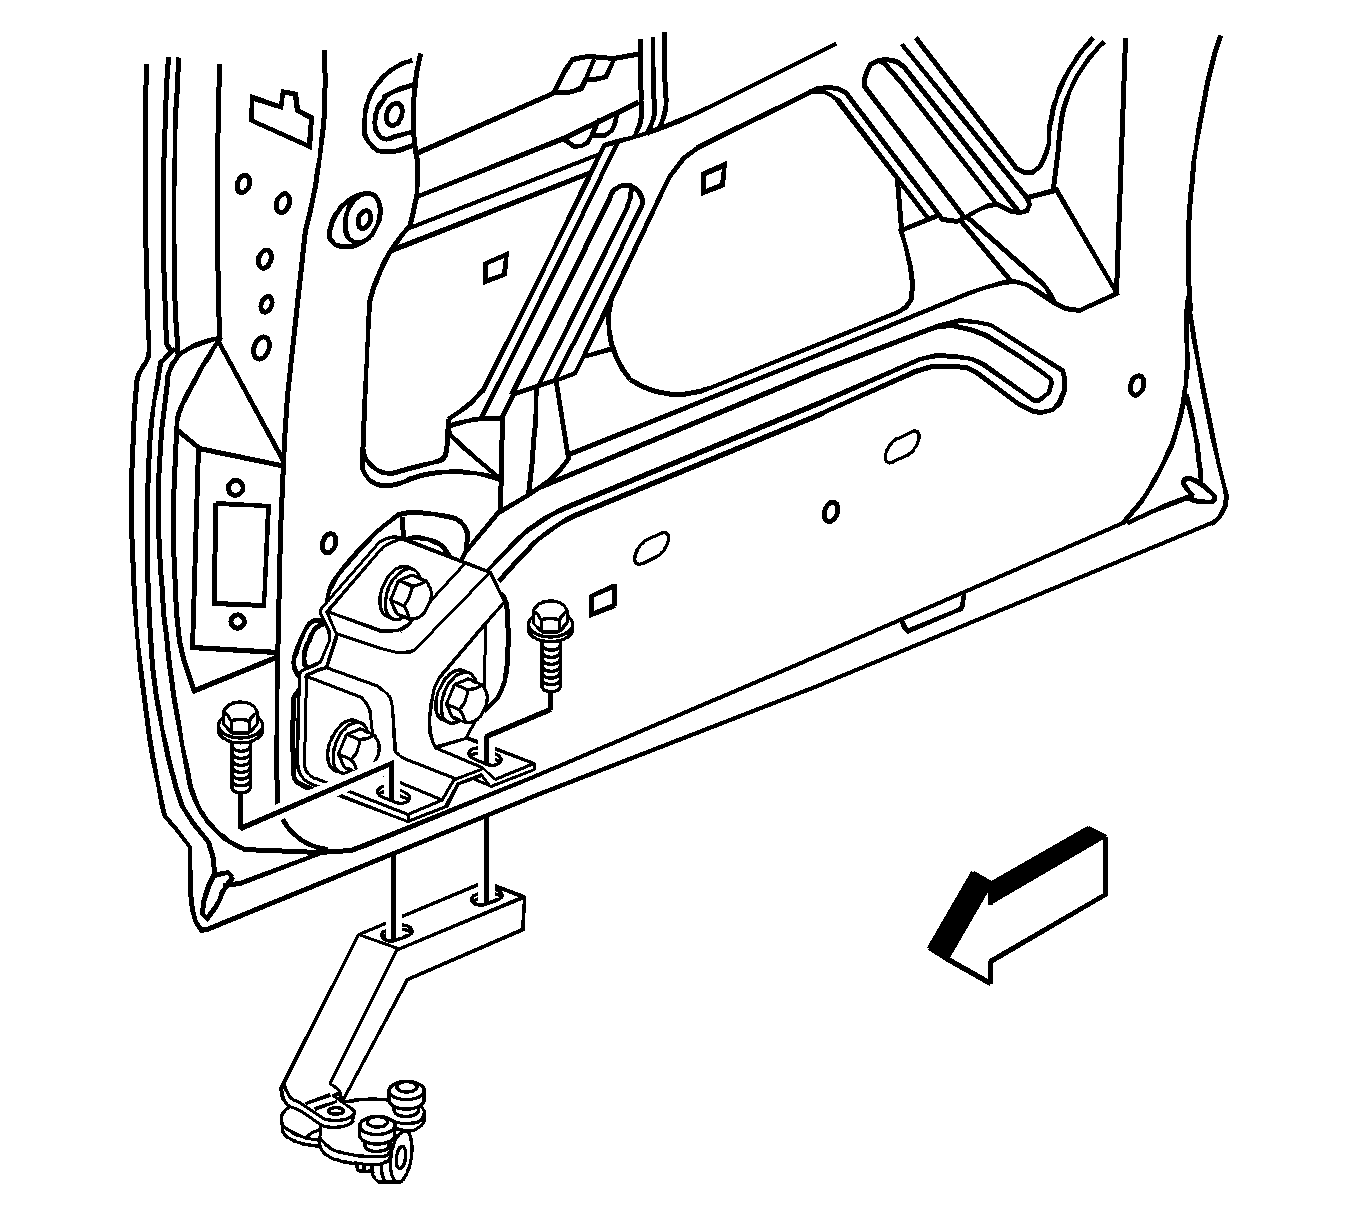
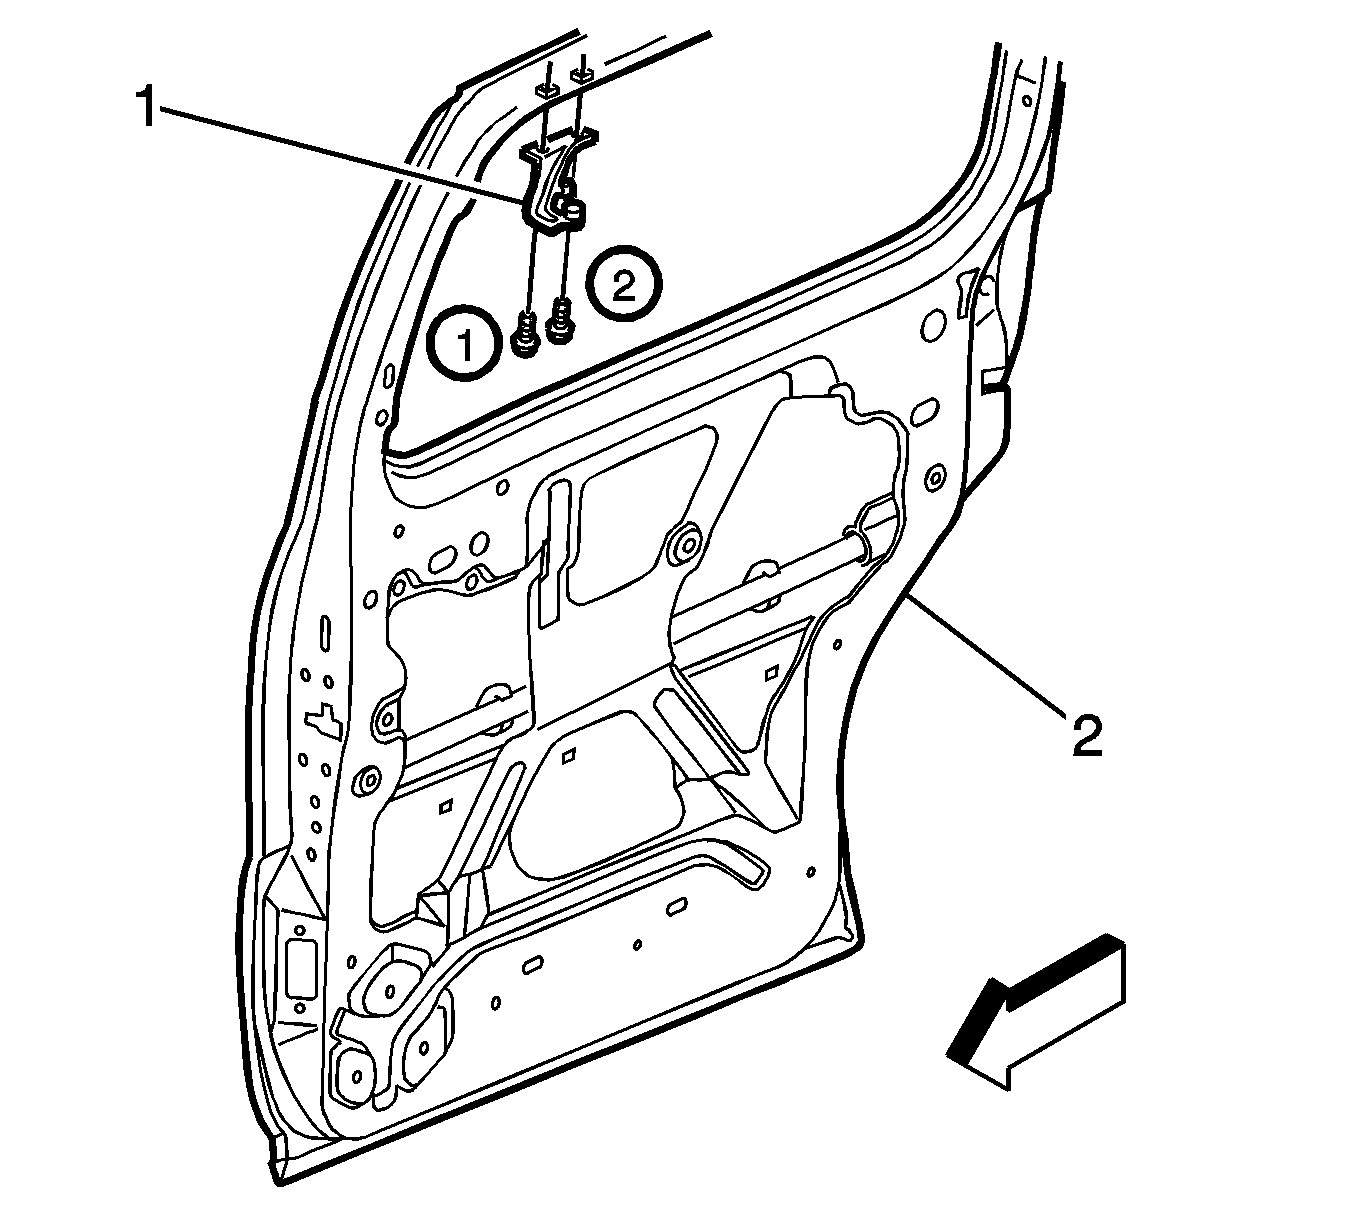
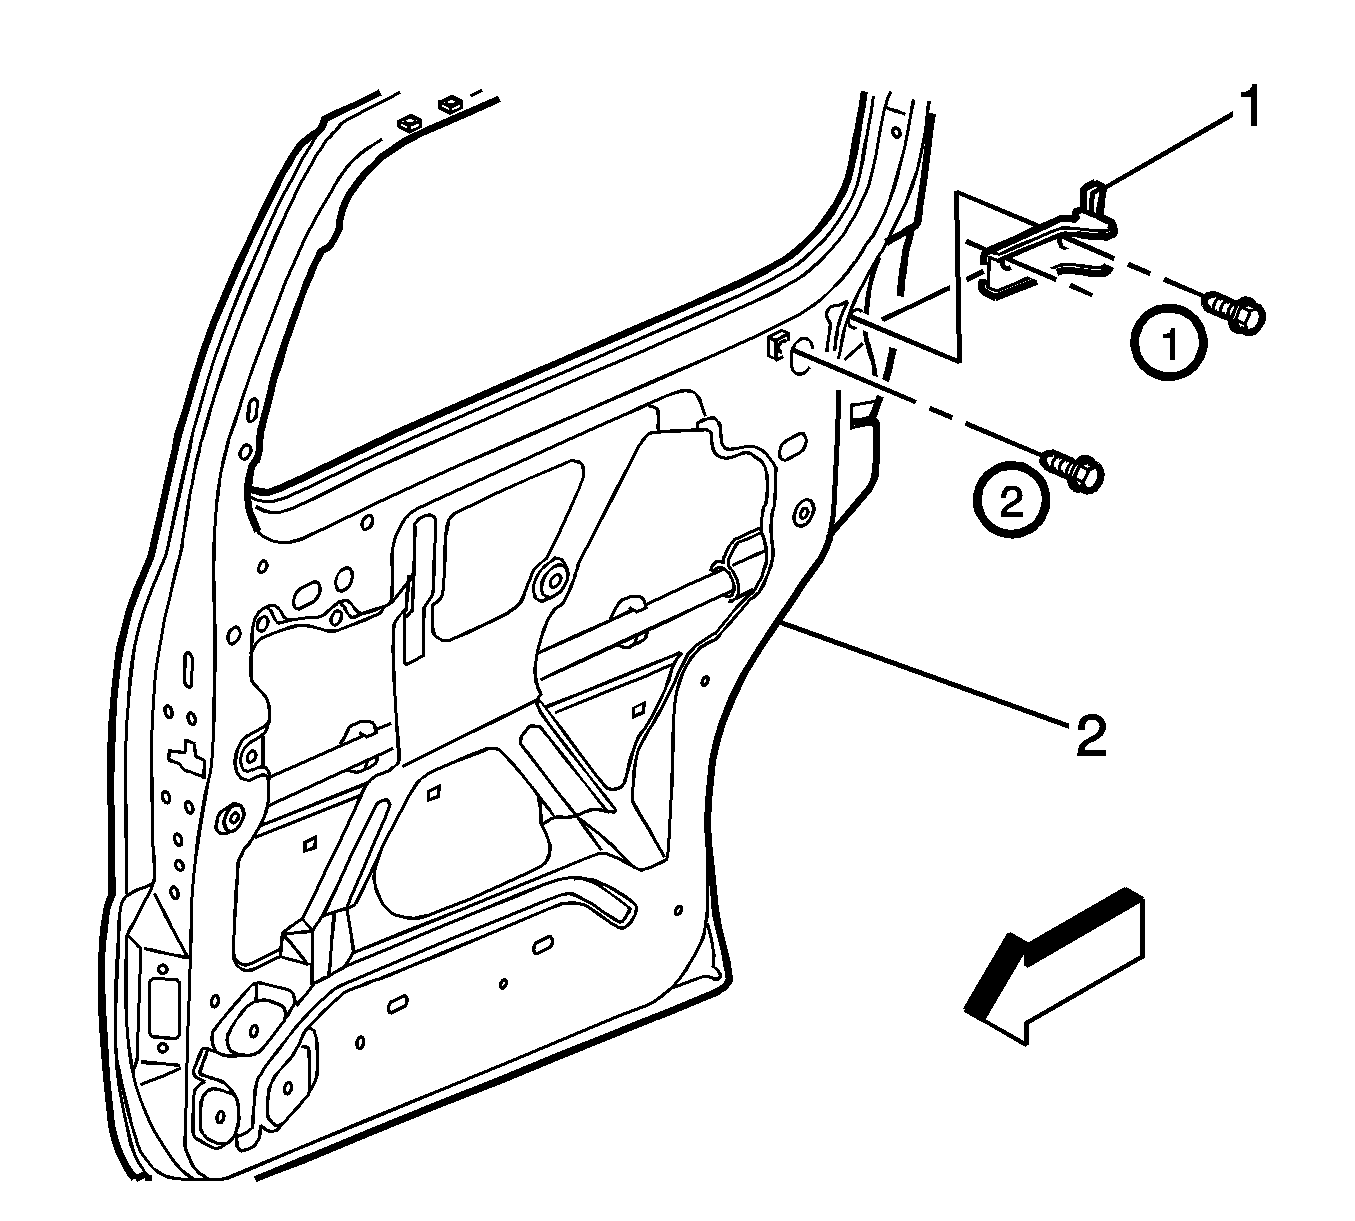
- Loosen the sliding door upper roller bracket (1) bolts.
- Adjust the upper door in or out.
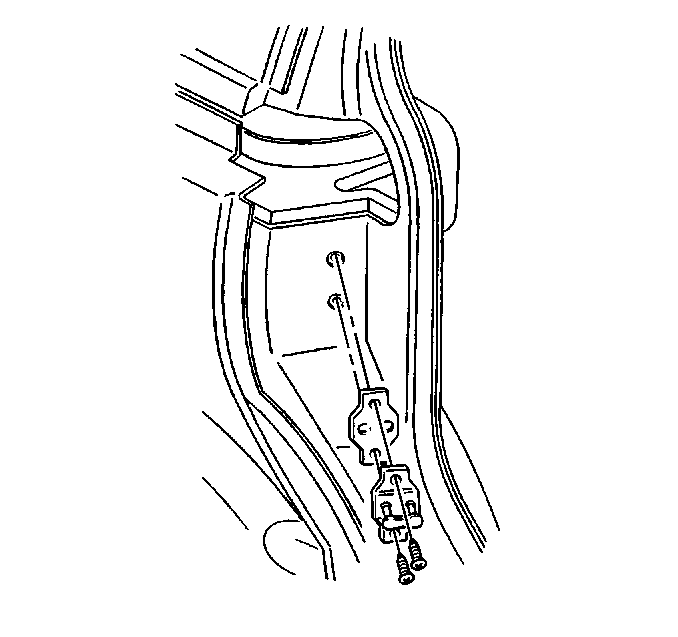
- Loosen the 2 screws on the rear door striker (2).
- Move the striker in and out in order to adjust the rear edge of the sliding door, as needed.
- Ensure the striker spacer plate (1) is in alignment with the striker plate (2) prior to securing the screws.
- Install the sliding door trim panel. Refer to Rear Side Door Trim Panel Replacement .
- Install the plastic plugs on the lower front sliding door inner trim panel in order to cover the sliding door lower roller bracket bolts.
- Install the garnish molding. Refer to Rear Side Door Garnish Molding Replacement .
- If equipped with a power sliding door, enable the PSD system by installing the PSD 15A fuse into the I/P fuse block.
Important: By removing the power sliding door (PSD) 15A fuse, the low current logic power for both the LH and RH power sliding door modules (PSDM) will be interrupted and both PSDs will be inoperative.
Important: When adjusting either the manual or the power sliding door, loosen only one bolt at a time on the sliding door lower roller bracket and the sliding door center roller bracket. Failure to loosen one bolt at a time may result in a complete loss of sliding door alignment.
Notice: Refer to Fastener Notice in the Preface section.
Tighten
Tighten the vertical bolts to 25 N·m (18 lb ft).
Tighten
Tighten the bolts, as sequenced, to 25 N·m (18 lb ft).
Tighten
Tighten the bolts to 25 N·m (18 lb ft).
Important: By installing the 15A fuse, the low current logic power will be restored to both the LH and RH PSDMs and the PSDs will be operational. However, both PSDMs will have to learn the full open and full closed positions of the PSD. Refer to Control Module References .
Up and Down Adjustment Procedure
- If equipped with a power sliding door, disable the PSD system by removing the PSD 15A fuse from the I/P fuse block.
- Remove the lower front plastic plugs on the sliding door inner trim panel in order to access the sliding door lower roller bracket to door bolts.
- Remove the close-out panel on the center rear of the sliding door inner trim panel in order to access the sliding door center roller bracket bolts.
- Loosen the sliding door lower roller bracket bolt.
- Adjust the front edge of the sliding door up or down as needed.
- Tighten the loosened sliding door lower roller bracket to door bolts.
- Loosen the sliding door center roller bracket bolt.
- Adjust the rear edge of the sliding door up or down as needed.
- Tighten the loosened sliding door center roller bracket bolt.
- Install the close-out panel on the center rear of sliding door inner trim panel in order to cover the sliding door center roller bracket bolts.
- Install the plastic plugs on the lower front sliding door inner trim panel in order to cover the sliding door lower roller bracket bolts.
- If equipped with a power sliding door, enable the PSD system by installing the PSD 15A fuse into the I/P fuse block.
Important: By removing the power sliding door (PSD) 15A fuse, the low current logic power for both the LH and RH power sliding door modules (PSDM) will be interrupted and both PSDs will be inoperative.
Important: When adjusting either the manual or the power sliding door, loosen only one bolt at a time on the sliding door lower roller bracket and the sliding door center roller bracket. Failure to loosen one bolt at a time may result in a complete loss of sliding door alignment.
Notice: Refer to Fastener Notice in the Preface section.
Tighten
Tighten the bolts in sequence, as shown, to 25 N·m (18 lb ft).
Tighten
Tighten the bolt to 25 N·m (18 lb ft).
Important: By installing the 15A fuse, the low current logic power will be restored to both the LH and RH PSDMs and the PSDs will be operational. However, both PSDMs will have to learn the full open and full closed positions of the PSD. Refer to Control Module References .
