Parking Brake Adjustment Disc
Tools Required
J 21177-A Drum-to-Brake Shoe Clearance Gage
Caution: Refer to Brake Dust Caution in the Preface section.
- Apply and fully release the parking brake six times.
- Verify that the parking brake pedal releases completely.
- Raise and suitably support the vehicle. Refer to Lifting and Jacking the Vehicle in General Information.
- Remove the rear wheels and tires. Refer to Tire and Wheel Removal and Installation in Tires and Wheels.
- Relieve tension on the park brake system at the park brake equalizer.
- Remove both rear caliper bracket bolts .
- Remove brake caliper and bracket as one assembly. Do not disconnect the brake hose from the caliper. support the assembly with mechanic's wire, or equivalent .
- Remove rear brake rotor.
- Set the J 21177-A inside of the park brake drum (1) at the widest point.
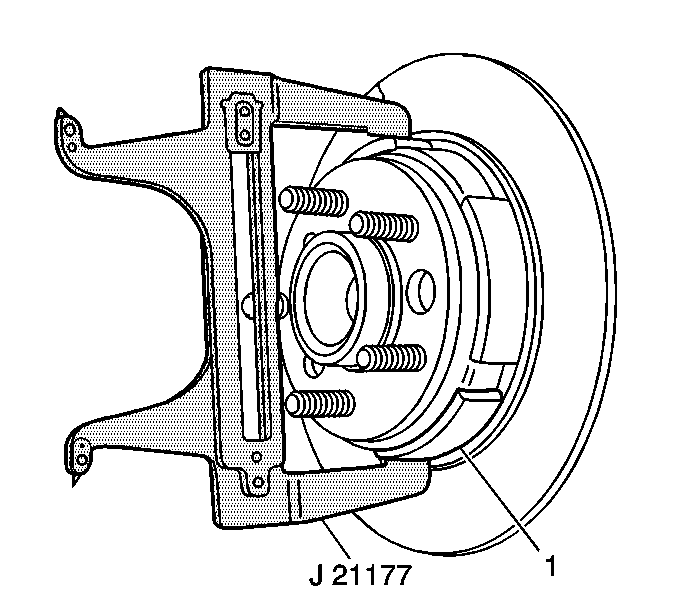
- Position the J 21177-A over the park brake shoe (1) at the widest point.
- Turn the adjuster on the actuator until the park brake shoe (1) just contacts the J 21177-A .
- Repeat steps eight through eleven for the opposite side.
- Install both rear brake rotors.
- Install both rear brake calipers and brackets.
- Clean and visually inspect threads of the caliper bracket bolts (2) and mounting holes in the knuckle.
- Apply THREADLOCKER, GM P/N 12345493 (Canadian P/N 10953488), or equivalent to the threads of the brake caliper bracket bolts (2).
- Install the caliper bracket bolts.
- Install the rear wheels and tires. Refer to Tire and Wheel Removal and Installation in Tires and Wheels.
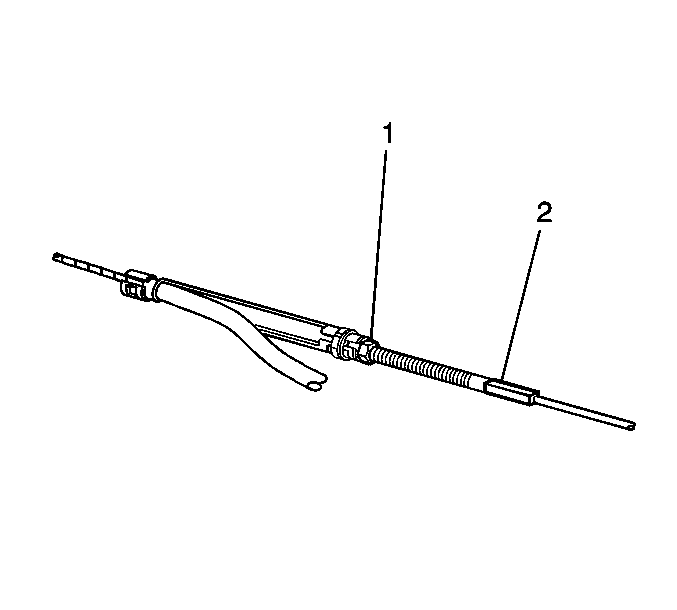
- Adjust the parking brake cable by turning the nut at the equalizer (2) while spinning both rear wheels. When either rear wheel starts to drag, back off the nut one full turn.
- Lower the vehicle to curb height.
- Apply the parking brake, then inspect for rotation of the rear wheels. If the rear wheels rotate during this inspection, readjust the parking brake cable.
- Release the parking brake. Verify that the wheels rotate freely.
- Lower the vehicle.
| • | Turn ON the ignition. Verify that the BRAKE indicator lamp is off. |
| • | If the BRAKE indicator lamp is on, ensure that the parking brake pedal is in release mode and fully returned to stop. Remove the slack in the front parking brake cable by pulling downward on the cable. |
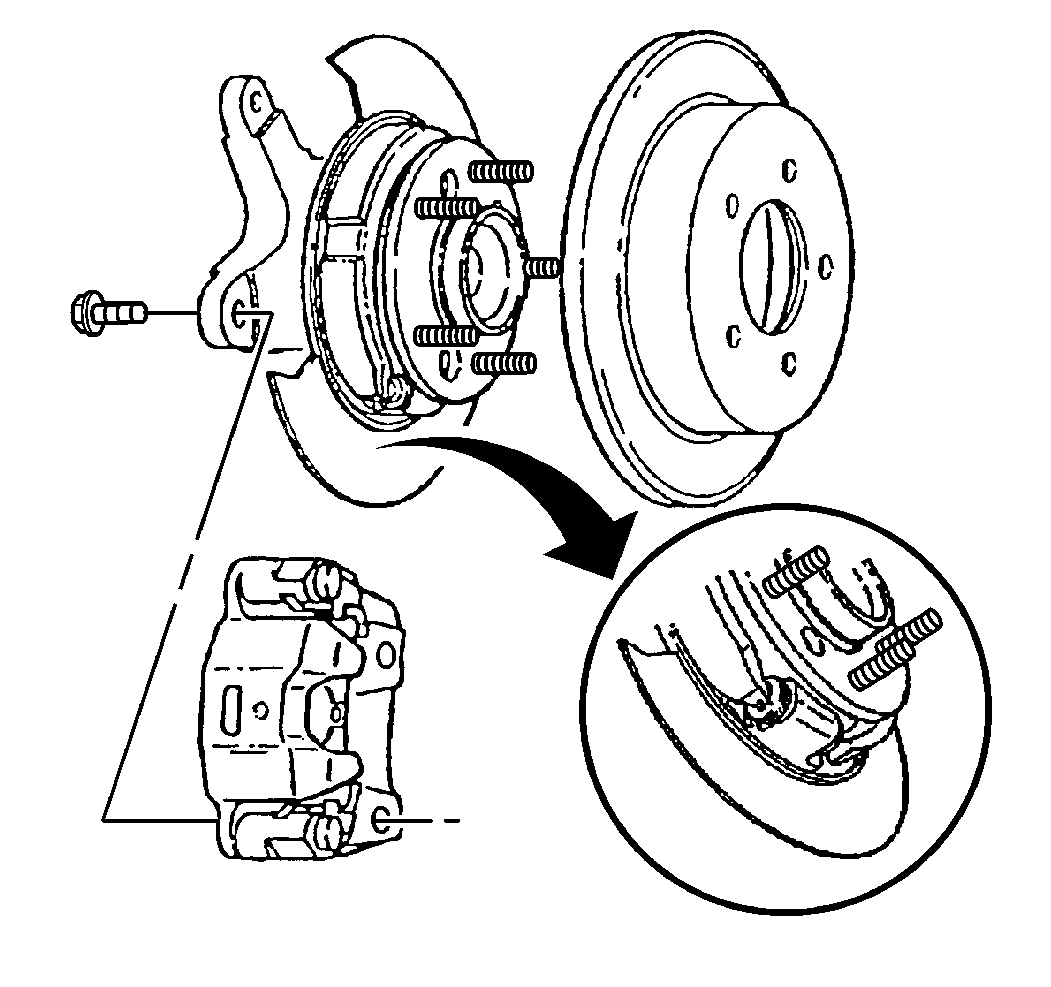
Notice: Support the brake caliper with heavy mechanic wire, or equivalent, whenever it is separated from its mount and the hydraulic flexible brake hose is still connected. Failure to support the caliper in this manner will cause the flexible brake hose to bear the weight of the caliper, which may cause damage to the brake hose and in turn may cause a brake fluid leak.
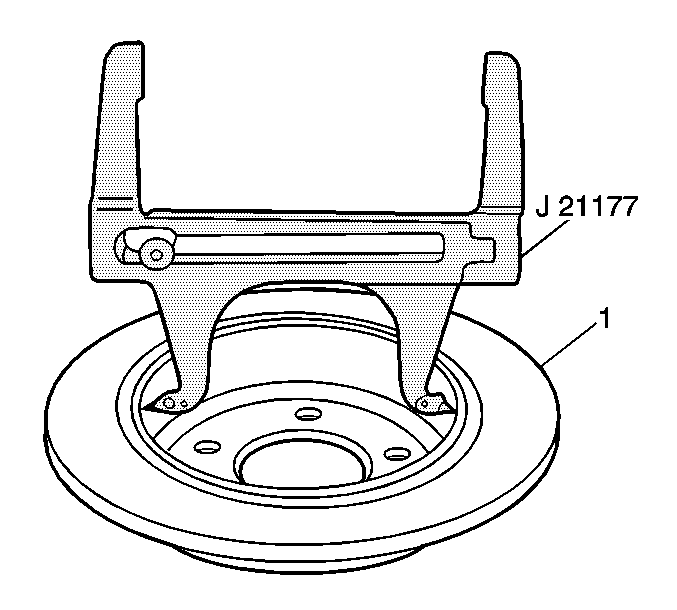
| • | Place the contacts on the tool to the widest point of the drum (1). |
| • | Tighten the set screw on the tool to ensure the proper measurement when removing the tool from the drum (1). |
Important: To ensure that the proper clamp load will be present when installed. It is imperative that the threads on the caliper bracket bolts, as well as the mounting holes in the knuckle, be cleaned of all debris and inspected before proceeding with installation.
Notice: Use the correct fastener in the correct location. Replacement fasteners must be the correct part number for that application. Fasteners requiring replacement or fasteners requiring the use of thread locking compound or sealant are identified in the service procedure. Do not use paints, lubricants, or corrosion inhibitors on fasteners or fastener joint surfaces unless specified. These coatings affect fastener torque and joint clamping force and may damage the fastener. Use the correct tightening sequence and specifications when installing fasteners in order to avoid damage to parts and systems.
Tighten
Tighten the brake caliper bracket bolts to 130 N·m (96 lb ft).
Parking Brake Adjustment Drum
Caution: Refer to Brake Dust Caution in the Preface section.
- Apply and fully release the parking brake 6 times. Verify that the park brake pedal releases completely.
- Turn ON the ignition. Verify that the BRAKE indicator lamp is off.
- Raise and suitably support the vehicle. Refer to Lifting and Jacking the Vehicle in General Information.
- Remove the rear wheels and tires. Refer to Tire and Wheel Removal and Installation in Tires and Wheels.
- Adjust the drum brakes. Refer to Drum Brake Adjustment in Drum Brakes.
- Install the rear wheels and tires. Refer to Tire and Wheel Removal and Installation in Tires and Wheels.
- Adjust the park brake system by turning the nut at the equalizer (2) while spinning both rear wheels. When either rear wheel starts to drag, back off the nut one full turn.
- Lower the vehicle to curb height.
- Apply the parking brake 5 clicks and then check the forward rotation of the rear wheels. With 5 clicks applied it should be very difficult to turn the wheels by hand (should require 30 -60 N·m torque , measured with a torque wrench on a wheel stud). With less than 5 clicks applied, wheels should turn easily by hand. Readjust the equalizer nut as needed to obtain this condition.
- Release the parking brake. Verify that the wheels rotate freely.
- Lower the vehicle.
If the BRAKE lamp is on, then check the following:
| • | Ensure that the parking brake is in release mode and fully returned to the stop. |
| • | Check the front park brake cable slack. Remove the slack in the front park brake cable by pulling downward on the cable. |
