For 1990-2009 cars only
Removal Procedure
- Remove the intake manifold cover. Refer to Intake Manifold Cover Replacement .
- Remove the air cleaner outlet duct. Refer to Air Cleaner Outlet Duct Replacement .
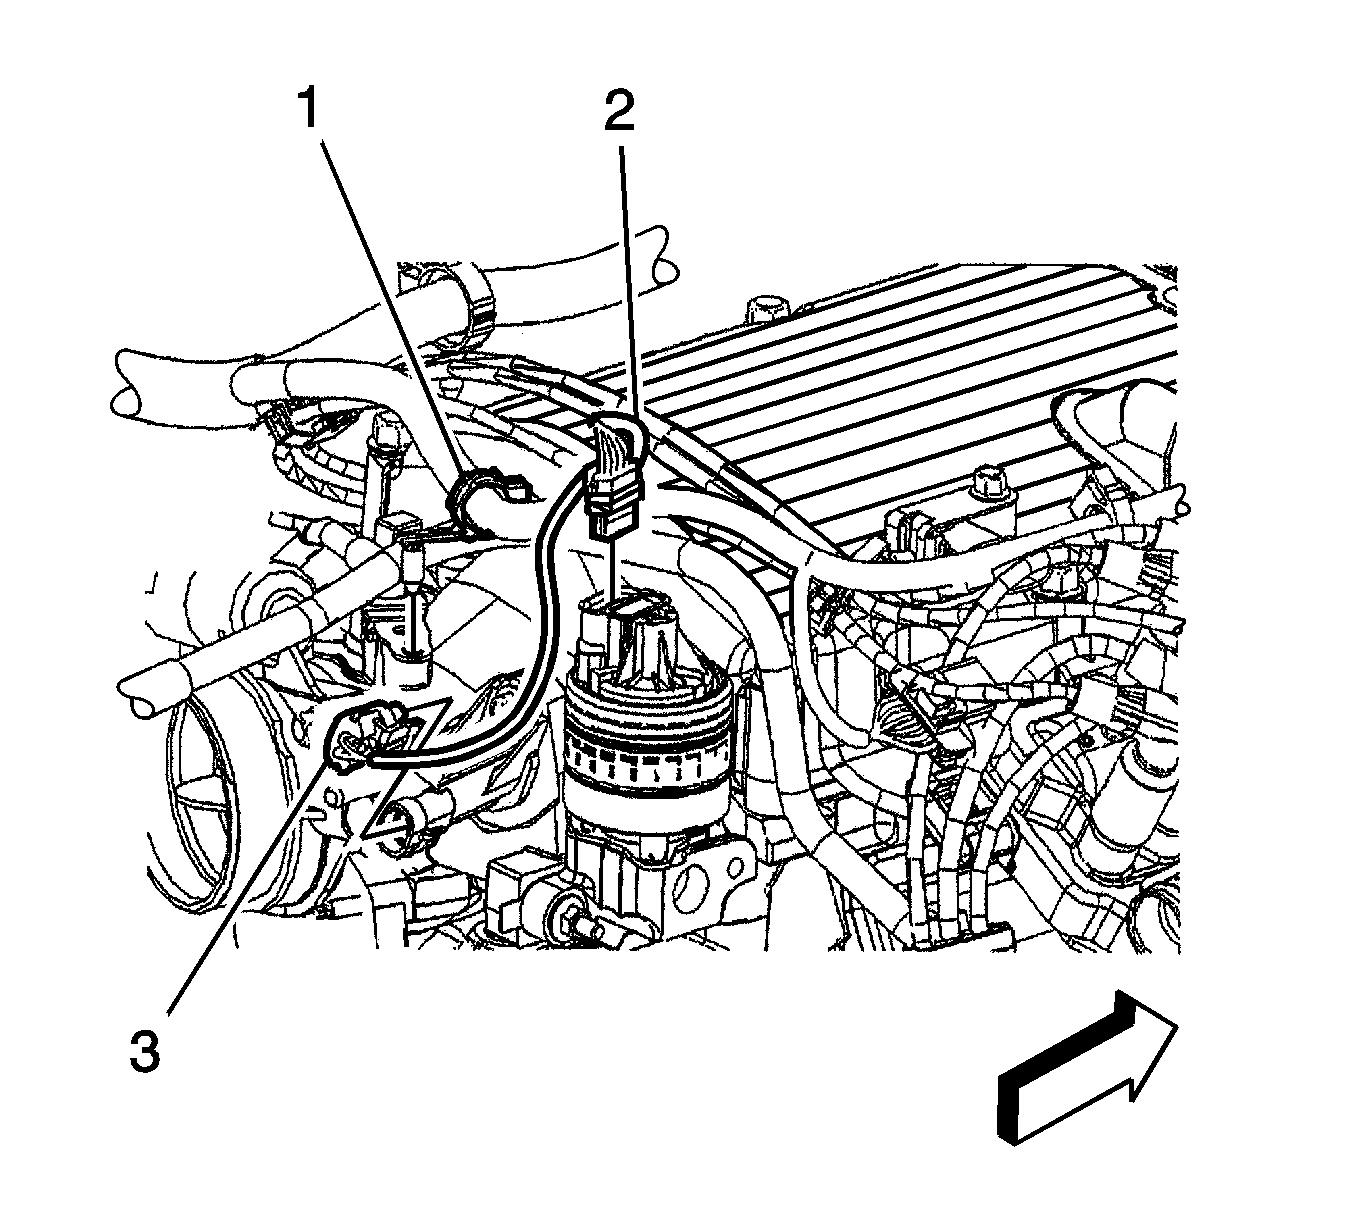
- Disconnect the engine harness electrical connector (2) from the exhaust gas recirculation (EGR) valve.
- Raise and support the vehicle. Refer to Lifting and Jacking the Vehicle .
- Remove the transaxle fill tube bolt to the transaxle case.
- Remove the transaxle fill tube nut at the EGR valve and reposition fill tube.
- Lower the vehicle.
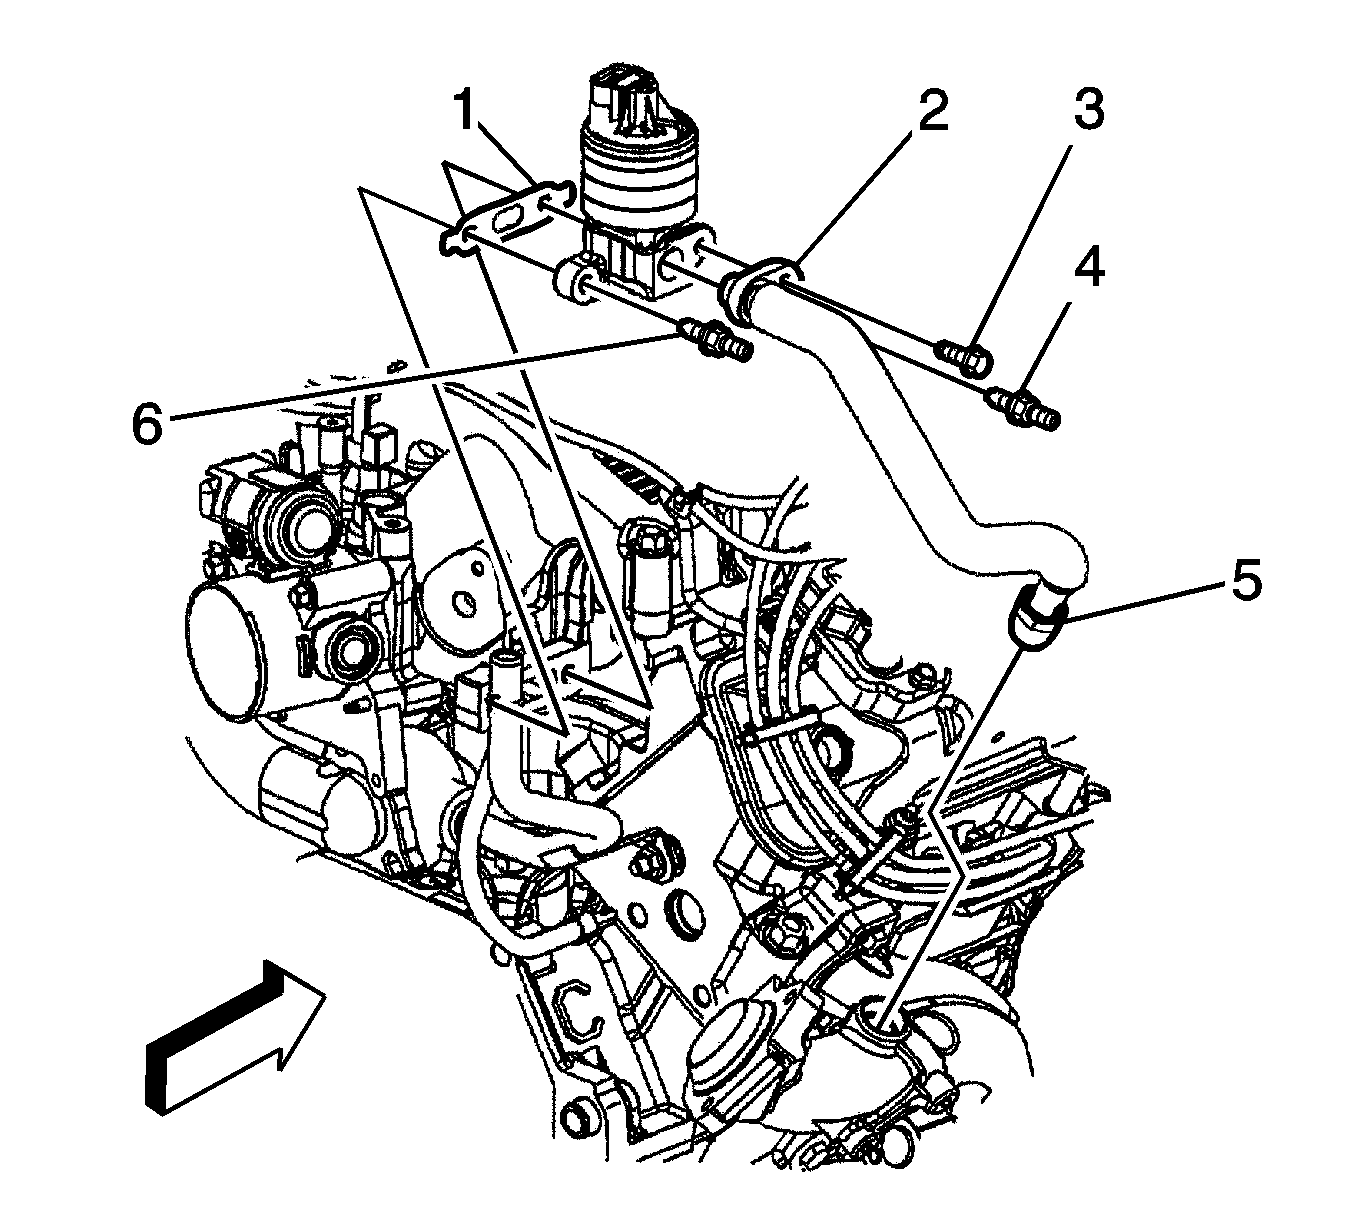
- Remove the EGR pipe bolt (3) and carefully pull the pipe (2) assembly back.
- Remove the EGR valve studs (4, 6).
- Remove EGR valve.
- Remove the EGR valve gasket (1).
- Clean and inspect the EGR valve gasket mating surfaces.
Installation Procedure
- Install a new EGR valve gasket (1).
- Install the EGR valve.
- Install the EGR valve studs (4, 6).
- Install the EGR pipe (2) to the EGR valve.
- Install the EGR pipe bolt (3).
- Connect the engine harness electrical connector (2) to the EGR valve.
- Raise the vehicle.
- Position the transaxle fill tube to the normal installed position and install the fill tube nut at the EGR valve.
- Install the transaxle fill tube bolt to the transaxle case.
- Lower the vehicle.
- Install the air cleaner outlet duct. Refer to Air Cleaner Outlet Duct Replacement .
- Install the intake manifold cover. Refer to Intake Manifold Cover Replacement .
Notice: Refer to Fastener Notice in the Preface section.
Tighten
Tighten the studs to 30 N·m (22 lb ft).
Tighten
Tighten the bolt to 25 N·m (18 lb ft).
Tighten
Tighten the nut to 13 N·m (115 lb in).
Tighten
Tighten the bolt to 13 N·m (115 lb in).
